Loading ...
Loading ...
Loading ...
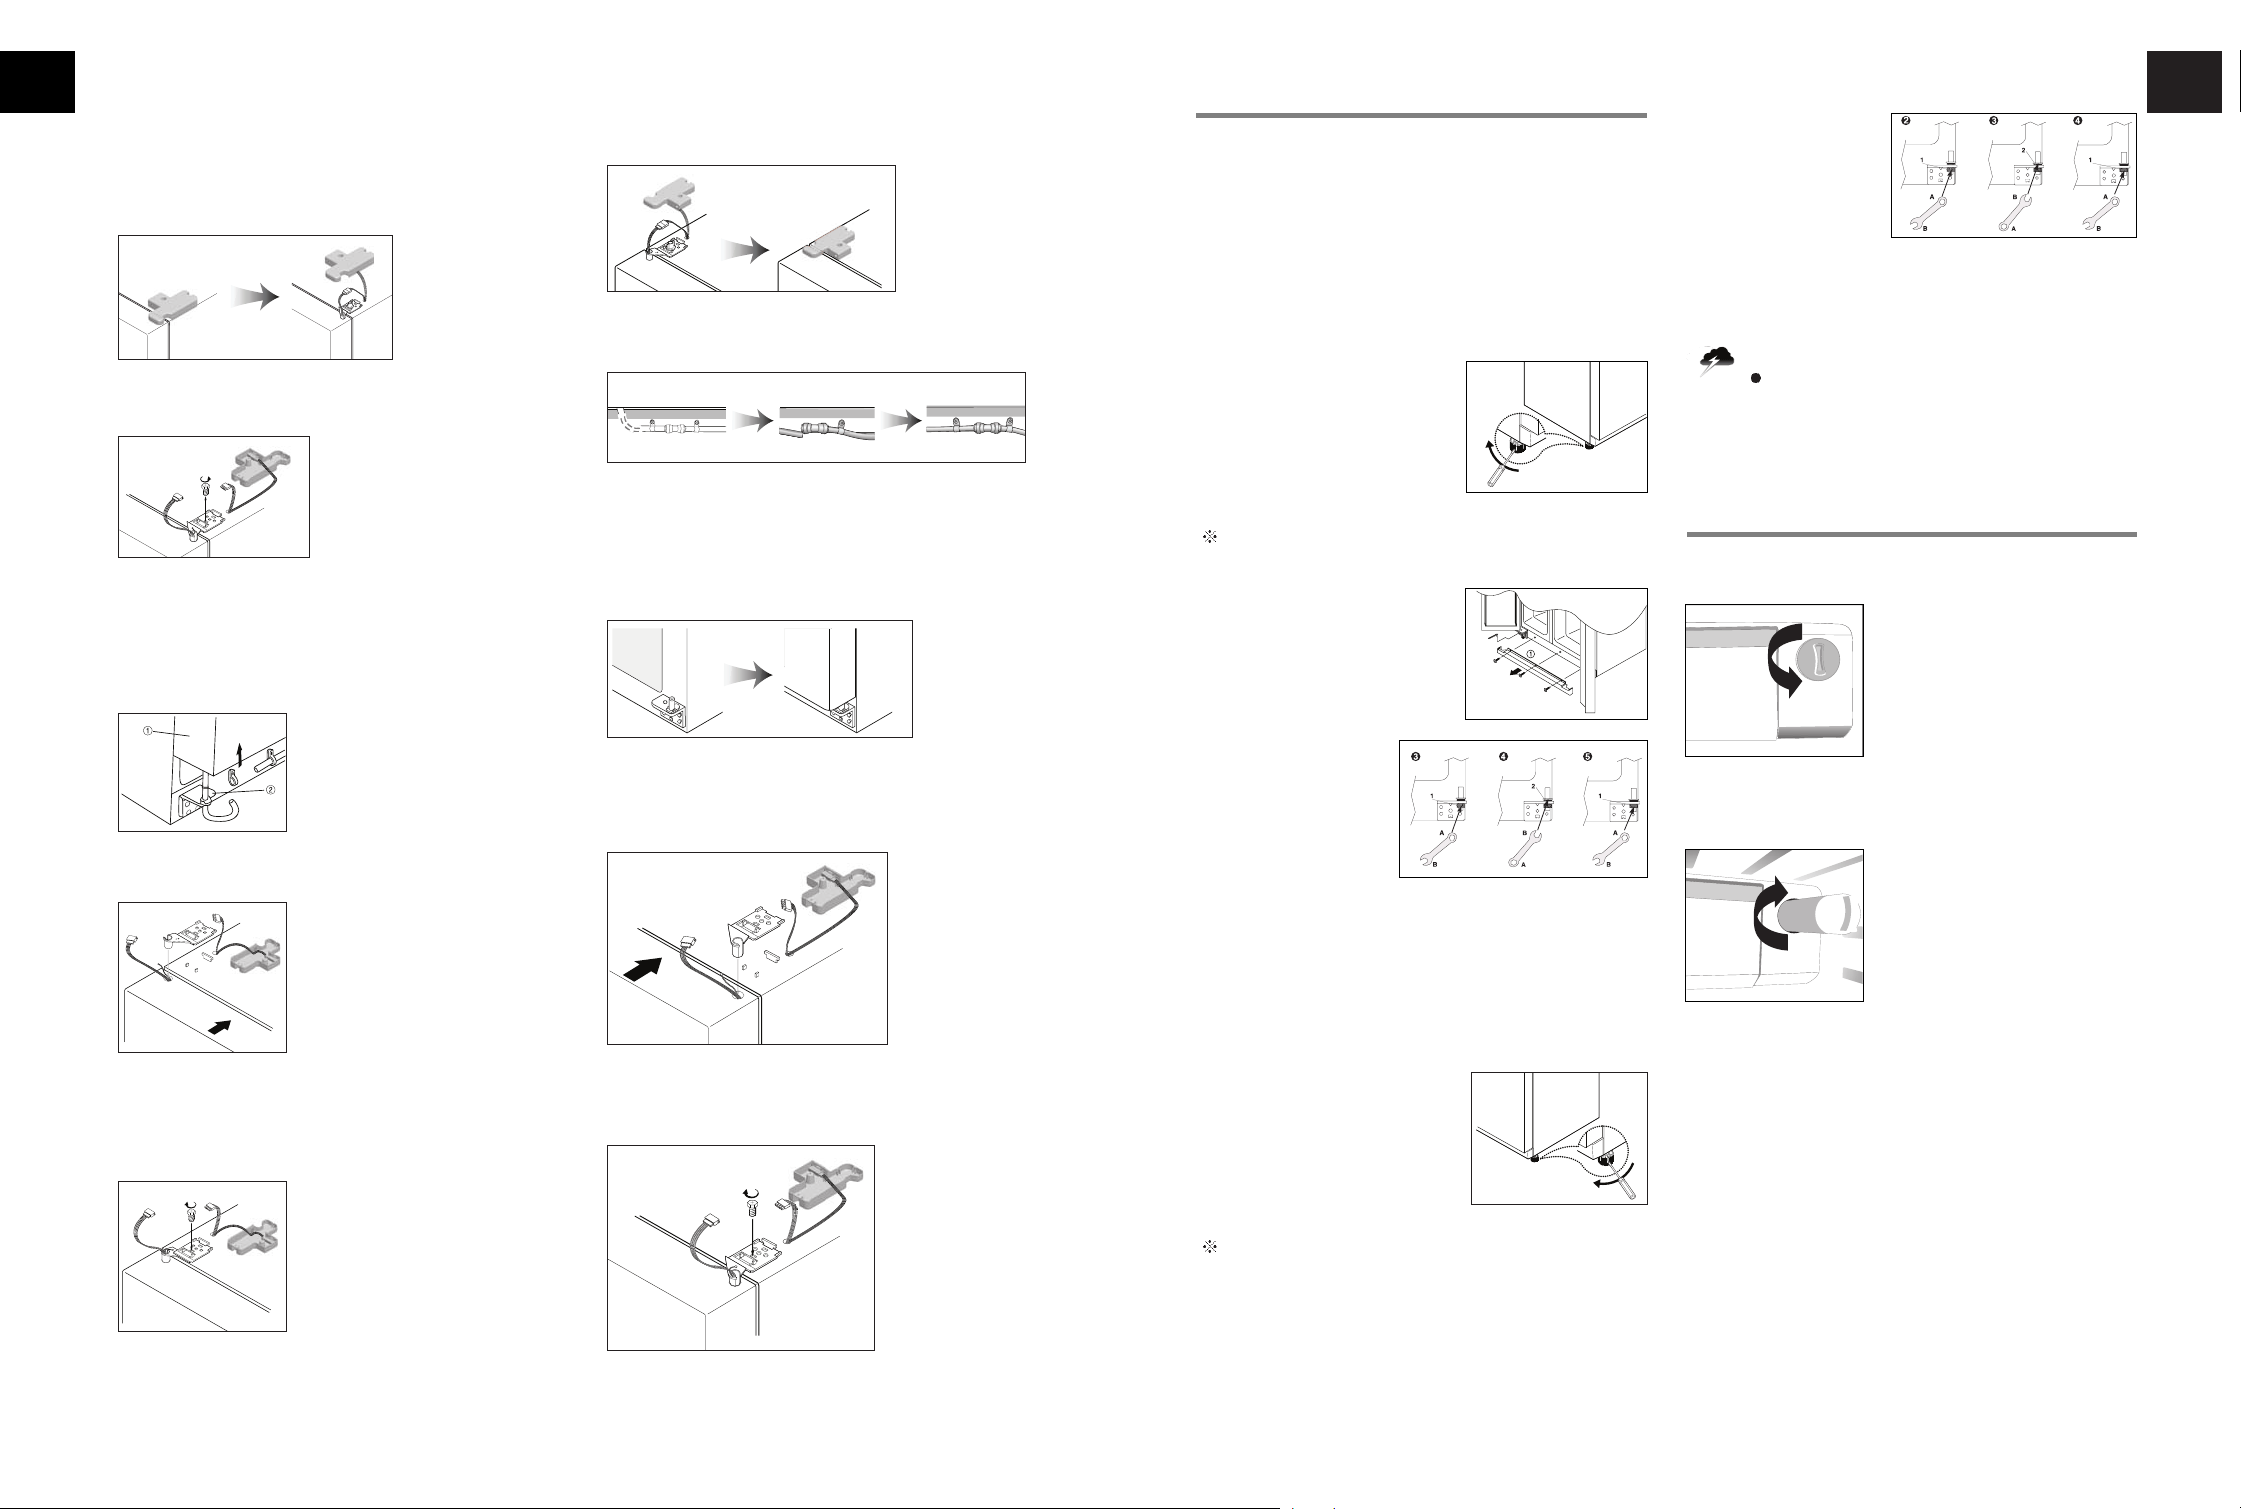
Refrigerator Leveling &
Door Adjustment
(If needed. )
Refrigerator must be level in order to maintain optimal
performance and desirable front appearance.
(If the floor beneath the refrigerator is uneven, freezer and
refrigerator doors look unbalanced.)
In case freezer door is lower than
refrigerator door...
Insert a screw driver (flat tip)
into a groove of the left wheel
(bottom of freezer) and turn it
clockwise until the door is
balanced. (clockwise to raise
freezer door; counterclockwise
to lower)
Unless the freezer door is balanced by step 1, then
follow the next steps.
Open the doors, unscrew the
front cover and remove, if it is
attached.
Insert a wrench (A
part) into the hinge
nut(1part) and
unscrew the nut with
wrenching clockwise.
Insert a wrench (B part) into the hinge nut(2part)
and wrenching clockwise to lower the door.
If door is aligned, fasten the nut (1) tightly with
wrenching counter-clockwise.
In case refrigerator door is lower than
freezer door...
Insert a screw driver (flat tip)
into a groove of the right wheel
(bottom of refrigerator) and turn
it clockwise until the door is
balanced. (clockwise to raise
refrigerator door ;
counterclockwise to lower)
Unless the refrigerator door is balanced by step 1, then
follow the next steps.
Insert a wrench (A part) into the hinge nut (1 part) and
unscrew the nut with wrenching clockwise.
Insert a wrench (B part) into the hinge nut (2 part) and
wrenching counter-clockwise to upper the door.
If door is aligned,
fasten the nut (1)
tightly with wrenching.
Front Cover
After installation and/or door leveling, fasten front cover with
screws. (Remove the screws on the front bottom panel first.
Click and screw the cover)
Caution
The front of refrigerator needs to be higher just a
little than the back for easy door closing, but if the
wheel is raised too much for door balance, i.e.
front of refrigerator is higher than the back, it can
be difficult to open the door.
Water filter
1. Remove the locking cap for intalling the filter.
(The ice and water dispenser can also be used without a
water filter, in which case the locking cap must be used. )
2. Carefully turn the filter clockwise.
3. Change the filter at least every 6 months.
Information concerning the water filter
- After use, the water system is subject to low pressure.
Proceed with caution when removing the filter.
- Flush the water system if the appliance has not been in
use for a lengthy period, or if the ice/water has an
unpleasant taste or smell. To do this, dispense water
through the water dispenser for several minutes.
If the unpleasant taste or smell remains, replace the filter.
Removing Refrigerator Door
Unscrew top hinge cover with ascrew driver.
Insert a thin screw driver into the
side groove of the cover to remove.
Turn top hinge fastener counterclockwise 3~4 times.
Disconnect harness wires.(model dependent)
Replacing Freezer Door
Insert the water tube into the hole of the
bottom hinge pin first (Dispenser Models Only). Insert
the bottom of freezer door into the bottom hinge pin.
Insert the bottom hole of freezer door
straight to the bottom hinge pin.
Let the top of door close to the cabinet and insert the
top hinge pin to the top hole of freezer door.
( Insert the back of hinge to the groove of protrusion
first, then front to the top hole of door.)
Turn the hinge fastener tightly to the end.
Connect harness wirings and screw ground wire.
Fasten the Bending Tube Guide and Insert the water
tube far into the coupling.(Dispenser Models Only)
Replacing Refrigerator Door
Insert the bottom hole of refrigerator
door straight to the bottom hinge pin
Let the top of door close to the cabinet and insert the
top hinge pin to the top hole of freezer door.
(Insert the back of hinge to the groove of protrusion first,
then front to the top hole of door.)
Turn the hinge fastener tightly to the end.
Connect harness wirings (model dependent) and screw
ground wire. Click and screw the top hinge cover.
1
2
1
2
(
3
12 13
1
(
2
3
4
1
1
2
3
2
4
3
4
5
5
enen
Loading ...