Loading ...
Loading ...
Loading ...
2. Connect the wire coloured blue to
the terminal either marked with the
letter “N“ or coloured black.
3. Connect the wire coloured brown to
the terminal either marked with the
“L“ or coloured red.
4. Check that no cut, or stray strands of
wire is present and the cord clamp
(E) is secure over the outer sheath.
Make sure the electricity supply
voltage is the same as that indicated
on the appliance rating plate.
5. Switch on the appliance.
The appliance is supplied with a 13 amp
fuse (B). In the event of having to change
the fuse in the plug supplied, a 13 amp
ASTA approved (BS 1362) fuse must be
used.
WARNING!
A cut off plug inserted into a
13 amp socket is a serious
safety (shock) hazard. Ensure
that it is disposed of safely.
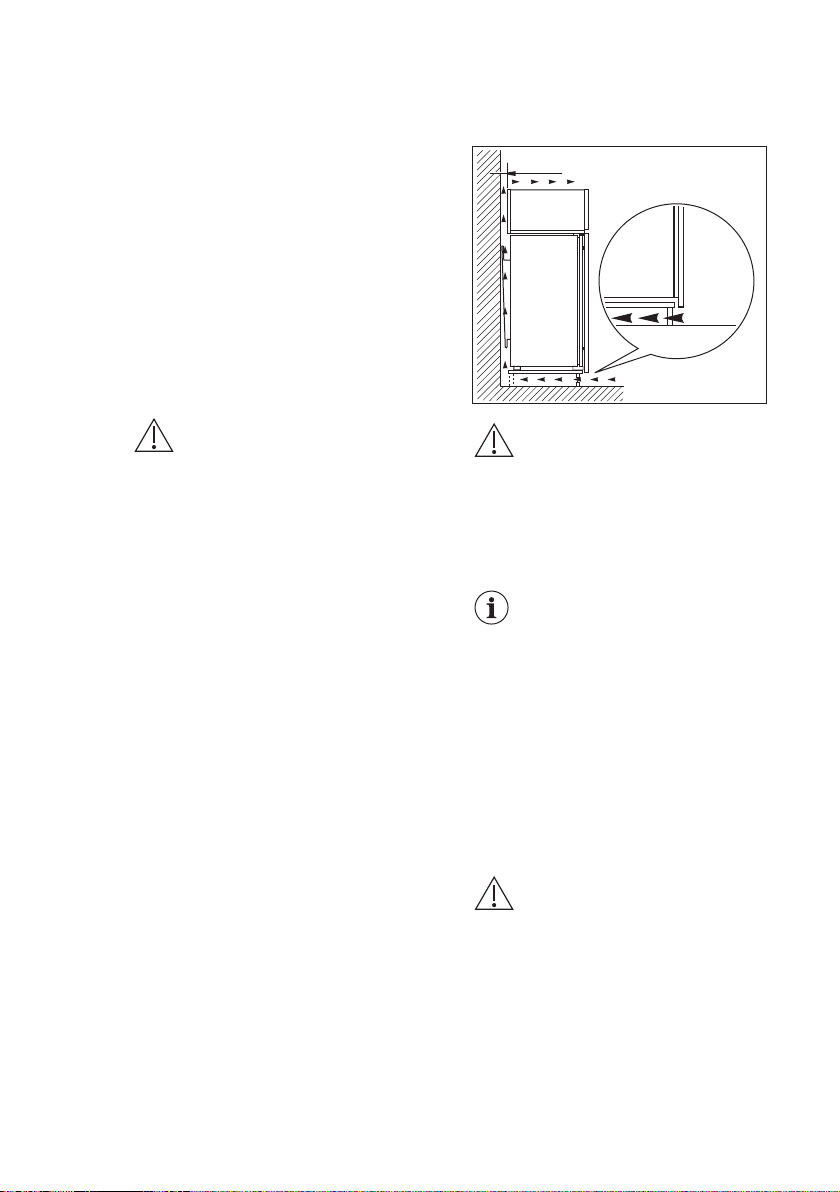
3.4 Ventilation requirements
The airflow behind the appliance must
be sufficient.
5 cm
min.
200 cm
2
min.
200 cm
2
CAUTION!
Refer to the assembly
instructions for the
installation.
4. OPERATION
4.1 Switching on
1. Insert the plug into the wall socket.
2. Turn the Temperature regulator
clockwise to a medium setting.
4.2 Switching off
To turn off the appliance, turn the
temperature regulator to the "O"
position.
4.3 Temperature regulation
The temperature is regulated
automatically.
1. Turn the Temperature regulator
toward lower settings to obtain the
minimum coldness.
2. Turn the Temperature regulator
toward higher settings to obtain the
maximum coldness.
A medium setting is
generally the most suitable.
However, the exact setting
should be chosen keeping in
mind that the temperature
inside the appliance
depends on:
• room temperature,
• how often the door is
opened,
• the quantity of food
stored,
• the location of the
appliance.
CAUTION!
If the ambient temperature
is high or the appliance is
fully loaded, and the
appliance is set to the lowest
temperatures, it may run
continuously causing frost to
form on the rear wall. In this
case the dial must be set to
a higher temperature to
allow automatic defrosting
and therefore reduced
energy consumption.
ENGLISH 7
Loading ...
Loading ...
Loading ...