Use two or more people to move and install or uninstall appliance.
Failure to do so can result in back or other injury.
Decide on the final location for the cooktop. Avoid drilling into or severing existing wiring during installation.
On Glass Cooktop models only:
Using two or more people, place the cooktop upside down on a covered surface.
Remove foam strip from the package containing literature.
Remove backing from foam strip. Apply foam strip adhesive side down around bottom of cooktop, flush with edge.
NOTE: The foam strip keeps debris away from the underside of the cooktop and helps the cooktop to sit flat on uneven counters.
A. Cooktop base
B. Foam strip
C. Cooktop
Install Cooktop
Style 1: Cooktop over undercounter built-in oven
IMPORTANT: Clamping brackets should not be used.
Using two or more people, place cooktop right side up into the cutout.
NOTE: Make sure that the front edge of the cooktop is parallel to the front edge of the countertop. If repositioning is needed, lift entire cooktop up from cutout to avoid scratching the countertop.
Style 2: Cooktop over cabinets
Determine whether your cabinet construction provides clearance for installing clamping brackets at cooktop base ends. This is the recommended location. Clamping brackets can be installed on the front and back of cooktop base bottom, if necessary.
A. Attachment screw holes for optional front and back location
B. Clamping bracket (end locations recommended)
C. Cooktop base bottom
D. Attachment screw
E. Attachment screw location (recommended)
2. The clamping brackets can be installed before or after the cooktop is placed into the cutout. Complete the following steps for the option you choose.
Installing Brackets Before Placing Cooktop in Cutout
Using two or more people, place the cooktop upside down on a covered surface.
Remove the attachment screws for the selected bracket locations from the bottom of the cooktop base.
Select bracket mounting holes that will allow the bracket to extend far enough out from the cooktop for the installation of 21/2" (6.4 cm) clamping screws. See the “Attach Cooktop to Countertop” section for illustration of clamping screw installation.
A. Clamping bracket
B. Recommended attachment screw location
C. Clamping screw location
D. Edge of cooktop base bottom
4. Attach brackets to cooktop base bottom with bracket attachment screws using the bracket mounting holes selected in Step 2.
5. Rotate brackets so they do not extend beyond edge of cooktop base.
6. Tighten screws just enough to hold brackets in place when cooktop is put in cutout.
7. Using two or more people, turn the cooktop right side up and place in cutout.
NOTE: Make sure that the front edge of the cooktop is parallel to the front edge of the countertop. If repositioning is needed, lift entire cooktop up from cutout to avoid scratching the countertop.
8. Loosen the screws and rotate the brackets so that they are perpendicular to the edge of the cooktop base and extend beyond its edge. Securely tighten screws.
Installing Brackets After Placing Cooktop in Cutout
Using two or more people, place cooktop right side up into the cutout.
NOTE: Make sure that the front edge of the cooktop is parallel to the front edge of the countertop. If repositioning is needed, lift entire cooktop up from cutout to avoid scratching the countertop.
Remove the attachment screws for the selected bracket locations from the bottom of the cooktop base.
Select bracket mounting holes that will allow the bracket to extend far enough out from the cooktop for the installation of 21/2" (6.4 cm) clamping screws.
A. Cooktop
B. Cooktop base
C. Attachment screw
D. Clamping bracket (extends far enough beyond cooktop base to allow installation of clamping screws)
E. 21/2" (6.4 cm) clamping screw (to be installed in the “Attach Cooktop to Countertop” section)
F. Countertop
G. Foam seal
4. Attach brackets to cooktop base bottom with bracket attachment screws using the bracket mounting holes selected in Step 3. Securely tighten screws.
Make Gas Connection
To Assemble Pressure Regulator:
Using two or more people, stand the cooktop on its side or back.
Connect the flexible stainless steel connector to the pressure regulator using a 1/2" (13 mm) male pipe thread adapter and nipple. A combination of pipe fittings must be used to connect the cooktop to the existing gas line. Shown following is a typical connection. Your connection may be different, according to the supply line type, size, and location.
Install the pressure regulator with the arrow pointing up toward the bottom of the cooktop base and in a position where you can reach the regulator cap.
A. Access cap
B. Rear of cooktop
C. Gas pressure regulator
D. Up arrow. Regulator must be installed with arrow pointing up to cooktop bottom
IMPORTANT: All connections must be wrench-tightened. Do not make connections to the gas regulator too tight. Making the connections too tight may crack the regulator and cause a gas leak. Do not allow the regulator to turn on the pipe when tightening fittings.
Use only pipe-joint compound made for use with Natural and Propane gas.
Do not use TEFLON® tape. You will need to determine the fittings required depending on your installation.
Typical flexible connection
Apply pipe-joint compound made for use with Propane gas to the smaller thread ends of the flexible connector adapters see G in the following illustration).
Attach one adapter and nipple to the gas pressure regulator and the other adapter and nipple to the gas shut-off valve. Tighten both adapters and nipples.
Use a 15/16" (24 mm) combination wrench and pliers to attach the flexible connector to the adapters. Check that connector is not kinked.
A. 3/8" (9.5 mm) nipple
B. 3/8" (9.5 mm) adapter
C. Flexible connector
D. 1/2" (13 mm) nipple
E. Gas pressure regulator
F. 1/2" (13 mm) adapter
G. Use pipe-joint compound
H. Manual gas shut-off valve
Complete Connection
Open the manual shut-off valve in the gas supply line. The valve is open when the handle is parallel to the gas pipe.
Test all connections by brushing on an approved noncorrosive leak-detection solution. Bubbles will show a leak. Correct any leak found.
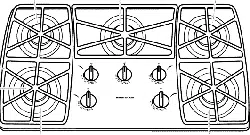
Remove surface burner caps and grates from parts package.
Align notches in burner caps with pins in burner base. Burner caps should be level when properly positioned. If burner caps are not properly positioned, surface burners will not light.
Place burner grates over burners and caps.
A. Igniter electrode
B. Burner cap
C. Burner base
4. Plug into a grounded 3 prong outlet.
Attach Cooktop to Countertop
NOTE: This section applies only if you are using clamping brackets.
A. Glass cooktop
B. Cooktop base
C. Attachment screw
D. Clamping bracket (extends far enough beyond cooktop base to allow installation of clamping screws)
E. 21/2" (6.4 cm) clamping screw
F. Countertop
G. Foam seal
Place the 21⁄2" (6.4 cm) clamping screws into the outermost hole in the clamping bracket.
Check that the cooktop is still level.
Use a screwdriver to tighten the screws against the countertop. Do not overtighten.
Complete Installation
Electronic Ignition System
Initial lighting and gas flame adjustments
Surface burners use electronic igniters in place of standing pilots.
When the cooktop control knob is turned to Lite, the system creates a spark to light the burner. This sparking continues, as long as the control knob is turned to Lite.
Check Operation of Surface Burners
Push in and turn the surface burners control knobs to LITE.
The surface burner flame should light within 4 seconds. The first time a surface burner is lighted it may take longer than 4 seconds to light because of air in the gas line.
Check the flame on Hi for a blue color. It should be clean and soft in character. No yellow tip, blowing or lifting of flame should occur.
Occasional orange flashes are normal and reflect different elements in the air or gas.
After verifying the proper burner operation, turn the control knobs to OFF.
If burners do not light properly:
Turn surface burner control knob to OFF.
Check that the power supply cord is plugged in and the circuit breaker has not tripped or the fuse blown.
Check that the gas shut-off valves are set to the open position.
Check that burner caps are properly positioned on burnerbases.
Recheck operation of surface burners. If a burner does not light at this point, contact your dealer or authorized service company for assistance.
Check Flame Height
Adjust the height of surface burner flames. The surface burner low flame should be a steady blue flame approximately 1/4" (6.4 mm) high.
A. Low flame
B. High flame
If the low flame needs to be adjusted:
The flame can be adjusted using the adjustment screw in the center of the valve stem. The valve stem is located directly underneath the control knob.
A. Adjustment screw in center of valve stem
Remove the control knob.
Hold the knob stem with a pair of pliers. Use a small flatblade screwdriver to turn the screw located in the center of the control knob stem until the flame is the proper size. Turn the screw clockwise to decrease the flame height or counterclockwise to increase the flame height.
Replace the control knob.
Test the flame by turning the control from Lo to Hi, checking the flame at each setting.
Power Failure
In case of prolonged power failure, the surface burners can be lit manually. Hold a lit match near a burner and turn knob counterclockwise to LITE. After burner lights, turn knob to setting.
Do not use a grill or griddle accessory during a power failure, as the vent fan will not operate.
GAS CONVERSIONS
IMPORTANT: Gas conversions from Natural gas to Propane gas must be done by a qualified installer. Before proceeding with conversion, shut off the gas supply to the appliance prior to disconnecting the electrical power.
WARNING:
This conversion kit shall be installed by a qualified service agency in accordance with manufacturer’s instructions and all applicable codes and requirements of the authority having jurisdiction.
If the information in these instructions is not followed exactly, a fire, an explosion or production of carbon monoxide may result causing property damage, personal injury or loss of life.
The qualified service agency is responsible for the proper installation of this kit. The installation is not proper and complete until the operation of the converted appliance is checked as specified in the manufacturer’s instructions supplied with the kit.
Convert from Natural Gas to Propane Gas
1. Turn manual shut-off valve to the closed position.
A. To cooktop
B. Shut-off valve (closed position)
C. Gas supply line
2. Unplug cooktop or disconnect power.
To Convert Gas Pressure Regulator
A. Access cap
B. Rear of cooktop
C. Gas pressure regulator
D. Gas flow
Determine the type of regulator you have:
Style 1: The cap has a slot and "NAT" printed on it.
Remove access cap by using a flat-blade screwdriver or coin, turning the access cap counterclockwise.
The gas pressure regulator has two settings that are stamped on either side of the cap. Turn the cap and reinstall into regulator with the stamp "LP" visible from the outside of the regulator.
Style 2: The cap does not have a slot and requires a wrench to be removed.
Remove the access cap by using a wrench, turning the access cap counterclockwise.
Remove the spring retainer from the cap by pushing against the flat side of the spring retainer. Look at the spring retainer to locate the "NAT" or "LP" position. Turn over the spring retainer so the "LP" is showing on the bottom. Snap the spring retainer back into the cap. Reinstall the cap onto the regulator.
A. Access cap
B. Gasket
C. Gas pressure regulator
D. LP position
E. NAT position
4. Test the gas pressure regulator and gas supply line.
The regulator must be checked at a minimum 2.5 cm water column above the set pressure. The inlet pressure to the regulator should be as follows for operation and checking the regulator setting:
Line pressure testing above 1/2 psi (3.5 kPa) gauge cm WCP)
The cooktop and its individual shut-off valve must be disconnected from the gas supply piping system during any pressure testing of that system at test pressures in excess of psi (3.5 kPa).
Line pressure testing at 1/2 psi (3.5 kPa) gauge cm WCP) or lower
The cooktop must be isolated from the gas supply piping system by closing its individual manual shut-off valve during any pressure testing of the gas supply piping system at test pressures equal to or less than 1/2 psi (3.5 kPa).
5. If they are installed, remove the burner grates. Use the following chart to match the correct gas orifice spud with the burner location and model being converted.
Propane Gas Orifice Spud Chart
Four Burner Models
Five Burner Models
Burner Locations
A. Left front B. Left rear C. Center
D. Right rear E. Right front
6. Remove all burner caps and burner bases.
7. Using a T20® TORX® screwdriver, remove the burner base. NOTE: Remove one burner base at a time, and then replace after converting. Do not disassemble entire cooktop.
A. Igniter electrode B. Gas tube opening C. Burner cap D. Burner base
8. Apply masking tape to the end of a 7 mm nut driver to help hold the gas orifice spud in the nut driver while changing it. Press nut driver down onto the gas orifice spud and remove by turning it counterclockwise and lifting out. Set gas orifice spud aside.
A. Orifice spud B. Orifice spud holder C. Screw D. Spark electrode
9. Replace with correct Propane gas orifice spud. See charts in Step 5.
A. Burner cap B. Electrode C. Burner base
10. Place Natural gas orifice spuds in plastic parts bag for future use and keep with package containing literature.
11. Replace burner bases and tighten the two screws IMPORTANT: Be sure that the electrode aligns with the notch or hole in the burner base. The igniter electrode is ceramic and could break during installation of the burner base.
12. Replace burner cap.
13. Repeat steps 1-12 for the remaining burners.
14. Open shut-off valve in the gas supply line. The valve is open when the handle is parallel to the gas pipe. REMEMBER: Once you have completed converting all of the cooktop burners, test the appliance for leaks by brushing on an approved noncorrosive leak-detection solution. If bubbles appear, a leak is indicated. Correct any leaks found.
15. Plug cooktop into grounded 3 prong outlet or reconnect power.
Convert from Propane Gas to Natural Gas
1. Turn manual shut-off valve to the closed position.
A. To cooktop B. Shut-off valve (closed position) C. Gas supply line
2. Unplug cooktop or disconnect power.
To Convert Gas Pressure Regulator
A. Access cap B. Rear of cooktop C. Gas pressure regulator D. Gas flow
3. Determine the type of regulator you have:
Style 1: The cap has a slot and "LP" printed on it.
Remove access cap by using a flat-blade screwdriver or coin, turning the access cap counterclockwise.
The gas pressure regulator has two settings which are stamped on either side of the cap. Turn the cap and reinstall into regulator with the stamp "NAT" visible from the outside of the regulator.
Style 2: The cap does not have a slot and requires a wrench to be removed.
Remove the access cap by using a wrench, turning the access cap counterclockwise.
Remove spring retainer from the cap by pushing against the flat side of the spring retainer. Look at the spring retainer to locate the "LP" or "NAT" position. Turn over the spring retainer so the "NAT" is showing on the bottom. Snap the spring retainer back into the cap. Reinstall the cap onto the regulator.
A. Access cap B. Gasket C. Gas pressure regulator
D. NAT position E. LP position
4. For more information regarding gas installation requirements see the Gas Supply Requirements section of your Owner's Manual.
5. If they are installed, remove the burner grates.
Use the following chart to match the correct gas orifice spud with the burner location and model being converted.
Natural Gas Orifice Spud Chart
Four Burner Models
Five Burner Models
Burner locations
A. Left front B. Left rear C. Center
D. Right rear E. Right front
6. Remove burner cap.
7. Using a T20® TORX® screwdriver, remove the burner base. NOTE: Remove one burner base at a time and then replace after converting. Do not disassemble entire cooktop.
A. Igniter electrode
B. Gas tube opening
C. Burner cap
D. Burner base
8. Apply masking tape to the end of a 7 mm nut driver to help hold the gas orifice spud in the nut driver while changing it. Press nut driver down onto the gas orifice spud and remove by turning it counterclockwise and lifting out. Set gas orifice spud aside.
A. Orifice spud B. Orifice spud holder C. Screw D. Spark electrode
9. Replace with correct Natural gas orifice spud. See the charts in Step 4.
A. Burner cap B. Electrode C. Burner base
10. Place Propane gas orifice spuds in plastic parts bag for future use and keep with package containing literature.
11. Replace burner base and tighten the two screws. IMPORTANT: Be sure that the electrode aligns with the notch or hole in the burner base. The igniter electrode is ceramic and could break during installation of the burner base.
12. Replace burner cap.
13. Repeat steps 1-11 for the remaining burners.
14. Open shut-off valve in the gas supply line. The valve is open when the handle is parallel to the gas pipe. REMEMBER: Once you have completed converting all of the cooktop burners, test the appliance for leaks by brushing on an approved noncorrosive leak-detection solution. If bubbles appear, a leak is indicated. Correct any leaks found.
15. Plug cooktop into grounded 3 prong outlet or reconnect power.
Lighting the Electronic Igniters
The cooktop burners use electronic igniters in place of standing pilots. When the cooktop control knob is pushed in and turned to Lite, the system creates a spark to light the burner. This sparking continues until the control knob is turned to the desired setting.
To Check Operation of the Cooktop Burners:
1. Push in and turn knobs to Lite. The cooktop burner flame should light within 4 seconds. The first time a burner is lit, it may take longer than 4 seconds to light because of air in the gas line. Do not leave the knob in the Lite position after burner lights.
2. If burners do not light properly, turn the control knob to Off. Make sure the burner cap is in the proper position.
3. Check that the power supply cord is plugged in and circuit breaker has been tripped or household fuse has not blown.
4. Check that the shut-off valve is in the on position.
5. Check burner operation again. If one or all of the burners do not light at this point, see the "Online Ordering Information" section in the Quick Start Guide.
Low Flame Height Adjustment
Each burner flame has been factory set to the lowest position available to provide reliable and constant reignition of the burner.
However, each burner can be adjusted.
To Adjust:
After lighting, push in and turn each control knob to the Lo position.
If the burner does not stay lit on Lo, turn the control knob to LITE until the burner lights.
Quickly turn the control knob down to LO.
If the burner goes out after adjusting, readjust the valve.
To Readjust Valve:
Remove control knob(s).
Insert a flat-blade screwdriver into the hollow valve stem and engage the slotted screw.
3. The flame size can be increased or decreased by turning the screw. Adjust flame until you can quickly turn the control knob from the Hi to Lo position without extinguishing the flame. The flame should be as small as possible without going out.
NOTE: For higher altitudes, no further burner adjustments are necessary
Complete Burner Adjustment
1. Check burner flame(s) for proper size and shape. The cooktop low burner flame should be a steady blue flame approximately 1/4" (6.4 mm) high.
2. Completely fill out the conversion label (8286315) and attach label to bottom of the cooktop next to the rating tag. Do not cover the rating tag with the conversion label.
3. Save the orifices removed from the cooktop along with these instructions for future reference.
4. Read the "Sealed Surface Burners" section in the Use and Care Guide supplied with your appliance.
Moving the Cooktop
If removing the cooktop is necessary for cleaning or maintenance:
Disconnect Power.
Shut gas line off.
Disconnect the flexible stainless steel connector.
Unscrew mounting brackets.
Using two or more people, place the cooktop on a covered surface.
Complete cleaning or maintenance.
Reinstall cooktop using the "Install Cooktop" section of your Owner's Manual.
CARE AND MAINTENANCE
General Cleaning
IMPORTANT: Before cleaning, make sure all controls are off and the cooktop is cool. Always follow label instructions on cleaning products.
Soap, water, and a soft cloth or sponge are suggested first, unless otherwise noted.
CERAMIC GLASS (on some models)
Cleaning Method:
To avoid damaging the cooktop, do not use steel wool, abrasive powder cleansers, chlorine bleach, rust remover, or ammonia.
1. Remove food/residue with the Cooktop Scraper.
For best results, use the Cooktop Scraper while the cooktop is still warm but not hot to the touch. It is recommended to wear an oven mitt while scraping the warm cooktop.
Hold the Cooktop Scraper at approximately a 45° angle against the glass surface and scrape the residue. It will be necessary to apply pressure in order to remove the residue.
Allow the cooktop to cool down completely before proceeding to Step 2.
2. Apply a few dime-sized drops of affresh®† Cooktop Cleaner to the affected areas.
Rub affresh® Cooktop Cleaner onto the cooktop surface with the blue Cooktop Cleaning Pad. Some pressure is needed to remove stubborn stains.
Allow the cleaner to dry to a white haze before proceeding to Step 3.
3. Polish with a clean, dry cloth or a clean, dry paper towel.
Repeat steps 1 through 3 as necessary for stubborn or burned-on stains.
The Complete Cooktop Cleaner Kit is available for order including the following:
Cooktop Scraper
Affresh® Cooktop Cleaner
Blue Cooktop Cleaning Pads
Refer to the Quick Start Guide for contact information.
EXTERIOR PORCELAIN ENAMEL SURFACES (on some models)
Food spills containing acids, such as vinegar and tomato, should be cleaned as soon as the cooktop, grates and caps are cool.
These spills may affect the finish.
To avoid chipping, do not bang grates and caps against each other or hard surfaces such as cast iron cookware.
Do not reassemble caps on burners while wet.
Do not clean in the Self-Cleaning cycle.
Do not clean in dishwasher.
Cleaning Method:
Nonabrasive plastic scrubbing pad and mildly abrasive cleanser: Clean as soon as cooktop, grates and caps are cool.
Gas Grate and Drip Pan Cleaner (not included):
Refer to the Quick Start Guide for contact information.
STAINLESS STEEL (on some models)
To avoid damage to stainless steel surfaces, do not use soapfilled scouring pads, abrasive cleaners, Cooktop Cleaner, steel wool pads, gritty washcloths, or abrasive paper towels.
Rub in direction of grain to avoid damaging.
Cleaning Method:
All-purpose cleaner:
Rinse with clean water and dry with soft, lint-free cloth.
Affresh® Stainless Steel Cleaner (not included):
Refer to the Quick Start Guide for contact information.
COOKTOP CONTROLS
To avoid damage to the cooktop controls, do not use steel wool, abrasive cleansers, or oven cleaner.
To avoid damage, do not soak knobs.
When replacing knobs, make sure knobs are in the Off position.
Do not remove seals under knobs.
Cleaning Method:
Soap and water:
Pull knobs straight away from control panel to remove.
CONTROL PANEL
To avoid damage to the control panel, do not use abrasive cleaners, steel wool pads, gritty washcloths or abrasive paper towels.
Cleaning Method:
Glass cleaner and soft cloth or sponge: Apply glass cleaner to soft cloth or sponge, not directly on panel.
Affresh® Kitchen and Appliance Cleaner (not included): Order Part Number W10355010
PORCELAIN-COATED GRATES AND CAPS
Food spills containing acids, such as vinegar and tomato, should be cleaned as soon as the cooktop, grates and caps are cool.
These spills may affect the finish.
To avoid chipping, do not bang grates and caps against each other or hard surfaces such as cast iron cookware.
Do not reassemble caps on burners while wet.
Cleaning Method:
Nonabrasive plastic scrubbing pad and mildly abrasive cleanser:
Clean as soon as cooktop, grates and caps are cool.
Dishwasher (grates only, not caps): Use the most aggressive cycle.
Gas Grate and Drip Pan Cleaner Part Number 31617 (not included):
Refer to the Quick Start Guide for contact information.
SURFACE BURNERS
Sealed Burner models
See the “Sealed Surface Burners” section in the online Control Guide.
SIMMER PLATE (on some models)
Do not clean in dishwasher.
Cleaning Method:
Liquid detergent and water:
Wipe with damp cloth or sponge then rinse with clean water and wipe dry.
Mild-abrasive cleanser:
Rub in the direction of the grain lines with a damp cloth.