| Problem |
Possible Causes |
What To Do |
| Start/Reset status indicator light flashing |
The door was opened or the cycle was interrupted. |
Press the Start button once and close the door to start the dishwasher. To cancel a wash cycle, press and hold the Start/Reset button for 3 seconds with the door open, and then close the door. The dishwasher will drain and the wash cycle lights will turn off. |
| Dishwasher BEEPS once every minute |
This is a reminder that your dishwasher door has been left open during operation. It will continue beeping until you press Start/Reset and close the door |
Press Start/Reset and close the door. |
| Beeping at the end of the cycle |
This is a reminder that your dishwasher door has been left open during operation. It will continue beeping until you press Start/Reset and close the door |
Press Start/Reset and close the door. |
| Beeping at the end of the cycle |
This is normal. The dishwasher will beep at the end of the cycle |
The dishwasher will beep 4 times (unless interupted) and the Clean light will display at the end of the wash cycle |
| Dishes and flatware not clean |
Main or Fine filter is clogged
Low inlet water temperature
Water pressure is temporarily low
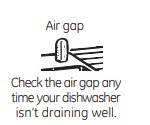
Air gap or disposer is clogged
No air gap or high drain loop
Filter needs cleaning
Improper rack loading
|
See the Care and Cleaning section
Make sure inlet water temperature is correct (see the Using the dishwasher section). Turn on the hot water faucet nearest the dishwasher, let run until the water temperature stops rising. Then start the dishwasher and turn off the faucet. This ensures the entering water is hot.
Turn on a faucet. Is water coming out more slowly than usual? If so, wait until pressure is normal before using your dishwasher. Normal water pressure to the dishwasher should be 20-120 psi.
Clean the air gap or flush the disposer
Verify that you have an air gap or a high drain loop. Refer to the Installation Instructions.
The filter assembly must be cleaned regularly to allow the filter to efficiently remove food particles from the wash water. See the Care and Cleaning section
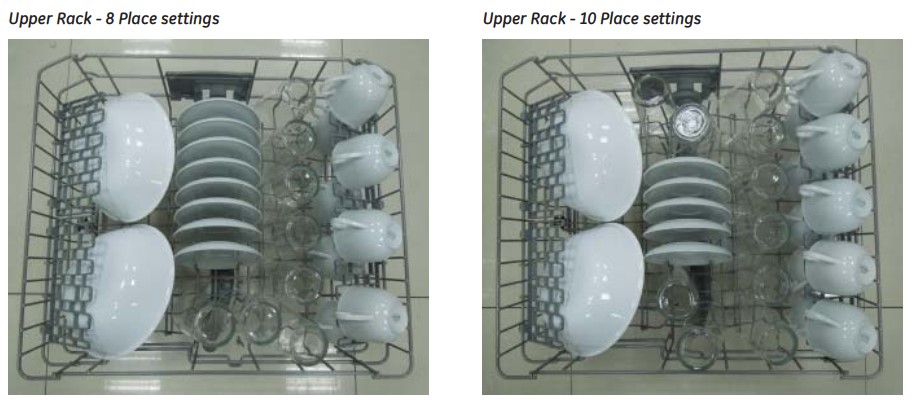
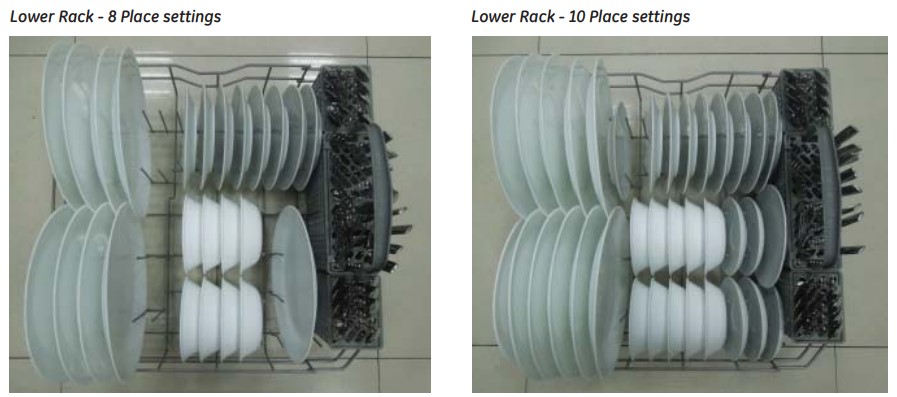
Make sure large dishware does not block the detergent dispenser or the wash arms. See the Loading the dishwasher section.
|
| Spots and filming on glasses and flatware |
Extremely hard water
Low inlet water temperature
Overloading or improper loading of the dishwasher
Old or damp powder detergent
Rinse agent dispenser empty
Too little or low performing detergent
|
Use rinse agents such as Cascade® Rinse Aid to prevent spots and prevent new film buildup. If water is extremely hard, a softener may be required.
Make sure water temperature is at least 120°F (49°C).
Load dishwasher as shown in the Loading the dishwasher section.
Make sure detergent is fresh.
Refill with rinse agent such as Cascade® Rinse Aid.
Make sure you use the proper amount of highly rated detergent.
|
| Cloudiness on glassware |
Combination of soft water and too much detergent
Low performing phosphate free detergent
Water temperature entering the dishwasher exceeds 150°F (66°C)
|
This is called etching and is permanent. To prevent this from happening, use less detergent if you have soft water. Wash glassware in the shortest cycle that will get it clean.
See A white film on glassware, dishware and the interior in this Troubleshooting section
This could be etching. Lower the water heater temperature
|
| Suds in the tub |
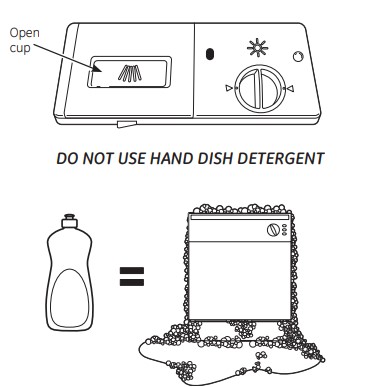
Wrong detergent 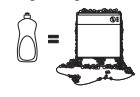
Rinse agent was spilled
|
Use only automatic dishwasher detergents to avoid sudsing. Cascade® automatic dishwashing detergents have been approved for use in all dishwashers. To remove suds from the tub, open the dishwasher and let suds dissipate. Cancel the wash cycle by pressing and holding the Start/Reset button for 3 seconds with the door open, and then close the door. The dishwasher will drain and the wash cycle lights will turn off. To restart or resume the cycle, press Start/Reset
Always wipe up rinse agent spills immediately.
|
| Detergent left in dispenser cups |
Dishes or utensils are blocking the detergent cup
|
- Reposition the dishes, so the water from the lower spray arm can flush the detergent cup. See the Loading the dishwasher section.
- Reposition the tall utensils or heavy silverware that may be keeping the dispenser cup door from opening. See the Loading the dishwasher section.
- Don’t place large bowls or pots directly under the detergent dispenser
|
| Black or gray marks on dishes |
Aluminum utensils have rubbed against dishes |
Remove marks with a mild, abrasive cleaner |
| Dishes don’t dry |
Low inlet water temperature
Rinse agent dispenser is empty
|
Make sure inlet water temperature is at least 120°F (49°C). Select a Heated Dry Cycles cycle
Check the rinse agent dispenser and fill as required.
|
| Control panel responded to inputs but dishwasher never filled with water |
Door may not be completely
Water valve may be turned off
|
Make sure the door is firmly closed.
Make sure water valve (usually located under the sink) is turned on.
|
| Stained tub interior |
White film on inside surface - hard water minerals |
- We recommend Cascade® Rinse Aid to help prevent hard water mineral hard water minerals deposits from forming.
- Run dishwasher with citric acid to remove mineral deposits. Citric acid (Part number: WD35X151) can be ordered through GE Appliance Parts. See back cover for ordering information. Alternatively, purchase Lemi Shine and follow the directions on the label
|
| Dishwasher won’t run |
Fuse is blown or circuit breaker is tripped
Power is turned off
Proper Start sequence was not followed
Reboot your control
|
Replace fuse or reset circuit breaker. Remove any other appliances from the circuit.
In some installations, the power to the dishwasher is provided through a wall switch, often located next to the disposer switch. Make sure it is on.
See the Using the dishwasher section.
Turn off power to the dishwasher (at circuit breaker or wall switch) for 30 seconds, then turn back on
|
| Control panel lights go off when you’re setting controls |
Time too long between touching of selected buttons |
Each button must be touched within 30 seconds of the others. To relight, touch any button again or open the door and unlock. |
| Water standing in the bottom of the tub |
Air gap is clogged
High drain loop or air gap not installed
This is normal
|
Clean the air gap. See the Care and cleaning section.
Refer to the Installation Instructions for proper drain line installation
A small amount of clean water around the outlet of the tub bottom at the back of the tub keeps the water seal lubricated.
|
| Water won’t pump out of the tub |
Drain is clogged |
- If you have an air gap, clean it. See the Care and cleaning section.
- If the dishwasher drains into a disposer, run disposer clear.
- Check to see if your kitchen sink is draining well. If not, you may need a plumber
|
| Steam |
This is normal |
Warm, moist air comes through the vent during drying and when water is being pumped out. This is necessary for drying. |
| Sanitized or Cycle Sanitized light does not illuminate at the end of the cycle |
The door was opened and the cycle was interrupted during final rinse
The incoming water temperature was too low
|
Do not interrupt the cycle by opening the door during the wash cycle.
Raise the water heater temperature to between 120°F (49°C) and 140°F (60°C)
|
| Noise |
Normal operating sounds: Detergent cup opening Water entering dishwasher Water draining out of the tub immediately after you start the dishwasher The motor starting during the drying period Drain pump sounds during pump out
Rattling dishes when the spray arm rotates
Motor hums
|
These are all normal. No action is required.
Make sure dishes are properly loaded. See the Loading the arm rotates dishwasher section
Dishwasher has not been used on a regular basis. If you do not use your dishwasher often, set it to fill and pump out once every week. This will help keep the seal moist.
|
| A white film on glassware, dishware and the interior |
This problem is likely caused by a low quality phosphate-free dishwasher detergent |
To remove the white film, run your dishes through a dishwasher cycle with citric acid. Use a WD35X151 citric acid kit found online. Otherwise, use Lemi Shine (WX10X10019) found at GE Appliance Parts or your local grocery store. Pour the citric acid in the detergent cup and close the cover. Place the filmed but otherwise clean glassware and dishware in the dishwasher. Leave silverware and other metal items out of the dishwasher. Turn the dishwasher on and let it run through a complete cycle without detergent. The glassware, dishware, and dishwasher should come out film free. Alternatively, a vinegar rinse may be used. Pour 1 cup of vinegar into dishwasher just after the detergent cup opens and let the dishwasher complete its cycle. This may be repeated several times a year as needed The use of a rinse agent such as Cascade® Rinse Aid may help minimize a repeat build up of film. Also, the use of a highly rated detergent such as Cascade® Platinum Pacs will help prevent film build-up |

 Check the Water Temperature
 Use a Rinse Agent
 Proper Use of Detergent
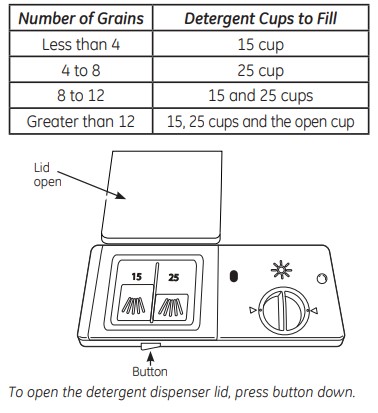
 Forget to Add a Dish?