Loading ...
Loading ...
Loading ...
5
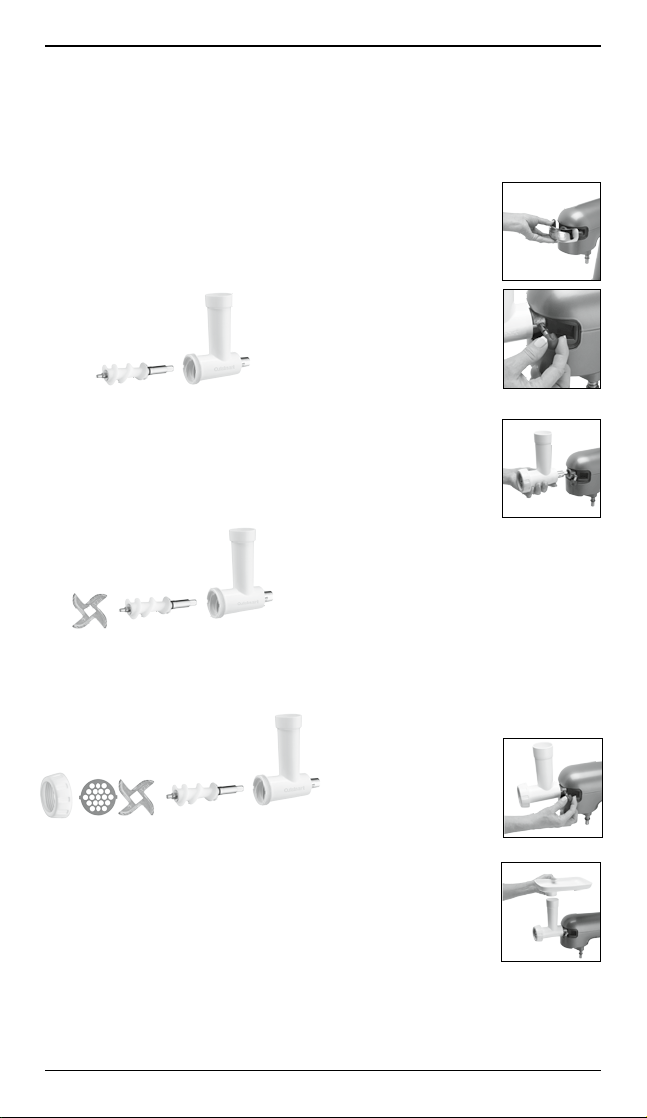
Assembling Meat
Grinder Attachment
Assemble the meat grinder at-
tachment prior to attaching to
the stand mixer.
1. Insert the feed screw pin into
the open end of the attach-
ment.
2. Place the cutter with the at
side facing out toward you
over the feed screw pin (this is
an important step or the meat
grinder will not work).
3. Place the grinding plate over
the cutter on the feed screw
pin.
4. Screw on the ring nut by
turning it clockwise and hand
tighten.
When you are nished meat
grinding, and if the ring nut is too
tight to remove, use the wrench
to loosen.
Attaching to stand
mixer
1. Make sure stand
mixer is OFF.
2. Gently pull port
cover off front
of mixer head to
remove.
3. Turn the stand
mixer attachment
knob counter-
clockwise until
outlet opening is
unobstructed.
4. Insert the square
metal end of the
assembled at-
tachment into
the opening. If necessary,
turn it to the right slightly so
the small round knob on the
attachment is below the notch
on right side of opening, and
turn it back and forth slightly
until the knob slips into the
notch and attachment locks
into place.
5. Turn the stand
mixer attachment
knob clockwise to
secure grinder to
mixer.
6. Fit the tray onto
the top of the
meat grinder and
put a mixing bowl
under the grinder
to catch food.
MEAT GRINDER
Loading ...
Loading ...
Loading ...