Documents: Go to download!
User Manual
- Owner's manual - (English, Spanish)
- Installation Instructions - (English)
- Operating Instructions
- Troubleshooting Tips
Table of contents
Owner’s Manual washer
Operating Instructions
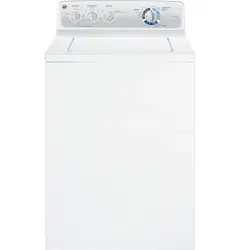
About the control pannel - for models with "pull knob" start
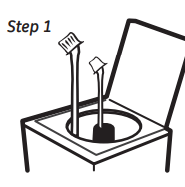
- Add detergent.
- Add diluted fabric softener (on models with a fabric softener dispenser)
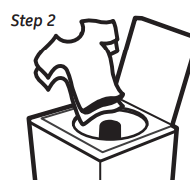
- Add items.
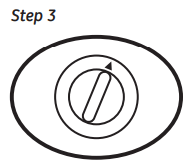
- Select load size and other wash options
- Select wash cycle
- Select OPTIONS
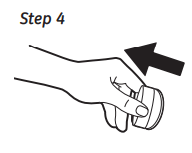
- Close lid.
- Pull knob.

Controls
A. Load Size: Loosely load items in the washer basket. Overloading may negatively impact wash performance. Adjust the load size accordingly. Reset: If you decide that you want a higher water level, move the Load Size first to Reset and then to the higher water setting.
B. Temperature: Select the water temperature for the wash and rinse cycles. Always follow fabric manufacturer’s care label or instructions when laundering. On some models and cycles, warm and hot water settings may seem cooler than your previous washer. This will not affect wash performance. Wash Temperatures
- Hot - Some cold water is added to save energy. This will seem cooler than your hot water heater setting.
- Warm - Some cold water will be added, so this will seem cooler than what your previous washer provided.
- Cold - Some warm water may be added to the washer to maintain a minimum temperature.
C. Options (on some models)
- Fabric Softener and Power Rinse
- Set this option when adding fabric softener during the rinse cycle or when you use extra detergent or bleach to clean heavily soiled items. It provides an enhanced rinse.
D. Wash Cycle - Cycle selector knob
The chart below will help you match the wash cycle setting with your items. The chart is ranked from greatest to least wash intensity.
Your washer may not have all these cycles. (Cycles vary by model.)
- Whites: For heavy to lightly soiled cottons, household linens, work and play items. (Regular Wash/Fast Spin)
- Colors: For non-colorfast cottons and blends and items that are labeled cold wash. (Regular Wash/Fast Spin)
- Permanent: Press For wrinkle-free and permanent press items, and knits. (Pulsed Wash/Fast Spin)
- Rinse & Soak: For rinsing chlorine, perspiration, stains, etc., out of items. (Followed by Drain & Fast Spin.)
- Drain & Spin: For draining the tub and spinning water out of the clothes. (Fast Spin)
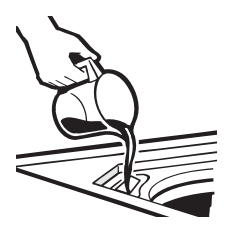
Liquid Bleach Funnel: The water fill dilutes liquid chlorine bleach as the washer fills for the wash cycle.
- Check clothing care labels for special instructions.
- Measure liquid bleach carefully, following instructions on the bottle.
- Never pour undiluted liquid chlorine bleach directly onto clothes or into the wash basket.
- Do not pour powdered bleach into bleach funnel.
- Before starting the washer, pour measured amount of bleach directly into bleach funnel. Avoid splashing or over-filling dispenser. If you prefer to use powdered bleach, add it into the wash basket with your detergent.
- Do not mix chlorine bleach with ammonia or acids such as vinegar and/or rust remover. Mixing can produce a toxic gas which may cause death.
FAQ
1. Q: What is the difference between Heavy and Light settings?
- A: For Whites and Colors, the wash agitation time is increased by 6 minutes and for Permanent Press, by 12 minutes. (Times are approximate)
2. Q: Which cycle is best for heavily soiled items?
- A: Whites or Colors cycles have the greatest wash intensity. This cycle provides the best overall cleaning . Permanent Press should be used for wrinkle-free and permanent press items.
3. Q: How can I reduce linting?
- A: Sort wash loads by fabric type and whether they collect lint (velveteen, corduroy) or produce lint (terry cloth, chenille). Wash small loads for a shorter amount of time.
4. Q: How much detergent do I use?
- A: For best performance, always follow the detergent manufacturer’s instructions on usage. Many detergents are concentrated, so consult the product label and follow the clearly marked lines on the detergent measuring cups. Excessive detergent can negatively impact the wash performance.
5. Q: How does the selection of Power Rinse or Fabric Softener affect water usage of my washer?
- A: Selecting the Power Rinse or Fabric Softener feature will increase the amount of water used by your washer during the rinse cycle. The added water assists in the proper dilution of fabric softener. The quantity of water used in this cycle is comparable to the amount used in the initial fill.
6. Q: Why do Hot and Warm water temperature settings not seem as hot as my previous washer?
- A: Your new washer is designed to meet current federal energy and water efficiency requirements. Although temperature settings and water levels may seem different than your previous washer, it will not affect wash performance.
About washer features
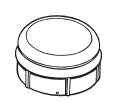
- The Agitator Cap (on some models)
- The agitator cap fits into the top of the agitator. If it accidentally comes off, simply put it back on.
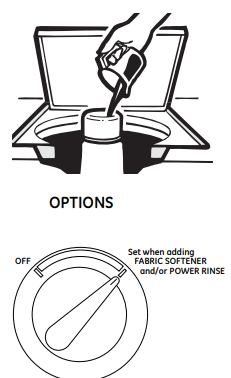
Fabric Softener Dispenser (on some models): The fabric softener dispenser automatically releases liquid fabric softener. Setting the knob ensures that it dispenses at the proper time. Do not stop the washer or raise the lid during the first spin. This will cause the dispenser to empty too soon. To use, follow these steps:
- Make sure dispenser is securely attached to agitator.
- Use only diluted liquid fabric softener. Pour into dispenser, using amount recommended on package. Never pour fabric softener directly on items. It may stain them.
- Add water to dispenser until it reaches the maximum fill line.
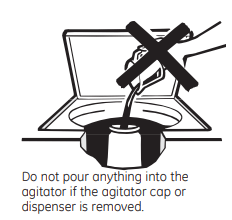
- Select Fabric Softener setting knob to activate the cycle. Note: Fabric softener will not dispense if the knob is in the “OFF” position.
Cleaning the Fabric Softener Dispenser (on some models)
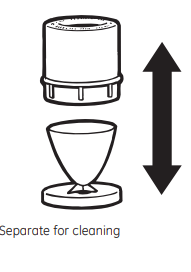
- Remove the dispenser from the top of the agitator.
- Separate the dispenser cup from the cover by grasping the top and pushing down on the inside of the cup with your fingers. Dispenser cup will pop free from the cover.
- To clean the dispenser, soak both the dispenser cup and the dispenser cover in the following solution:
- 1 US gallon (3.8 liters) warm water
- 1/4 cup (60 ml) heavy-duty liquid detergent
- 1 cup (240 ml) bleach
- If necessary, loosen buildup with a clean, soft cloth after soaking. Do not use a stiff brush; you may roughen the surface of the dispenser.
- Rinse and reassemble dispenser. Place dispenser back on the agitator.
Loading and using the washer.
Always follow fabric manufacturer’s care label when laundering.
 Sorting Wash Loads
- Sort by color (whites, lights, colors), soil level, fabric type (sturdy cottons, easy care, delicates) and whether the fabric produces lint (terry cloth, chenille) or collects lint (velveteen, corduroy).
- Fire Hazard: Never place items in the washer that are dampened with gasoline or other flammable liquids. No washer can completely remove oil. Do not dry anything that has ever had any type of oil on it (including cooking oils). Doing so so can result in death, explosion, or fire
 Proper Use of Detergent
- Add detergent before adding items so that the detergent can work effectively. Using too little or too much detergent is a common cause of laundry problems.
- For spots, apply pre-treatment to items as recommended on the product label. Application should be made in the basket to prevent overspray which may cause the coloring on the lid or graphics to fade.
- You can use less detergent if you have soft water, a smaller load or a lightly soiled load.
- When using high efficiency or concentrated detergents, consult the product label to determine amount required for optimum performance. Excessive detergent will negatively impact wash performance
 Loading the Washer
Load dry items loosely in the washer basket. When loading wet items, make sure you set the load/water level high enough to allow the items to move freely. Water level should just cover the items. To add items after washer has started, lift the lid and submerge additional items next to the agitator.
- Do not wrap long items like sheets or pants around the agitator.
- Do not wash fabrics containing flammable materials (waxes, cleaning fluids, etc.).
- Washer will not agitate or spin with the lid up, however the timer will continue to run.
Care and cleaning of the washer.
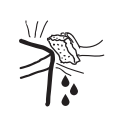
- Wash Basket: Leave the lid open after washing to allow moisture to evaporate. If you want to clean the basket, use a clean soft cloth dampened with liquid detergent; then rinse. (Do not use harsh or gritty cleaners.)
- Fill Hoses: GE recommends changing the hoses every 5 years.
- Exterior: Immediately wipe off any spills. Wipe with damp cloth. Try not to hit surface with sharp objects.
- Moving and Storage: Ask the service technician to remove water from drain pump and hoses. See the Installation Instructions packed with product for information on how to reinstall the shipping rod to keep the tub stationary when moving the washer. For more information, visit GEAppliances.com or call 800. GE.CARES (800.432.2737). Do not store the washer where it will be exposed to the weather.
- Long Vacations: Be sure water supply is shut off at faucets. Drain all water from hoses if weather will be below freezing
Troubleshooting Tips
Before you call for service…
Troubleshooting Tips Save time and money! Review the charts on the following pages, or visit GEAppliances.com. You may not need to call for service.
WATER
| Possible Causes | What To Do | |
| Too many suds |
Too much detergent Type of detergent Soft water |
Measure your detergent carefully. Use less soap if you have soft water, a smaller load or a lightly soiled load. Switch to a lower sudsing detergent brand and follow instructions on package. Try less detergent. |
| Water leaks |
Using too much detergent in washer Fill hoses or drain hose is improperly connected Household drain may be clogged Drain hose loose Drain hose rubs on wall Constant water pressure to the fill hoses at the water source |
Use less detergent. Use less soap if you have soft water, a smaller load or a lightly soiled load. Make sure hose connections are tight at faucets and rubber washers are installed. Make sure end of drain hose is correctly inserted in and secured to drain facility. Check household plumbing. You maa plumbery need to call Make sure drain hose is fully seated in back of washer and that the two retaining screws are fully seated. Make sure drain hose does not make contact with the wall. May cause excessive wear on the hose. Tighten hoses at the faucets and turn the water off after each use. Check condition of the fill hoses; they should be replaced every 5 years. |
| Water temperature seems incorrect |
Cooler water temperatures provide improved energy efficiency Water supply is turned off or improperly connected Water valve screens are stopped up House water heater is not set properly |
This washer uses cooler wash and rinse temperatures than your previous washer. This includes cooler hot and warm washes. This will not affect wash performance Turn both hot and cold faucets fully on and make sure hoses are connected to correct faucets. Turn off the water source and remove the water connection hoses from the upper back of the washer. Use a brush or toothpick to clean the screens in the machine. Reconnect the hoses and turn the water back on. Make sure house water heater is delivering water at 120°F–140°F (48°C–60°C). |
| Water pumped out before cycle is complete | Lid lifted or cycle was put in pause for over 24 hours | Reset cycle. |
| Water won’t drain | Drain hose is kinked or improperly connected |
Straighten drain hose and make sure washer is not sitting on it. Top of drain outlet should be less than 6 ft (1.8 m) above floor |
| Washer pauses during wash cycle | This is normal | This is normal. The washer alternates between agitate and soak during some wash cycles to get your clothes cleaner with less wear. |
| Washer pauses during spin cycle | This is normal | The washer may pause during the to remove spin cycle soapy water more efficiently |
OPERATION
| Possible Causes | What To Do | |
| Washer won’t operate |
Washer is unplugged Water supply is turned off Controls are not set properly Lid is open - safety feature prevents agitation and spinning when lid is up Circuit breaker/fuse is tripped/blown Timer knob not pulled Lid magnet missing |
Make sure cord is plugged securely into a working outlet. Turn both hot and cold faucets fully on. Check controls Close lid and reset cycle, to the beginning if necessary. Check house circuit breakers/fuses. Replace fuses or reset breaker. Washer should have separate outlet. Pull timer knob. Call for service. |
| Movement inside machine when shut of | Shifting mechanism is disengaging the motor | When the machine is manually turned off, the shifter will disengage the motor before completely shutting down. If lid is raised before the motor is disengaged, the process will stop and will resume when lid is closed. |
PERFORMANCE
| Possible Causes | What To Do | |
| Clothes too wet | Incorrect spin cycle selected | Make sure the spin cycle selected matches the load you are washing. Some fabrics will feel wetter when rinsed with cold water |
| Colored spots |
Incorrect use of fabric Incorrect use of fabric Dye transfer |
Check fabric softener package for instructions and follow directions for using dispenser. Make sure you have selected the Fabric Softener option. Pretreat stain and rewash Sort whites or lightly colored items from dark colors. |
| Grayed or yellowed clothes |
Not enough detergent Hard water Water is not hot enough Washer is overloaded Detergent is not dissolving Dye transfer |
Use more detergent (especially with larger loads). clothes Be sure to follow detergent manufacturer’s directions Use a water conditioner like Calgon brand or install a water softener. Make sure water heater is delivering water at 120°F–140°F (48°C–60°C). Select load size to match clothes load. Add detergent before you load items. Sort clothes by color. If fabric label states wash separately, unstable dyes may be indicated. |
| Lint or residue on clothes |
Clothes are air or line dried Incorrect sorting Washing too long Detergent not dissolving Overloading Incorrect use of fabric softener |
If you do not dry your clothes with a clothes dryer, your clothes may retain more lint. Separate lint producers from lint collectors. Wash small loads for a shorter time than larger loads Add detergent before you load items. Try a liquid detergent. Use warmer water temperature Load clothes loosely in the washer basket. Adjust load size based on items size and materials. Make sure load size selected matches clothes load size. Check fabric softener package for instructions and follow directions for using dispenser. Make sure you have selected the Fabric Softener option. |
| Pilling | Result of normal wear on poly-cotton blends and fuzzy fabrics | While this is not caused by the washer, you can slow the pilling process by washing garments inside out. |
| Snags, holes, tears, rips or excessive wear |
Pins, snaps, hooks, sharp buttons, belt buckles, zippers and sharp objects left in pockets Undiluted chlorine bleach Chemicals like hair bleach or dye, permanent wave solution |
Fasten snaps, hooks, buttons and zippers. Remove loose items like pins, objects in pockets and zippers and sharp objects sharp buttons. Turn knits (which snag easily) inside out. Check bleach package instructions for proper amount. Never add undiluted bleach to wash or allow clothes to come in contact with undiluted bleach. Rinse items that may have chemicals on them before washing |
| Wrinkling |
Improper sorting Overloading or incorrect water level Incorrect wash and dry cycles Repeated washing in water that is too hot |
Avoid mixing heavy items (like work clothes) with light items (like blouses). Try a fabric softener. Load your washer so clothes have enough room to move freely with water covering all of the clothes. Match Cycle selection to the type of fabric you are washing (especially for easy care loads). Wash in warm or cold water |
SOUNDS
| Possible Causes | Reason | |
| "Metallic clicking" | Shifter mechanism is engaging or disengaging | The drive system will engage at the start of agitate and disengage when agitate is complete. This occurs multiple times during the wash. |
| Back and forth "swoosh" or light "clicking" sound during agitate | Electric motor reversing direction | This machine has a drive system that doesn’t use gears. This sound is the motor rotating back and forth to clean your laundry. |
| "Click" when water stops filling | Relay switch | The relay makes a click sound when activated. The water level activates the relay and stops filling |
| "Clicking" behind Control Panel during fill | Automatic Temperature Control Valve | Two valves mix cold and hot water. The “clicking” is when either valve turns on or off to raise or lower the fill water temperature. |
| Water flow changes during fill | Automatic Temperature Control Valve | Two valves mix cold and hot water. The flow changes when either valve turns on or off to raise or lower the fill water temperature. |
| Motor "whining up" or "coasting down" in spin | Motor ramping up/down during spin cycle | The motor will speed up incrementally during the spin cycle. When spin is complete, it will coast until it stops. |
| "Humming" | Water drain pump | The drain pump will make a humming sound when pumping out water after agitation stops and continue until spin is complete. |
| "Gurgling" | Water drain pump | When the pump starts drawing in air, It starts to gurgle. The washer should then begin spinning and the sound will continue until it is done spinning |
| Washer is noisy |
Washer is uneven Shipping rod is still assembled in the unit |
To level the front of the washer, adjust the front leveling legs by rotating the individual leg in the proper direction for up or down. To level the back of the washer, lift the back of the machine 4” (11 cm) and set down To remove the shipping rod from the washer, pull the yellow tag and remove the attached rod from the bottom right hand side of the washer. |
See other models: GTUP240EM0WW JBP82SF1SS PSB48YSKCSS PSF26RGWAWW JGBP32WEF2WW
