Loading ...
Loading ...
Loading ...
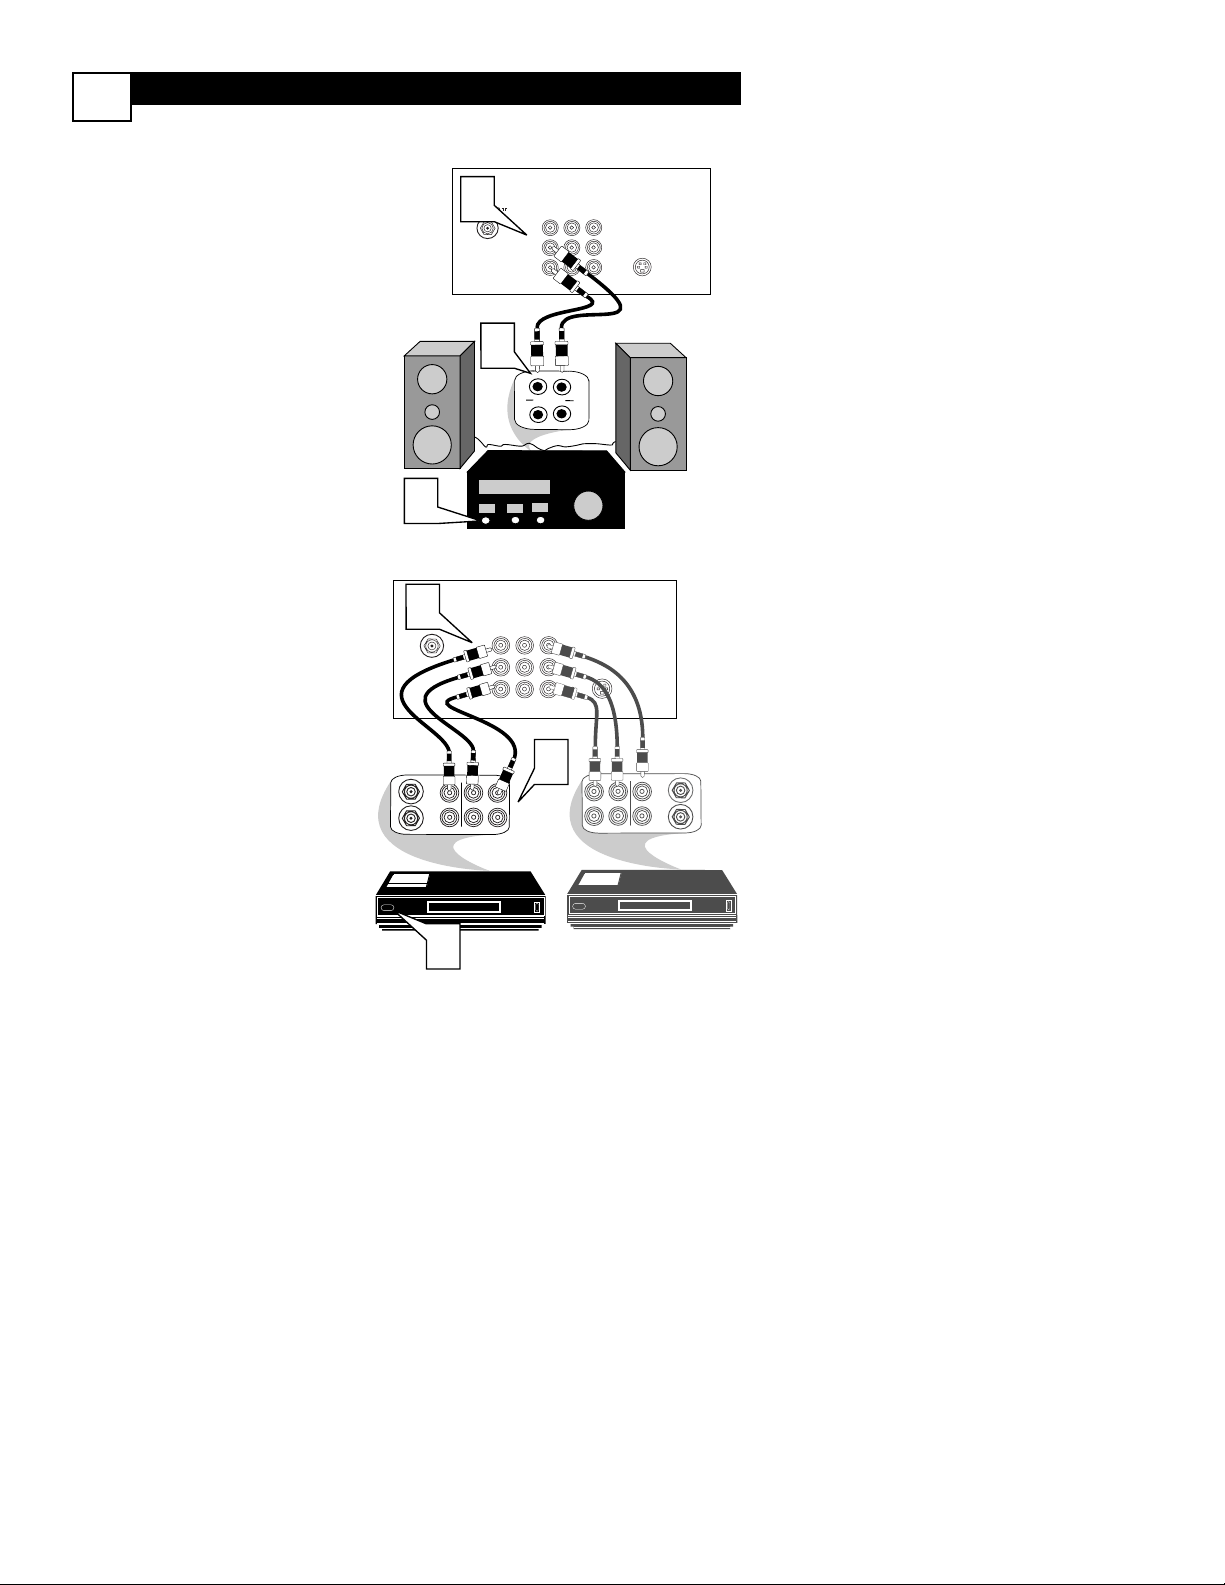
AV (AUDIO/VIDEO) OUT(PUT) CONNECTIONS
8
T
he Audio/Video Output jacks are great for
recording with a VCR or used to connect
an external audio system for better sound
reproduction.
AUDIO SYSTEM CONNECTION:
1
Connect one end of the R(ight)
and L(eft) AUDIO jacks on the
TV to the R and L audio input jacks
on your amplifier or sound system.
Set the audio system’s volume to a
normal listening level.
2
Turn the TV and audio system
ON. To adjust the volume on the
audio system, you will need to
change the volume at the external
audio system, not the television.
SECOND VCR CONNECTION:
NOTE: Refer to panel number 4 for the
proper hookup of the first VCR. Follow
the instructions on how to tune to the
AV1 channel to view a pre-recorded
tape.
The following steps allow you to
connect a second VCR to record the
program while your watching it.
1
Connect one end of the yellow
Video Cable to the AV Out
VIDEO plug. Connect the other end
to the VIDEO IN plug on the second
VCR.
2
Connect one end of the red and
white Audio cable from the AV
Out AUDIO L and R plugs on the
TV to the AUDIO IN plugs on the
VCR.
3
Turn the Second VCR ON,
insert a VHS tape and it’s ready to
record what’s being viewed on the
TV screen.
A
U
X
/
T
V
I
N
P
U
T
P
H
O
N
O
I
N
P
U
T
R
L
2
L
AV Out
VIDEO
S-VIDEO
CVI
Y
Pb
Pr
AV In
AUDIO
1
1
R
Back of TV
Audio Cables
(Red and White)
Y
Pb
Pr
ANTENNA
OUT
ANTENNA
IN
VIDEO
AUDIO
IN
IN
OUTOUT
LR
ANTENNA
OUT
ANTENNA
IN
VIDEO
AUDIO
IN
IN
OUT OUT
RL
1
2
3
L
AV Out
VIDEO
S-VIDEO
CVI
AV In
AUDIO
R
Back of TV
Audio Cables
1st VCR
(refer to panel 4 for
proper connection)
Video
Cable
2nd VCR with Audio and
Video Input Jacks
SECOND VCR CONNECTION:
AUDIO SYSTEM CONNECTION:
Loading ...
Loading ...
Loading ...