Loading ...
Loading ...
Loading ...
14
How to Install the Monitor
5 6
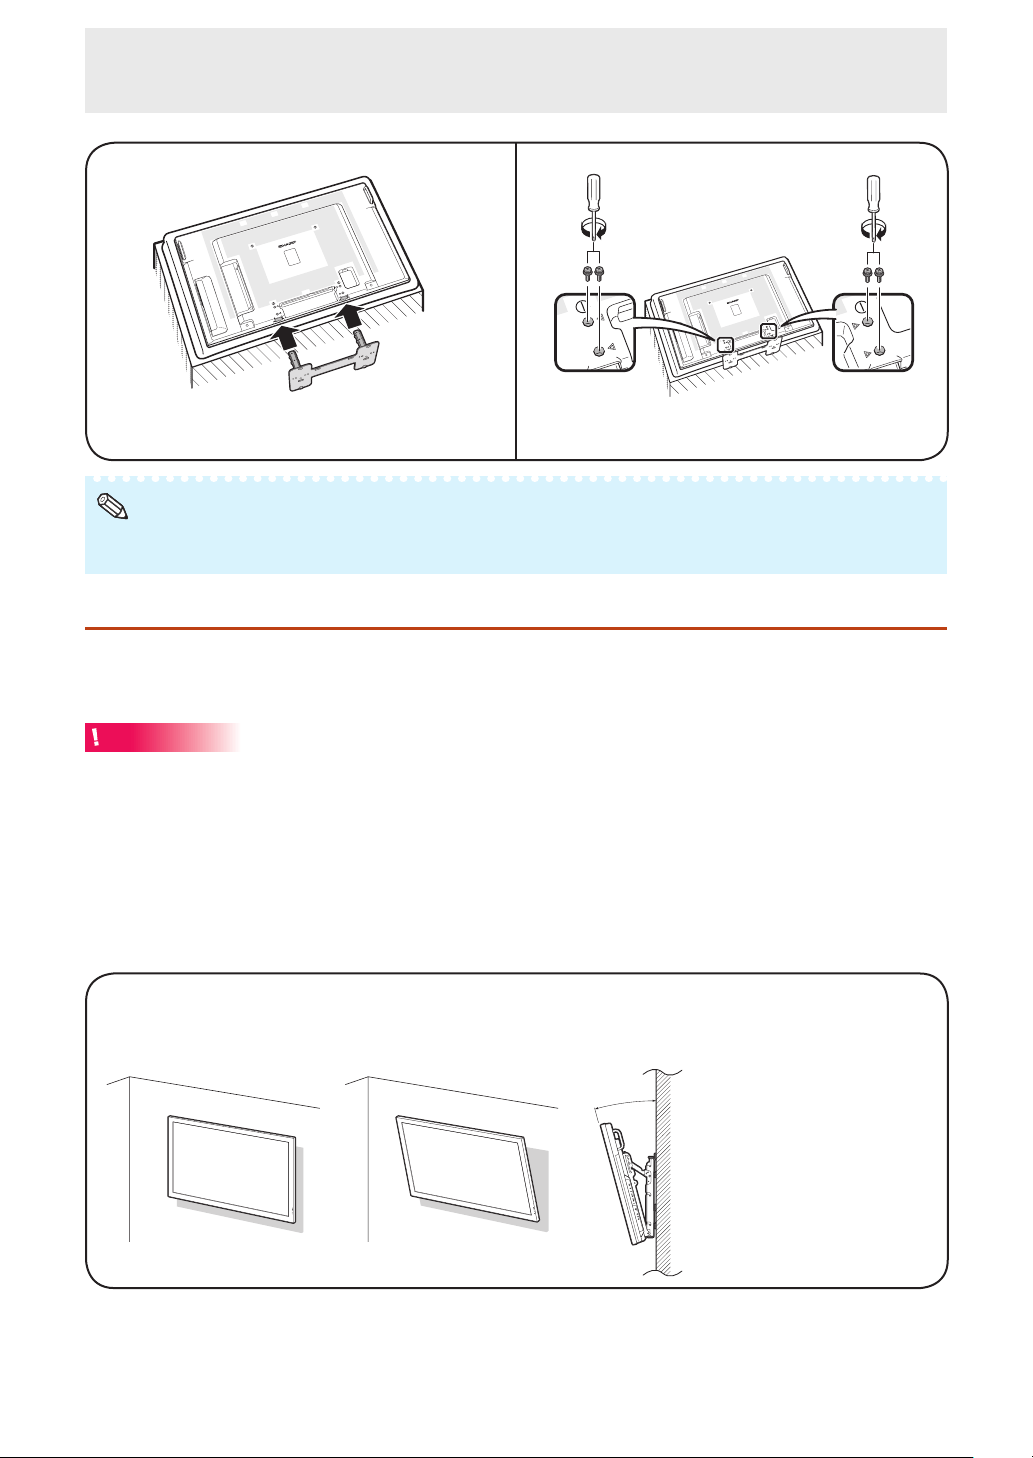
Insert and tighten the screws into the 4 holes on
the rear of the monitor.
Insert the stand into the openings on the
underside of the monitor.
• To detach the stand, perform the steps in reverse order.
• Store the protective covers. You will need them after detaching the stand.
Note
Mounting the monitor on the wall
n
Handling and precautions with the wall-mounted monitor
• You can mount the monitor on the wall using the optional AN-52AG4 bracket.
• For details, refer to the instructions supplied with the optional AN-52AG4 bracket.
Caution
• This monitor should be mounted on the wall only with the AN-52AG4 (SHARP) wall-mount bracket. The
use of other wall-mount brackets may result in an unstable installation and may cause serious injuries.
• Installing the monitor requires special skill that should only be performed by qualified service personnel.
Customers should not attempt to do the work themselves. SHARP bears no responsibility for improper
mounting or mounting that results in accident or injury.
Using a SHARP recommended bracket to mount the monitor
• You can ask a qualified service professional about using a SHARP recommended AN-52AG4 bracket to
mount the monitor to the wall.
• Carefully read the instructions that come with the bracket before beginning work.
Hanging on the wall
AN-52AG4 wall-mount bracket. (See the bracket instructions for details.)
AN-52AG4
Vertical mounting Angular mounting
About setting the monitor angle
• The center of the display
TL-M5200:
5
1
⁄
4
inch (136 mm) under the
“A” position.
TL-M4600:
6
55
⁄
64
inch (174 mm) under the
“A” position.
• Refer to the operation manual of
AN-52AG4 for details.
0°/5°/10°/15°/20°
Loading ...
Loading ...
Loading ...