| Problem |
Possible Cause |
Solutions |
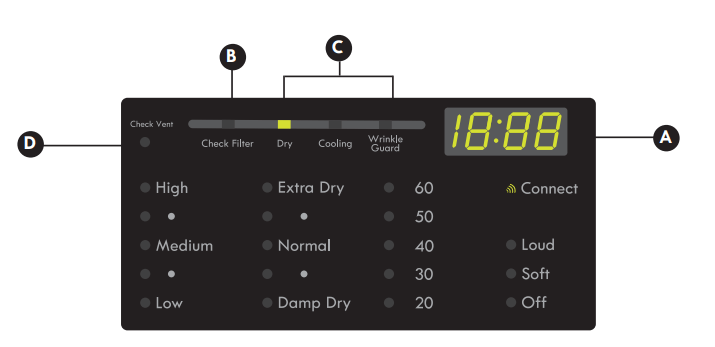
| *CHECK VENT is blinking |
Exhaust system is too long or has too many turns/restrictions. |
Install a shorter or straighter duct run. See the Installation Instructions for details. |
| Partial blockage of the ductwork due to lint buildup or other foreign object. |
Ductwork should be checked/cleaned immediately. Dryer can be used in this condition, but drying times will be longer and energy consumption will increase. |
| * This warning light does not indicate a dryer failure and is not covered by the dryer warranty. Contact a duct cleaning service to set up an appointment to have your exhaust system cleaned and inspected. |
| Dryer will not turn on |
Power cord is not properly plugged in. |
Make sure that the plug is securely plugged into a grounded outlet matching the dryer’s rating plate. |
| House fuse is blown, circuit breaker has tripped, or power outage has occurred. |
Reset circuit breaker or replace fuse. Do not increase fuse capacity. If the problem is a circuit overload, have it corrected by a qualified electrician. |
| Dryer does not heat |
House fuse is blown, circuit breaker has tripped, or power outage has occurred. |
Reset circuit breaker or replace fuse. Do not increase fuse capacity. If the problem is a circuit overload, have it corrected by a qualified electrician.
NOTE: Due to the design of electric dryers, it is possible for a circuit problem to allow an electric dryer to run without heat.
|
| Gas supply or service is turned off (gas models only). |
Confirm that the house gas shutoff and the dryer gas shutoff valves are both fully open. Even if gas is not supplied to the dryer, it will run and no error codes will display. Verify that other gas appliances in the home are working normally. |
| Greasy or dirty spots on clothes |
Clean and dirty clothes are being dried together. |
Only use your dryer to dry clean items. Soil from dirty clothes can transfer to the clean clothes in the same or later loads. |
| Clothes were not properly cleaned or rinsed before being placed in the dryer. |
Stains on dried clothes could be stains that weren’t removed during the washing process. Make sure that clothes are being completely cleaned or rinsed according to the instructions for your washer and detergent. Some difficult soils may require pre-treating prior to washing. |
| Excess static in clothes after drying |
Fabric softener is not used or used incorrectly. |
Use a fabric softener to reduce static electricity. Be sure to follow the fabric softener manufacturer’s instructions. |
| Clothes dried too long (over dried). |
Overdrying a load of laundry can cause a buildup of static electricity. Adjust settings and use a shorter drying time, or use AUTO DRY cycles. |
| Drying synthetics, permanent press, or synthetic blends. |
These fabrics are naturally more prone to static buildup. Try using fabric softener, or use DAMP DRY and/or shorter TIMED DRY time settings. |
| Drying time is not consistent |
Heat settings, load size, or dampness of clothing is not consistent. |
The drying time for a load will vary depending on the type of heat used (electric, natural gas, or LP gas), the size of the load, the type of fabrics, the wetness of the clothes, and the condition of the exhaust duct and lint filter. Even an unbalanced load in the washer can cause poor spinning, resulting in wetter clothes which will take longer to dry |
| Clothes take too long to dry |
Exhaust ducts are blocked, dirty, or duct run is too long. |
Confirm that the exhaust duct is properly configured and free of debris, lint, and obstructions. Make sure that outside wall dampers can open properly and are not blocked, jammed, or damaged. |
| Load is not properly sorted. |
Separate heavy items from lightweight items. Larger and heavier items take longer to dry. Light items in a load with heavy items can fool the sensor because the light items dry faster |
| Large load of heavy fabrics. |
Heavy fabrics take longer to dry because they tend to retain more moisture. To help reduce and maintain more consistent drying times for large and heavy fabrics, separate these items into smaller loads of a consistent size. |
| Dryer controls are not set properly. |
Use the appropriate control settings for the type of load you are drying. Some loads may require an adjustment of the DRY LEVEL setting for proper drying. |
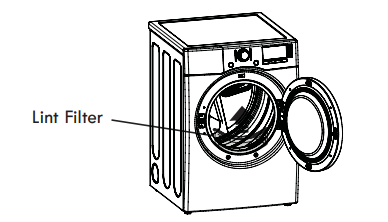
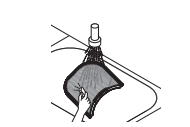
| Lint filter needs to be cleaned. |
Remove the lint from the filter before every load. With the lint removed, hold the filter up to a light to see if it is dirty or clogged. If it looks dirty, follow the cleaning instructions in the Care and Cleaning section. With some loads that produce high amounts of lint, such as new bath towels, it may be necessary to pause the cycle and clean the filter during the cycle. |
| House fuse is blown, circuit breaker has tripped, or power outage has occurred. |
Reset the circuit breaker or replace the fuse. Do not increase fuse capacity. If the problem is a circuit overload, have it corrected by a qualified electrician.
NOTE: Due to the design of electric dryers, it is possible for a circuit problem to allow an electric dryer to run without heat.
|
| Dryer is overloaded. |
Divide extra large loads into smaller loads for better drying performance and efficiency. |
| Dryer is underloaded. |
If you are drying a very small load, add a few extra items to ensure proper tumbling action. If the load is very small and you are using AUTO DRY cycles, the electronic control cannot properly sense the dryness of the load and may shut off too soon. Use TIMED DRY or add some extra wet clothes to the load. |
| Clothes are wrinkled |
Clothes dried too long (overdried). |
Overdrying a load of laundry can lead to wrinkled clothes. Try a shorter drying time or DAMP DRY setting and remove items while they still retain a slight amount of moisture. |
| Clothes left in dryer too long after cycle ends. |
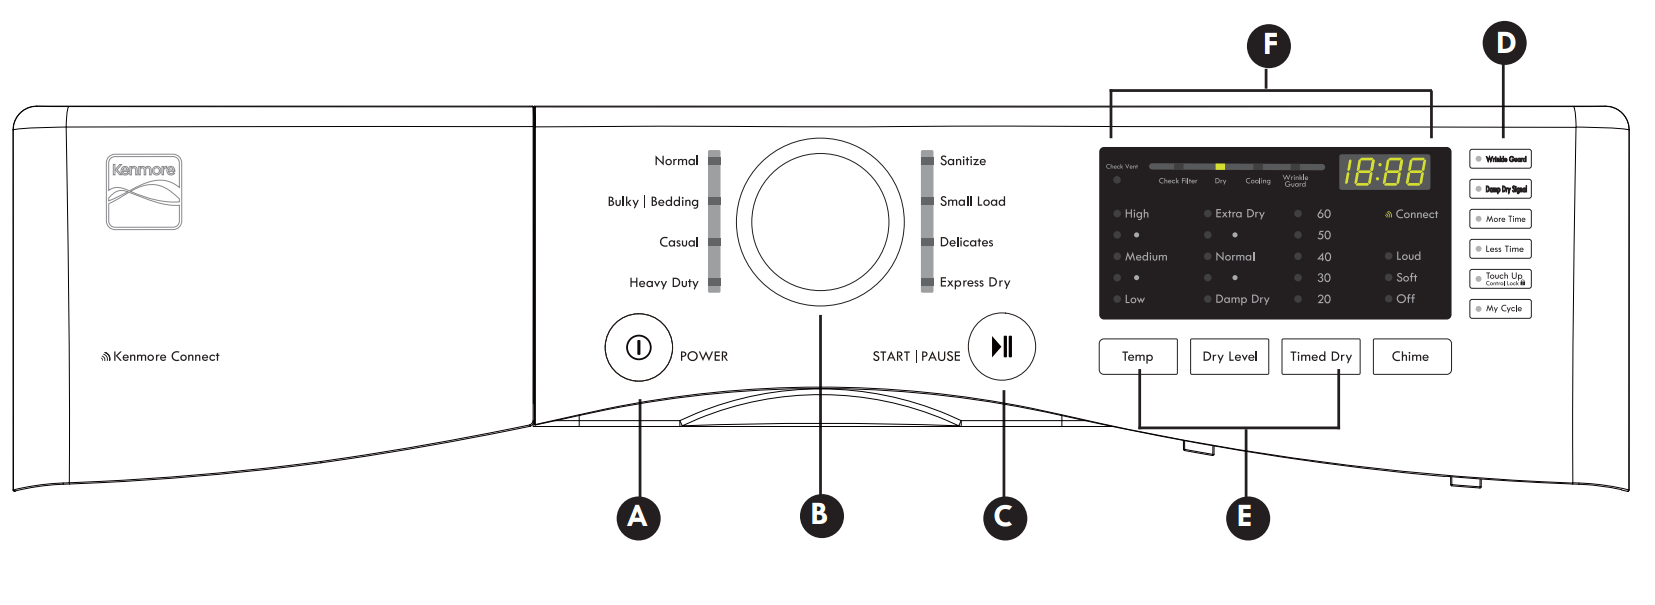
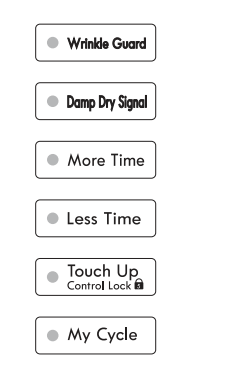
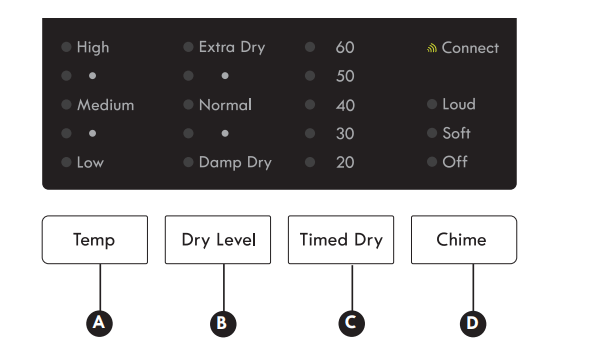
Use the WRINKLE GUARD option. This feature will tumble the clothes briefly every few minutes for up to 150 minutes to help prevent wrinkling. |
| Clothes are shrinking |
Garment care instructions are not being followed. |
To avoid shrinking your clothes, always consult and follow fabric care instructions. Some fabrics will naturally shrink when washed. Other fabrics can be washed but will shrink when dried in a dryer. Use a low or no heat setting. |
| Display shows error code: tE1 or tE2 |
Temperature sensor failure |
Turn off the dryer and call for service. |
| Lint on clothes |
Lint filter not cleaned properly |
Remove the lint from the filter before every load. With the lint removed, hold the filter up to a light to see if it is dirty or clogged. If it looks dirty, follow the cleaning instructions in the Care and Cleaning Section. With some loads that produce high amounts of lint, it may be necessary to clean the filter during the cycle. |
| Laundry not sorted properly. |
Some fabrics are lint producers (i.e., a fuzzy white cotton towel) and should be dried separately from clothes that are lint trappers (i.e., a pair of black linen pants). |
| Excess static in clothes |
Use a fabric softener to reduce static electricity. Be sure to follow the manufacturer’s instructions.
Overdrying a load of laundry can cause a buildup of static electricity. Adjust settings and use a shorter drying time, or use AUTO DRY cycles.
|
| Dryer is overloaded. |
Divide extra large loads into smaller loads for drying |
| Tissue, paper, etc., left in pockets. |
Check pockets thoroughly before washing and drying clothes. |
| Buttons are disabled or CL shows in display |
CONTROL LOCK function is engaged. |
Press and hold the TOUCH UP button for five seconds to activate or deactivate the function. |
| Light does not turn on when door is opened |
Dryer has been off for more than four minutes and the light is disabled. |
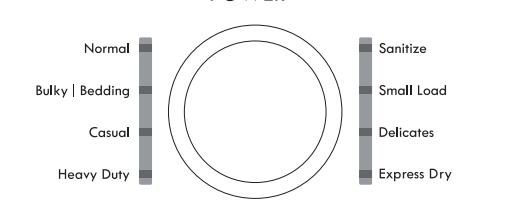
Press the POWER button to turn on the dryer, which will enable the drum light. |


 : Selecting this option will tumble the clothes after the cycle ends for a few seconds every few minutes without heat. This option is active for 150 minutes after the end of the cycle, or until the door is opened. This helps prevent wrinkles if the clothes are not removed immediately after the cycle has finished.
 : Use this option to disable the controls. The Control Lock can be activated any time the dryer is ON. When the controls are locked “CL” will display alternately with the estimated time remaining. Once set, the Control Lock must be turned off before the controls can be used. Press and hold the TOUCH UP button for five seconds to lock or unlock the controls.
 :
:
 : If you press the Damp Dry Signal, the dryer will emit a chime when the clothes are just short of completely dry, in case you want to remove them for ironing or hang drying.
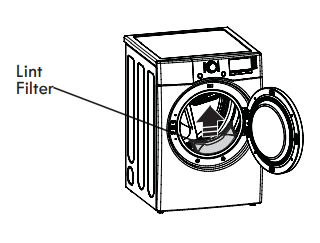

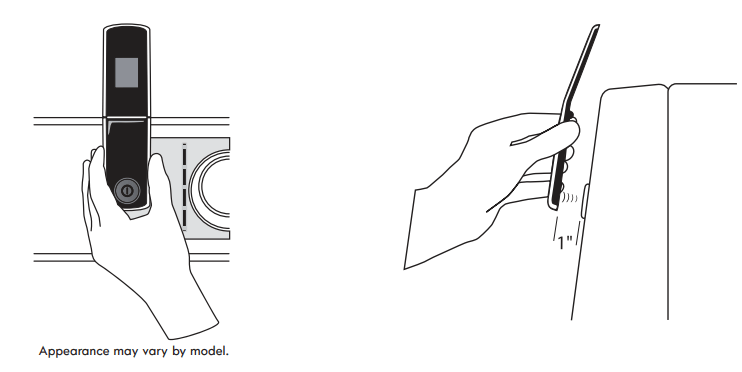
 : HOLD the mouthpiece of your phone over the POWER button, when instructed to do so by the call center, no more than one inch from (but not touching) the machine. NOTE: Do not press any other buttons or turn the cycle selector knob.
 : PUSH and hold the TEMP button while continuing to hold your phone to the POWER button.
 : LISTEN for three beeps. After you hear the three beeps, release the TEMP button. Keep the phone in place until the tone transmission has finished. This takes about 6 seconds, and the display will count down the time. Once the countdown is over and the tones have stopped, resume your conversation with the technician, who will then be able to assist you in using the information transmitted for analysis.