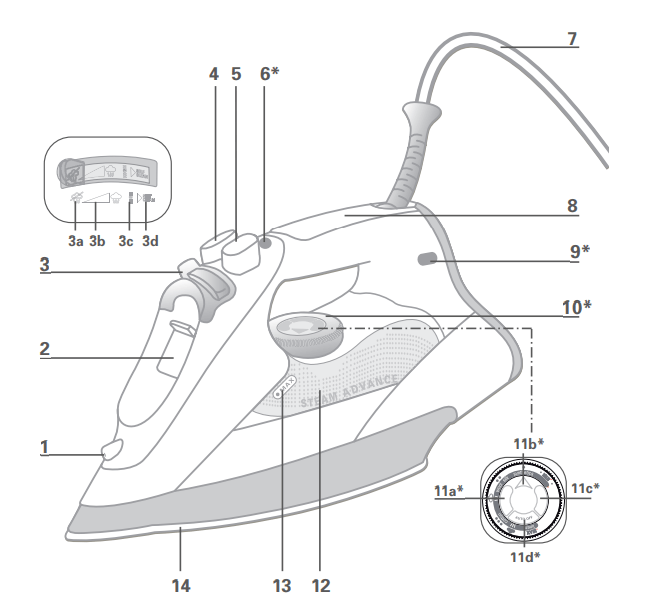
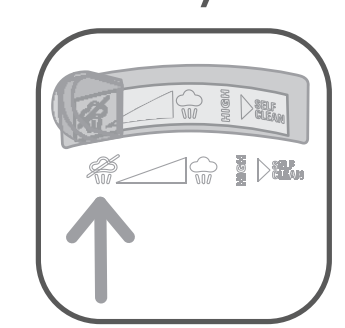
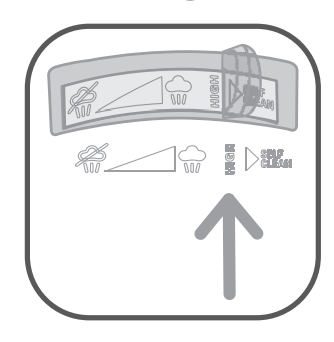
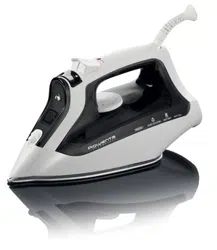
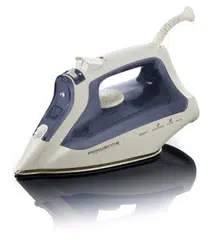
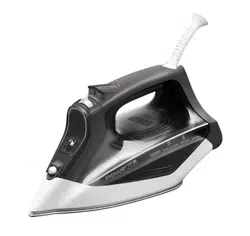
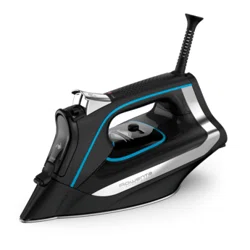
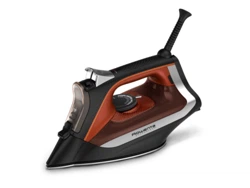
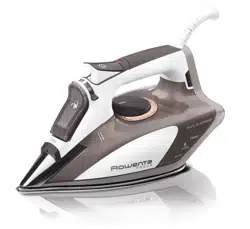
Variable steam control a Dry ironing b Smooth steam c High Pressure steam d Self Clean
Spray button
Burst of steam button
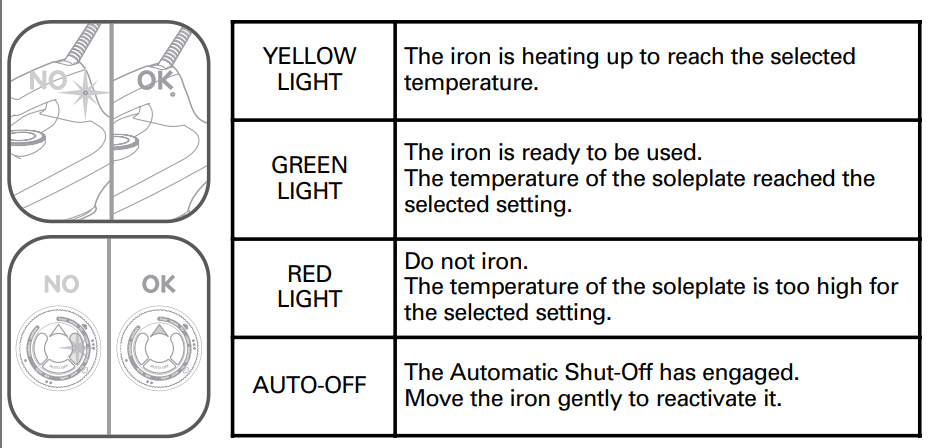
Auto-off indicator light*
Cord
Handle
Thermostat control light*
Temperature control dial
LED display* a Yellow LED b Green LED c Red LED d Auto-off LED
Water tank
Maximum water level indicator
Microsteam400 soleplate
* depending on model
BEFORE USE
Unpacking
- Remove soleplate cover before using iron. Remove all packaging from the iron.
- Please read all of the instructions for use and the Important Safeguards carefully.
- It is normal for a small amount of smoke and a light odor to be produced the first time it is used. This will quickly disappear.
- Particles may emit from iron during first use. They are not harmful and should disappear after iron has been allowed to steam.
Helpful Hints
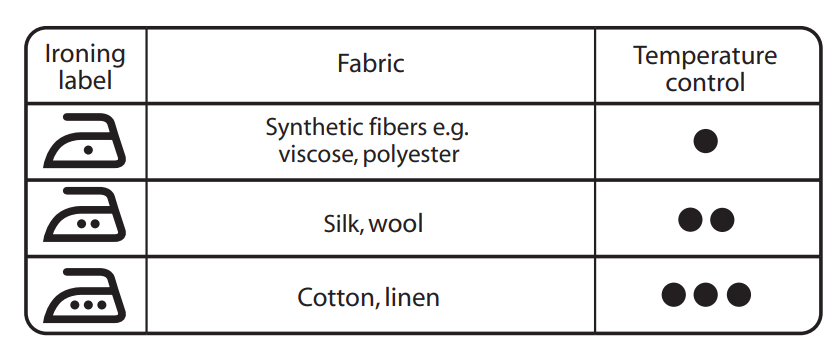
- When ironing start with fabrics that require a low temperature setting (•) and finish with those which need the highest temperature (•••).
- Mixed fiber fabrics should be ironed on the temperature for the most delicate fabric. For example a shirt that is 60% cotton and 40% polyester should be ironed at the (•) setting for synthetics.
- If spray starch is used, spray it onto the reverse side of the garment. Allow starch to penetrate before ironing by setting garment aside for 30 seconds.
- For best results, use a mesh type ironing board to allow excess steam to escape.
- For delicate fabrics, we recommend carrying out a test on an unobtrusive area of the garment such as an inner seam.
- Adhere to manufacturer recommendations on garment label.
WATER RECOMMENDATIONS
Tap water
Rowenta irons are designed to be used with REGULAR TAP WATER (up to 12 grains of hardness). If your water is harder than this, Rowenta recommends mixing half tap water with half bottled spring water which reduces the hardness; or just use bottled spring water. Never use 100 % distilled water as this can cause the iron to spit and leak.
Softened water
There are many types of household water softeners and the water from many of them is perfectly acceptable for use in an iron. However, some types of softeners, particularly those that use chemicals such as salt, can cause the appliance to leak or spit during use. If you experience this type of problem, we recommend that you try using bottled spring water or untreated tap water. Never use 100 % distilled water.
Once you have changed water it will take several uses to correct the problem. Rowenta recommends trying the steam function for the first time on an old towel or cloth that can be discarded to avoid damaging your clothes.
Iron and other impurities
If your water supply contains large amounts of iron or organic matter, these minerals can collect inside the appliance and eventually appear as brown stains. If you experience these problems Rowenta recommends using bottled spring water. Never use 100 % pure distilled water.
ALWAYS REMEMBER: Battery water and water containing additives (such as starch, perfume or fabric conditioner condensed water from driers) may not be used. Such additives can affect the properties of the steam and, at high temperatures, can form deposits in the steam chamber, which will mark the laundry when they are emitted through the steam vents.
Descaling liquids/agents should not be used.
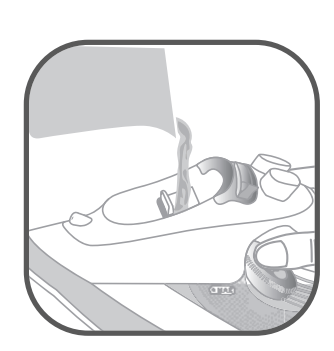
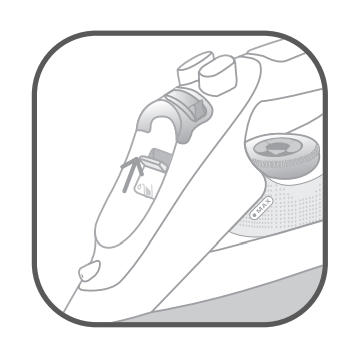
Filling with Water
- Ensure the iron is unplugged.
- Slide the variable steam control completely to the left.
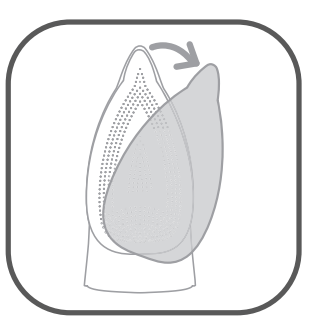
- Rest the iron on heel and tilt it forward approximately 1 inch.
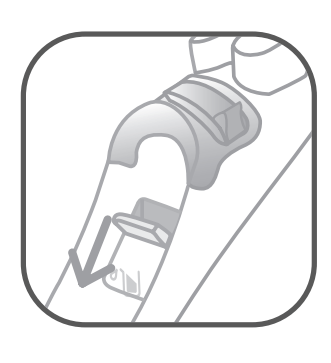
If the iron is equipped with a covered filling inlet, open the filling inlet by sliding the cover down.
- Fill with water (containing no additives) to the max mark on the water tank. We recommend using the enclosed filling cup rather than filling under the tap.
- If equipped with filling inlet cover, slide cover to close.
If you need to add water during ironing, UNPLUG the iron and follow the steps above. Ensure iron heats back to temperature afterwards, that means thermostat light will go out.
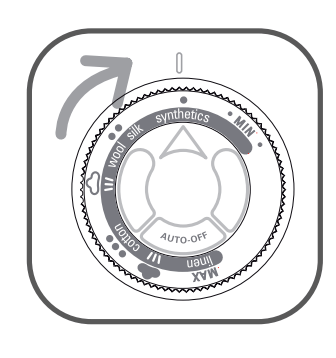
Selecting the Temperature
The digital Temperature Control Dial allows you to closely monitor the temperature of the soleplate.
Set the temperature control dial according to the fabric you are ironing.
Check the garment label for appropriate setting. We recommend using the chart below as a guide.
IMPORTANT! The iron takes longer to cool down than to heat up. We recommend that you start with fabrics to be ironed at a low temperature. For mixed fabrics set the temperature for the most delicate fabric.
TIP Always spray starch onto the reverse side of the fabric to be ironed
Dry Ironing
To iron without steam, slide the variable steam control lever to the # position.
We recommend dry ironing with an empty tank. Set the temperature for the type of material to be ironed
Steam Ironing
You can steam iron from temperature setting •• up. The steam quantity can be adjusted batween Smooth Steam (soft steam continous diffusion) up tu High Pressure Steam.
We recommanded stetting to High Pressure Steam only when the iron is at temperature setting •••.
WARNING! Never iron or steam clothes while they are being worn. Use caution and do not direct soleplate at people, animals, etc.
Before ironing for the first time fill iron and allow to heat.
The iron should be allowed to emit steam for at least 1 minute to remove any impurities.
Press the burst of steam button a few times prior to ironing. This should also be done if iron isn't used regularly.
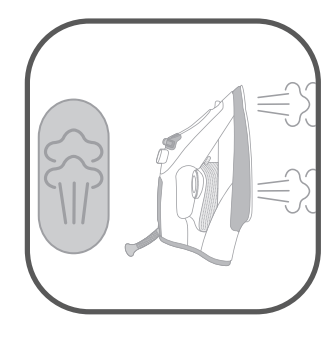
High Pressure Steam
Your iron is fitted with the new High Pressure Steam system. This technology generates higher steam pressure to enable the steam to penetrate much faster and further into the fabric. This way you get excellent results from your ironing.
The steam is emitted in frequent bursts rather than continuously. The pressure generates may cause a slight noise. This is not a technical fault!
Burst of Steam
This feature is ideal for removing stubborn wrinkles or pressing in sharp creases.
When the temperature control is set to a steam setting (•• or •••) the burst of steam can be used. Press the button to generate a burst of steam. Leave an interval of at least four seconds between bursts.
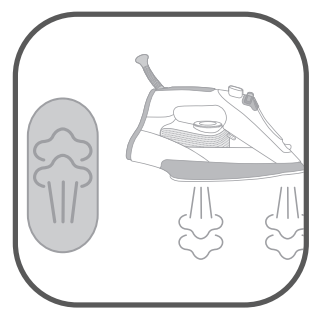
Vertical Steam
This feature is ideal for hanging clothes, drapes, curtains, etc.
When the temperature control is set to a steam setting vertical steam can be used.
To use feature, hold iron vertically with the tip tilted forward slightly.
Press the burst of steam button repeatedly while moving iron up the garment from bottom to the top. If vertical steam output starts to decrease tilt iron forward to a horizontal position and then back to vertical to continue.
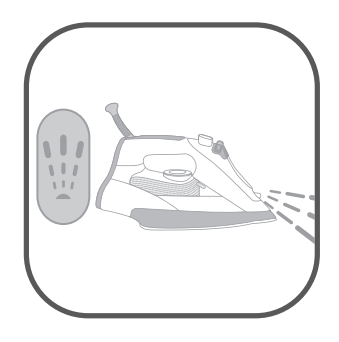
Spray Setting
This feature is ideal for stubborn wrinkles or set increases. Ensure there is water in the tank then press the spray button.
Do not spray silk.
Anti-Drip System*
In order to produce steam, all irons require a high temperature.
If the soleplate is not hot enough some of the water will not turn to steam and can spit or leak from the soleplate.
The Anti-Drip system automatically switches off the steam when ironing at low temperatures to prevent spitting.
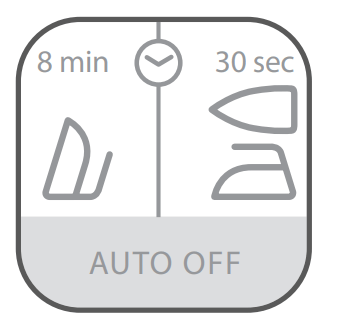
3-Way Smart Automatic Shut-Off*
If your iron is equipped with Auto-Off and the iron is not moved while plugged in, an internal safety switch will turn it off.
It will turn off in 8 minutes if left vertically or in 30 seconds if left on its soleplate or tipped over.
The white light on the LED temperature dial will flash when the Automatic Shut-Off feature has engaged. To deactivate feature, move the iron or shake is gently. Wait until the green light is on before ironing.
AUTO-OFF IS NOT AN ON/OFF SWITCH. ALWAYS UNPLUG WHEN NOT IN USE.
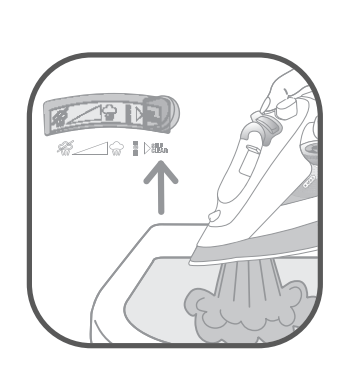
Self Clean
WARNING! Do not use descaling agents. They can damage the lining of the steam chamber.
This feature allows loose mineral deposits and other impurities to be flushed from the soleplate.
- Fill the iron with tap water to the max mark on the water tank.
- Be sure that variable steam lever is set to minimum.
- Stand the iron on heel and plug in.
- Set thermostat to (•••) setting.
- Once heated, unplug iron.
- Hold iron horizontally over the sink with the soleplate pointing away from body.
- Move the variable steam lever completely to the right and hold in the self clean position for one minute.
WARNING! Doing this will cause steam and hot water to be ejected from the soleplate. Take all proper precautions and hold iron away from body.
- Move the iron gently back and forth and side to side until all water has run through plate.
- Carefully wipe all water and material from the soleplate with an old towel, as the water and minerals can stain the soleplate (although this has no effect on glide or performance).
WARNING! Iron and soleplate may still be very hot. Exercise care while wiping.
- Place iron on heel and leave to cool.
Before using iron after self cleaning, test steam and burst of steam on an old towel or cloth than can be discarded.
Vapodur Valve
To ensure the iron continues to steam efficiently, open and close the valve a few times after each use. This is done by moving the variable steam control lever left to right a few times.
Anti-Calc System
- Minerals in water can build up in the steam chamber.
The Anti-Calc system contains a special material that neutralizes the harmful minerals. This system is designed to extend and maintain the high steam performance of the iron. The cartridge is not replaceable.
NOTE: Do not use descaling agents in your iron.
After Use
1. Turn the temperature dial to the min setting. Slide the steam lever to the no steam position.
2. Unplug the appliance.
3. Place the iron on its heel and allow to cool completely.
4. Empty water from the appliance before storing.
We recommend emptying the iron when not in use.
5. To protect the soleplate, we recommend storing iron on its heel.
Maintenance and Cleaning
Before cleaning ensure that the appliance is unplugged and completely cooled down.
Never use household cleaners, abrasive cleaning pads or solvents.
Cleaning the Soleplate
Rowenta soleplates have excellent non-stick properties and can be wiped clean when cold.
- In normal use a draggy coating may build up on the soleplate (starch, detergent build-up, burnt synthetic fibers). This can be easily removed by using the Rowenta Soleplate Cleaning Kit or a quality hot iron soleplate cleaner available at most stores. The Rowenta kit is also available through our website
- To prevent scratching of the soleplate, do not iron over sharp objects (zippers, etc.). Do not place the iron on rough surfaces, e.g. metal iron support, which may scratch the soleplate.
Troubleshooting
Issues
Possible causes
Solutions
Iron does not heat.
The temperature control is set too low.
Not properly plugged in.
Auto-off has engaged*.
Set the temperature control to a higher temperature.
Check that iron is plugged in correctly.
Move iron or shake it gently to reactivate.
Yellow and red LED are blinking alternately.
The electronics has an internal failure.
Contact our Rowenta Customer Relations Helpline
Thermostat control light* or the yellow LED* goes on and off.
This is normal.
When the Thermostat control light* or the yellow LED* gooes on and off the iron is heating up. As soon as the Thermostat control light* goes off or the green LED* lights up the set temperature has been reached.
Not enough steam.
There is insufficient water in the tank.
Iron is not set to a steam
Fill the water tank.
See section called "Steam Ironing".
The Anti-Drip function is active *.
Wait for the soleplate to reach correct temperature.
Iron is emitting a brown or white substance.
Water may need to be changed due to hardness or organic matter.
Garment has not been rinsed sufficiently.
See section "Water Recommendations". Switch to spring water or mix tap water with spring water.
Ensure garment is rinsed thoroughly to remove any detergent deposits or chemicals on new garments.
Iron is leaking.
Over use of burst button.
Distilled or softened water being used.
Overfilled.
Allow more time between each burst.
See section "Water Recommendations". Switch to spring water or mix tap water with spring water. Do not fill past max line on tank. Be sure to close filling inlet.
The Auto-off light is
Auto-off has engaged*.
Move iron or shake gently
flashing
to reactivate.
Build-up on the
Starch use.
Spray reverse side of
soleplate.
fabric and allow starch to
Burnt material. Ironing at too high a temperature.
penetrate.
Be sure to set temperature according to fabric being ironed.
Spray function does not work.
Priming may be necessary on first use.
Fill with water.
Hold cold iron horizontally. Place finger over the spray nozzle to create a vacuum. Press the spray button 4 to 5 times. Remove finger from nozzle, press spray button a few more times.
If troubleshooting does not assist, before consulting the retailer regarding their return/exchange policy, please telephone consumer service at 781-396-0600.