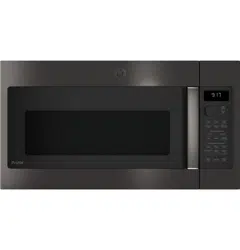
Documents: Go to download!
User Manual
- User Manual - (English, Spanish)
- Quick Specs - (English)
- Instruction - (English)
- About the features of your oven
- About the other features
- Care and cleaning of the oven
- Replacing the LED lamp.
- About the exhaust feature.
- Before you call for service…
Table of contents
About the features of your oven
Throughout this manual, features and appearance may vary from your model.
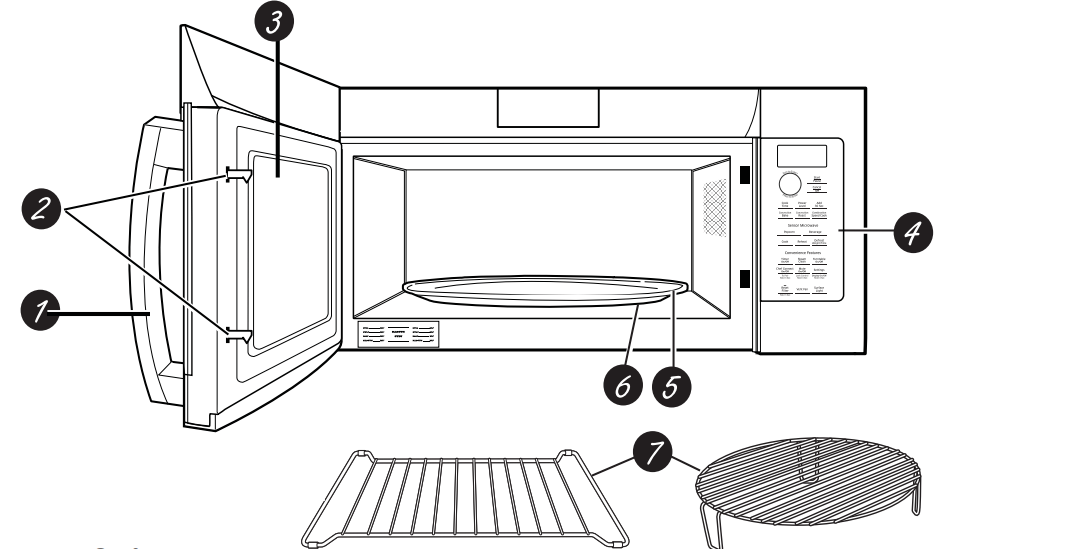
Features of the Oven
- Door Handle.
- Door Latches.
- Window with Metal Shield. Screen allows cooking to be viewed while keeping microwaves confined in the oven.
- Control Panel and Selector Dial.
- Removable Turntable. Do not operate the oven in the microwave mode without the turntable and turntable support seated and in place
- Removable Turntable Support. Do not operate the oven in the microwave mode without the turntable and turntable support seated and in place.
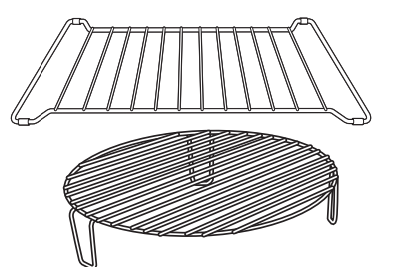
- Shelves. Use with Convection Bake, Convection Roast or Combination Fast Bake. (Do not use when microwave cooking.) For best results, use one shelf in the lower position and leave at least a 1-inch gap between the cooking dish and the sides of the oven. For two- level Baking or Fast Baking use both shelves
Optional kits.
Available at extra cost from your GE supplier
Filler Panel Kits
PVM9179DF/PVM9179EF/ PVM9179SK
JX36BWW – White
JX36BBB – Black
JX36BES – Slate
JX36BSS – Stainless
PVM9179DK/PVM9179EK/ PVM9179SK
JX36DWW - White
JX36DBB - Black
JX36DES – Slate
JX36BSS – Stainless
When replacing a 36" range hood, filler panel kits fill in the additional with to provide a custom built-in appearance
For installation between cabinets only, not for the end - of - cabinet installation. Each kit contains two 3" wide filler panels
JX15BUMP - Bump Out Kit
When installing a microwave in a kitchen with 15” deep cabinets, the bump out kit is required. The kit allows the microwave to be installed 3 inches futher out which prevents the cabinets from blocking the ventilation holes the topof the microwave grill.
Filter Kits
JX81H - Recirculating Charcoal Filter Kit
Filter kits are used when the oven cannot be vented to the outside.
Available at extra cost from your GE supplier. See the back cover for ordering by phone or at GEAppliances.com.
About the other features
 | Vent Fan The vent fan removes steam and other vapors from surface cooking. Press Vent Fan once for high fan speed, twice for medium fan speed, three times for low fan speed or a fourth time to turn the fan off. NOTE: The FAN indicator will be lit while the fan is operating. | Automatic Fan An automatic fan feature protects the microwave from too much heat rising from the cooktop below it. It automatically turns on if it senses too much heat. If you have turned the fan on you may find that you cannot turn it off. The fan will automatically turn off when the internal parts are cool. It may stay on for 30 minutes or more after the cooktop and microwave controls are turned off. |
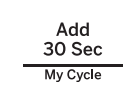 | Add 30 Sec The Add 30 Sec button can be used in 2 ways. • It will add 30 seconds to the time counting down each time it is pressed. • It can be used as a quick way to select 30 seconds of cook time. 30 seconds is the default time. It can be changed in Settings under My Cycle | My Cycle The Add 30 Sec button can be adjusted to the My Cycle feature. 1 Press the Settings button and turn the dial to select My Cycle. Press the dial to enter. 2 Turn the dial to select time (from 5 Sec to 60 Sec) and press the dial to complete the setting. |
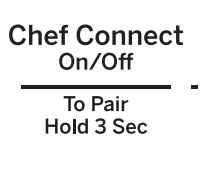 | Chef Connect Use the Chef Connect feature for connecting your microwave to a GE range to sync your vent fan, cooktop surface lights and clock via Bluetooth technology 1. You must have a Chef Connect enabled range. To pair your microwave for the first time, initiate the Chef Connect process on the GE range. Refer to the range owner’s manual for instructions 2. On the microwave, hold Chef Connect button for 3 seconds. The Bluetooth icon If a GE Range is not found within 2 minutes during search mode the microwave will stop searching and the Bluetooth icon On initial setup, the setup protocol will start. If the Chef Connect feature is enabled the default settings are as follows: - Display clock sync: ON - Auto surface light: ON (HIGH setting) - Auto vent fan: OFF - Auto off: 15 minutes 3. Turn the dial to select surface light Sync On/Off. Press the dial to confirm. If on, it allows the microwave surface lights to turn on at HIGH level automatically when the paired range’s cooktop burner turns ON. If OFF, the microwave surface lights will not automatically turn on when a cooktop burner turns on. 4. Turn the dial to select Vent Fan Sync ON/ OFF. Press the dial to confirm. If ON, it allows the microwave vent fan to turn on at LOW speed automatically when the paired range’s cooktop burner turns on. If OFF, the vent fan will turn ON automatically when a cooktop burner is Pairing is now complete, the Chef Connect feature is now on | Note: If there is no sync option selected during set up, 5 minutes after icon After completing the setting per above steps, your microwaves vent fan and surface light could be set to turn on automatically when the cooktop burner is turned on. The cooktop and range clock display will be synced to display the same time. The vent fan and cooktop light will be set to automatically turn off 15 minutes after the cooktop burner is turned OFF If desired, the light, fan, and auto off settings can now be changed using option in Settings. Press Chef Connect once to temporarily turn OFF communication between the microwave and range. Press again to turn communication back ON. The icon In the case of an unintended disconnect such as lost power to the microwave or range the connection will remain after power resumed. For very short power interruptions, the power may need to be reset in order to reconnect Note: To unpair the microwave from the range, press and hold the Chef Connect button on the microwave for 3 seconds. The Bluetooth icon will start to flash. Press cancel or wait 2 minutes for the flashing to stop. You may need to unpair when the GE range is replaced or serviced.
|
Care and cleaning of the oven
Helpful Hints
An occasional thorough wiping with a solution of baking soda and water keeps the inside fresh. Be sure the power is off before cleaning any part of this oven.
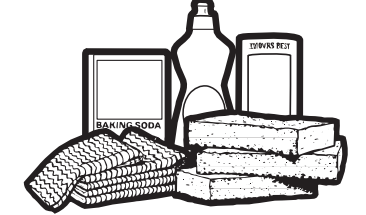
How to Clean the Inside
Walls, Floor, Inside Window, Metal and Plastic Parts on the Door
Same spatters can be removed with a paper towel, other may require a damp cloth. Remove greasy spatters with a sudsy cloth, then rinse with a damp cloth. Do not use abrasive cleaners or sharp utensils on oven walls. Never use a commercial oven cleaner on any part of your microwave
Never use a commercial oven cleaner on any part of your microwave
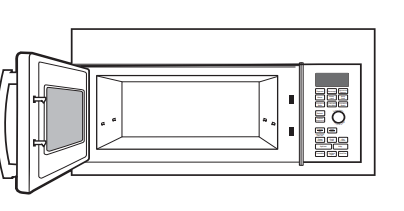
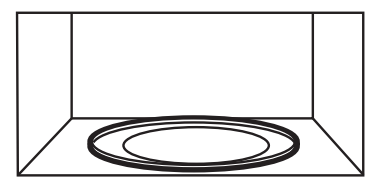
Removable Turntable and Turntable Support
To prevent breakage, do not place the turntable into water just after cooking. Wash it carefully in warm, sudsy water or in the dishwasher. The turntable and support can be broken if dropped. Remember, do not operate the oven in the microwave mode without the turntable and support seated and in place.
Shelves
Clean with mild soap and water or in the dishwasher.
Do not clean in a self-cleaning oven.
How to Clean the Outside
We recommend against using cleaners with ammonia or alcohol, as they can damage the appearance of the microwave oven. If you choose to use a common household cleaner, first apply the cleaner directly to a clean cloth, then wipe the soiled area.
Case
Clean the outside of the microwave with a sudsy cloth. Rinse and then dry. Wipe the window clean with a damp cloth.
Control Panel
Wipe with a damp cloth. Dry thoroughly. Do not use cleaning sprays, large amounts of soap and water, abrasive or sharp objects on the panel - they can damage it, Some paper towels can also scratch the control panel.
Door Panel
Before cleaning the front door panel, make sure you know what type of panel you have. Refer to the eighth digit of the model number. “S” is stainless steel, “L” is CleanSteel and “B”, “W” or “C” are plastic colors.
Stainless Steel (on some models)
The stainless steel panel can be cleaned with Stainless Steel Magic or a similar product using a clean, soft cloth. Apply stainless cleaner carefully to avoid the surrounding plastic parts. Do not use appliance wax, polish, bleach or products containing chlorine on Stainless Steel finishes.
Plastic Color Panels
Use a clean, soft, lightly dampened cloth, then dry thoroughly.
Door Seal
It’s important to keep the area clean where the door seals against the microwave. Use only mild, non-abrasive detergents applied woth a clean sponge or soft cloth, Rinse well
Bottom
Clean off the grease and dust on the bottom often. Use a solution of warm water and detergent.
Replacing the LED lamp.
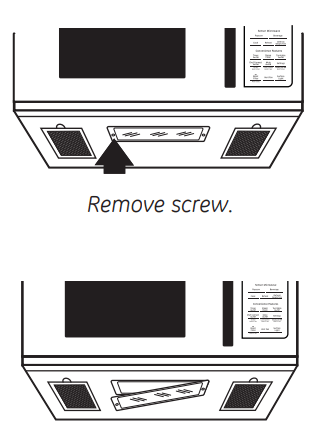
Cooktop Light/Nite Light
Replace with LED lamp. Order WB02X26814 from your GE supplier.
- To replace the cooktop light/nite light, first disconnect the power at the main fuse or circuit breaker panel, or pull the plug.
- Remove the screw from the side of the light compartment cover and lower the cover until it stops.
- Be sure the bulb is cool before removing. Remove a screw and connector from LED lamp.
- Connect LED lamp and secure using the screw. Raise the light cover and replace the screw. Connect electrical power to the oven.
About the exhaust feature.
Vent Fan
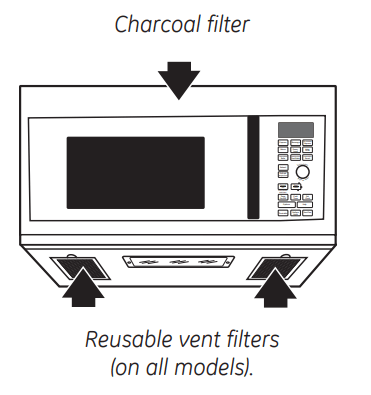
The vent fan has two metal reusable vent filters.
Models that recirculate air back into the room also use a charcoal filter.
Reusable Vent Filters
The metal filters trap grease released by foods on the cooktop. They also prevent flames from foods on the cooktop from damaging the inside of the oven. For this reason, the filters must always be in place when the hood is used. The vent filters should be cleaned once a month, or as needed.
Removing and Cleaning the Filters
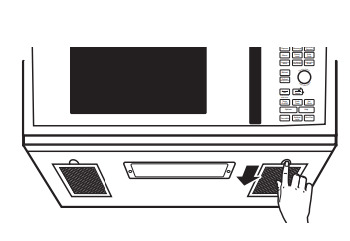
To remove, slide them to the rear using the tabs. Pull down and out. To clean the vent filters, soak them and then swish around in hot water and detergent. Don’t use ammonia or ammonia products because they will darken the metal. Light brushing can be used to remove embedded dirt.
Rinse, shake and let dry before replacing.
To replace, slide the filters into the frame slots on the back of each opening. Press up and to the front to lock into place.
Before you call for service…
| Problem | Possible Causes | What To Do |
| Oven will not start | A fuse in your home may be blown or the circuit breaker tripped. |
|
| Power surge. |
| |
| Plug not fully inserted into wall outlet. |
| |
| Door not securely closed. |
| |
| Control panel lighted, yet oven will not start | Door not securely closed. |
|
| Start/Pause button not pressed after entering cooking selection |
| |
| Another selection entered already in oven and Cancel/Off button not pressed to cancel it |
| |
| Cooking time not entered after pressing Cook Time. |
| |
| Cancel/Off was pressed accidentally. |
| |
| Food weight not entered after selecting Auto Defrost or Fast Defrost. |
| |
| Food type not entered after pressing Auto Cook. |
| |
| CONTROL LOCKED appears on display | The control has been locked. |
|
| OVEN TOO HOT FOR SENSOR COOKING--- USING ALTERNATE METHOD appears on display | One of the sensor cooking buttons was pressed when the temperature inside the oven was greater than 200°F. |
|
| Floor of the oven is warm even when the oven has not been used | The cooktop light is located below the oven floor. When light is on, the heat it produces may make the oven floor get warm |
|
| You hear an unusual low-tone beep | You have tried to change the power level when it is not allowed. |
|
| Oven emits a smoky odor and gray smoke after using the Bake feature | Oils on the stainless steel cavity are burning off after using the Bake feature the first few times |
|
| Food browns on top much faster than on the bottom | Rack has been placed in the “high” position. |
|
| Oven temperature fluctuates during cooking | The cooking element cycles on and off to maintain the oven temperature at the desired setting. |
|
| Vent fan comes on automatically | The vent fan automatically turns on to protect the microwave if it senses too much heat rising from the cooktop below. |
|
| During Bake, Roast or Fast Bake after preheating), the vent fan will automatically come on to cool the oven components. |
| |
| SENSOR ERROR appears on the display | When using a Sensor feature, the door was opened before steam could be detected |
|
| Steam was not detected in a maximum amount of time. |
|
Things That Are Normal With Your Microwave Oven
- Moisture on the oven door and walls while cooking. Wipe the moisture off with a paper towel or soft cloth
- Moisture between the oven door panels when cooking certain foods. Moisture should dissipate shortly after cooking is finished
- Steam or vapor escaping from around the door
- Light reflection around door or outer case
- Dimming oven light and change in the blower sound at power levels other than high.
- Dull thumping sound while oven is operating
- The vent fan operating while the microwave is operating. The vent fan will not go off nor can it be turned off until the microwave is off.
- Warm, convection bake, convection roast and combination fast bake have a maximum cooking time of 179 minutes (2 hours and 59 minutes). When the maximum cooking time is reached, the oven will automatically indicate that cooking is complete and turn off the cooking element.
- When using convection bake, convection roast or combination fast bake with a preheat, the oven door must be opened and the cooking time set after preheat or the oven will turn off the cooking element after 1 hour.
- TV-radio interference might be noticed while using the microwave. Similar to the interference caused by other small appliances, it does not indicate a problem with the microwave. Plug the microwave into a different electrical circuit, move the radio or TV as far away from the microwave as possible or check the position and signal of the TV/radio antenna.
See other models: PEB7227ANDD PVM9215SKSS PEM31DFWW GNE25JGKWW GFE24JBLTS
 on the display will start flashing as the microwave starts to search and pair with your GE Range. The icon