Loading ...
Loading ...
Loading ...
Installation Instructions
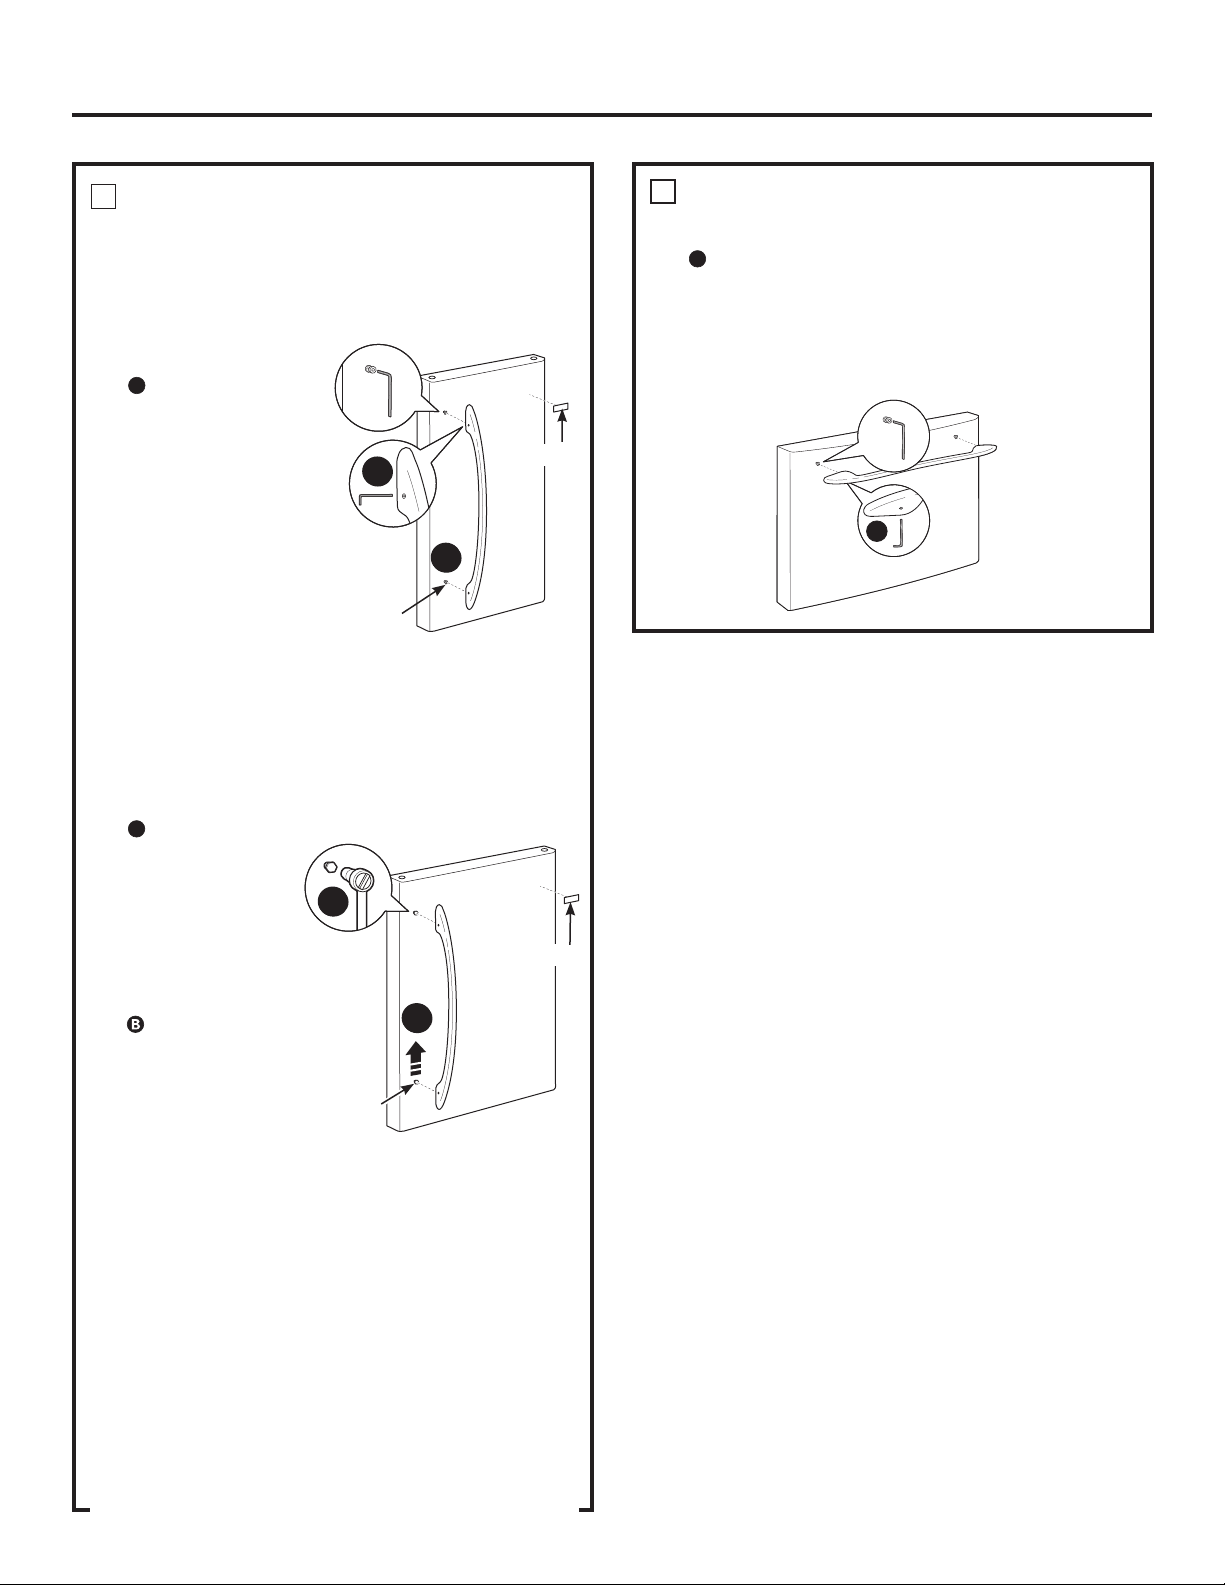
REMOVE THE FRESH FOOD
DOOR HANDLE
(For placement in the installation location
or reversal of the handles – on some
models)
Stainless steel (on
some models):
A
REMOVING
THE DOOR
HANDLE: Loosen
the set screws
with the 3/32”
Allen wrench
and remove
the handle.
NOTE: For
Double Door
models follow
the same
procedure on
the opposite
door.
Plastic handle
(on some models):
A
REMOVING THE DOOR HANDLE: Depress the
tab on the
underside of
the handle and
slide the handle
up and off of
the mounting
fasteners.
REVERSING THE
DOOR HANDLE
(on some
models):
• Remove
the handle
mounting
fasteners with a 3/16” Allen wrench and
transfer
the handle mounting fasteners to the right
side.
• Remove the logo badge.
• Remove and transfer the plug button to
the left side of the fresh food door. NOTE:
Use a flat plastic edge to prevent damaging
the door. Remove any adhesive on the door
with a mild detergent. Remove the paper
covering on the adhesive backing on the
logo badge prior to carefully attaching the
badge to the door.
6
A
B
A
B
Mounting
Fasteners
Mounting
Fasteners
Badge
Badge
(appearance may vary)
(appearance may vary)
REMOVE THE FREEZER DOOR HANDLE
Stainless steel and plastic handles:
A
Loosen the set screws located on the
underside of the handle with the 1/8” Allen
wrench and remove the handle.
NOTE: If the handle mounting fasteners need
to be tightened or removed, use a 3/16” Allen
wrench.
7
A
17
Loading ...
Loading ...
Loading ...