1. Dehumidifier must be operated in an enclosed area to be most effective. Close all doors, windows, and other outside openings to the room. The effectiveness of the dehumidifier depends on the rate at which new moisture-laden air enters the room.
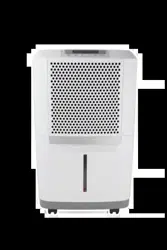
2. Place dehumidifier in a location that does not restrict airflow through the front of the unit or out of the louvers on the left side of cabinet.
3. A dehumidifier operating in a basement will have little or no effect in drying an adjacent enclosed storage area, such as a closet, unless there is adequate circulation of air in and out of the area. lt may be necessary to install a second dehumidifier in the enclosed area for satisfactory drying.
4. The dehumidifier must be installed on a level floor that will support it with a full bucket of water.
5. There should be a minimum of 12 inches clearance around the dehumidifier.
How It Works
When the unit is started, the fan begins to pull moisture-laden air across the dehumidifying coils. The coils condense or draw moisture from the air, and air flows through the top louvers into the room as dry, warm air. Moisture removed from air is collected in a bucket on the front of the dehumidifier.
The unit is designed to operate between 41 °F (5 °C), and 96 °F (35 °C). The unit will not work properly if the temperature is out of this temperature range, or the performance of the unit will fall greatly.
The "Compressor" circuit has an automatic 3 minute time delayed start if the unit is turned off and on quickly. This prevents overheating of the compressor and possible circuit breaker tripping. Make sure the tank is fitted correctly otherwise unit will not turn on.
Operating Instructions
Operating Instructions
Allow the unit to reach room temperature before operating. To begin operating the dehumidifier, follow these steps:
1. Plug the power cord into a properly grounded 115 volt AC outlet.
2. To turn the unit on, press the ON/OFF button. The unit will run in the factory setting of CONTINUOUS and high fan speed. In the CONTINUOUS mode, the unit will only display CO and not the room humidity. It is recommended you leave the unit running in the CONTINUOUS setting for the first three or four days until the sweating and dampness odors have stopped.
3. After a few days when the Relative Humidity has declined, press the HUMIDITY buttons to choose a value between 35% to 85%, so the room is kept at a comfortable humidity. Pressing the buttons will change the humidity selection in 5% increments. After you have set the desired humidity, the readout will display the actual room humidity. If at any time you want to return to the CONTINUOUS Mode, pressing the HUMIDITY button will lower the Relative Humidity through the 5% increments until the display reads CO.
4. You can also use the FAN SPEED button to change the fan speed to HIGH or LOW. The indicator light will show the setting you have selected. A higher fan speed will result in quicker moisture removal.
5. The CLEAN FILTER light will illuminate after 250 hours of operation. At this time refer to the care and cleaning section to remove and clean the filter. Once the filter has been cleaned and replaced, simply press the FILTER button to extinguish the light.
6. The TIMER function enables you to either Delay Start or Delay Stop the unit in the choice from 0.5 hour to 24 hours. If the unit is running, then selecting Timer will turn the unit off in the hours that will be set (Delay Stop). If the unit is off, then selecting Timer will turn the unit on in the hours that will be set (Delay Start). TIMER setting: First press TIMER button, then adjust timer setting, by tapping or holding the button to change the delay timer at 0.5 hour increments, up to 10 hours, then by 1 hour increments up to 24 hours. The control will count down the time remaining (8,7.5,7, etc.) until the unit either starts or stops. For the Delay Start, the fan speed and humidity maintained will be the same as previous setting. After TIMER setting finishes, pressing TIMER button again at any time will stop the TIMER function. The Delay Start/Stop Feature will work until the unit either starts or stops. Once that happens the above steps have to be repeated.
7. To shut the unit down, press the ON/OFF button
Fault Codes
1. If the display reads "AS" or "ES" , a sensor has failed. Contact your Authorized Frigidaire Service Center.
Removing Collected Water
1. Emptying the Bucket:
a.When the bucket is full, the unit will shut down and the BUCKET FULL indicator will illuminate.
b. Do not move the unit at this time otherwise water may spill on the floor.
c. Press sides of bucket gently to unclip the bucket from the unit.
d. Remove the bucket as shown in the photographs below and empty the bucket.
e. Replace the empty bucket back into the unit and once seated correctly, the unit will start up again.
f. You should hear a click when the bucket is in the correct position
If the bucket full light does not extinguish, check that the float is correctly snapped in place as indicated by the diagram.
2.Continuous Drainage:
a. For continuous drainage operation, you will need a garden hose and a drain nearby to discharge the water into.
b. Unscrew the drain cap on the back side of the unit. (fig.1)
c. Insert the female threaded end of the hose onto the drain connector of the unit. (fig.2)
d. Screw the garden hose onto the threaded portion of the drain connector. (fig.3)
e. Make sure the hose is secure so there are no leaks.
f. Direct the hose toward the drain, making sure that there are no kinks that will stop the water flowing.
g. Place the end of the hose into the drain. (fig.4)
h. Select the desired humidity setting and fan speed on the unit for continuous draining to start.
Care and Cleaning
Filter
Remove the filter every two weeks based on normal operating conditions.
To remove the filter, remove Bucket then pull filter downwards.
Wash the filter with clean water then dry.
Re-install the filter, then replace Bucket.
Cabinet
Dust cabinet with an oil-free cloth, or using a damp cloth.
Vacuum grill using brush attachment.
Water Bucket
Clean bucket with warm water and detergent
Storage
25 or 30 Pint Dehumidifier:
50 or 70 Pint Dehumidifier:
Before You Call
Before calling for service, review this list. It may save you time and expense. This list includes common occurrences that are not the result of defective workmanship or materials in this appliance.
OCCURRENCE
SOLUTION
DEHUMIDIFIER DOES NOT OPERATE.
Wall plug disconnected. Push plug firmly into wall outlet.
House fuse blown or circuit breaker tripped. Replace fuse with time delay type or reset circuit breaker.
The dryness level you selected has been reached. Dehumidifier automatically shuts off when selected amount of moisture has been removed from the air. If you want to remove more moisture, Select 'CONTINUOUS' by using the humidity button or knob. After the dehumidifier starts, reset the control to the desired setting.
Bucket not installed properly. See "Removing Collected Water".
Water in the bucket has reached its preset level. Dehumidifier automatically turns off when this occurs. Empty bucket and return bucket to position.
Dehumidifier is not turned on. Turn unit on.
"BUCKET FULL" light is on. Remove bucket, empty water and re-install correctly.
DEHUMIDIFIER RUNS TOO MUCH.
Windows or doors near dehumidifier are open to outdoors. Close all windows or doors to outside.
Area to be dehumidified is too large. Check with your dealer to see if capacity is adequate.
Air movement through dehumicfifier is blocked. Grill may be dirty. Use brush attachment of vacuum cleaner to clean grill. See "Care and Cleaning". Dehumidifier must be placed in a space that does not restrict air flowing into the rear coil or out of the front grill.
Dehumidifier has been installed or restarted recently. The higher the moistuire in the room, the longer the dehumidifier will operate.
Dehumidifier is in the CONTINUOUS mode and will remain on in this mode, use the humidity button or knob to set a RH% higher level.
DEHUMIDIFIER IS OPERATING BUT ROOM IS NOT DRY ENOUGH.
Humidity setting is too high. Press the HUMIDITY button or rotate knob to a lower setting or choose CONTINUOUS for maximum dryness.
Dehumidifier has been installed or restarted recently. The higher the moisture in the room air, the longer it takes for the room air to become dry.
Dehumidifier does not have sufficient clearance to operate. Air flow to front grill is blocked. See "Selecting a Location".
Room temperature is too low. Unit will not operate satisfactorily if the room temperature is below 41 °F(5 °C). See "Operating Conditions".
Refer to causes under DEHUMlDIFIER RUNS TOO MUCH.
FROST APPEARS ON COILS ABOVE BUCKET.
Dehumidifier has been turned on recently. This is normal due to refrigerant rushing through the coil. Frost will usually disappear within 60 minutes.
Room Temperature is too low. All models will operate satisfactorily at temperatures greater than 41 °F (5 °C).
FAN NOISE.
Air is moving through the dehumidifier. This is a normal sound.
Major Appliance Limited Warranty
Your appliance is covered by a limited one-year warranty and a limited 2-5 year warranty on the sealed system (the compressor, condenser, evaporator and tubing). For one year from your original date of purchase, Electrolux will pay all costs for repairing or replacing any parts of this appliance that prove to be defective in materials or workmanship when such appliance is installed, used and maintained in accordance with the provided instructions. From the second to the fifth year from your original purchase date, Electrolux will repair or replace any parts in the Sealed Refrigeration System (compressor, condenser, evaporator and tubing) that prove to be defective in materials or workmanship. In years 2-5, the consumer will be responsible for diagnostic, labor and parts costs as well as any removal, transportation and reinstallation expenses which are incurred during service on components other than those covered under the Sealed Refrigeration System 5-year warranty.
This warranty does not cover the following:
Products with original serial numbers that have been removed, altered or cannot be readily determined.
Product that has been transferred from its original owner to another party or removed outside the USA or Canada.
Rust on the interior or exterior of the unit.
Products purchased "as-is" are not covered by this warranty.
Food loss due to any refrigerator or freezer failures.
Products used in a commercial setting.
Service calls which do not involve malfunction or defects in materials or workmanship, or for appliances not in ordinary household use or used other than in accordance with the provided instructions.
Service calls to correct the installation of your appliance or to instruct you how to use your appliance.
Expenses for making the appliance accessible for servicing, such as removal of trim, cupboards, shelves, etc., which are not a part of the appliance when it is shipped from the factory.
Service calls to repair or replace appliance light bulbs, air filters, water filters, other consumables, or knobs, handles, or other cosmetic parts.
Surcharges including, but not limited to, any after hour, weekend, or holiday service calls, tolls, ferry trip charges, or mileage expense for service calls to remote areas, including the state of Alaska.
Damages to the finish of appliance or home incurred during installation, including but not limited to floors, cabinets, walls, etc.
Damages caused by: services performed by unauthorized service companies; use of parts other than genuine Electrolux parts or parts obtained from persons other than authorized service companies; or external causes such as abuse, misuse, inadequate power supply, accidents, fires, or acts of God.
DISCLAIMER OF IMPLIED WARRANTIES; LIMITATION OF REMEDIES
CUSTOMER'S SOLE AND EXCLUSIVE REMEDY UNDER THIS LIMITED WARRANTY SHALL BE PRODUCT REPAIR OR REPLACEMENT AS PROVIDED HEREIN. CLAIMS BASED ON IMPLIED WARRANTIES, INCLUDING WARRANTIES OF MERCHANTABILITY OR FITNESS FOR A PARTICULAR PURPOSE, ARE LIMITED TO ONE YEAR OR THE SHORTEST PERIOD ALLOWED BY LAW, BUT NOT LESS THAN ONE YEAR. ELECTROLUX SHALL NOT BE LIABLE FOR CONSEQUENTIAL OR INCIDENTAL DAMAGES SUCH AS PROPERTY DAMAGE AND INCIDENTAL EXPENSES RESULTING FROM ANY BREACH OF THIS WRITTEN LIMITED WARRANTY OR ANY IMPLIED WARRANTY. SOME STATES AND PROVINCES DO NOT ALLOW THE EXCLUSION OR LIMITATION OF INCIDENTAL OR CONSEQUENTIAL DAMAGES, OR LIMITATIONS ON THE DURATION OF IMPLIED WARRANTIES, SO THESE LIMITATIONS OR EXCLUSIONS MAY NOT APPLY TO YOU. THIS WRITTEN WARRANTY GIVES YOU SPECIFIC LEGAL RIGHTS.
YOU MAY ALSO HAVE OTHER RIGHTS THAT VARY FROM STATE TO STATE.
If You Need Service
Keep your receipt, delivery slip, or some other appropriate payment record to establish the warranty period should service be required. If service is performed, it is in your best interest to obtain and keep all receipts. Service under this warranty must be obtained by contacting Electrolux at the addresses or phone numbers below.
This limited warranty only applies in the USA and Canada. In the USA, your appliance is warranted by Electrolux Major Appliances North America, a division of Electrolux Home Products, Inc. In Canada, your appliance is warranted by Electrolux Canada Corp. Electrolux authorizes no person to change or add to any obligations under this warranty. Obligations for service and parts under this warranty must be performed by Electrolux or an authorized service company. Product features or specifications as described or illustrated are subject to change without notice.


 buttons to choose a value between 35% to 85%, so the room is kept at a comfortable humidity. Pressing the
  button will lower the Relative Humidity through the 5% increments until the display reads CO.