Loading ...
Loading ...
Loading ...
24
IMPORTANT: Before you begin, turn the refrigerator control off or
turn cooling off. Unplug refrigerator or disconnect power. Remove
food, the ice storage bin (on some models), and any adjustable
door or utility bins from doors.
TOOLS NEEDED Depending on your model, you may need the
following: Bubble level, flat-blade screwdriver, Phillips screwdriver
tip #2 with 4” long as minimum, 3/16" hex key, 1/4", 3/8”, and 5/16”
hex-head socket wrench, 1/4" and 5/16" open-ended wrenches or
adjustable wrench, internal star drive or 3/8" hex-head socket
wrench, TORX T30 screwdriver.
Install and Remove Door Handles
PARTS INCLUDED: Door handles (2), 1/8" and 3/32ʺ hex key as
needed, spare setscrew(s).
To Install the Handles:
NOTE: The handle mounting setscrews are pre-installed in the
handle.
1. Remove the handles, which are packed inside the refrigerator.
NOTE: To avoid scratching the finish, place the handles on
a towel or other soft surface.
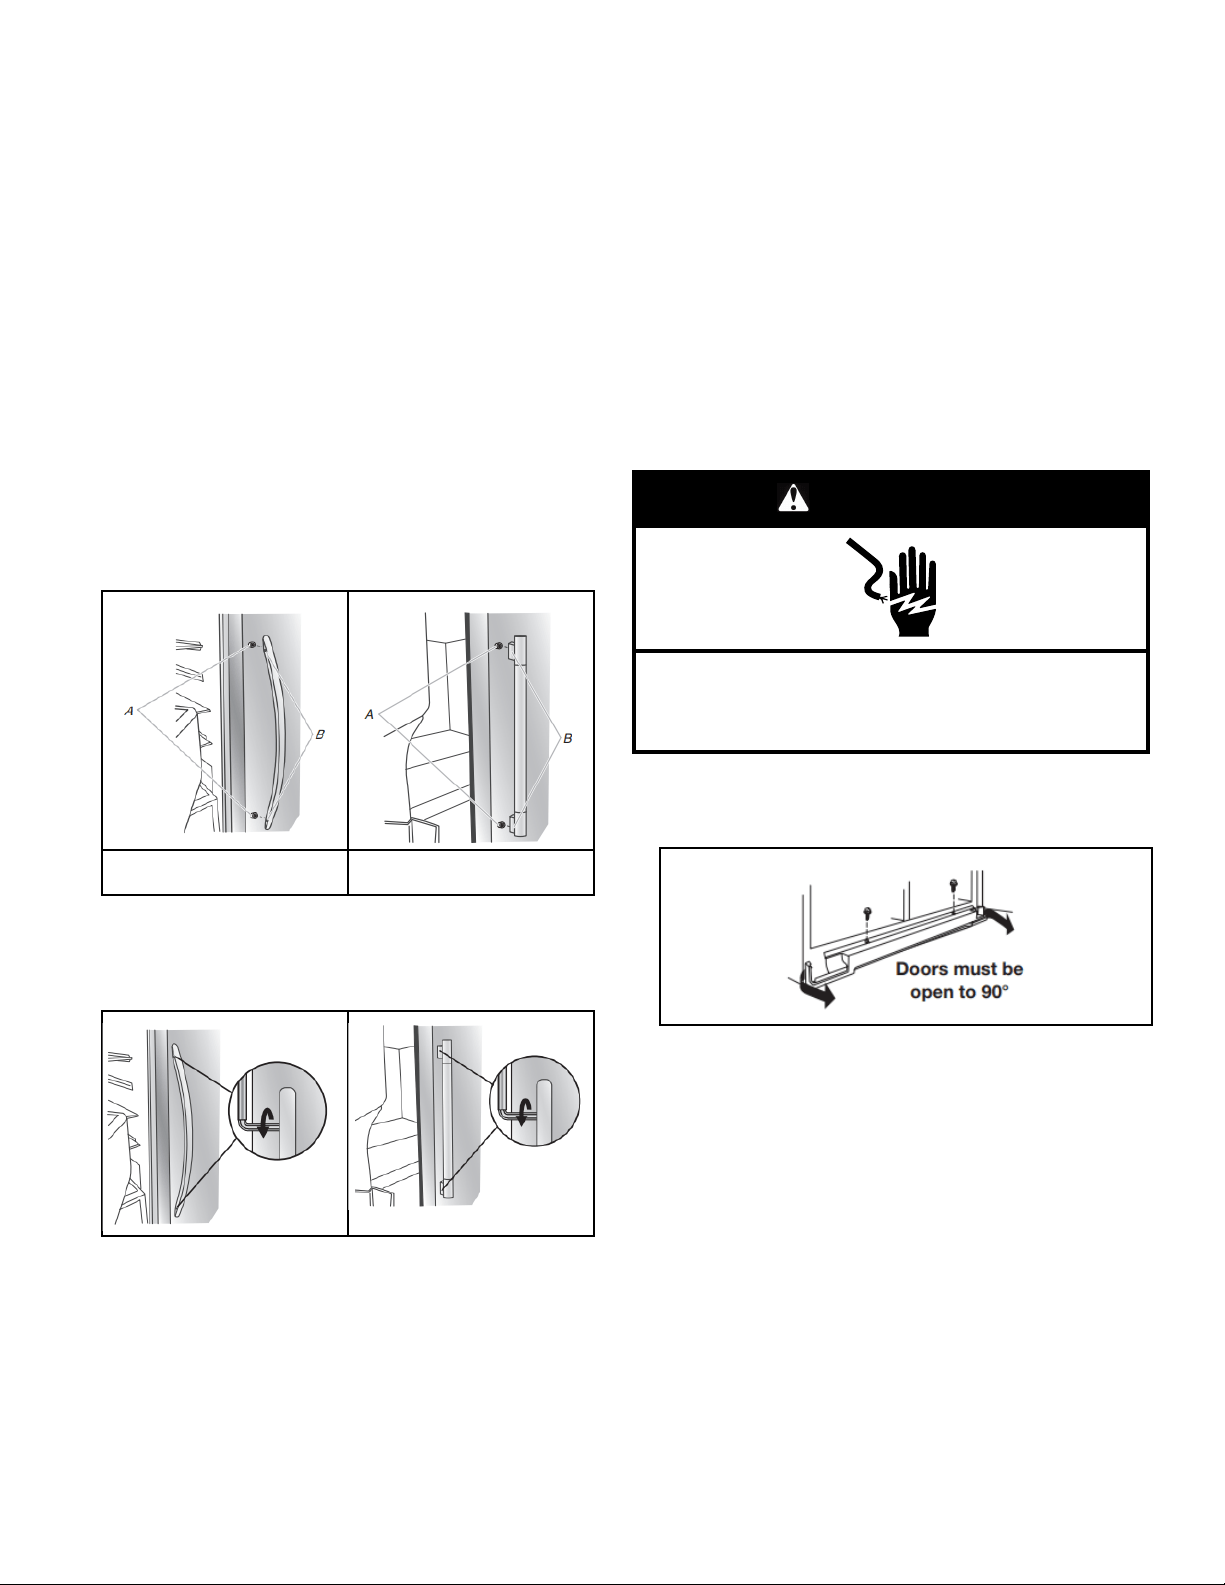
2. Open the freezer door. On the refrigerator door, place the
handle on the shoulder screws with the setscrews facing the
freezer.
A. Shoulder screws B. Setscrews inside the
handle
3. Firmly push the handle toward the door until the handle base
is flush against the door.
4. While holding the handle, insert the short end of the hex key
into the upper hole and slightly rotate the hex key until it is
engaged in the setscrew.
5. Using a clockwise motion, tighten the setscrew until it begins
to contact the shoulder screw.
6. Repeat steps 4 and 5 to begin fastening the lower setscrew.
7. Once both setscrews have been partially tightened as outlined
in the previous steps, fully tighten both the upper and lower
setscrews.
IMPORTANT: When the screws feel tight, tighten them an
additional quarter-turn. The handle is not properly installed
without this extra tightening.
8. Open the refrigerator door and close the freezer door. Repeat
steps 2 through 7 to install the other handle onto the freezer
door with the setscrews facing the refrigerator.
9. Save the hex key and all instructions.
To Remove the Handles:
Style 1
1. While holding the handle, insert the short end of the hex key
into the upper hole and slightly rotate the hex key until it is
engaged in the setscrew.
2. Using a counterclockwise motion, loosen the setscrew a
quarter-turn at a time.
3. Repeat steps 1 and 2 for the upper setscrew. Gently pull the
handle away from the door.
4. If necessary, use a Phillips screwdriver to remove the shoulder
screws from the door.
Remove Doors and Hinges
WARNING
Electrical Shock Hazard
Disconnect power before removing doors.
Failure to do so could result in death or electrical shock.
1. Unplug refrigerator or disconnect power.
2. Open both doors to 90°. Remove the base grille by removing
the two screws, then pulling out on the outside corners as
shown below.
NOTE: The doors must only be opened to 90°. If they are
opened all the way, the base grille will not come off.
3. Disconnect the water tubing, located behind the base grille on
the freezer door side. The dispenser tubing runs through the
door hinge and must be disconnected in order to remove the
door.
NOTE: On models with the ice storage bin on the door,
there are two water tubing connections, as shown. On
models with the ice storage bin inside the freezer, there is
only one water tubing connection.
Loading ...
Loading ...
Loading ...