Loading ...
Loading ...
Loading ...

14
CLEANING
IMPORTANT:
Always disconnect the appliance from the gas
and electricity supplies before carrying out
any cleaning operation.
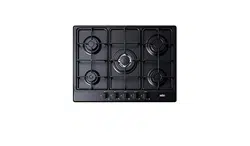
Periodically wash the hot plate, the enameled steel
pan support, the enameled burner caps “A”, “B”
and “C” and the burner heads "T" (see fig. 10 and
11) with lukewarm soapy water. Also
clean plugs
"AC" and flame detection "TC"
(see fig. 10). Clean
them gently with a small nylon
brush as shown (see
fig. 12) and allow to dry fully.
Do not wash in the
dishwasher. It is very important
to clean the surface
soon after every use, while the
glass is still
somewhat warm.
Do not allow vinegar, coffee, milk, salt water,
or
lemon or tomato juice to remain in contact
with
the enameled surfaces for long periods of
time.
Do not clean using abrasive metal scourers,
abrasive powders or corrosive sprays.
WARNINGS:
Comply with the following instructions, before
remounting the parts:
- Check that burner head slots have not
become clogged by foreign bodies.
- Check that enameled burner caps “A-B-C”
(fig. 10-11) have b e e n correctly positioned
on the burner head. They must be steady.
- The exact position of the pan support is
established by the rounded corners, which
should be set towards the side edge of the
hot plate.
- Do not force the taps if they are difficult to
open or close. Contact customer service for
technical assistance or repairs.
- Correctly preserve the plate after use by
treating it with special, easily available
products. This will keep the surface of the
plate clean and bright. The operation will
also prevent the formation of rust.
- Don’t use steam jets to clean the
equipment.
- Food b u r n t onto an electric plate must
be removed dry.
- After use, pour a little lukewarm oil on the
plate and wipe it with a cloth.
Note: Continuous use can cause the
burners to change color due to the
high
temperature.
FIG. 10
FIG. 11
FIG. 12
Loading ...
Loading ...
Loading ...