Loading ...
Loading ...
Loading ...
LOCATION
• Two people should be used when moving the
appliance.
• Remove interior and exterior packaging prior to
installation. Wipe the outside of the appliance
with a soft, dry cloth and the inside with a
lukewarm wet cloth.
• Place the appliance on a fl oor that is strong
enough to support it when it is fully loaded.
• Do not place the appliance in direct sunlight or
near sources of heat, such as a stove or heater,
as this can increase electrical consumption.
Extreme cold ambient temperatures may also
cause the appliance to perform improperly.
• Do not use the appliance near water, for
example in a wet basement or near a sink.
• This appliance is intended for household use
only. It is not designed for outside installation,
including anywhere that is not temperature
controlled (garages, porches, vehicles, etc.).
• Before connecting the appliance to a power
source, let it stand upright for approximately
6 hours. This will reduce the possibility of a
malfunction in the cooling system from handling
during transportation.
• This appliance is 45 cm (17.7 inches) wide
by 52 cm (20.5 inches) high by 51 cm (20.1
inches) deep. Make sure that you leave the
minimum amount of space between the
appliance and all surrounding walls and vents.
• Allow 12.7 cm (5 inches) of space between the
back, sides and top of the appliance and all
adjacent walls.
• This appliance is intended for free-standing
installation only and is not intended to be
built into a cabinet or counter. Building in this
appliance can cause it to malfunction.
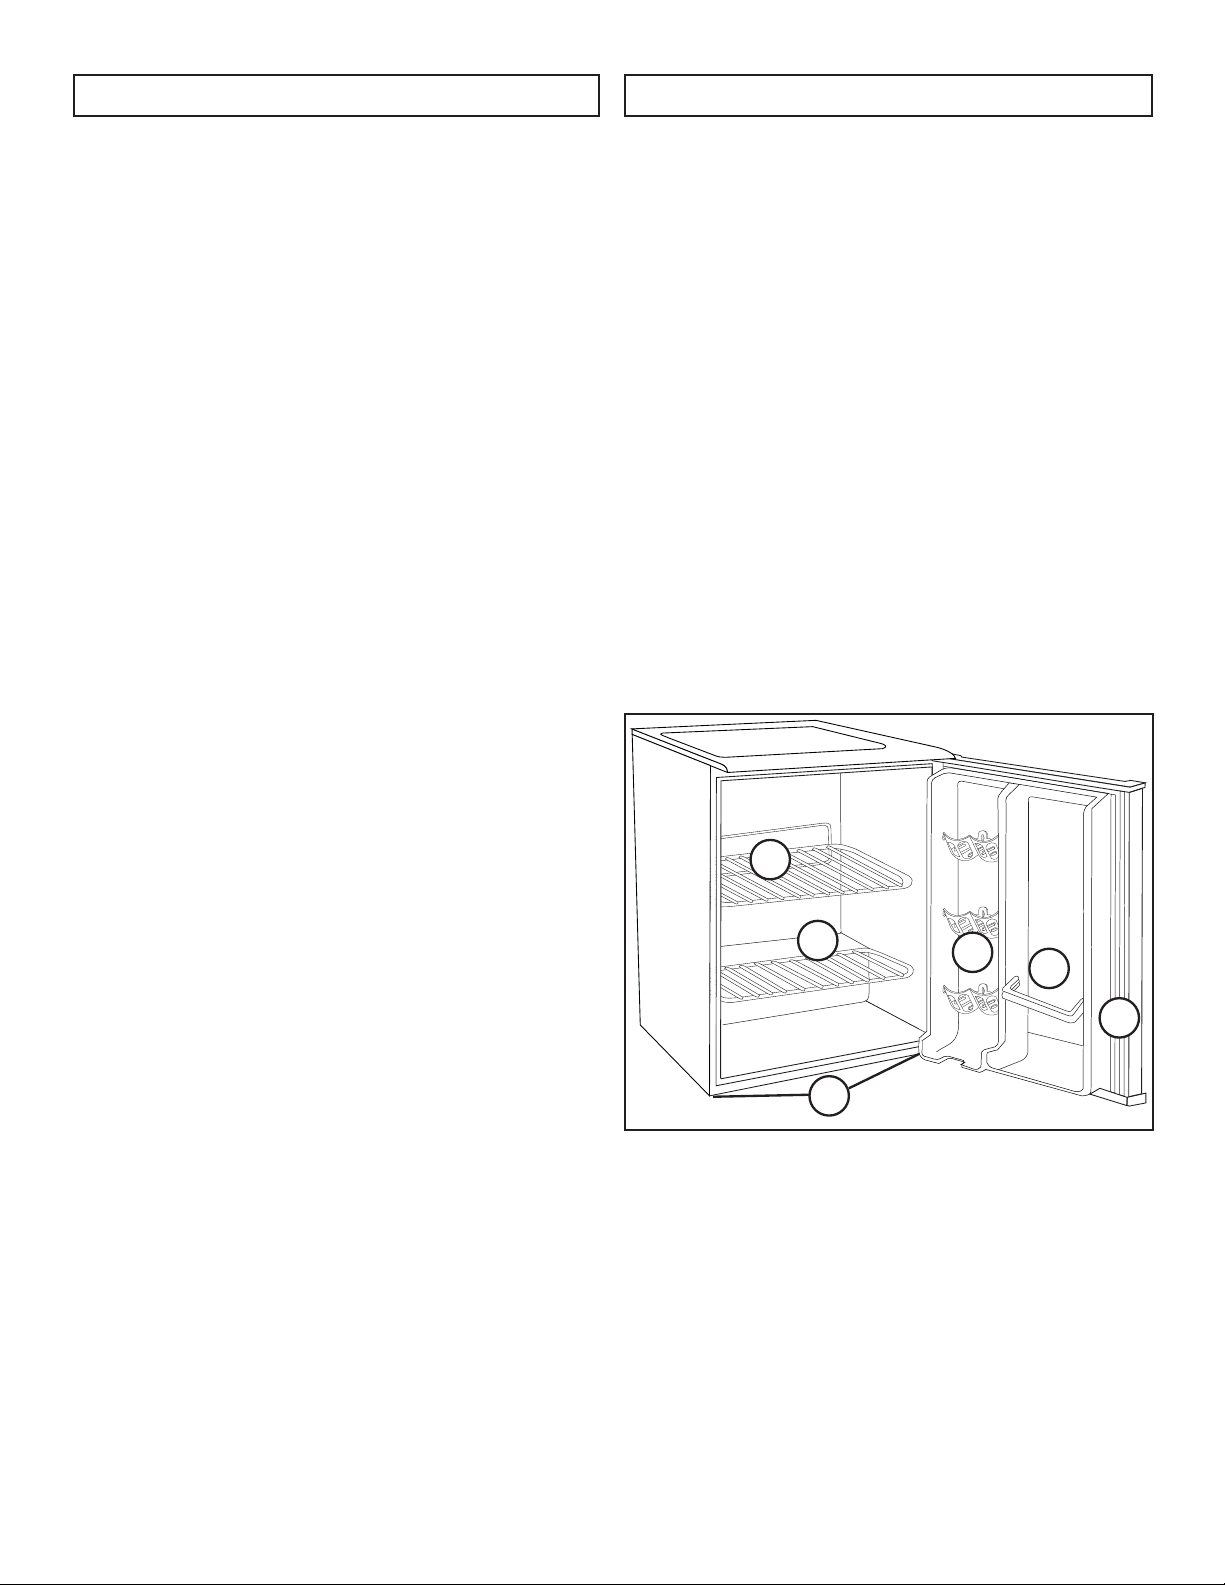
FEATURES
1. Adjustable Shelves
2. Defrost Water Outlet: Ice that forms inside the
appliance will automatically thaw and drain
through this outlet.
3. CANSTOR™ Door Liner: Holds 355ml cans of
pop, juice, or beer.
4. Bottle Rack: For tall, small and medium cans or
jars.
5. Magnetic Gasket: Tight fi tting door seal keeps
all the cooling power locked inside.
6. Leveling Legs: Adjust so the unit is level.
7. Thermostat Dial (not shown): Temperature can
be adjusted by turning the thermostat dial on the
inner ceiling of the appliance.
1
2
3
6
4
5
3
INSTALLATION INSTRUCTIONS OPERATING INSTRUCTIONS
Loading ...
Loading ...
Loading ...