
English
SMARTPHONE RECEIVER
SPH-10BT
Operation Manual
Important (Serial number)
The serial number is located on the bottom of this unit. For your own security and convenience, be sure to
record this number on the enclosed warranty card.

- 2 -
English
Getting Started ........................................................................................ 3
Radio....................................................................................................... 12
USB/iPhone®.......................................................................................... 13
Bluetooth ............................................................................................... 14
Using Pioneer Smart Sync/APP.......................................................... 16
Parking Sensor...................................................................................... 19
Settings .................................................................................................. 20
FUNCTION settings ............................................................................... 20
AUDIO settings ...................................................................................... 21
SYSTEM settings .................................................................................... 22
ILLUMINATION settings........................................................................ 24
P.SENSOR settings................................................................................. 24
Additional Information ....................................................................... 25
About this manual:
• In the following instructions, a USB memory or USB audio player are referred to as
“USB device”.
• When an iPhone is connected to the unit, the source name on the unit appears as
[iPod]. Please note that this unit supports only iPhones (iPhone 5s or later) regardless
of the source name (page 28).
Table of Contents
- 3 -- 3 -
English
SPH-10BT
Optional remote control
The remote control CD-R510 is sold separately.
Frequently used operations
Getting Started
Basic operation
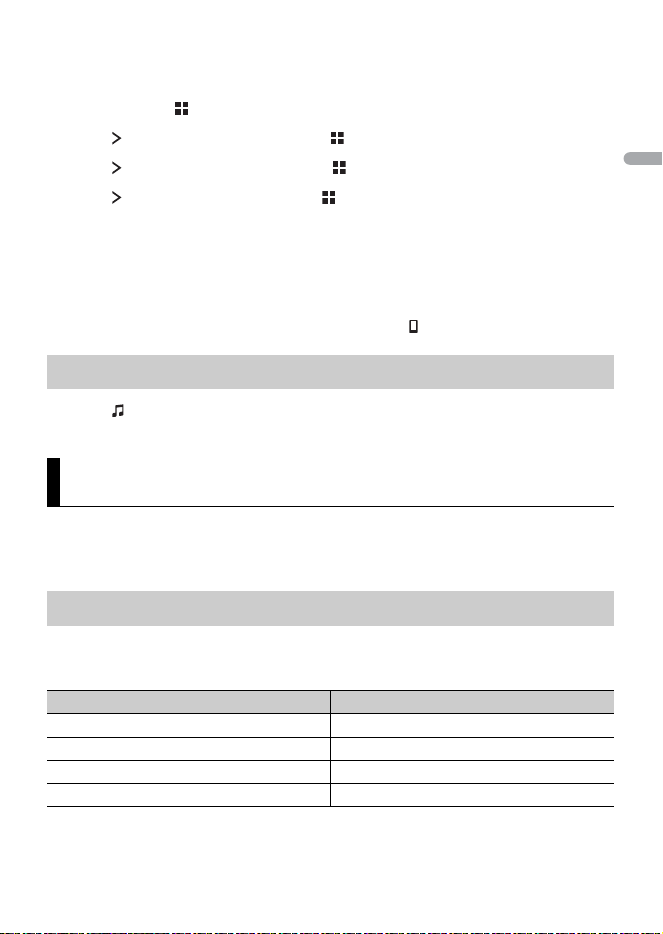
Purpose Operation
Turn on the power* Press to turn on the power.
Press and hold to turn off the power.
Adjust the volume Press / .
Select a source Press repeatedly.
Return to the previous display/list Press .
Return to the normal display from the menu Press and hold .
Answering a call Press any button.
Ending a call Press .
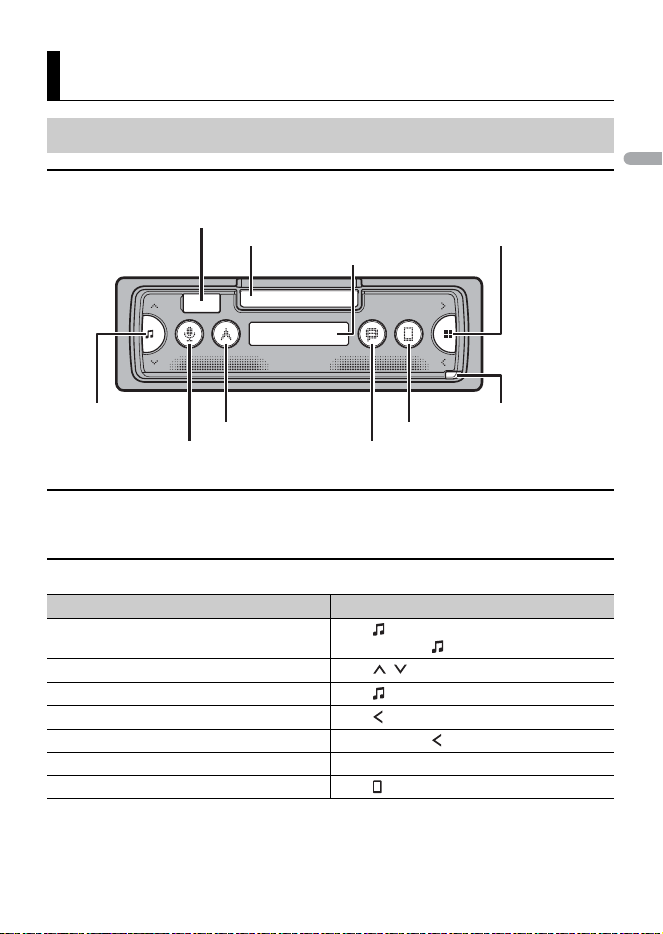
Source (music)/Off Detach button
Display window
Smartphone holder
Phone
Message
Navigation
Voice recognition
USB port
Application launch
- 4 -
English
* When this unit’s blue/white lead is connected to the vehicle’s auto-antenna relay control terminal,
the vehicle’s antenna extends when this unit’s source is turned on. To retract the antenna, turn the
source off.
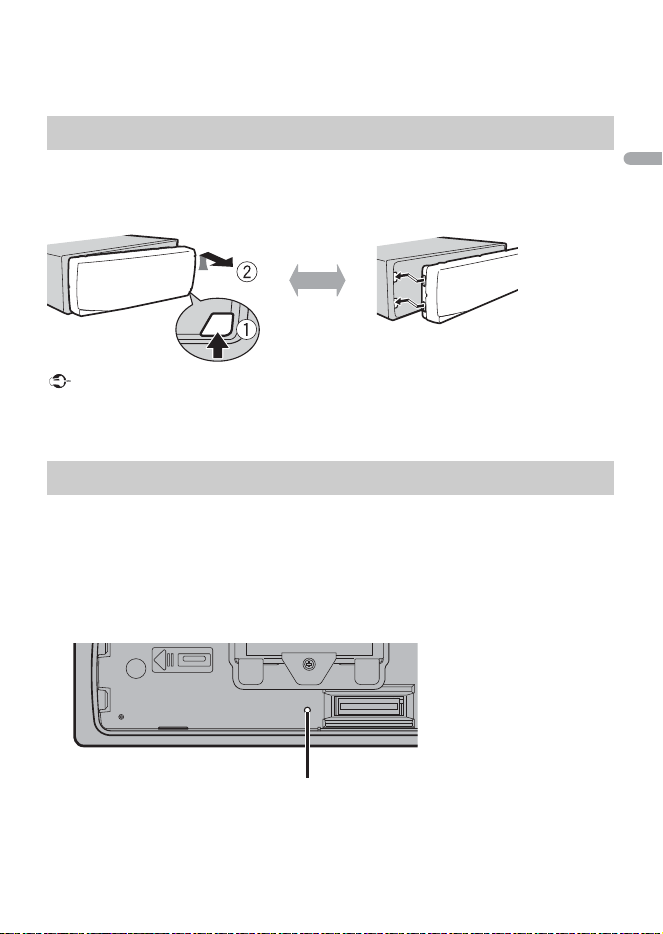
Detach the front panel to prevent theft. Remove any cables and devices attached to the
front panel and turn off the unit before detaching it.
Important
• Avoid subjecting the front panel to excessive shock.
• Keep the front panel out of direct sunlight and high temperatures.
• Always store the detached front panel in a protective case or bag.
The microprocessor must be reset in the following situations:
– Before using this unit for the first time after installation
– If the unit fails to operate properly
– When strange or incorrect messages appear on the display
1 Remove the front panel (page 4).
2 Press the RESET button with a pointed instrument longer than 8 mm.
Detaching the front panel
Resetting the microprocessor
Detach Attach
RESET button
- 5 -- 5 -
English
WARNING
• Do not use the built-in holder if your smartphone would cover, obscure or block indicators (lamps)
relating to vehicle system status and operation, such as Passenger Air Bag status lamps, Air Bag
Malfunction lamp, Anti-lock Braking System status, Electronic Stability Control (ESC) status, Hazard
lamp activation, and controls related to heating, ventilation, air-conditioning and defrost functions
and any related vents and fans. If you encounter any of these issue, use an appropriate alternate
mounting device to secure the smartphone in a location that does not block indicators, controls or
vents, violate the law, or cause a hazard.
• Mount, remove, and adjust the smartphone and its orientation (vertical or horizontal) only when
safely parked.
• Before driving, make sure the smartphone is mounted securely so it does not separate from the
mounting device during a sudden stop. Do not use the built-in holder if it is difficult to securely attach
your smartphone to it or if bad road conditions could cause the smartphone to separate or fall from it.
• Do not leave the smartphone in the built-in holder when leaving your vehicle.
• Be careful not to get your hands or fingers caught in the moving parts while operating the built-in
holder.
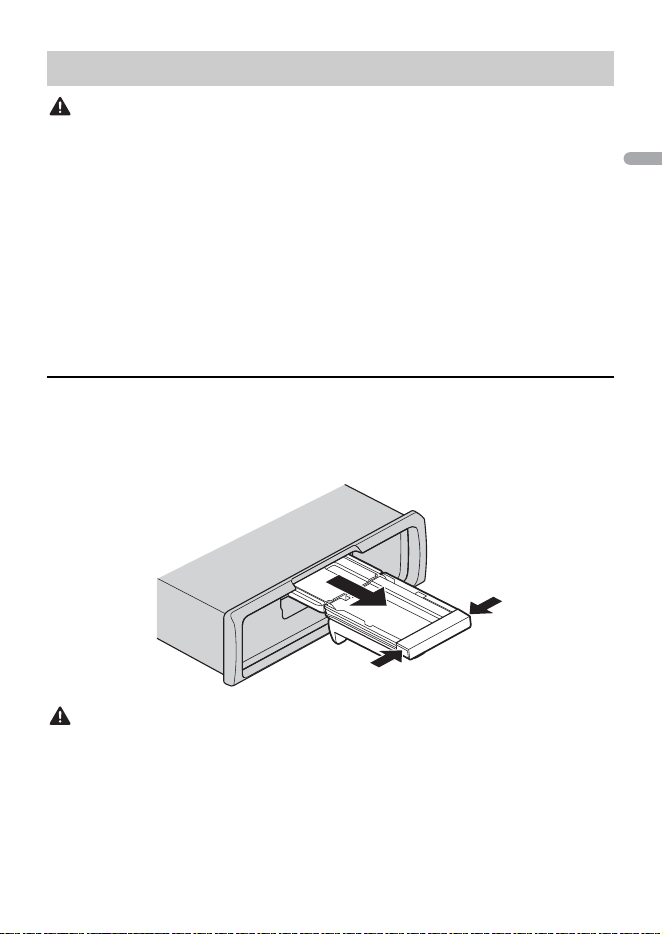
Removing the smartphone holder
1
Detach the front panel (page 4).
2 Pull out the holder by holding the anti slip portion on the edge of the holder until
the holder is completely visible.
CAUTION
Never pull up the holder until the holder is completely visible.
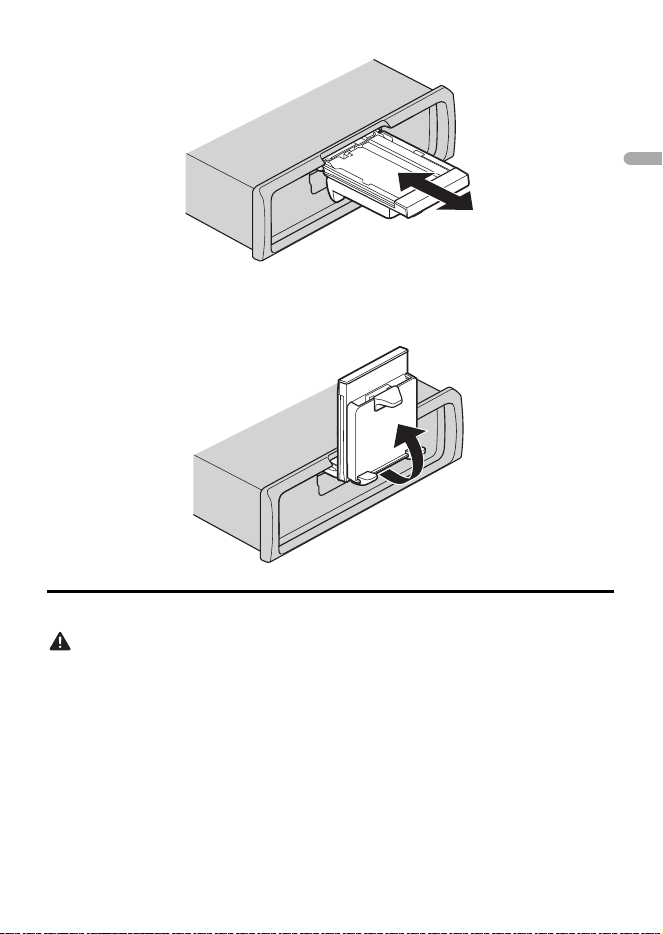
3 Pull up the holder vertically.
Operating the smartphone holder

- 7 -- 7 -
English
NOTE
Detach the smartphone from the device while adjusting the holder.
2 Pull up the holder.
Attaching the smartphone to the holder
CAUTION
• Depending on the shape of the smartphone, smartphone case or cover, it may not be attachable to
the holder.
• Be careful not to pinch your fingers.
Compatible smartphone size
H: 2.28 in. - 6.69 in. (58 mm - 170 mm)
W: 2.28 in. - 3.42 in. (58 mm - 87 mm)
D: 0.15 in. - 0.39 in. (4 mm - 10 mm)
Weight: under 0.55 lbs (0.25 kg)
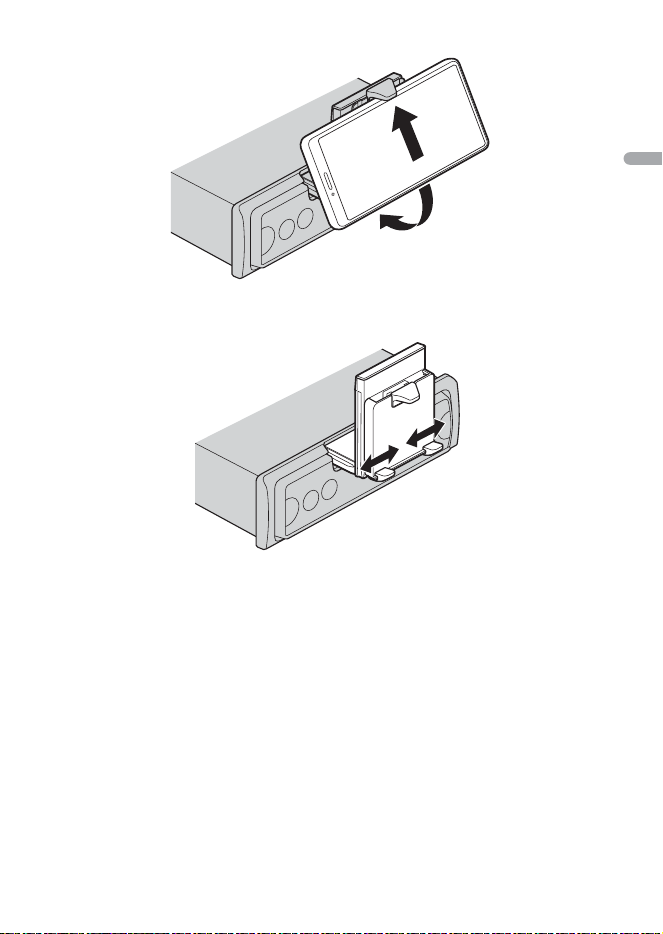
1 Hook the smartphone on the upper arm and then push it into the lower arm.
- 8 -
English
2 Slide the lower arms position to avoid hitting the lower arm and smartphone
buttons against each other.
NOTES
• Make sure that the smartphone is held properly on the holder.
• When the smartphone buttons come in contact with the upper or lower arms, adjust the
smartphone’s position or turn the smartphone upside down.
- 9 -- 9 -
English
Adjusting the smartphone holder
Adjusting the holder angle
The holder angle range:
Downward 45° to upward 100°
WARNING
Do not set the holder where it may (i) interfere with vehicle panels or switches or (ii) impair the driver’s
performance.
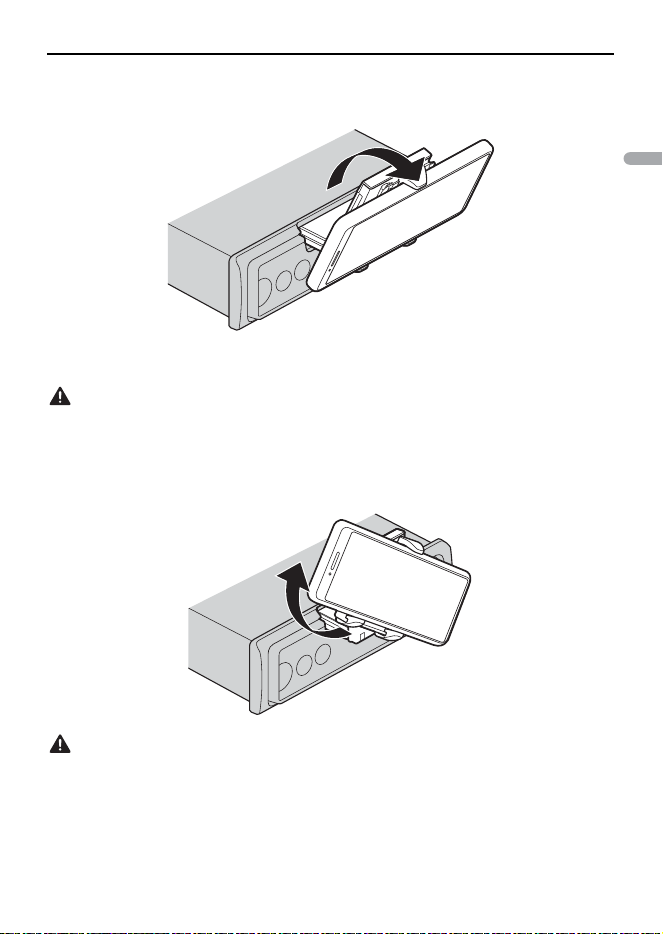
Turning the smartphone holder from a horizontal to a vertical position
1 Rotate the smartphone holder 90° clockwise.
CAUTION
Be careful to not drop the smartphone when the smartphone is attached to the holder while rotating.
Turning the smartphone holder from a vertical to a horizontal position
1 Rotate the smartphone holder 90° anticlockwise.
- 10 -
English
CAUTION
Be careful to not drop the smartphone when the smartphone is attached to the holder while rotating.
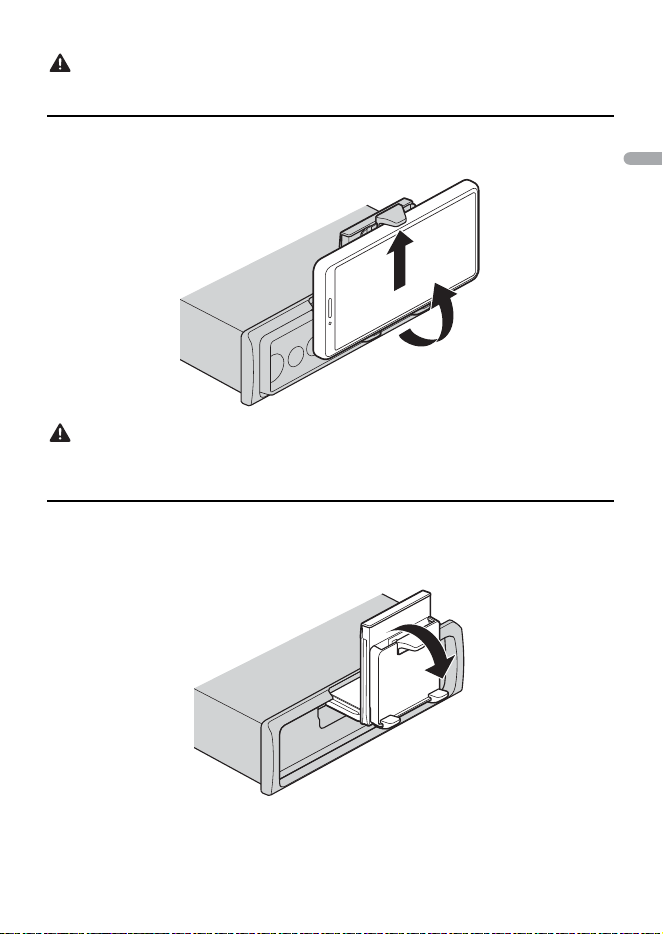
Detaching the smartphone from the holder
1
Pull out the smartphone while pushing up the upper arm with the smartphone.
CAUTION
• Be careful to not drop the smartphone.
• Do not use the holder when the smartphone is detached.
Storing the smartphone holder
1
Detach the front panel (page 4).
2 Fold the holder horizontally.
3 Push the holder completely into the unit.

- 11 -- 11 -
English
4 Attach the front panel to the unit (page 4).
1 Press and hold until the unit turns off.
2 Press and hold to display the main menu.
3 Press to select [INITIAL], then press to confirm.
4 Press to select an option, then press to confirm.
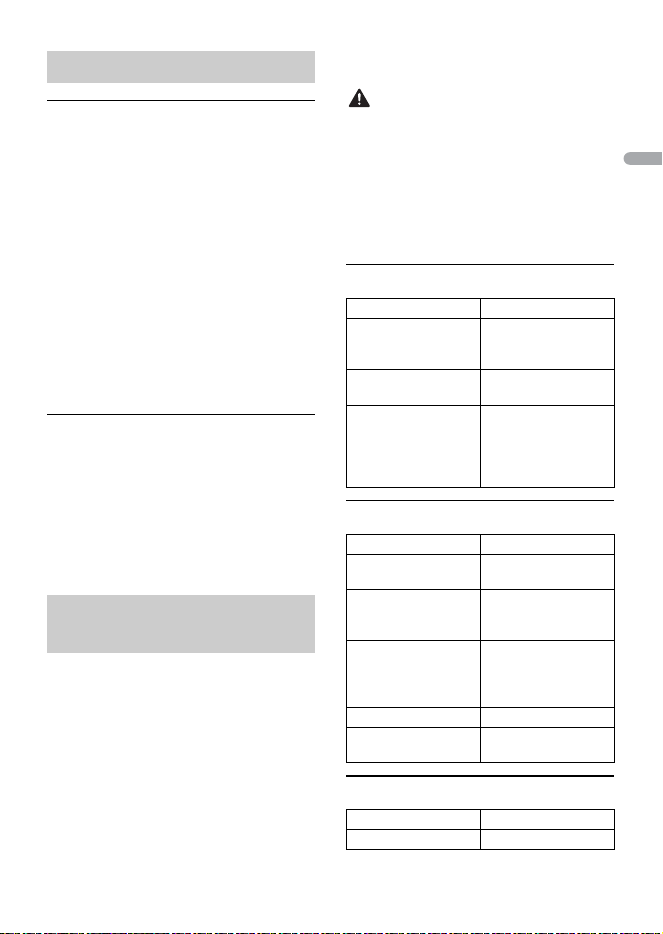
INITIAL settings
Menu Item Description
SP-P/O Select when there is a full-range speaker connected to the rear
speaker output leads and there is a subwoofer connected to the
RCA output.
[FUL/SUB]
[SUB/SUB] Select when there is a passive subwoofer connected directly to
the rear speaker output leads and there is a subwoofer
connected to the RCA output.
[FUL/FUL] Select when there are full-range speakers connected to the rear
speaker output leads and RCA output. If there is a full-range
speaker connected to the rear speaker output leads, and the
RCA output is not used, you may select either [FUL/SUB] or [FUL/
FUL].
UPDATE Select [S/W VER] to confirm the latest system information on the
unit.
Select [START] to update the unit to the latest software and
initialize the unit settings. For details on the latest software and
updating, visit our website.
[S/W VER], [START]
RESET Select [YES] to initialize the unit settings. The unit will be
restarted automatically.
[YES], [NO]
- 12 -
English
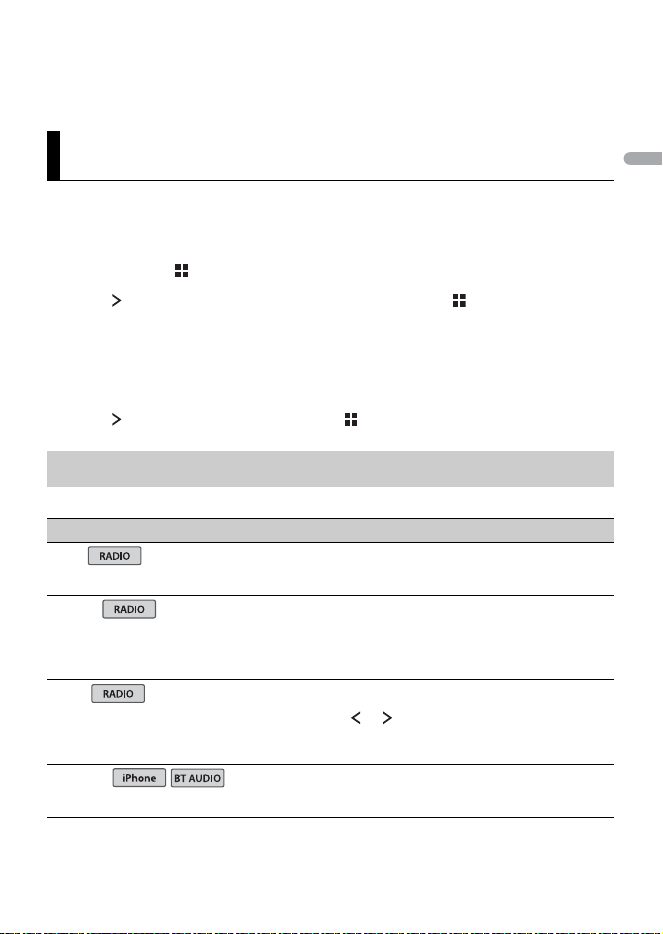
1 Press to select [RADIO].
2 Press to select the band from [FM1], [FM2], [FM3] or [AM].
3 Press or .
TIP
The / buttons can be also used to select a preset station when [SEEK] is set to [P.CH] in the
FUNCTION settings (page 20).
The six strongest stations are stored then select the channel by pressing / .
1 After selecting the band, press and hold to display the main menu.
2 Press to select [FUNCTION], then press to confirm.
3 Press to select [BSM], then press to confirm.
To seek a station manually
1
After selecting the band, press / to select a station.
Press and hold / then release to seek an available station. Scanning stops when
the unit receives a station. To cancel seek tuning, press / .
NOTE
[SEEK] needs to be set to [MANUAL] in the FUNCTION settings (page 20).
To store stations manually
This function is only available on Pioneer Smart Sync (page 16). For details, see the
application's help section.
Radio
Receiving preset stations
Best stations memory (BSM)
- 13 -- 13 -
English
Disconnect headphones from the device before connecting it to the unit.
USB devices (including Android™)/iPhone
1
Open the USB port cover.
2 Plug in the USB device/iPhone using an appropriate cable.
NOTES
• To automatically switch to USB source when a USB device/iPhone is connected to the unit, set [USB
AUT] to [Y] in the SYSTEM settings (page 23).
• To use iPhone source, [APP CTL] needs to be swtiched to the appropriate settings (page 23).
CAUTION
Use a USB cable (sold separately) to connect the USB device as any device connected directly to the
unit will protrude out from the unit, which could be dangerous.
Before removing the device, stop playback.
AOA connections
A device running Android OS 4.1 or later installed and also supports AOA (Android Open
Accessory) 2.0 can be connected to the unit via AOA, using the cable supplied with the
device.
NOTE
If you use an AOA connection, [APP CTL] needs to be set to [WIRED] in the SYSTEM settings (page 22).
You can make various adjustments in Pioneer Smart Sync (page 16).
*1 Compressed audio files only
*2 When you use the fast forward or reverse function while playing a VBR file, the playback time may
be not correct.
USB/iPhone®
Playing back
Operations
Purpose Operation
Select a folder*1 Press .
Select a track/song (chapter) Press or .
Fast forward or reverse*2 Press and hold or .

- 14 -
English
Important
If ten or more Bluetooth devices (e.g. a phone and separate audio player) are connected, they may not
work properly.
TIP
The next connection to the unit is performed automatically if the Bluetooth device has been connected
previously in the following steps.
1 Turn on the Bluetooth function of the device.
2 Select the unit name shown in the device display.
3 Make sure the same 6-digit number appears on this unit and the device, then
select [Y] if the 6-digit numbers displayed on this unit and the device are the
same.
Bluetooth reconnection
Once the Bluetooth connection is established with the device, you can connect the
device from the unit.
1 Turn on the Bluetooth function of the device.
2 Press .
[DEV LIST] appears.
3 Press to select the device.
4 Press to confirm.
First, make a Bluetooth connection with the Bluetooth telephone (page 14). Up to two
Bluetooth telephones can be connected simultaneously.
Important
• Leaving the unit on standby to connect to your phone via Bluetooth while the engine is not running
can drain the vehicle’s battery.
• Be sure to park your vehicle in a safe place and apply the parking brake before operation.
Bluetooth
Bluetooth connection
Bluetooth telephone
- 15 -- 15 -
English
To make a phone call
This function is only available on Pioneer Smart Sync (page 16). For details, see the
application's help section.
To answer an incoming call
1
Press any button when a call is received.
TIP
When two phones are connected to the unit via Bluetooth and there is an incoming call while one
phone is being used for a call, a message will appear in the display. To answer that incoming call, you
need to end the existing call.
Basic operations
You can make various adjustments in Pioneer Smart Sync (page 16).
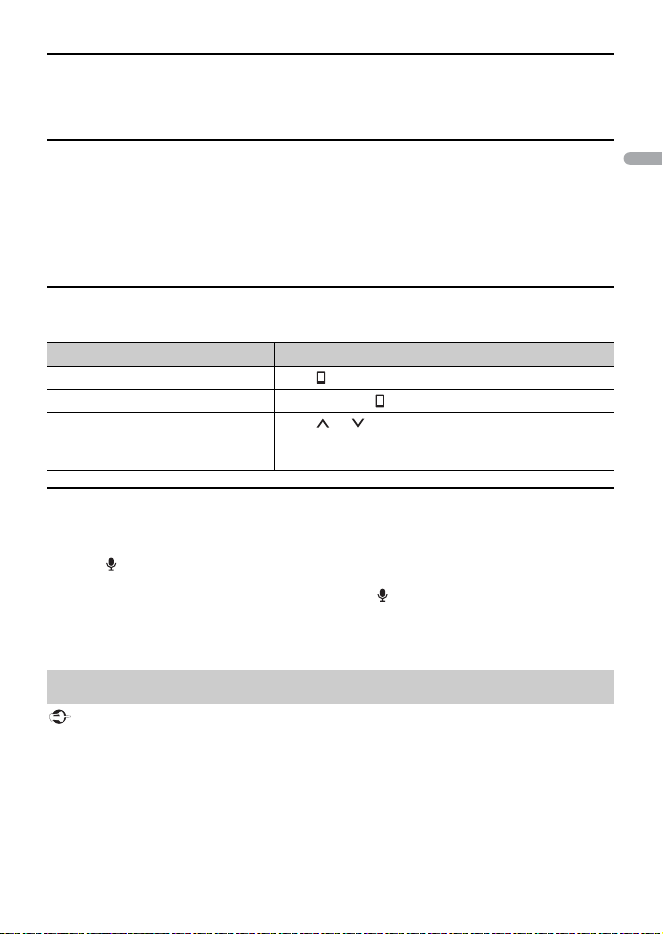
Voice recognition
This function is only available when an iPhone/Android device equipped with voice
recognition is connected to the unit via Bluetooth.
1 Press then talk into the microphone to input voice commands.
To exit the voice recognition mode, press and hold .
NOTE
For details on the voice recognition features, refer to the manual supplied with your device.
Important
• Depending on the Bluetooth audio player connected to this unit, the available operations will be
limited to the following two levels:
– A2DP (Advanced Audio Distribution Profile) can only play back songs on your audio player.
– AVRCP (Audio/Video Remote Control Profile) can perform functions such as playback, pause, select
song, etc.
• The sound of the Bluetooth audio player will be muted when the phone is in use.
Purpose Operation
End a call Press .
Reject an incoming call Press and hold when a call is received.
Adjust the volume of the caller’s
voice (When private mode is on,
this function is not available.)
Press or during the call.
Bluetooth audio
- 16 -
English
• When the Bluetooth audio player is in use, you cannot connect to a Bluetooth telephone
automatically.
• Depending on the type of Bluetooth audio player you have connected to this unit, operation and
information displayed may vary based on availability and functionality.
1 Make a Bluetooth connection with the Bluetooth audio player.
2 Press to select [BT AUDIO] as the source.
3 Start playback on the Bluetooth audio player.
NOTE
You must reconnect the Bluetooth connection when the source is switched or the unit is turned off.
TIP
When more than two and up to five devices are registered to the unit via Bluetooth, you can switch the
Bluetooth device by playing back songs on the device. By doing so, playing back a song from the
Bluetooth device of each passenger is easily available. However, depending on the usage conditions,
multiple connections may not be available and the audio files/songs may not be able to be played back
properly.
Basic operations
You can make various adjustments in Pioneer Smart Sync (page 16).
Pioneer Smart Sync is the application that intelligently brings your maps, messages, and
music together in the vehicle.
You can operate the unit from Pioneer Smart Sync installed on an iPhone/Android
device. In some cases, you can control aspects of the application, such as source
selection, pause, etc., by using the unit.
For details on what operations are available on the application, see the application’s help
section.
NOTE
The APP source is not available when a Pioneer Smart Sync connection is not made.
WARNING
Do not attempt to operate the application while driving. Make sure to pull off the road and park your
vehicle in a safe location before attempting to use the controls on the application.
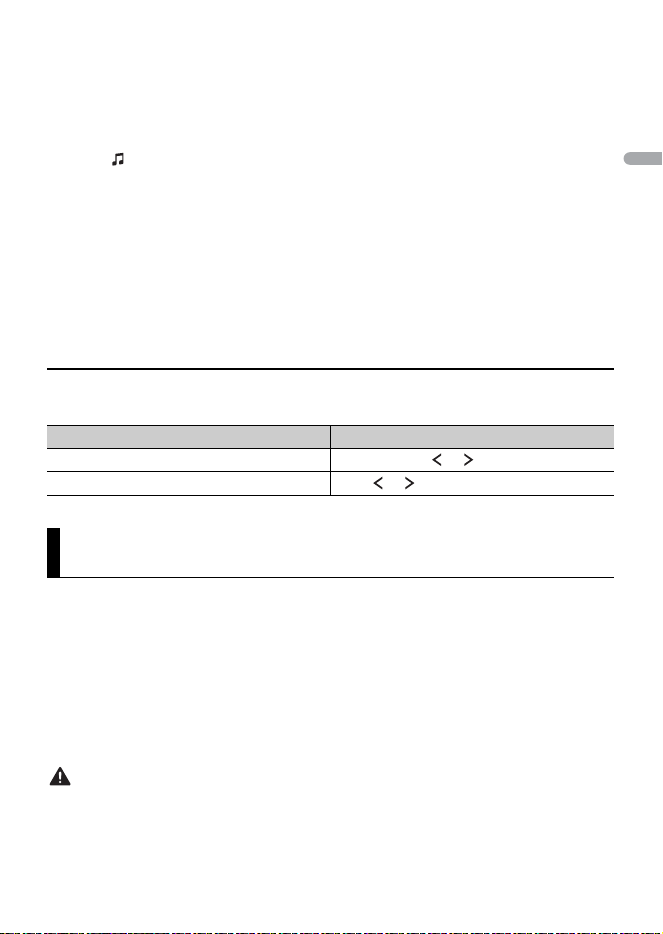
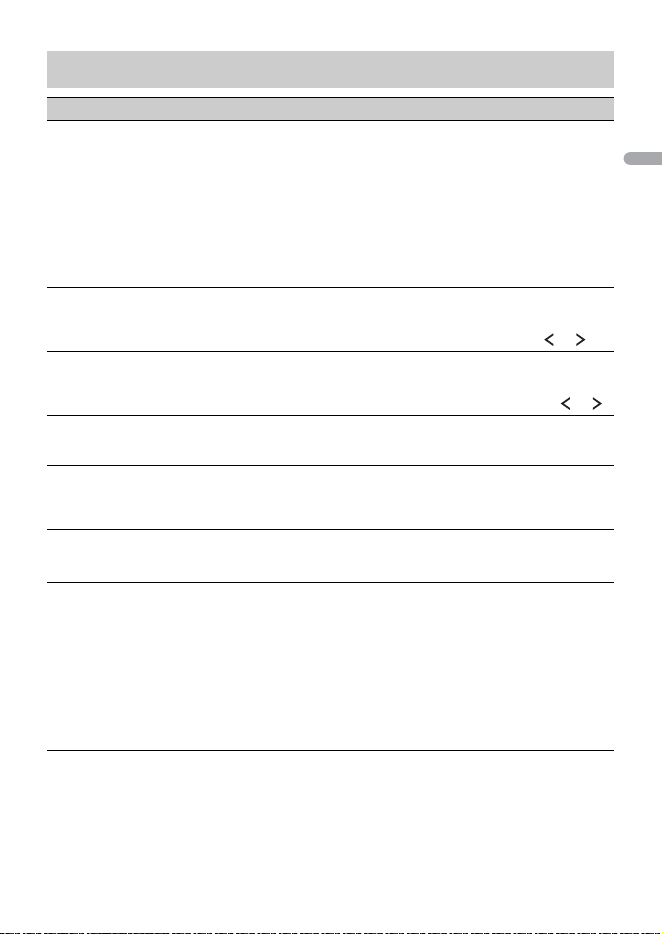
Purpose Operation
Fast forward or reverse Press and hold or .
Select a track Press or .
Using Pioneer Smart Sync/APP
- 17 -- 17 -
English
For iPhone users
This function is compatible with iOS 10.3 or later.
You can download Pioneer Smart Sync on iTunes® App Store®.
For Android device users
This function is compatible with devices that have Android OS 5.0 or later installed.
You can download Pioneer Smart Sync on Google Play™.
NOTE
Some Android devices connected via AOA 2.0 may not work properly or emit sounds due to their own
software design, regardless of the OS version.
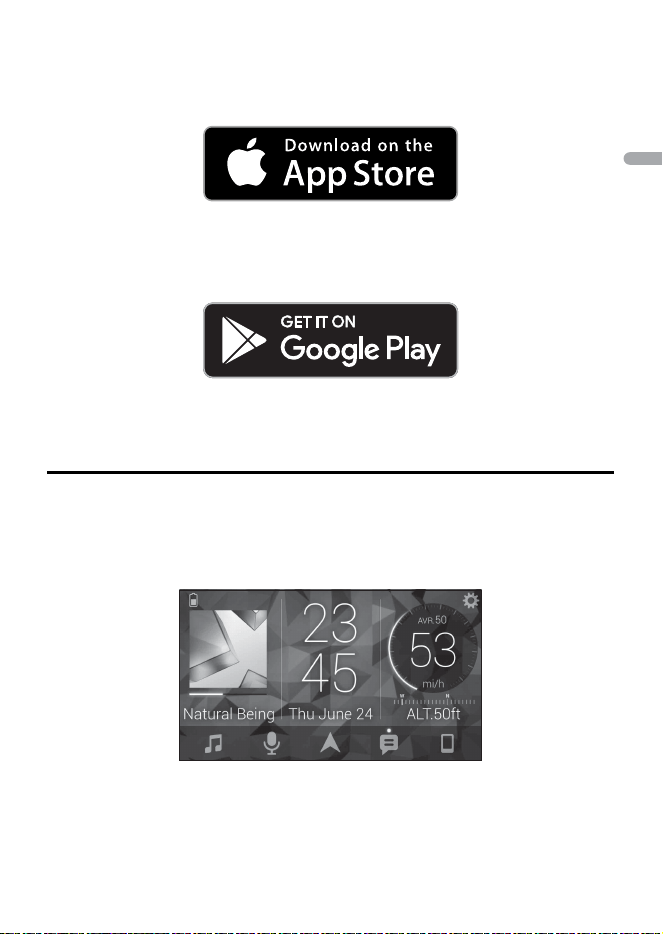
What kind of function does the application have?
Promoting the use of the unit
The interface of the unit can be evolved by using your iPhone/Android device.
Image (example):
Examples:
– Selecting a source of the unit
– Listening to the music on your iPhone/Android device
– Controlling the sound field intuitively and setting the illumination colour
- 18 -
English
– Controlling your connected Bluetooth device
Extending the functions of the unit by using the application
The following functions, which are unavailable on the unit alone, are available by
making a Pioneer Smart Sync connection.
NOTES
• Some functions may be restricted depending on the connection conditions with the application.
• The 31 Band EQ setting is converted into 13 bands when a music source from this product is engaged.
TIP
It is recommended to enter the search term "Pioneer Smart Sync" in the search field to search for the
application.
1 Connect this unit with the mobile device via Bluetooth.
• iPhone/Android device via Bluetooth (page 14)
Pioneer Smart Sync on the iPhone/Android device starts automatically.
NOTE
[APP CTL] needs to be set to [BT] in the SYSTEM settings to connect to the Pioneer Smart Sync
automatically (page 22).
Menu Item (example) Description
Using a navigation application You can specify and start the navigation
application installed on your device.
Message reading You can read messages received from the
apps installed on your device.
31 Band EQ setting You can select an equalizer band from the
31-band graphic equalizer.
Super "Todoroki" Sound You can boost the bass level more
dynamically than when not using the
Pioneer Smart Sync connection.
Easy Sound Fit You can perform the time alignment setting
easily by selecting your vehicle type.
Theme setting You can set the wall paper and the theme
colour at once.
Making a connection with Pioneer Smart Sync
- 19 -- 19 -
English
Pioneer Smart Sync connection via wired connection
You can also make the Pioneer Smart Sync connection via USB connection.
1 Press and hold to display the main menu.
2 Press to select [SYSTEM], then press to confirm.
3 Press to select [APP CTL], then press to confirm.
4 Press to select [WIRED], then press to confirm.
Pioneer Smart Sync on the iPhone/Android device starts automatically.
NOTES
• If Pioneer Smart Sync has not been installed on your iPhone/Android device yet, a message that
prompts you to install the application will appear on your iPhone/Android device.
• When you connect a mobile device other than an iPhone/Android device, it may not operate
correctly depending on your mobile device.
• To connect to the Pioneer Smart Sync manually, press and hold .
1 Press to select [APP].
A separately sold parking sensor (e.g. ND-PS1) is required to utilize the parking sensor
function which includes features indicates the distance from objects by sound and unit
display colours.
NOTE
The parking sensor function is only available when the gear shift is in the REVERSE (R) position and
[SENSOR] is set to [Y] in the P.SENSOR settings (page 24).
TIP
• The shortest distance in the detected distance range is applied on the unit's indicator.
Listening to music on your device
Parking Sensor
Sensor functions
Distance to the objective Unit display colour and warning sound
More than 160 cm (More than 60 in.) Green with no sound
160 cm to 90 cm (60 in. to 40 in.) Yellow with a slow intermittent beep sound
90 cm to 40 cm (40 in. to 20 in.) Orange with an intermittent beep sound
Less than 40 cm (Less than 20 in.) Red with a continuous beep sound
- 20 -
English
• The left/right illumination on the unit shows the distance between the two sensors on the left/right
sides and the object.
• The colour of the illumination displays the shorter distance of one of the two sensors.
You can adjust various settings in the main menu.
NOTE
The setting operation from this unit is not available when Pioneer Smart Sync is connected.
1 Press and hold to display the main menu.
2 Press to select one of the categories below, then press to confirm.
• FUNCTION settings (page 20)
• AUDIO settings (page 21)
• SYSTEM settings (page 22)
• ILLUMINATION settings (page 24)
• P.SENSOR settings (page 24)
3 Press to select the options, then press to confirm.
The menu items vary according to the source.
Settings
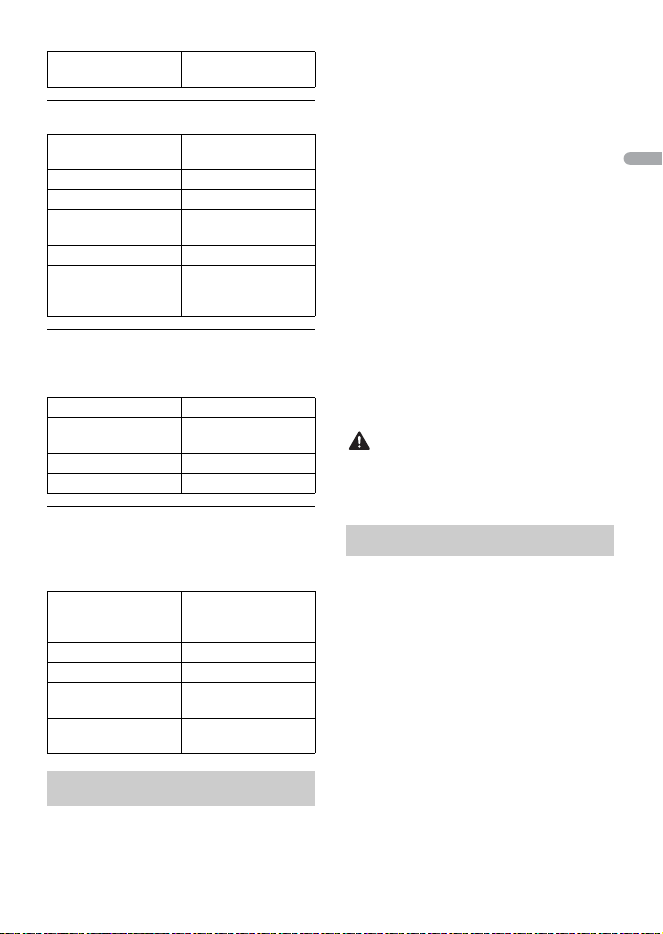
FUNCTION settings
Menu Item Description
BSM
Store the six strongest stations automatically.
LOCAL
FM: [OFF], [LEVEL1], [LEVEL2],
[LEVEL3], [LEVEL4]
AM: [OFF], [LEVEL1], [LEVEL2]
Restrict the tuning station according to the
signal strength.
SEEK
[MANUAL], [P.CH] Assign or buttons to seek the stations one
by one (manual tuning) or select a station from
the preset channels.
SEL DEV
Connect a Bluetooth device in the list.
iPhone
- 21 -- 21 -
English
AUDIO settings
Menu Item Description
EQ
[SUPERBAS], [POWERFUL],
[NATURAL], [VOCAL], [APP EQ]*,
[CUSTOM1], [CUSTOM2], [FLAT],
[VIVID], [DYNAMIC]
* [APP EQ] is displayed when the
preset equalizer curve that is not
available in the unit has been set
from Pioneer Smart Sync.
Select the preset equalizer curve.
• You can only customize the equalizer curve by
Pioneer Smart Sync (page 16).
FADER*1
Adjust the front and rear speaker balance.
• You can adjust the fader by pressing or .
BALANCE
Adjust the left and right speaker balance.
• You can adjust the balance by pressing or .
SUB.W*2
[Y], [N] Set to [Y] when using a subwoofer speaker.
D.BASS
[OFF], [LOW], [HIGH] Boost the bass level dynamically to offer an
effect as if a subwoofer was added to the system.
LOUDNES
[OFF], [LOW], [MID], [HIGH] Compensate for clear sound at low volume.
SLA
[+4] to [–4] Adjust the volume level for each source except
FM.
Each of the below combinations are set to the
same setting automatically.
• When making a USB connection, set USB,
iPhone and APP.
• When making a Bluetooth connection, set BT
AUDIO, iPhone and APP.

- 22 -
English
*1 Not available when [SUB/SUB] is selected in [SP-P/O] in the INITIAL settings (page 11).
*2 Not available when [FUL/FUL] is selected in [SP-P/O] in the INITIAL settings (page 11).
You can also access to these menus when the unit is turned off.
S.RTRV
[1] (effective for low compression
rates),
[2] (effective for high
compression rates),
[OFF]
Enhance compressed audio and restore rich
sound.
SYSTEM settings
Menu Item Description
LANG
[ENGLISH], [CAN.FRA.], [ESPAÑOL] Select the language to display the text
information from a compressed audio file.
CLOCK
[12H], [24H] Set the clock.
• This setting is not available when a Pioneer
Smart Sync connection is made.
BEEP
[Y], [N] A beep can be heard when any button is pushed.
Select [N] to disable this function.
BT CLR
[YES], [NO] Clear the Bluetooth device data ([DEV LIST])
stored in the unit.
[CLEARED] appears when data is successfully
deleted.
APP CTL
[BT], [WIRED] Select the appropriate connection method
according to your device.
See page 23 for details on the connections for
each device.
UNITS
[CM/M], [IN/FT] Select the distance unit to be displayed.
Menu Item Description
- 23 -- 23 -
English
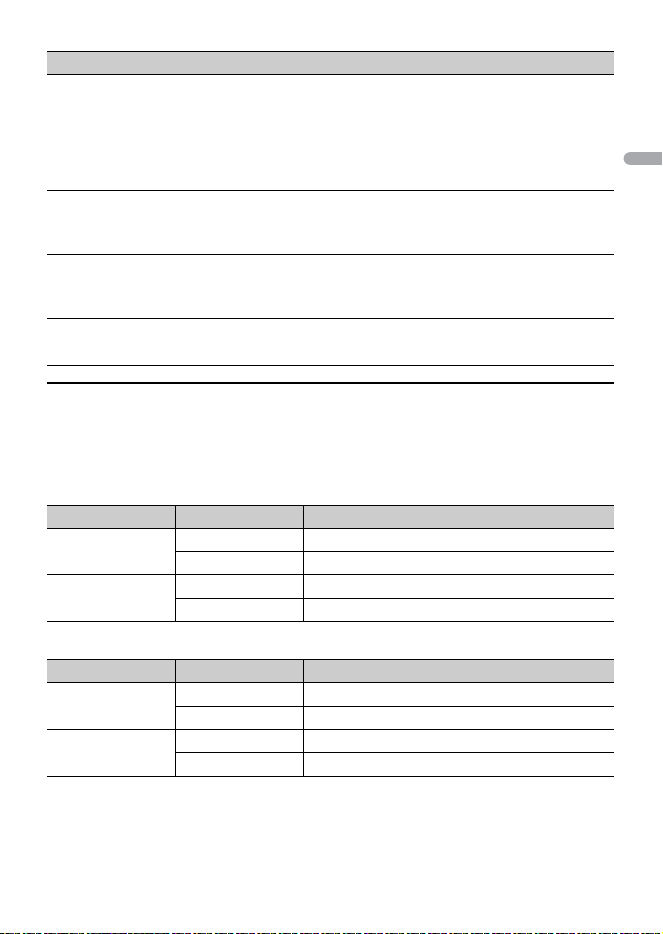
Information on the connections for each device
The available sources differ depending on the setting value.
Please set [APP CTL] according to the table for the source you want to use.
For details on Pioneer Smart Sync connection, see page 16.
When Pioneer Smart Sync connection is NOT performed
When Pioneer Smart Sync connection is performed
USB AUT
[Y], [N] Select [Y] to automatically switch to USB source
when a USB device/iPhone is connected to the
unit.
Select [N] when a USB device/iPhone is being
connected to the unit just for charging.
DISP OFF
[Y], [N] Set to off the screen display and all key's
illumination.
AT T /M UT
[MUTE], [ATT] Select mute or attenuate the volume when the
volume key is pressed and held.
DEV INF
Displaying the device information.
Setting Value Device Available source(s)
[WIRED] iPhone iPhone
Android USB (AOA)
[BT] iPhone iPhone
Android -
Setting Value Device Available source(s)
[WIRED] iPhone APP
Android APP
[BT] iPhone APP
Android APP
Menu Item Description

- 24 -
English
This setting functions by connecting the parking sensor (sold separately).
ILLUMINATION settings
Menu Item Description
COLOR
Select colour of the unit from 12 preset colours or
[SCAN].
• [SCAN]: Cycle through a variety of colors
automatically.
DIMMER
[SNC ILM], [SNC CLK], [OFF] Select the way to change the display brightness.
BRT
[1] to [10] Change the display brightness.
The available setting ranges differ depending on
[DIMMER].
P.SENSOR settings
Menu Item Description
SENSOR
[Y], [N] Select the parking sensor function on or off.
VOLUME
Adjust the parking sensor warning volume.
OUTPUT
[L+R], [LEFT], [RIGHT] Select the output of parking sensor warning
sound.
REVGEAR
[BATTERY], [GROUND] Select the polarity of the connected reverse
gear's lead.

- 25 -
English
The display automatically returns to the
normal display.
→ No operations have been made for
about 30 seconds.
–Perform an operation.
The sound is intermittent.
→ You are using a device, such as a cellular
phone, that may cause audible
interference.
–Move electrical devices that may be
causing the interference away from
the unit.
The sound from the Bluetooth audio
source is not played back.
→ There is a call in progress on a
Bluetooth-connected cellular phone.
–The sound will be played back when
the call is terminated.
→ A Bluetooth-connected cellular phone
is currently being operated.
–Stop using the cellular phone.
→ The connection between the unit and
the cellular phone is not established
correctly after a call made by a
Bluetooth-connected cellular phone.
–Make a Bluetooth connection
between the unit and the cellular
phone again.
Common
AMP ERR
→ This unit fails to operate or the speaker
connection is incorrect.
→ The protective circuit is activated.
–Check the speaker connection.
–Turn the ignition switch OFF and back
to ON again. If the message remains,
contact your dealer or an authorized
Pioneer Service Station for assistance.
NO XXXX (NO TITLE, for example)
→ There is no embedded text information.
– Switch the display or play another
track/file.
USB device/iPhone
READING
→ Sometimes there is a delay between the
start of playback and when you start to
hear any sound.
–Wait until the message disappears and
you hear sound.
NO AUDIO
→ There are no songs.
– Transfer the audio files to the USB
device and connect.
→ The connected USB device has security
enabled.
–Follow the USB device instructions to
disable the security.
SKIPPED
→ The connected USB device contains
DRM protected files.
–The protected files are skipped.
PROTECT
→ All the files on the connected USB
device are embedded with DRM.
–Replace the USB device.
N/A USB
→ The connected USB device is not
supported by this unit.
–Disconnect your device and replace it
with a compatible USB device.
Additional Information
Troubleshooting
Error messages

- 26 -
English
HUB ERR
→ The USB device connected via a USB
hub is not supported by this unit.
– Connect the USB device directly to this
unit using a USB cable.
CHECKUSB
→ The USB connector or USB cable has
short-circuited.
–Check that the USB connector or USB
cable is not caught in something or
damaged.
→ The connected USB device consumes
more than maximum allowable current.
– Disconnect the USB device and do not
use it. Turn the ignition switch OFF
and back to ACC or ON. Connect only
compliant USB devices.
→ The iPhone operates correctly but does
not charge.
–Make sure the connection cable for
the iPhone has not shorted out (e.g.,
not caught in metal objects). After
checking, turn the ignition switch OFF
and back to ON, or disconnect the
iPhone and reconnect.
ERROR-19
→ Communication failed.
–Perform one of the following
operations, then return to the USB
source.
• Turn the ignition switch OFF and
back to ON.
• Disconnect the USB device.
• Change to a different source.
→ iPhone failure.
–Disconnect the cable from the iPhone.
Once the iPhone’s main menu is
displayed, reconnect the iPhone and
reset it.
ERROR-23
→ USB device was not formatted properly.
–Format the USB device with FAT12,
FAT16 or FAT32.
ERROR-16
→ The iPhone firmware version is old.
–Update the iPhone version.
→ iPhone failure.
–Disconnect the cable from the iPhone.
Once the iPhone’s main menu is
displayed, reconnect the iPhone and
reset it.
STOP
→ There are no songs in the current list.
–Select a list that contains songs.
NO DEV
→ No Bluetooth device found.
–Connect the unit and iPhone via
Bluetooth (page 14).
CN FAIL
→ Bluetooth connection with iPhone
failed.
–Make a connection again on the
mobile device.
DISCNCT
→ Bluetooth connection lost.
–Make a connection again on the
mobile device.
Bluetooth device
ERROR-10
→ The power failed for the Bluetooth
module of the unit.
–Turn the ignition switch OFF and back
to ACC or ON.
APP
CNCT APP
→ Pioneer Smart Sync connection is not
made.
– Make a connection with Pioneer Smart
Sync (page 16).
- 27 -
English
USB storage device
• Connections via USB hubs are not
supported.
• Firmly secure the USB storage device
before driving. Do not let the USB storage
device fall onto the floor, where it may
become jammed under the brake or
accelerator pedal.
• Depending on the USB storage device,
the following problems may occur.
–Operations may vary.
–The storage device may not be
recognized.
– Files may not be played back properly.
– The device may cause audible
interference when you are listening to
the radio.
iPhone
• Do not leave the iPhone in places with
high temperatures.
• Firmly secure the iPhone when driving.
Do not let the iPhone fall onto the floor,
where it may become jammed under the
brake or accelerator pedal.
• Incompatible text saved on the iPhone
will not be displayed by the unit.
• Only the first 32 characters can be
displayed as a file name (including the file
extension) or a folder name.
• The unit may not work properly
depending on the application used to
encode WMA files.
• There may be a slight delay at the start of
the playback of audio files embedded
with image data, or audio files stored on a
USB device with numerous folder
hierarchies.
CAUTION
• Pioneer cannot guarantee compatibility
with all USB mass storage devices, and
assumes no responsibility for any loss of
data on media players, smartphones, or
other devices while using this product.
• Do not leave a USB storage device in any
place that is subject to high
temperatures.
WMA files
MP3 files
WAV files
Handling guidelines
Compressed audio
compatibility
File extension .wma
Bit rate 48 kbps to 320 kbps
(CBR), 48 kbps to 384
kbps (VBR)
Sampling frequency 32 kHz, 44.1 kHz, 48
kHz
Windows Media™
Audio Professional,
Lossless, Voice/DRM
Stream/Stream with
video
Not compatible
File extension .mp3
Bit rate 8 kbps to 320 kbps
(CBR), VBR
Sampling frequency 8 kHz to 48 kHz (32
kHz, 44.1 kHz, 48 kHz
for emphasis)
Compatible ID3 tag
version
1.0, 1.1, 2.2, 2.3, 2.4
(ID3 tag Version 2.x is
given priority over
Version 1.x.)
M3u playlist Not compatible
MP3i (MP3
interactive), mp3 PRO
Not compatible
File extension .wav
Quantization bits 8 and 16 (LPCM)
- 28 -
English
AAC files
FLAC files
• FLAC files may not be playable,
depending on the encoder.
USB device
• There may be a slight delay when starting
playback of audio files on a USB storage
device with numerous folder hierarchies.
This unit supports only the following iPhone
models. Older versions may not be supported.
Made for
–iPhone X
–iPhone 8
–iPhone 8 Plus
–iPhone 7
–iPhone 7 Plus
–iPhone SE
–iPhone 6s
– iPhone 6s Plus
–iPhone 6
–iPhone 6 Plus
–iPhone 5s
• Operations may vary depending on the
generation and/or software version of
the iPhone.
• Users of iPhone with the Lightning®
Connector should use the Lightning to
USB Cable (supplied with iPhone).
• Refer to the iPhone manuals for
information about the file/format
compatibility.
• Audiobook, Podcast: Compatible
CAUTION
Pioneer accepts no responsibility for data
lost on the iPhone, even if that data is lost
while this unit is used.
The user cannot assign folder numbers and
specify playback sequences with this unit.
Sequence of audio file depends on the
connected device.
Note that the hidden files in a USB device
cannot be played back.
Sampling frequency 16 kHz to 48 kHz
(LPCM)
Compatible format AAC encoded by
iTunes
File extension .m4a
Sampling frequency 11.025 kHz to 48 kHz
Stereo Bit Rate 16 kbps to 320 kbps,
VBR
Apple Lossless Not compatible
AAC file bought from
the iTunes Store (.m4p
file extension)
Not compatible
File extension .flac, .fla
Sampling frequency 8/11.025/12/16/22.05/
24/32/44.1/48/96 kHz
Quantization bit rate 8/16/24 bit
Channel mode 1/2 ch
Playable folder
hierarchy
Up to eight tiers (A
practical hierarchy is
less than two tiers.)
Playable folders Up to 1 500
Playable files Up to 15 000
Playback of copyright-
protected files
Not compatible
Partitioned USB
device
Only the first partition
can be played.
iPhone compatibility
Sequence of audio files
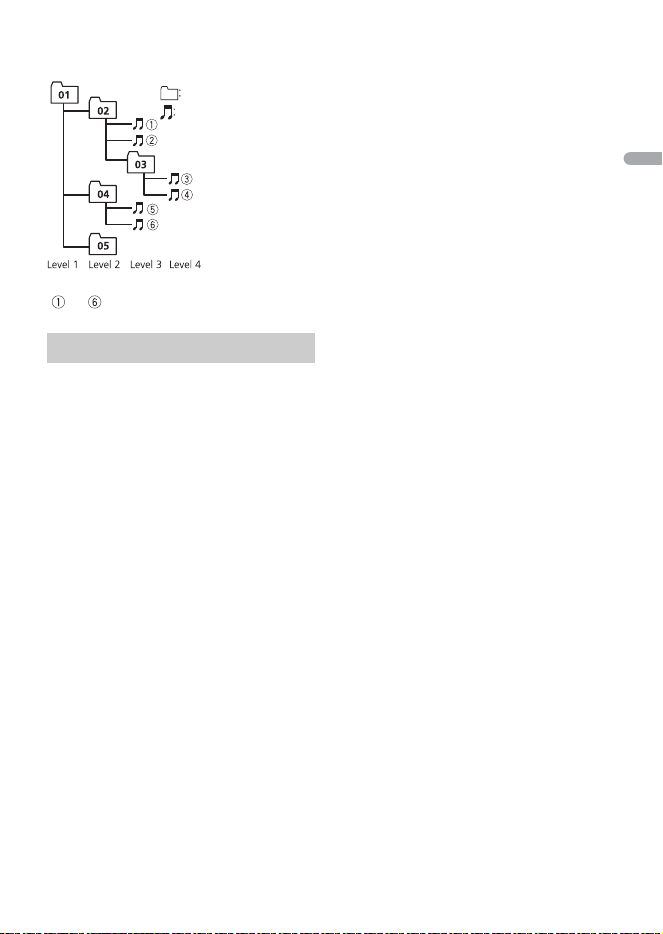
- 29 -
English
Example of a hierarchy
Bluetooth
The Bluetooth® word mark and logos are
registered trademarks owned by Bluetooth SIG,
Inc. and any use of such marks by PIONEER
CORPORATION is under license. Other
trademarks and trade names are those of their
respective owners.
iTunes
Apple and iTunes are trademarks of Apple
Inc., registered in the U.S. and other
countries.
WMA
Windows Media is either a registered
trademark or trademark of Microsoft
Corporation in the United States and/or
other countries.
This product includes technology owned
by Microsoft Corporation and cannot be
used or distributed without a license from
Microsoft Licensing, Inc.
FLAC
Copyright © 2000-2009 Josh Coalson
Copyright © 2011-2014 Xiph.Org
Foundation
Redistribution and use in source and
binary forms, with or without modification,
are permitted provided that the following
conditions are met:
–Redistributions of source code must
retain the above copyright notice, this list
of conditions and the following
disclaimer.
–Redistributions in binary form must
reproduce the above copyright notice,
this list of conditions and the following
disclaimer in the documentation and/or
other materials provided with the
distribution.
–Neither the name of the Xiph.org
Foundation nor the names of its
contributors may be used to endorse or
promote products derived from this
software without specific prior written
permission.
THIS SOFTWARE IS PROVIDED BY THE
COPYRIGHT HOLDERS AND
CONTRIBUTORS “AS IS” AND ANY EXPRESS
OR IMPLIED WARRANTIES, INCLUDING, BUT
NOT LIMITED TO, THE IMPLIED
WARRANTIES OF MERCHANTABILITY AND
FITNESS FOR A PARTICULAR PURPOSE ARE
DISCLAIMED. IN NO EVENT SHALL THE
FOUNDATION OR CONTRIBUTORS BE
LIABLE FOR ANY DIRECT, INDIRECT,
INCIDENTAL, SPECIAL, EXEMPLARY, OR
CONSEQUENTIAL DAMAGES (INCLUDING,
BUT NOT LIMITED TO, PROCUREMENT OF
SUBSTITUTE GOODS OR SERVICES; LOSS OF
USE, DATA, OR PROFITS; OR BUSINESS
INTERRUPTION) HOWEVER CAUSED AND
ON ANY THEORY OF LIABILITY, WHETHER
IN CONTRACT, STRICT LIABILITY, OR TORT
(INCLUDING NEGLIGENCE OR OTHERWISE)
ARISING IN ANY WAY OUT OF THE USE OF
THIS SOFTWARE, EVEN IF ADVISED OF THE
POSSIBILITY OF SUCH DAMAGE.
iPhone and Lightning
Use of the Made for Apple badge means
that an accessory has been designed to
connect specifically to the Apple
product(s) identified in the badge, and
has been certified by the developer to
Copyright and trademark
Folder
Compressed
audio file
to : Playback sequence
01 to 05: Folder number

- 30 -
English
meet Apple performance standards.
Apple is not responsible for the
operation of this device or its
compliance with safety and regulatory
standards.
Please note that the use of this
accessory with an Apple product may
affect wireless performance.
iPhone and Lightning are trademarks of
Apple Inc., registered in the U.S. and
other countries.
Siri®
Works with Siri through the microphone.
Google™, Google Play, Android
Google, Google Play and Android are
trademarks of Google LLC.
T-Kernel 2.0
This product uses the source code of T-
Kernel 2.0 under T-License 2.0 granted
by T-Engine Forum (www.tron.org).
MP3
Copyright (C) 1998-2009 PacketVideo
Licensed under the Apache License,
Version 2.0 (the "License"); you may not use
this file except in compliance with the
License.
You may obtain a copy of the License at
http://www.apache.org/licenses/LICENSE-
2.0
Unless required by applicable law or
agreed to in writing, software distributed
under the License is distributed on an "AS
IS" BASIS, WITHOUT WARRANTIES OR
CONDITIONS OF ANY KIND, either express
or implied.
See the License for the specific language
governing permissions and limitations
under the License.
General
Rated power source: 14.4 V DC (allowable
voltage range: 10.8 V to 15.1 V DC)
Grounding system: Negative type
Maximum current consumption: 10.0 A
Dimensions (W × H × D):
DIN
Chassis: 178 mm × 50 mm × 165 mm
(7 in. × 2 in. × 6-1/2 in.)
Nose: 188 mm × 58 mm × 16 mm (7-
3/8 in. × 2-1/4 in. × 5/8 in.)
D
Chassis: 178 mm × 50 mm × 165 mm
(7 in. × 2 in. × 6-1/2 in.)
Nose: 170 mm × 46 mm × 16 mm (6-
3/4 in. × 1-3/4 in. × 5/8 in.)
Weight: 1 kg (2.2 lbs)
Audio
Maximum power output:
• 50 W × 4 ch/4 Ω (for no subwoofer)
• 50 W × 2 ch/4 Ω + 70 W × 1 ch/2 Ω
(for subwoofer)
Continuous power output:
22 W × 4 (50 Hz to 15 000 Hz, 5 %
THD, 4 Ω load, both channels driven)
Load impedance: 4 Ω (4 Ω to 8 Ω (2 Ω for 1
ch) allowable)
Preout maximum output level: 2.0 V
Built in equalizer:
Frequency: 50 Hz/80 Hz/125 Hz/200
Hz/315 Hz/500 Hz/800 Hz/1.25 kHz/2
kHz/3.15 kHz/5 kHz/8 kHz/12.5 kHz
Gain: ±12 dB
High pass filter:
Frequency: 25 Hz/31.5 Hz/40 Hz/50
Hz/63 Hz/80 Hz/100 Hz/125 Hz/160
Hz/200 Hz/250 Hz
Slope: –6 dB/oct, –12 dB/oct, –18 dB/
oct, –24 dB/oct, OFF
Subwoofer/Low pass filter:
Specifications

- 31 -
English
Frequency: 25 Hz/31.5 Hz/40 Hz/50
Hz/63 Hz/80 Hz/100 Hz/125 Hz/160
Hz/200 Hz/250 Hz
Slope: –6 dB/oct, –12 dB/oct, –18 dB/
oct, –24 dB/oct, –30 dB/oct, –36 dB/
oct, OFF
Phase: Normal/Reverse
Speaker level:
+10 dB to –24 dB (1 dB step)
Time alignment:
0 Inch to 140 Inch (1 inch/Step)
USB
USB standard specification: USB 2.0 full
speed
Maximum current supply: 1.5 A
USB Protocol:
MSC (Mass Storage Class)
AOA (Android Open Accessory) 2.0
File system: FAT12, FAT16, FAT32
MP3 decoding format: MPEG-1 & 2 Audio
Layer 3
WMA decoding format: Ver. 7, 8, 9, 9.1, 9.2
(2 ch audio)
AAC decoding format: MPEG-4 AAC (iTunes
encoded only) (Ver. 10.6 and earlier)
FLAC decoding format: v1.2.1 (Free
Lossless Audio Codec)
WAV signal format: Linear PCM (Non-
compressed)
FM tuner
Frequency range: 87.9 MHz to 107.9 MHz
Usable sensitivity: 11 dBf (1.0 μV/75 Ω,
mono, S/N: 30 dB)
Signal-to-noise ratio: 65 dB (IHF-A network)
AM tuner
Frequency range: 530 kHz to 1 710 kHz
Usable sensitivity: 25 μV (S/N: 20 dB)
Signal-to-noise ratio: 60 dB (IHF-A network)
Bluetooth
Version: Bluetooth 4.0 certified
Output power: +4 dBm Maximum (Power
class 2)
BLE (Bluetooth Low Energy) Version: 4.0
certified
BLE (Bluetooth Low Energy) Output power:
+3 dBm Maximum
Frequency band(s): 2 400 MHz to 2 483.5
MHz
Bluetooth profiles:
GAP (Generic Access Profile)
SDAP (Service Discovery Application
Profile)
HFP (Hands Free Profile) 1.6
PBAP (Phone Book Access Profile)
A2DP (Advanced Audio Distribution
Profile)
AVRCP (Audio/Video Remote Control
Profile) 1.5
SPP (Serial Port Profile) 1.1
CTA2006 Specifications
Power output: 14 W RMS × 4 Channels (4 Ω
and 1 % THD+N)
S/N ratio: 91 dBA (reference: 1 W into 4 Ω)
NOTE
Specifications and the design are subject
to modifications without notice.
<
=
© 2019 PIONEER CORPORATION. All rights reserved.
<CRB5232-A> UC