Remove Packaging - IMPORTANT: Do not remove any permanent instruction labels inside your ice machine or the Tech Sheet that is fastened behind the lower access panel.
Remove tape and any labels from your ice maker before using (except the model and serial number label)To remove any remaining tape or glue, rub the area briskly with your thumb. Tape or glue residue can also be easily removed by rubbing a small amount of liquid dish soap over the adhesive with your fingers. Wipe with warm water and dry.
Do not use sharp instruments, rubbing alcohol, flammable fluids or abrasive cleaners to remove tape or glue. These products can damage the surface of your ice marker. For more information, see Important Safety Instructions.
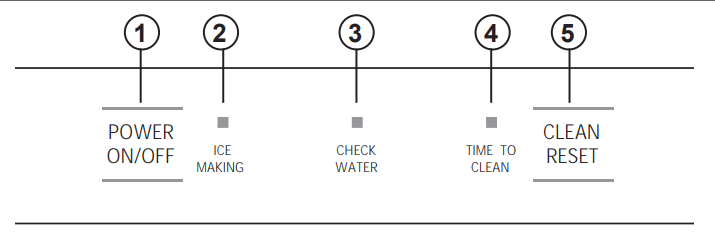
Controls
1. POWER ON/OFF - Press to turn the ice machine on or off.
2. ICE MAKING - Glows white when the unit is ON.
3. CHECK WATER - Glows red when there is not water supplied to the machine.
4. TIME TO CLEAN - Glows yellow when it's time to clean the machine. The light will switch ON after 6 months of use. It will remain on until the ice making system is cleaned using the process in the Care and Cleaning section.
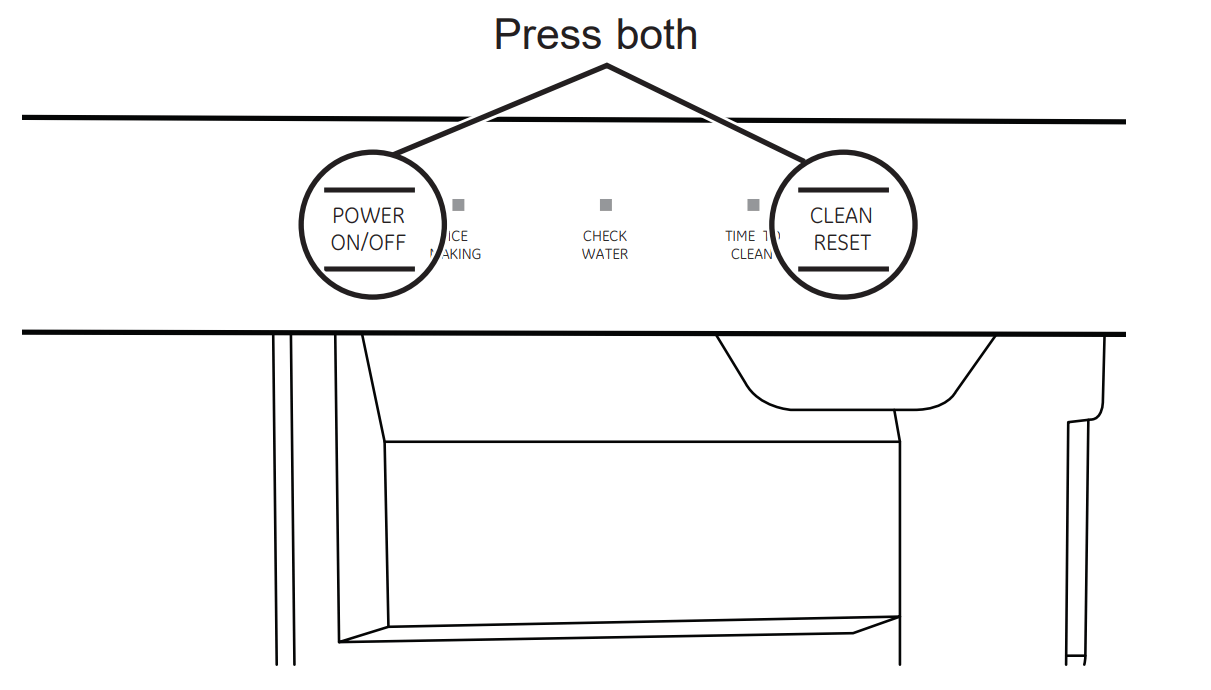
5. CLEAN RESET - Pressed with Power button for 5 seconds to start the cleaning process (see Care and Cleaning)
Features
Starting the ice machine
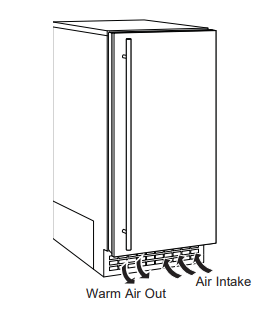
This machine takes in room temperature air at the lower right front and forces warm air out the lower left front. Restricting the airflow or operating the machine in a hot or cold environment will adversely affect the ability of the ice machine to make ice.
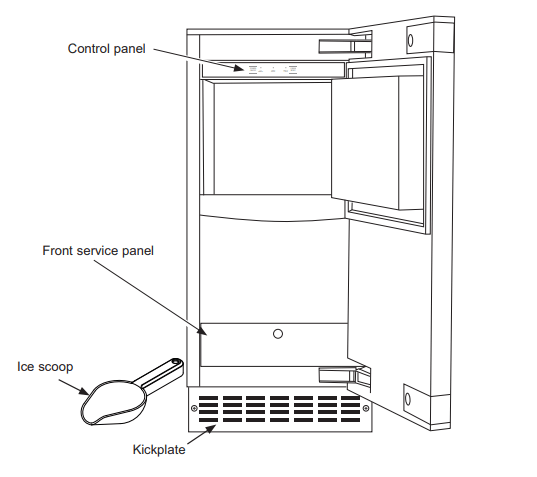
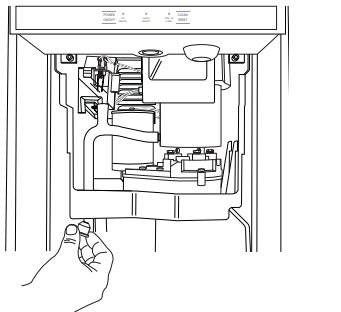
When the door is opened, the control panel, ice making area and ice storage bin are visible. The scoop is located in a holder along the right side wall.
This is a gravity drain model that must have a building drain connection below the level of the drain tube at the back of the cabinet. A pump can be installed, which can force drain water up a maximum of 10 feet, allowing it to be located where a gravity drain isn't available. See Accessories on page 21 for more information on the drain pump.
Initial Start Up
Turn on the water supply.
Switch on the electrical power.
Push and release the ON/ OFF switch to start the machine. The ICE MAKING light next to the ON/ OFF switch will glow white.
It will take about 10 minutes for the ice machine to begin dropping nugget ice into the storage bin. It is normal for that ice to melt and continue to melt but at a slower rate as the bin cools. It will take about 6-7 hours to fill up the ice storage bin. The storage bin holds about 2oIbs of ice when full.
Discard the first bin full of ice.
Care And Cleaning
Cleaning the Outside
The stainless steel door and door handle can be cleaned with a commercially available stainless steel cleaner. Cleaners with oxalic acid such as Bar Keepers Friend Soft CleanserTM will remove surface rust, tarnish and small blemishes.
Use only a liquid cleaner free of grit and rub in the direction of the brush lines with a damp soft sponge. Do not use appliance wax or polish on the stainless steel.
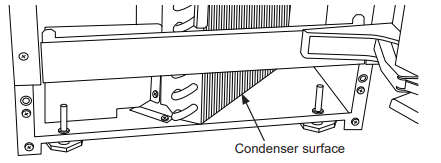
Cleaning the Condenser
The condenser has fins and tubes that can become clogged with dirt and lint.
To clean:
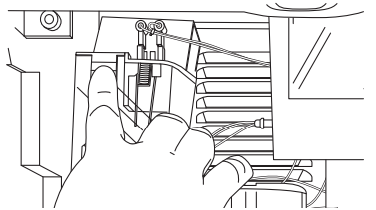
Remove the kickplate and front service panel.
Locate the condenser surface.
Vacuum the surface to remove all dust and lint. Notice: Do not dent the fins.
Return the kickplate and front service panel to their original positions. Fasten them to the cabinet using the original screws.
Removing Scale from the Ice Making System
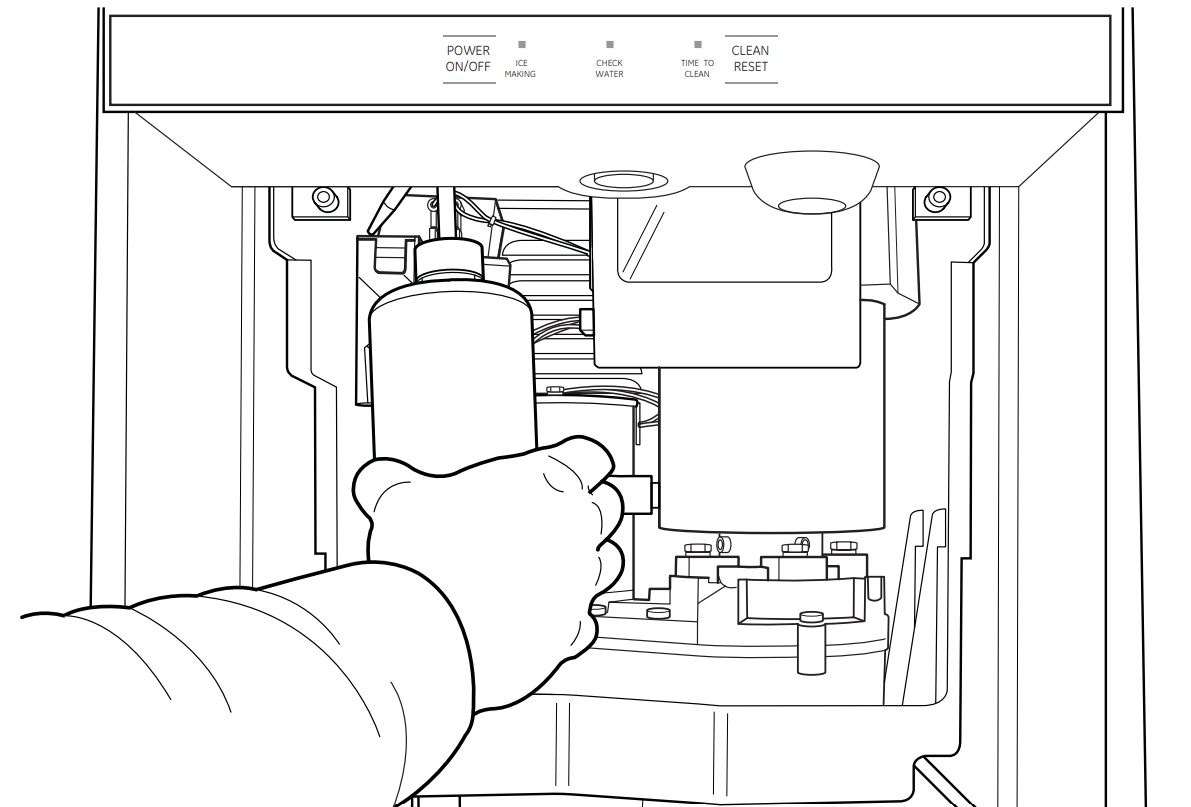
Cleaning the ice machine involves adding a solution of scale remover and water to the ice machine and continuing to add it as it makes ice. The scale remover must be diluted to the correct ratio. A squirt bottle will make adding the scale remover much easier when the unit is built in. If not built in, remove the top panel for reservoir access.
You should use rubber gloves when using the scale remover. To order scale remover, go to GEApplianceParts.com
Scoop out and discard all of the ice.
Press and release the ON/OFF button
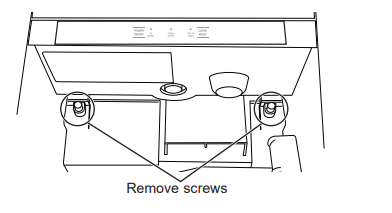
Open door and locate screws at the upper back wall of the bin. Remove the 2 screws
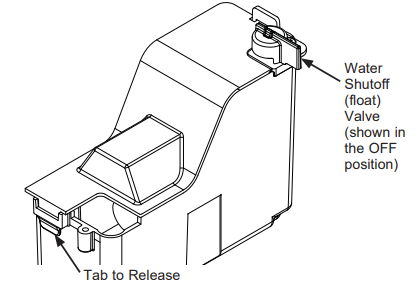
Remove the back panel of the bin by lowering it down past the scoop holder. The scoop holder will rotate to allow the panel to lower.
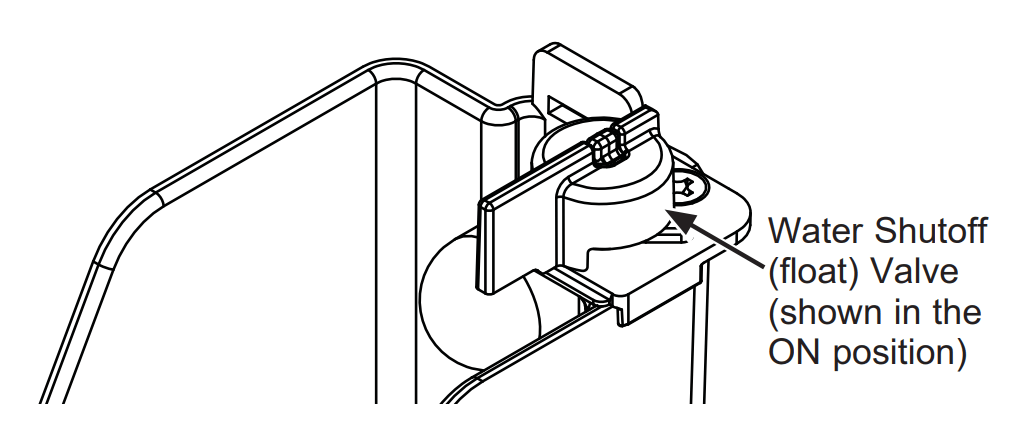
Water shutoff (float ) valve is located at the back of the reservoir. The valve MUST be turned to the OFF position before the reservoir cover can be removed. Turn knob CCW 90°
Push tab on front edge of reservoir cover and remove the cover. NOTE: Adjacent wires are low voltage and are not hazardous.
Locate the drain plug. Pull the drain plug out to drain the reservoir and evaporator. When draining is complete, return the plug to its original position.
Obtain premixed scale remover solution or mix a solution of scale remover with water according to the directions. Fill a 16 oz squirt bottle with the diluted or pre-mixed scale remover.
Fill the reservoir with the scale remover solution from the squirt bottle. Use about half (8 oz) of the solutions
Pree and hold both the CLEAN/ RESET and ON/ OFF buttons for 5 seconds. The TIME TO CLEAN light will blink on and off.
The auger motor will run for 10 minutes and then the compressor will start. Within 5 - 8 minutes the machine will start to make ice. The TIME TO CLEAN light will glow steady until the clean cycle is complete.
CAUTION: Kepp fingers away from moving parts.
After the ice making starts, continuously add scale remover solution to the reservoir to keep it about half full.
When all 16 oz of the solution is used, turn the water shutoff (float ) valve knob CW 90° to the ON position. After 40 minutes, the ice machine and all the control panel lights will shut off.
Pull the drain plug again to drain the system and then replace it.
Turn the Water Shut Off (Float ) Valve knob to the Off position, replace the reservoir cover, and then turn the Water Shut Off (Float ) Valve knob to the ON position.
Replace the upper back wall of the bin using the original screws. Push in to snap bottom of back panel into place.
Pour a gallon of hot ( 95° - 115°F ) water into the bin to flush out the drain and melt all ice that was made during the cleaning process. Be sure all ice is melted.
Use any left over scale remover solution to scrub the scale off of the bin liner. If none is left over, use pre-mixed or mix 1 quart according to the directions.
Rinse the liner with hot water.
Sanitize the bin interior
Push and release the ON/ OFF button to restart ice making. The ice scoop should be washed regularly and is dishwasher safe.
Other Maintenance
NOTE: It is normal for some lime scale to form on the gear reducer cover. Wipe up any loose scale. Check the top bearing.
The top bearing is non-metallic and requires no lubrication. However, it should be checked for wear occasionally. The top of panel must be removed to access the bearing. The wear limit is 1/ 64". and can be checked with a pin gauge.
Winterizing
Clean the ice making system per the instructions
Open the door and push the ON/ OFF button to turn the ice machine off.
Turn off the water supply.
Remove the back wall of the ice storage bin.
Remove the drain plug and drain the water reservoir return plug to its original position.
Models with a drain pump installed should have about 1/2 gallon of RV antifreeze (propylene glycol ) poured into the ice storage bin drain. NOTE: Automotive antifreeze must NOT be used
Turn off and unplug the machine.
Troubleshooting Tips
... Before you call for service
Save time and money! Review the charts on the following pages first and you may not need to call for service.
Problem
Possible Causes
What to Do
Low capacity
Restricted drain or standing water in the bin
Clean the air cooled condenser fins.
Clean the ice making system.
Check the drain line for kinks
No ice
Switch is OFF
Electric breaker has been tripped
Water supply is low
Auger motor is not working or is overloaded - lights are flashing
Press the ON/OFF button to turn the power on.
Flio the electric breaker back on
If the Check Water light is flashing Red, the water supply is low.
Reset by pressing ON/OFF button. If this doesn't reset the motor and the lights continue to flash, call for service.
Time to Clean light is on
Clean the ice making system following directions in the Care and Cleaning section.
Noise
The ice machine is designed for quiet operation but will make some noise during the ice making cycle.
Q: I've had my icemaker for a year now and it just started overfilling right after I cleaned it and turned it back on. What is causing the overfill? Is there an adjustment for the level of the ice in the bin? Reply


 After 40 minutes, the ice machine and all the control panel lights will shut off.