Loading ...
Loading ...
Loading ...
10
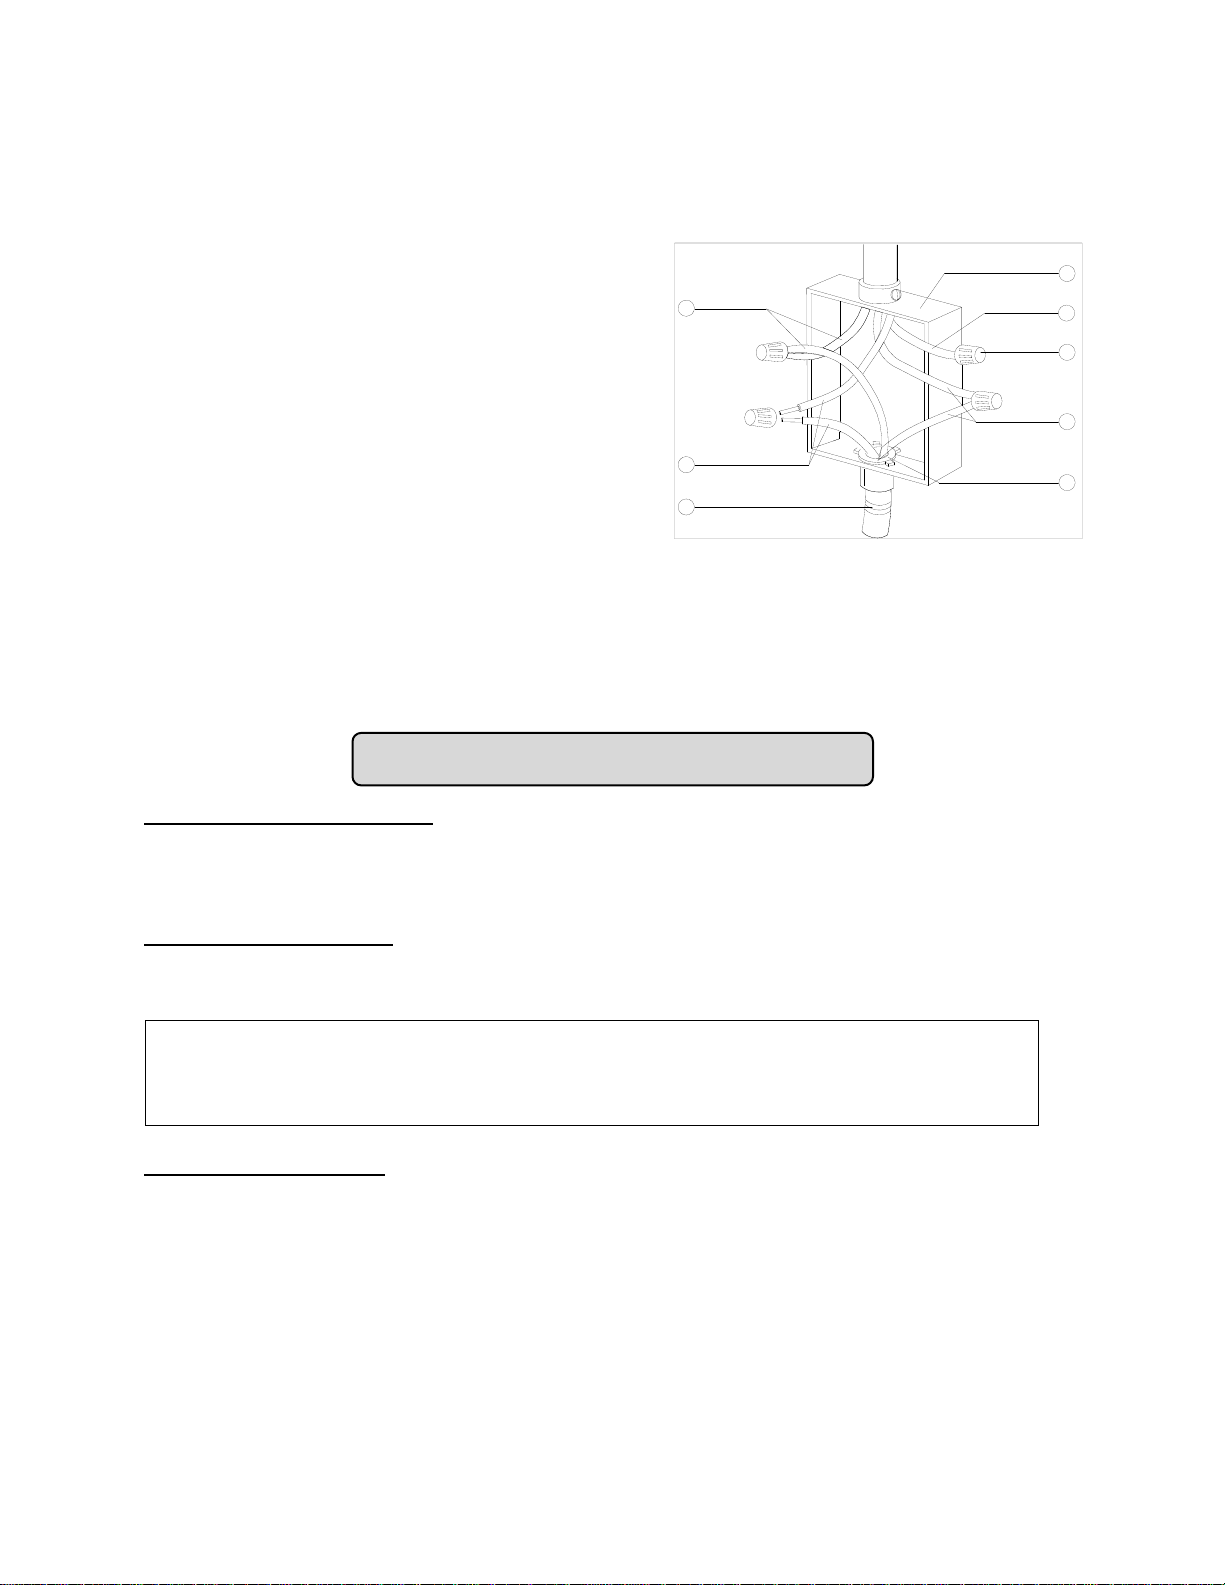
2. 4-Wire Power Cord Installation
IMPORTANT: Use the 4-wire cable from power supply where local codes do not permit connecting the
frame-ground conductor to the neutral (white) junction box wire.
1. Disconnect power
2. Remove junction box cover if present.
3. Connect the flexible cable conduit (3) from the
cooktop to the junction box (4) using a UL listed
or CSA approved conduit connector (7).
4. Tighten screws on conduit connector, if present.
5. Connect the two black wires (1) together using
the UL listed wire nut (5).
6. Connect the two red wires (2) together using
the UL listed wire nut.
7. Connect the green wire (6) from the cooktop
cable to the green wire (6) (in the junction box)
using the UL listed wire nut.
8. Put a UL listed wire nut on the end of the white wire (8).
NOTE: Do not connect the bare ground wire to the neutral (white) wire in the junction box.
9. Install junction box cover.
10. Reconnect power.
OPERATING YOUR APPLIANCE
OPERATING YOUR COOKTOP
Any burner can be turned on by pushing the control knob down and turning it clockwise or counter-
clockwise to the desired setting. To adjust the setting, turn the knob without pressing down. The burner is
turned off by turning the control knob clockwise or counter-clockwise to "0FF".
OPERATING INDICATORS
When the burner is turned on, the corresponding operating indicator will light up regardless of the setting.
COOKWARE SELECTION
Pots and pans
Special cookware is not required, but as is true with all types of cooking appliances, the better the
cookware, the better the performance.
Following these tips will allow you to make the most of your ceramic cooktop.
For the most even and energy efficient cooking, the diameter of the pots should match the diameter
of the burners as closely as possible.
Use cookware with thick, flat, smooth bottoms. Slightly concave bottoms will also work adequately.
WARNING
Do not touch or lay any heat-sensitive objects on the cooktop while the operating
indicator is still on. Danger of burns and fire hazard!
1
2
3
4
5
6
7
8
Loading ...
Loading ...
Loading ...