Loading ...
Loading ...
Loading ...
1. Open the document to be printed on your computer or mobile device.
2. Make sure the printer is correctly powered. Use a fully charged battery,
or connect the printer to an AC or DC power outlet.
3. Turn the printer on by pressing and holding the (Power) button for
about one second.
The POWER indicator lights in green (if the printer is connected to an
AC or DC power outlet) or in orange (if the rechargeable Li-ion battery
is used).
4. Connect the printer to a computer or mobile device using USB,
Bluetooth or Wi-Fi. For more information, see the Online User's Guide.
5. Load paper. Use both hands to hold the paper straight, and then
carefully insert the paper into the printer’s input slot until the roller pulls
it into the starting position. For best results, use genuine Brother paper.
6. Print from the application.
The DATA indicator flashes in green to indicate that the printer is
receiving data, and then the document is printed.
You can set the paper type to [Cut Sheet], [Roll] or [Perforated Roll] in the
printer driver.
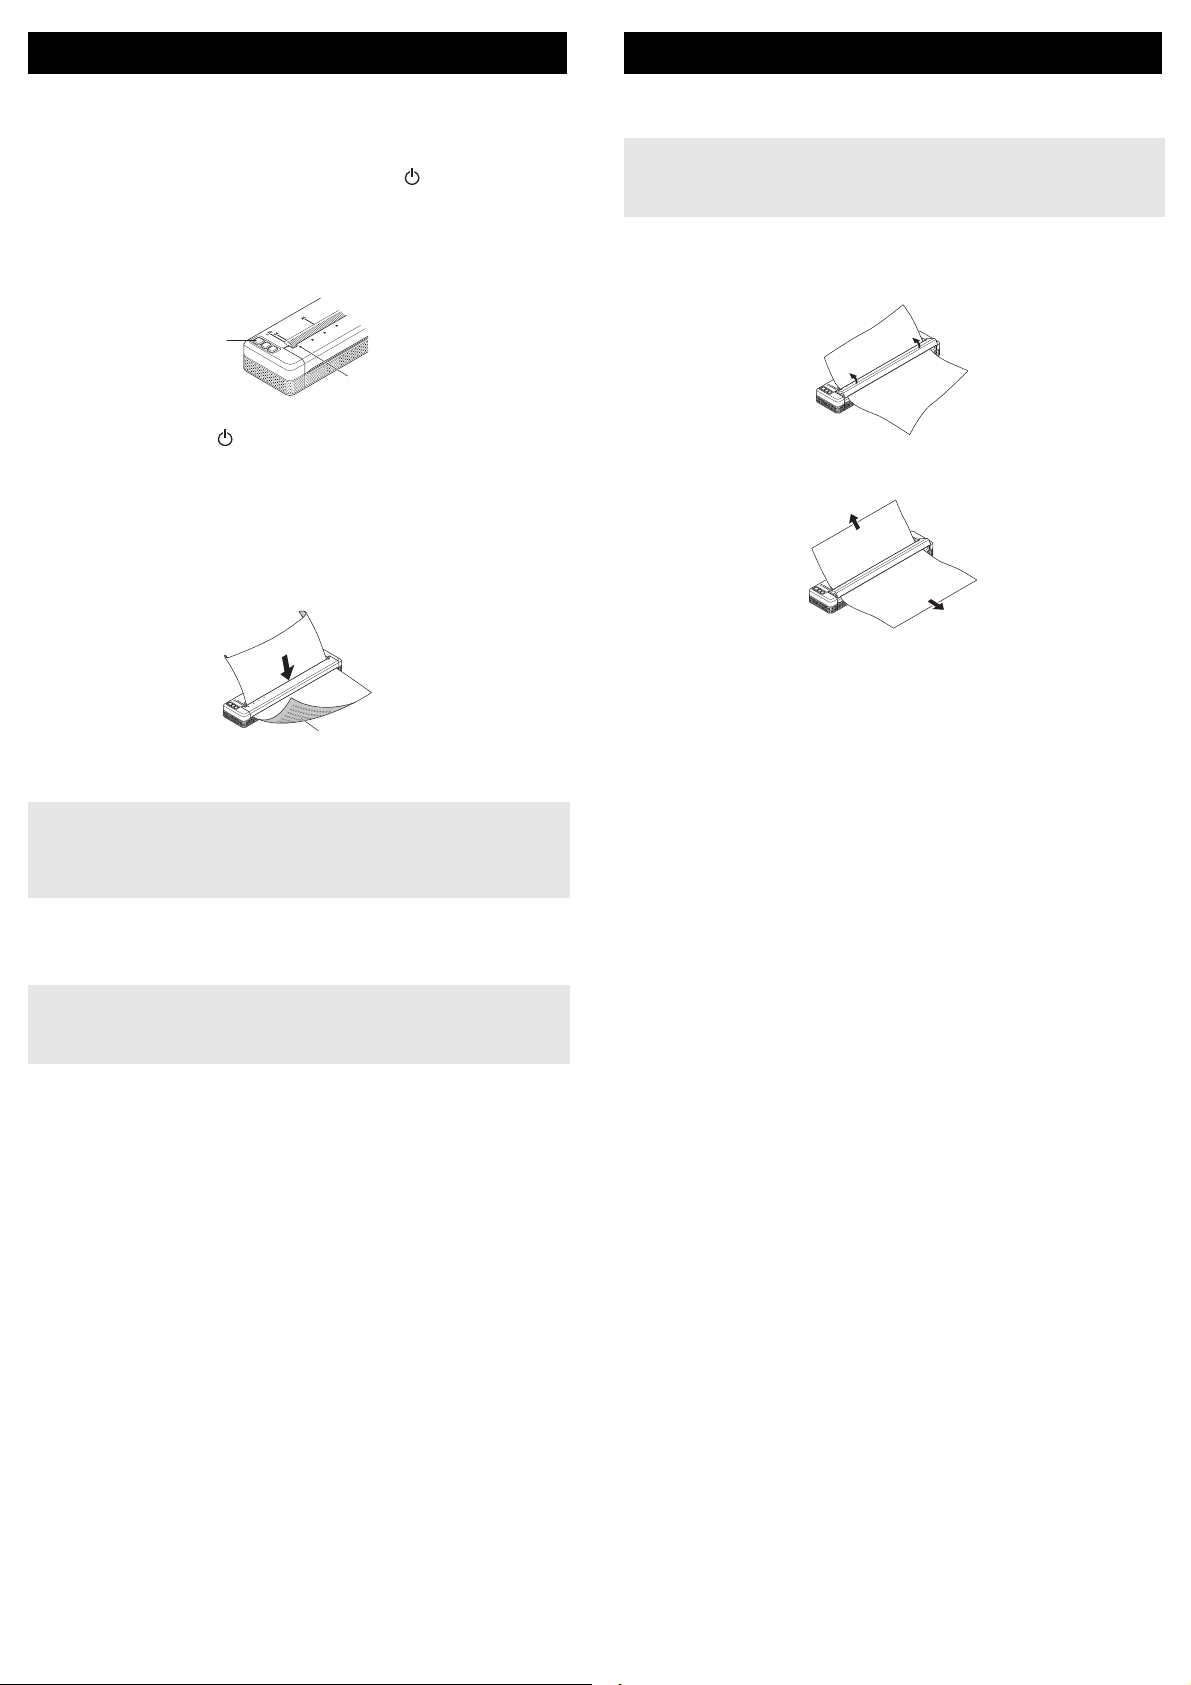
Clearing a Paper Jam
1. Carefully lift the release cover up to open it.
2. Carefully pull the paper out of the printer in either direction.
3. Close the release cover.
4. Insert paper and print again.
Printing
1 (Power) button
2 POWER indicator
1 Print surface
NOTE
• The bottom edge of the paper must be parallel to the roller.
• Only one side of the paper can be printed on. Check the paper, and
load it so that the smooth, thermal side faces down.
NOTE
If necessary, change the printer settings in the printer driver’s dialog box
or Printer Setting Tool. For more information, see the Online User's
Guide.
2
1
1
Notes on Using Paper
NOTE
Roll paper can be cut using the printer’s tear bar. Pull one edge of the
ejected paper up and toward the other edge diagonally.
*The tear bar is sharp. To avoid injury, do not touch the tear bar.
Loading ...
Loading ...
Loading ...