Loading ...
Loading ...
Loading ...
34
——————
—————————————————————————————————————————————————————————————————————————————————————————
—
————————————————————————————————————————————————————————————————————————————————————————————————————————————————————————————————————————————————————————————————————————————————————
5
Note
● When sewing with the walking foot, sew at
medium to low speeds.
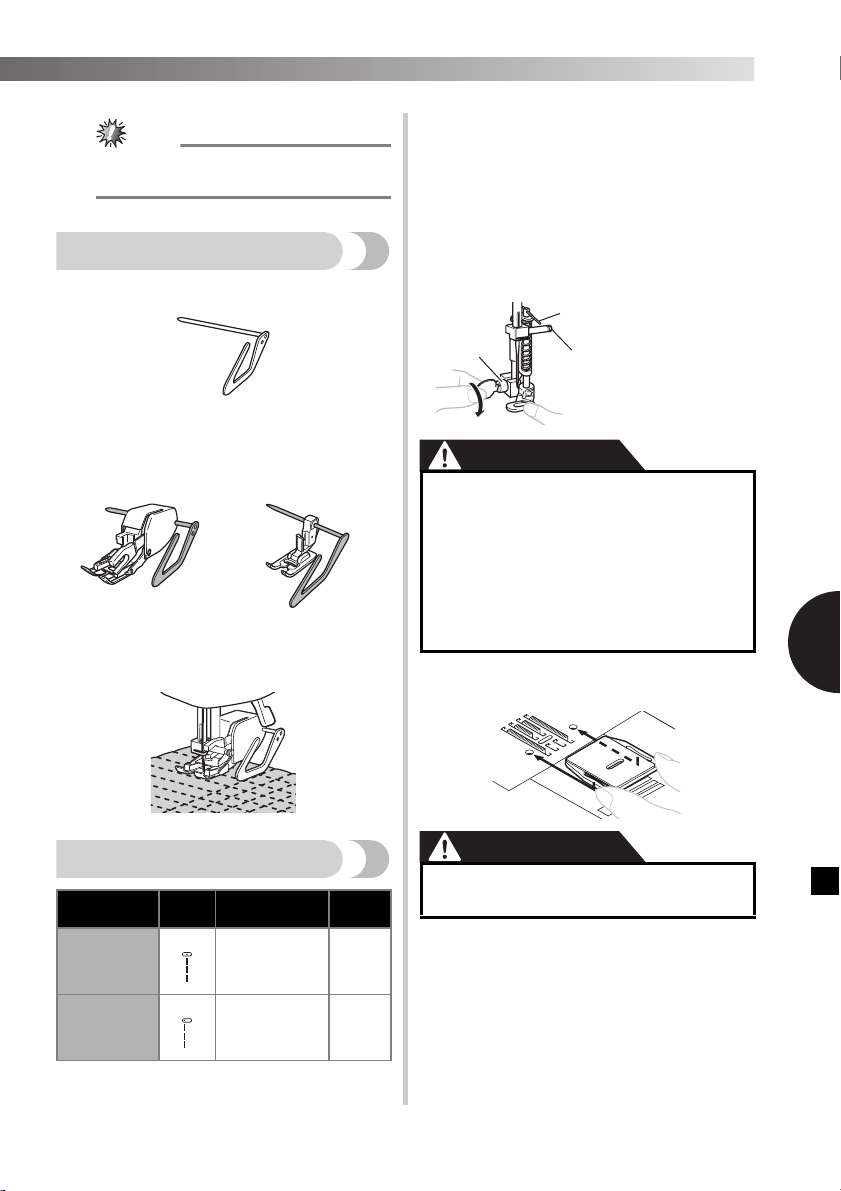
Using the quilting guide
Use the quilting guide to sew parallel stitches that are
equally spaced.
1
Insert the stem of the quilting guide into
the hole at the rear of the walking foot or
presser foot holder.
2
Adjust the stem of the quilting guide so
that the quilting guide aligns with the
seam that has already been sewn.
Using the quilting foot
The Quilting Foot is useful for darning and
free-motion machine quilting.
1
Follow the steps 1 to 3 on page 33.
2
Attach the quilting foot, making sure that
part A shown in the illustration is above
the needle clamp screw. Then lower the
presser foot lever and tighten the presser
foot screw.
• Make sure that the needle clamp screw is
firmly tightened.
CAUTION
3
Put the darning plate on the needle plate.
Turn on the machine.
CAUTION
4
Set the pattern selection dial to the
Straight Stitch.
• Before starting to sew, draw the quilting
design on the fabric.
■ Walking foot ■ Presser foot holder
Stitch Name Pattern
Stitch Length
[mm (inch)]
Other
Straight Stitch
(Center Needle
Position)
2.5 (3/32)
Darning
Plate
Straight Stitch
(Left Needle
Position)
2.5 (3/32)
Darning
Plate
5
7
1 Presser foot screw
2 Needle clamp screw
● Use the oval screwdriver to tighten the
presser foot holder screw securely. If the
screw is loose, the needle may hit the
presser foot and you may be injured.
● Turn the handwheel toward you
(counterclockwise) and check that the
needle does not touch the presser foot. If
the needle hits the presser foot, the
needle may bend or break.
● Do not turn on the machine while
pressing down the foot controller.
2
1
A
Loading ...
Loading ...
Loading ...