Loading ...
Loading ...
Loading ...
7
2. Setting up the monitor
Connect to PC
1. Connect the power cord to the back
of the monitor firmly.
2. Turn off your computer and unplug
its power cable.
3. Connect the monitor signal cable to
the video connector on the back of
your computer.
4. Plug the power cord of your
computer and your monitor into a
nearby outlet.
5. Turn on your computer and monitor.
If the monitor displays an image,
installation is complete.
Note
USB 2.4Ghz wireless devices, such
as, wireless mouse, keyboard, and
headphones, maybe have interference
by the high-speed signal of USB
3.0 devices, which may result in a
decreased efficiency of the radio
transmission. Should this happen,
please try the following methods to
help reduce the effects of interference.
• Try to keep USB2.0 receivers away
from USB3.0 connection port.
• Use a standard USB extension cable
or USB hub to increase the space
between your wireless receiver and
the USB3.0 connection port.
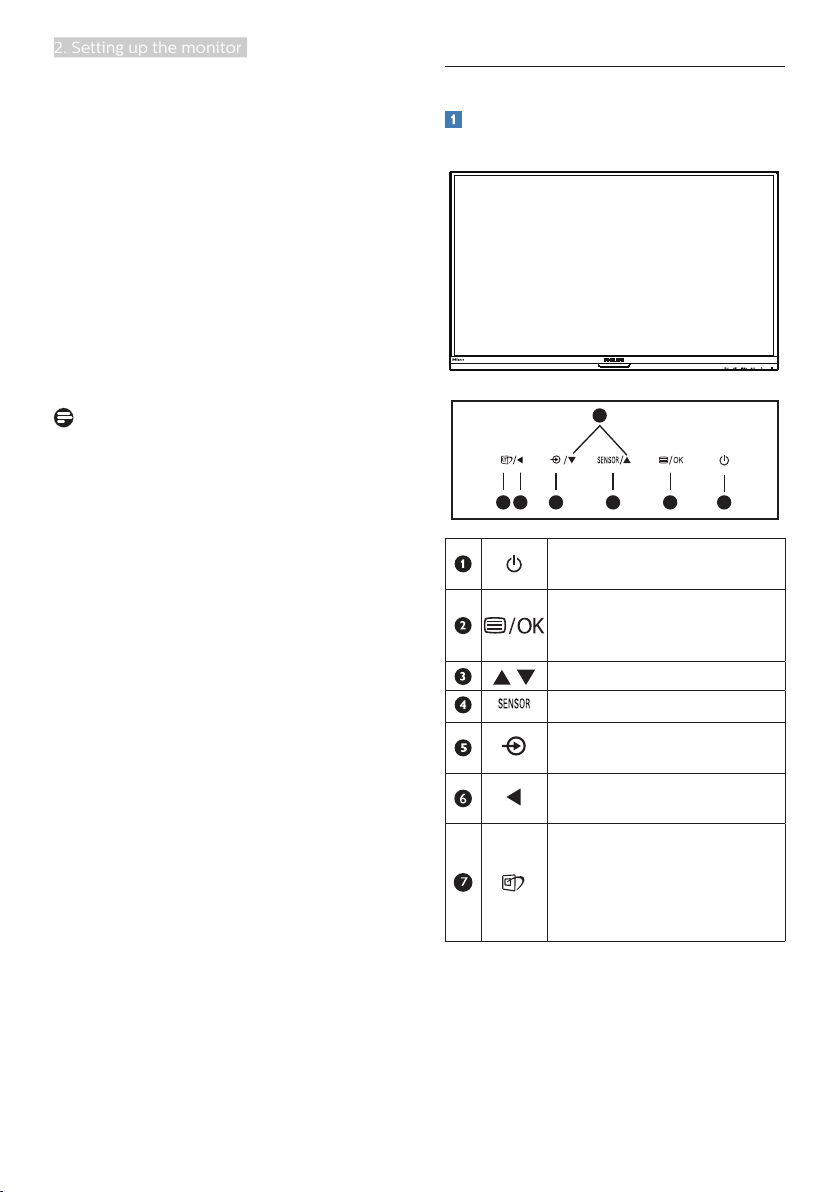
2.2 Operating the monitor
Description of the control buttons
241B7QPJEB,241B7QPTEB:
241B7
7
6
25
4
3
1
Switch monitor’s power
ON and OFF.
Access the OSD menu
.
Confirm the OSD
adjustment.
Adjust the OSD menu.
PowerSensor
Change the signal input
source.
Return to previous OSD
level.
SmartImage
hot key
. There
are 7 modes to select:
Office, Photo, Movie,
Game, Economy, LowBlue
Mode,Off.
Loading ...
Loading ...
Loading ...