Loading ...
Loading ...
Loading ...
Page6
INSTALLINGINTERIORASSEMBLY
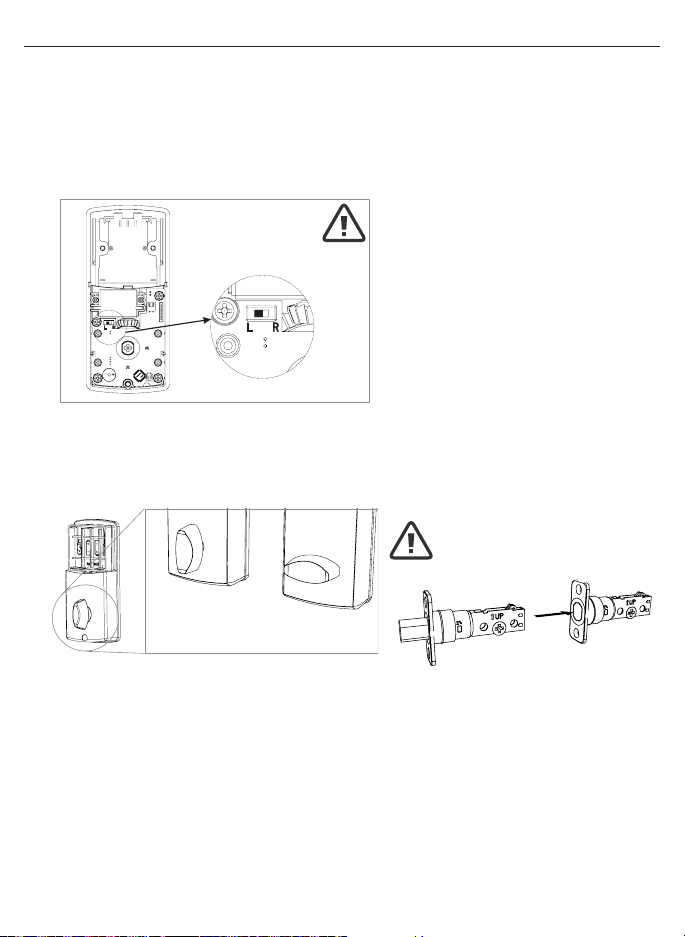
1. SET THE ENTRY SWITCH FOR LEFT OR RIGHT HANDED DOOR
a.Gentlymovetheswitchto“L”forLeftHandedDoor(Figure1a).
b.GentlymovetheSwitchto“R”forRightHandedDoor(Figure1b).
2. SET THE INTERIOR KNOB POSITION FOR LEFT OR RIGHT HAND HINGED DOORS
a.TheInteriorKnobgoesintheVerticalpositionforRightHandedDoors(Figure2a).
b.TheInteriorKnobgoesintheHorizontalpositionforLeftHandedDoors(Figure2b).
3. ATTACH THE CONTROL WIRE TO THE INTERIOR ASSEMBLY
a.UsecaretoattachtheControlWiremaleplugtotheInteriorAssemblyfemale
socket connector.
b.DonotforcetheControlWiremaleplugintotheInteriorAssemblyfemale
socket connector.
c.TheControlWiremaleplughastwoalignmenttabsonthesmoothsideofthe
plugwhichisthetopoftheplug.
d.TheControlWiremaleplugisinsertedwiththesmoothsideupintotheInterior
Assemblyfemalesocketconnector.
NOTE: Make sure
deadbolt Latch
is retracted
Left Handed Door
(Horizontal)
Entry Switch
(Left or Right)
Right Handed Door
(Vertical)
UnpacktheInteriorAssembly.Removethebatterycoverbyslidingthecoverupward.Locatethe
screwsholdingtheMountingPlatetotheInteriorAssembly.Removethescrewstoreleasethe
MountingPlatefromtheInteriorAssembly.
Figure1a-1b
Figure2a-2b
Loading ...
Loading ...
Loading ...