Loading ...
Loading ...
Loading ...
7
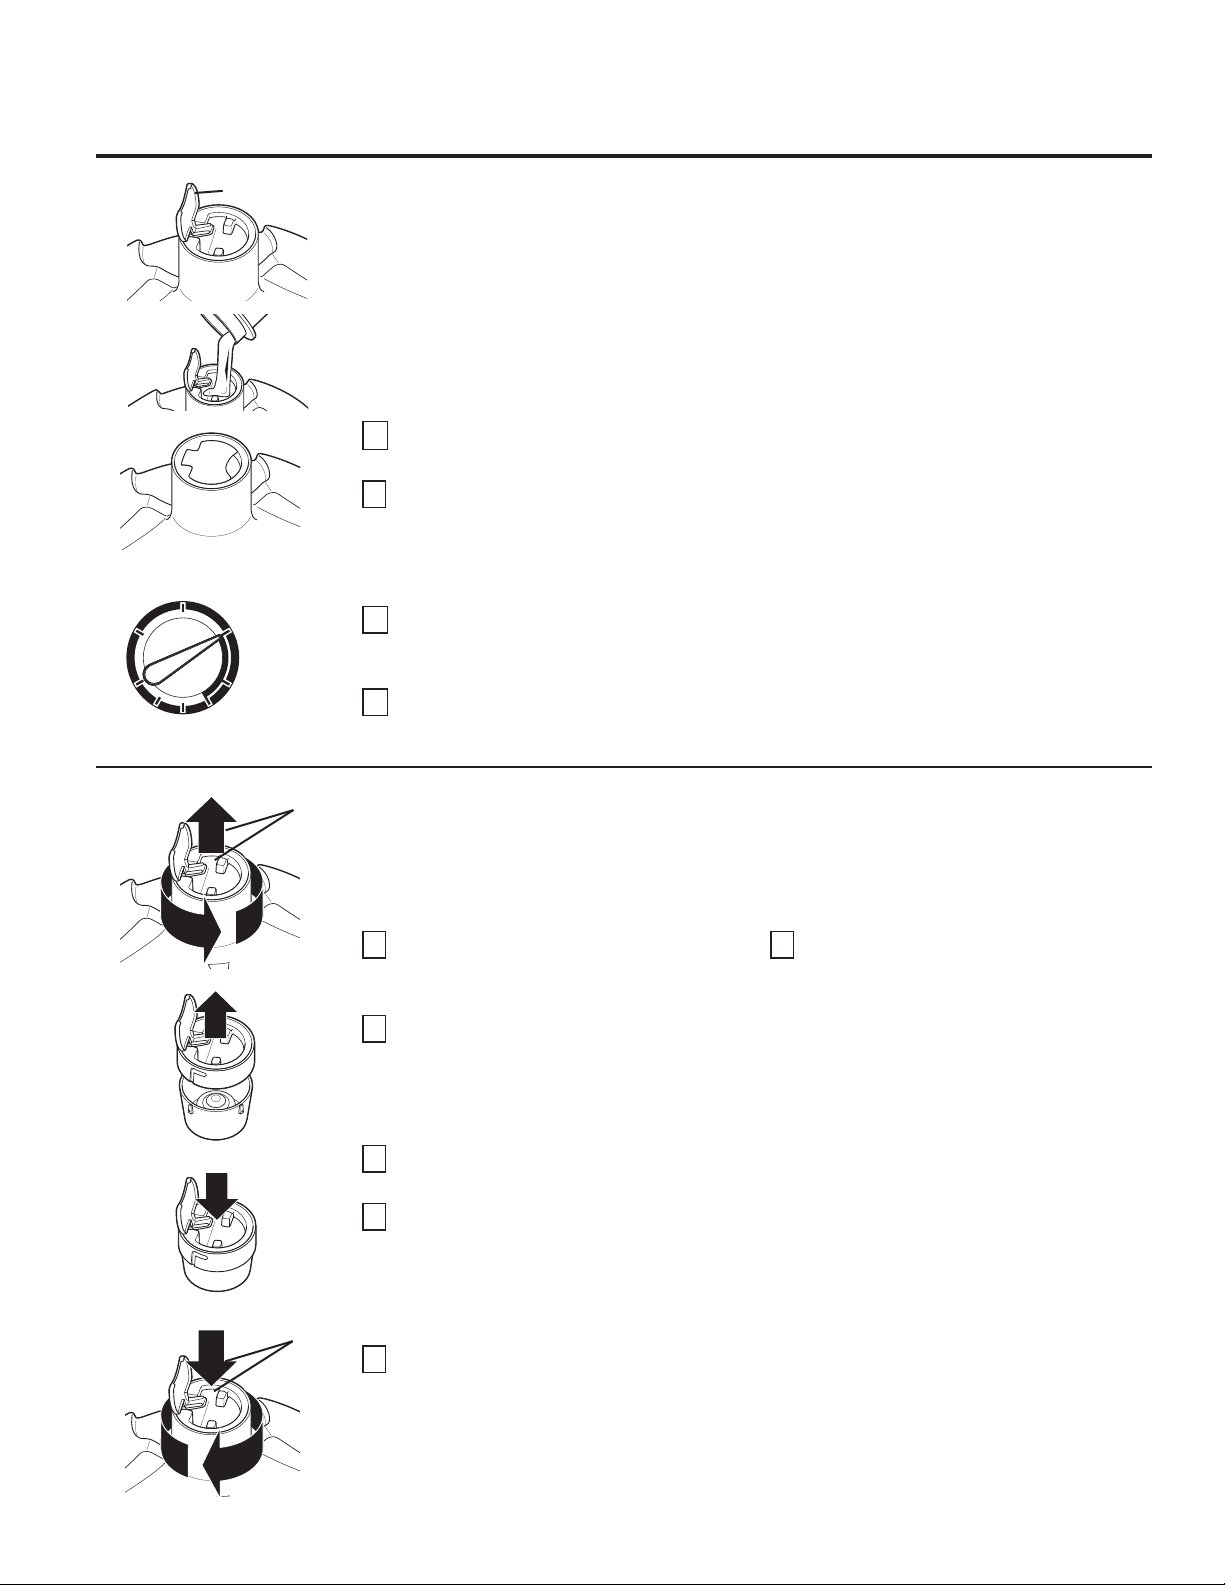
Cleaning the Fabric Softener Dispenser (on some models)
The Fabric Softener Dispenser is self cleaning. This dispenser should not require regular cleaning
like standard fabric softener dispensers. Wipe down exterior surfaces of the dispenser as needed. If
cleaning of the internal dispenser components is needed, follow these steps after the wash cycle is
complete:
The Fabric Softener Dispenser (on some models)
1
Lift the tab on the fabric softener dispenser
top.
2
Measure out fabric softener into the cap
and pour the softener into the dispenser
top. The fabric softener will drain into the
receiving cup inside the dispenser. Use only
“Ultra” or concentrated fabric softeners.
3
Push down on the tab to close the
dispenser top. Make sure the tab is pushed
down fully and snaps shut.
4
Select FABRIC SOFTENER from OPTIONS
on the control panel.
NOTE: Overfilling the dispenser will cause fabric
softener to drain out of the holes in the side of
the infusor when filling. Do not overfill.
NOTE: Do not use fabric softener dispensing
balls with this washer. They do not work
correctly in high efficiency washers.
AUTO SOAK
+ EXTENDED SPIN
AUTO
SOAK
FABRIC SOFTENER
+ 2nd RINSE & EXTENDED SPIN
Set when adding
FABRIC SOFTENER
FABRIC SOFTENER
+ 2nd RINSE
OFF
EXT.
SPIN
2nd
RINSE
The fabric softener dispenser automatically releases liquid fabric softener at the proper time during
the cycle.
Do not stop the washer or raise the lid during the first spin. This will cause the dispenser to
empty too soon.
Never pour fabric softener directly on clothes. This may cause stains on your clothing.
To use, follow these steps:
1
Lift the dispenser top tab and turn the top
counterclockwise using the 2 turning tabs
shown. Lift the dispenser out of the infusor.
2
Clean out any buildup from inside the
infusor with a soft cloth or toothbrush.
Ensure the three rectangular holes in the
bottom that allow the fabric softener to
drain are not blocked.
3
Gently pull the cap away from the
dispenser cup to separate.
4
Wipe surfaces with a soft cloth or soak the
parts in a solution of 1 gallon warm water,
1/4 cup liquid detergent and 1 cup bleach.
Ensure the small hole in the top surface of
the cap and its associated tube are not
obstructed.
5
Reassemble the dispenser cup and cap by
snapping them together.
6
Place the dispenser assembly into the
infusor. Turn the top clockwise using the 2
turning tabs shown. Push down on the tab
to close the dispenser top. Make sure the
tab is pushed down fully and snaps shut.
1
2
3
4
Tab
Turning
Tabs
Turning
Tabs
1
3
5
6
OPTIONS
GEAppliances.com
Loading ...
Loading ...
Loading ...