Loading ...
Loading ...
Loading ...
14
English
L
R
AUDIO IN
VIDEO OUT
HDMI OUT
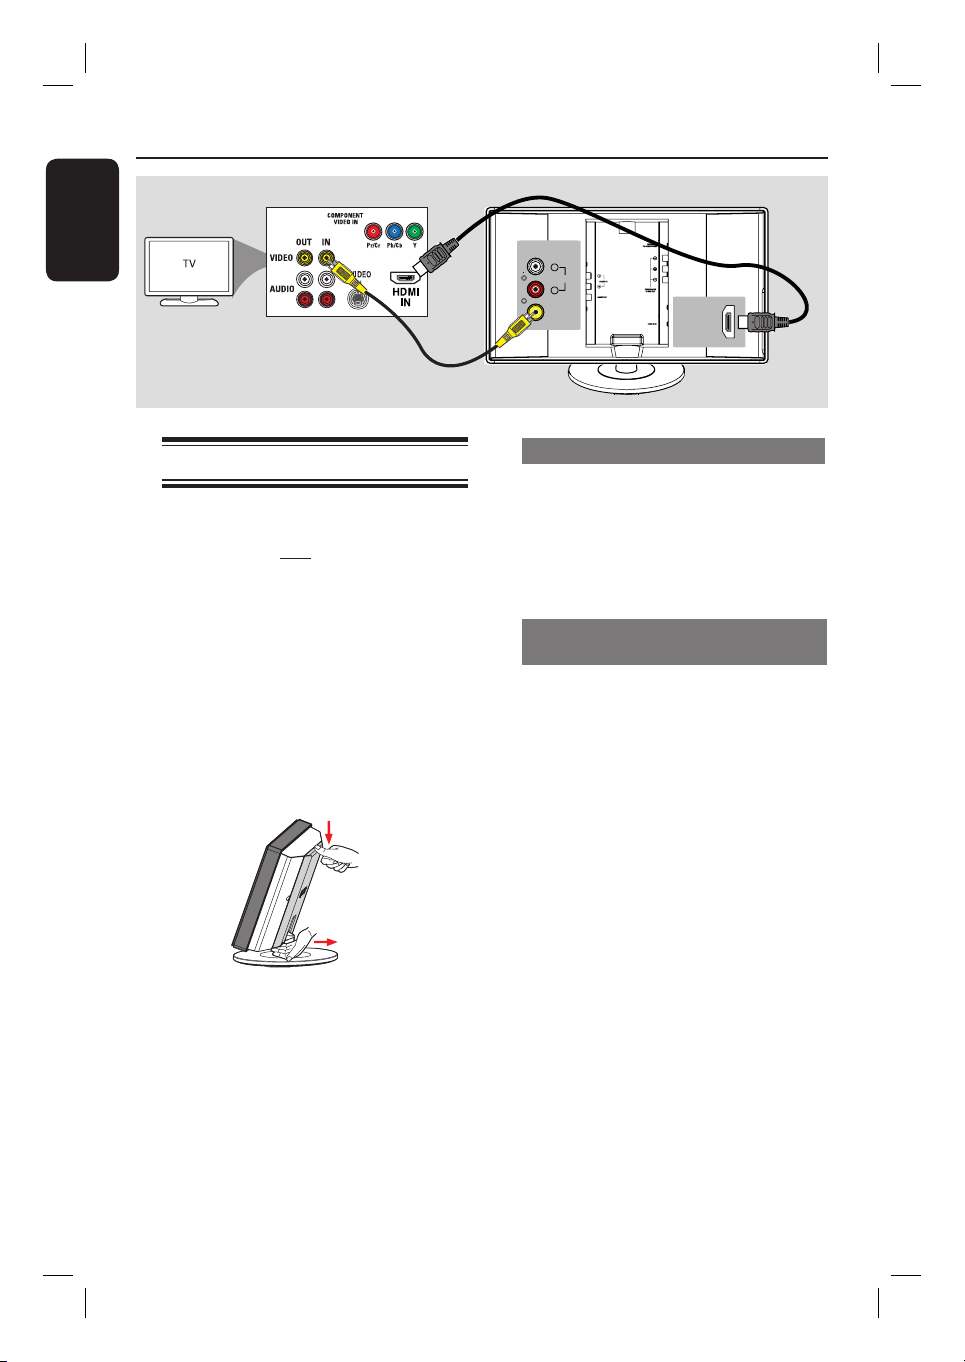
Step 2: Connecting to TV
This connection enables you to view the
video playback from this unit. You only
need to choose one of the options
below to make the video connection.
– For a standard TV, follow option 1.
– For a HDMI TV, follow option 2.
– For a progressive scan TV, follow
option 3.
– For TV with only a single antenna
input jack, follow option 4.
Before you start ...
Remove the main unit’s back cover by
pushing down from the cover top.
Helpful Hints:
– It is important to connect this unit directly
to the TV in order to enjoy optimum video
quality.
– To hear the TV channels through this unit,
connect the AUDIO IN jacks to the
corresponding AUDIO output jacks on the TV
using an audio cable. Press TV on the remote
control when watching the TV programs.
Basic Connections (continued)
Option 1
Option 2
Option 1: Using the Video jack
Connect a composite video cable
(supplied) from the VIDEO OUT jack
on the main unit to the video input jack
(or labeled as A/V In, Video In,
Composite or Baseband) on the TV.
Option 2: Connecting to a HDMI-
compatible TV
HDMI (High De nition Multimedia
Interface) is a digital interface that allows
pure digital video transmission without
the loss of image quality.
A Connect a HDMI cable from the HDMI
OUT on the main unit to the HDMI IN
on a HDMI-compatible device (e.g.,
HDMI TV, HDCP compliant DVI TV).
B When you have completed the necessary
connections, installation and set-up, see
‘Audio Setup Page and Video Setup Page’
for optimum HDMI audio and video
settings.
Helpful Hint:
– The HDMI is backward compatible with
some DVI devices using an appropriate
adaptor plug.
Loading ...
Loading ...
Loading ...