Loading ...
Loading ...
Loading ...
1.
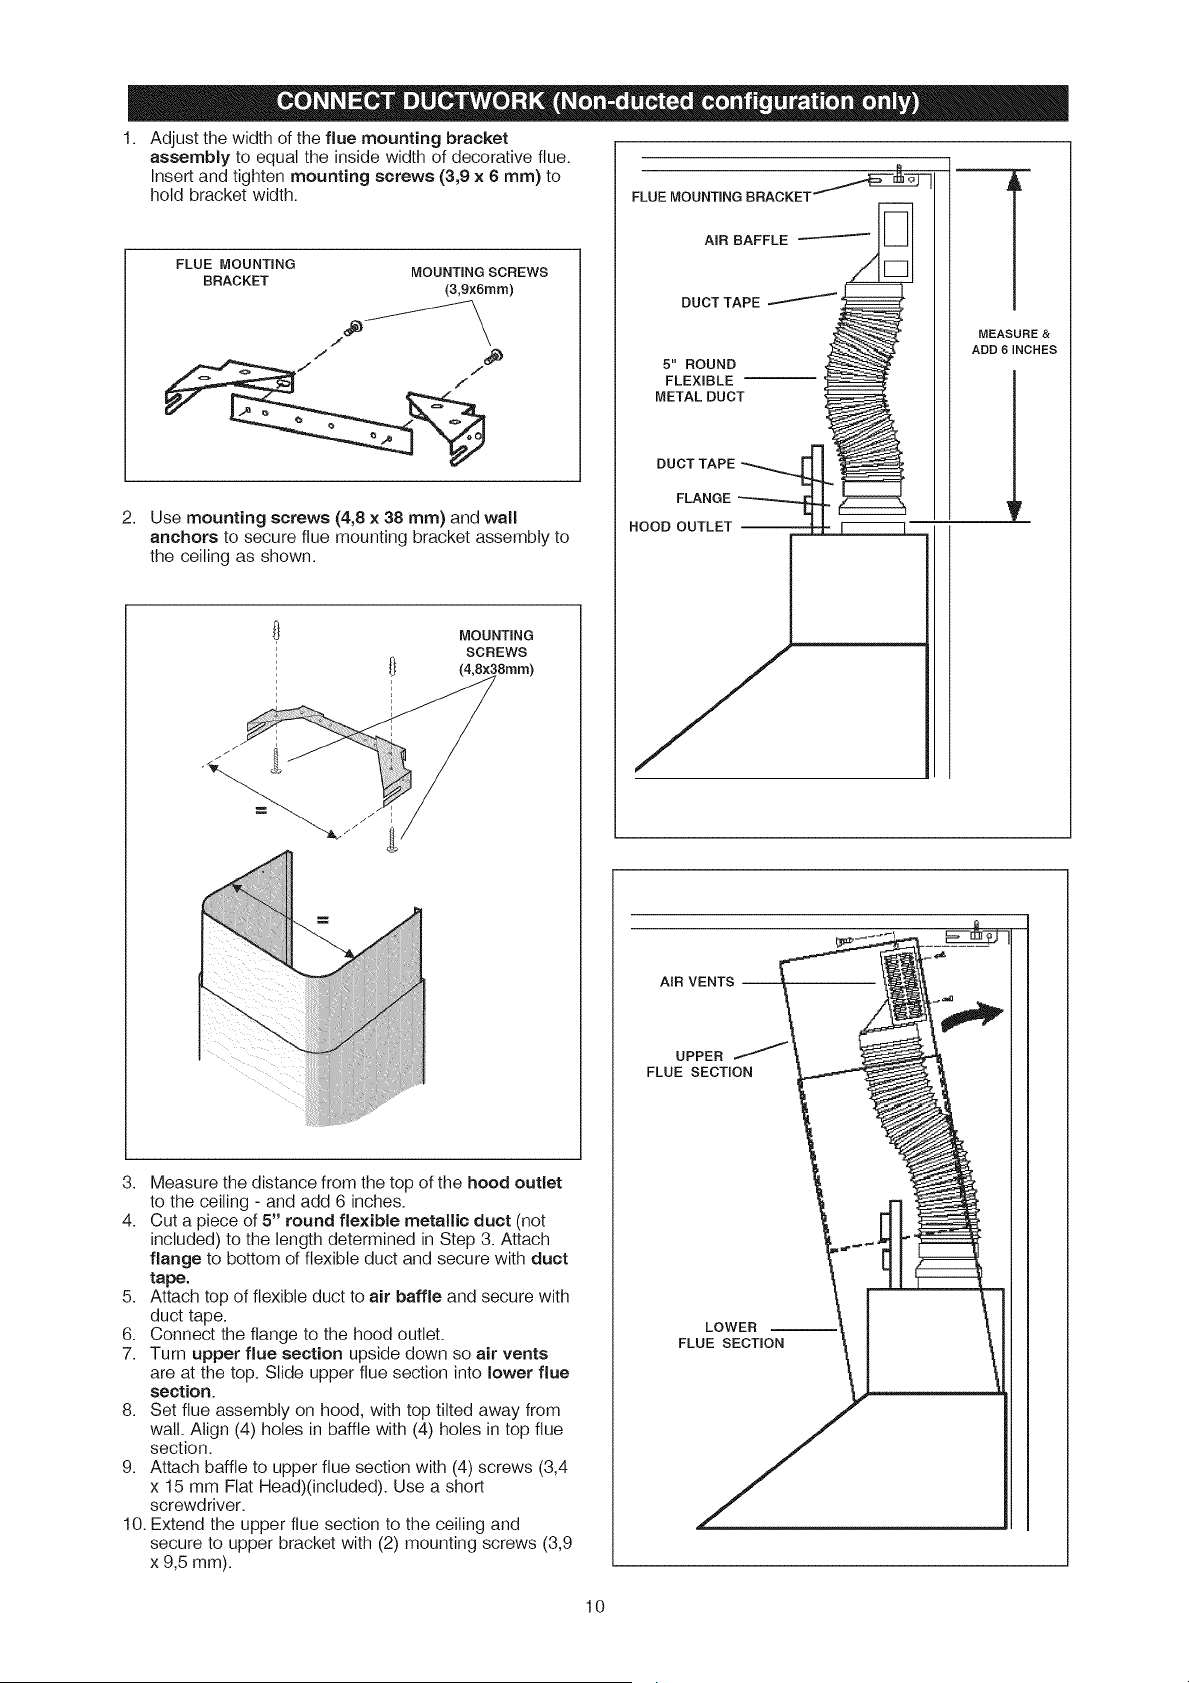
Adjust the width of the flue mounting bracket
assembly to equal the inside width of decorative flue.
Insert and tighten mounting screws (3,9 x 6 ram) to
hold bracket width.
FLUE MOUNTmNG
BRACKET
MOUNTING SCREWS
(3,gx6mm)
2. Use mounting screws (4,8 x 38 ram) and wall
anchors to secure flue mounting bracket assembly to
the ceiling as shown.
MOUNTING
SCREWS
3. Measure the distance from the top of the hood outlet
to the ceiling - and add 6 inches.
4. Cut a piece of 5" round flexible metallic duct (not
included) to the length determined in Step 3. Attach
flange to bottom of flexible duct and secure with duct
tape.
5. Attach top of flexible duct to air baffle and secure with
duct tape.
6. Connect the flange to the hood outlet.
7. Turn upper flue section upside down so air vents
are at the top. Slide upper flue section into lower flue
section.
8. Set flue assembly on hood, with top tilted away from
walt. Align (4) holes in baffle with (4) holes in top flue
section.
9. Attach baffle to upper flue section with (4) screws (3,4
x 15 mm Flat Head)(included). Use a short
screwdriver.
10. Extend the upper flue section to the ceiling and
secure to upper bracket with (2) mounting screws (3,9
x 9,5 mm).
FLUE MOUNTmNG BRACKET _
AIR BAFFLE /
DUCT TAPE
5" ROUND
FLEXIBLE
METAL DUCT
DUCT TAPE
FLANGE
HOOD OUTLET _
MEASURE &
ADD 6 INCHES
FLUE SECTmON
LOWER --
FLUE SECTION
10
Loading ...
Loading ...
Loading ...