Loading ...
Loading ...
Loading ...
4
PARTS
1. Lid
2. Water reservoir
3. Permanent filter
4. Filter holder
5. Water gauge
6. Hot plate
7. On/off switch
8. Carafe
9. Brewing status gauge
10. Scoop
BEFORE USING FOR THE FIRST TIME
Fill the reservoir to the max mark, and run the appliance without coffee.
FILLING
1. Remove the carafe from the rest.
2. Open the lid.
3. Fill with at least 2 cups of water, but not above the max mark (FIG A).
4. Fit the permanent filter into the filter holder (FIG B).
5. Put 1 scoop of filter-ground coffee into the filter for each cup.
6. Close the lid.
7. Replace the carafe on the rest.
MAKING COFFEE
CAUTION: DO NOT open the lid during brewing as there is the potential risk of scalding.
1. Put the plug into the power socket.
2. Move the switch to I. The light will come on.
3. Shortly afterwards, coffee will start to drip into the carafe.
4. When it’s done, the hotplate will keep the carafe warm. After 40 minutes, the hotplate and
appliance will shut down.
5. Move the switch to O.
6. Unplug, and let the appliance and carafe cool down fully before cleaning, or for about 10
minutes before refilling.
7. For the best flavour, drink the coffee within 40 minutes of brewing.
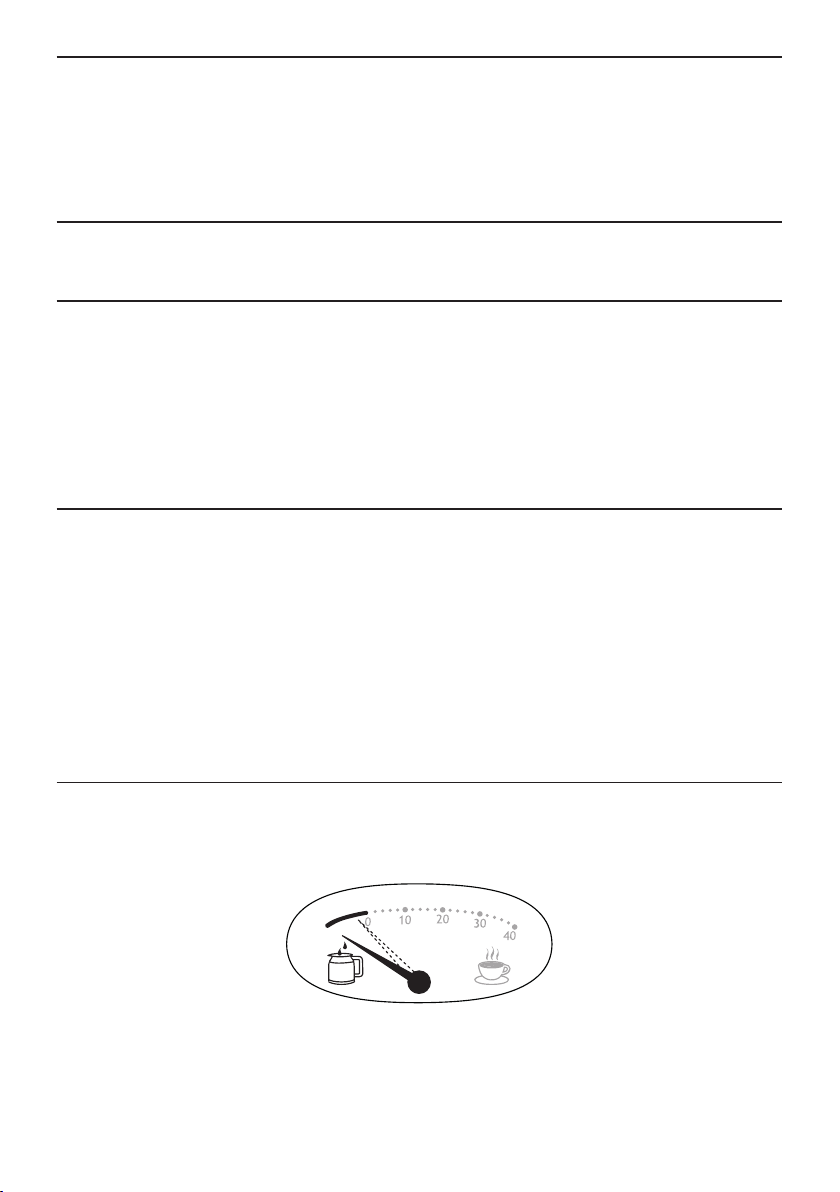
BREWING STATUS GAUGE
The gauge shows the status of your coffee machine.
• The pointer will first show the brewing stage as your coffee is being made. The pointer will
move slowly clockwise within the first (long) segment during brewing.
• Once brewing has finished, the pointer will move to the 0 marking. It will then show, in
minutes, how long the coffee has been kept warm by the hot plate (0 to 40 mins). After
about 40 minutes, chemical changes will affect the taste of the coffee.
Loading ...
Loading ...
Loading ...