Owner’s Manual
GE Answer Center
®
800.626.2000
TEMP
RECALL
Part No. 164D3333P189 Pub. No. 49-8962 7-99 JR
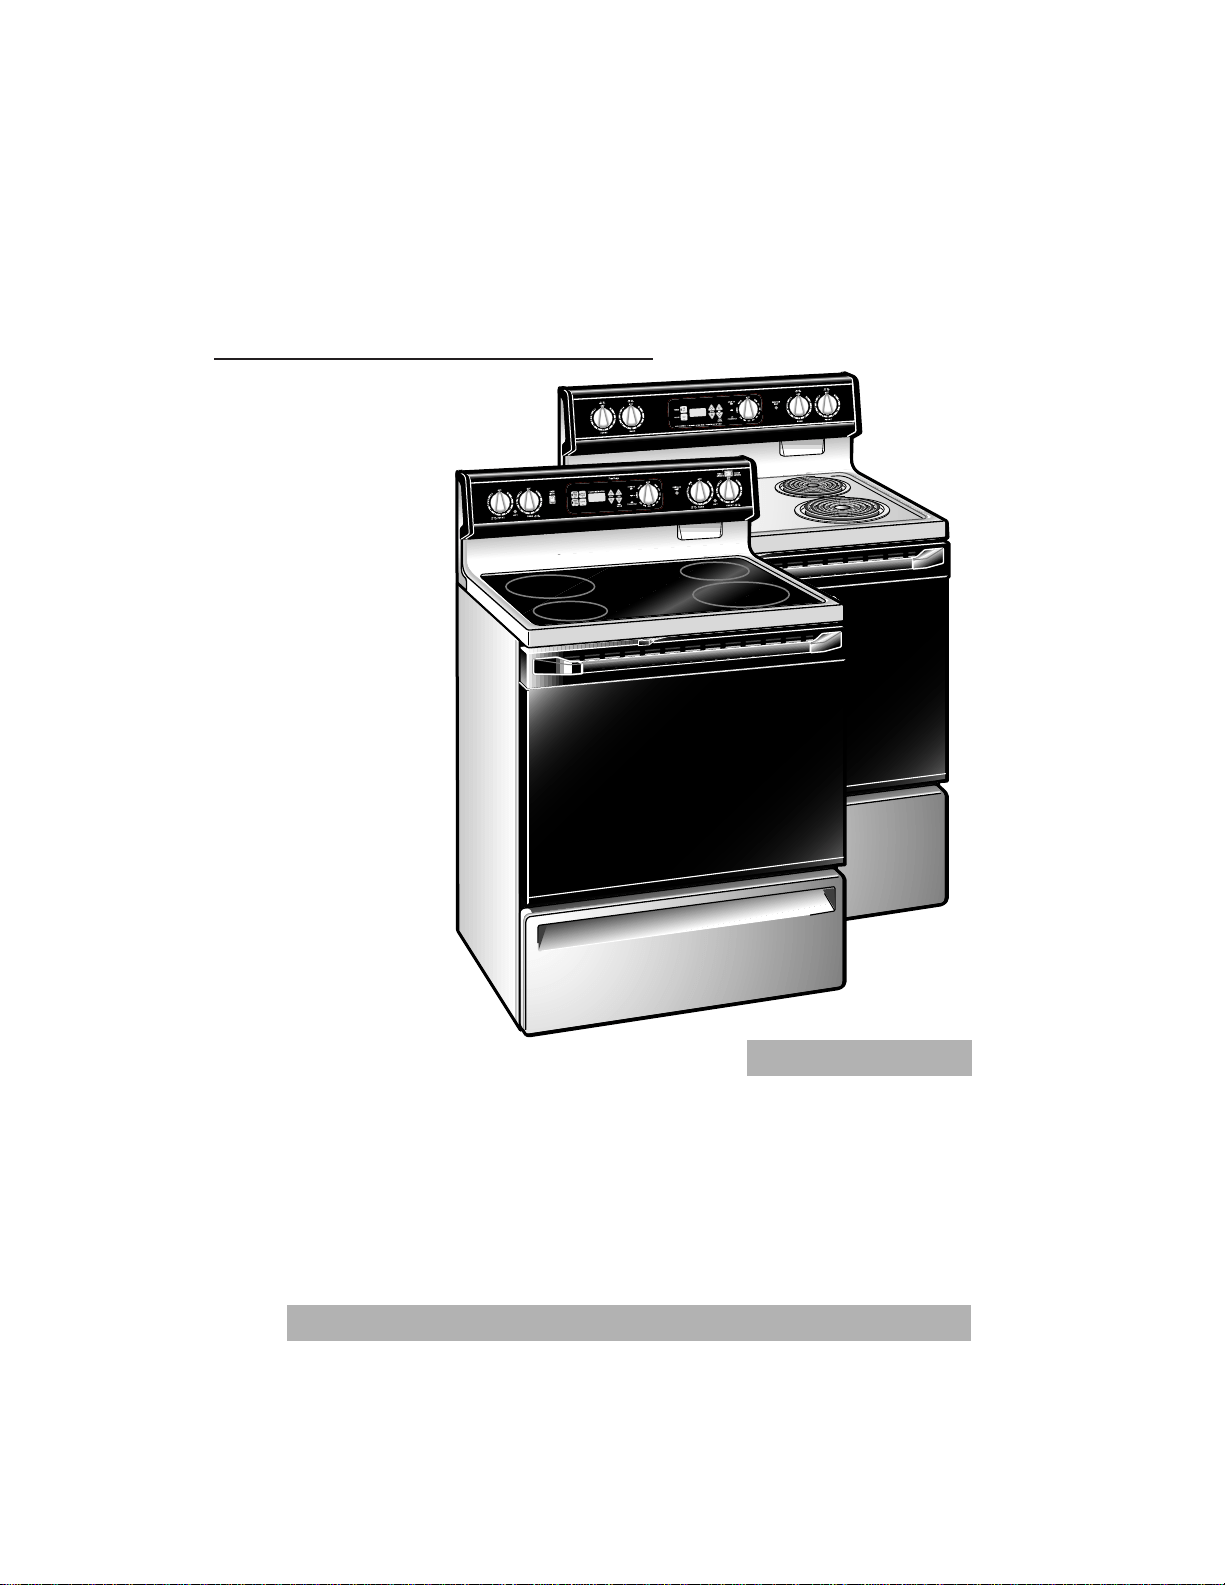
Coil Top and
Radiant Top Models
Electric Ranges
Range
Congratulations!
You Are Now Part of Our Family.
Welcome to our family.
We’re proud of our quality
products and we are
committed to providing
dependable service. You’ll
see it in this easy-to-use
Owner’s Manual and you’ll
hear it in the friendly voices
of our customer service
department.
Best of all, you’ll experience
these values each time you
use your range. That’s
important, because your
new range will be part of
your family for many years.
And we hope you will be
part of ours for a long time
to come.
We thank you for buying
our product. We appreciate
your purchase and hope you
will continue to rely on us
whenever you need quality
appliances for your home.
2
Important!
Staple sales slip or cancelled
check here.
Proof of the original purchase date
is needed to obtain service under
the warranty.
Write the model and serial
numbers here.
#
#
You can find them on a label behind
the range door or behind the storage
drawer.
AService Partnership.
Ask owners of any of our appliances
and they will tell you we stand behind
our products with unmatched quality
service. However, did you know that
most questions result from simple
problems that you can easily fix
yourself in just a few minutes? This
Owner’s Manual can tell you how.
Loading page 3...
Loading page 4...
Loading page 5...
Loading page 6...
Loading page 7...
Loading page 8...
Loading page 9...
■Never leave the surface
units unattended at
high heat settings.
Boilovers cause
smoking and greasy
spillovers that may
catch on fire.
■Use little fat for
effective shallow or
deep fat frying. Filling
the pan too full of fat
can cause spillovers
when food is added.
■If a combination of oils
or fats will be used in
frying, stir together
before heating, or as
fats melt slowly.
■Always heat fat slowly,
and watch as it heats.
■ Only certain types of
glass, glass ⁄ceramic,
earthenware or other
glazed containers are
suitable for cooktop
service; others may
break because of the
sudden change in
temperature.
■ To minimize the
possibility of burns,
ignition of flammable
materials and spillage,
the handle of a
container should be
turned toward the
center of the range
without extending over
nearby surface units.
■ Always turn the surface
units off before
removing cookware.
■When flaming foods
under the hood, turn
the fan on.
■Use a deep fat
thermometer whenever
possible to prevent
overheating fat beyond
the smoking point.
■Keep an eye on foods
being fried at high or
medium high heat
settings.
■Foods for frying should
be as dry as possible.
Frost on frozen foods
or moisture on fresh
foods can cause hot fat
to bubble up and over
the sides of the pan.
Use proper pan size—select cookware having flat bottoms
large enough to cover the surface unit heating element.
The use of undersized cookware will expose a portion of
the surface unit to direct contact and may result in ignition
of clothing. Proper relationship of cookware to surface unit
will also improve efficiency.
WARNING!
SURFACE UNITS–ALL MODELS
IMPORTANT SAFETY INFORMATION.
READ ALL INSTRUCTIONS BEFORE USING.
10
Operating Instructions
Installation Instructions
Safety InformationTroubleshooting TipsCustomer Service
Loading page 11...
■ Clean the cooktop
with caution. If a wet
sponge is used to wipe
spills on a hot cooktop,
be careful to avoid
steam burns.
■ To avoid the possibility
of a burn or electric
shock, always be certain
that the controls for all
surface units are at the
OFF
position and all
coils are cool before
attempting to lift or
remove a unit.
■ Do not immerse or
soak the removable
surface units. Do
not put them in a
dishwasher.
■ Be sure the drip pans
and the vent duct are
not covered and are in
place. Their absence
during cooking could
damage range parts
and wiring.
■ Do not use aluminum
foil to line the drip
pans or anywhere in
the oven except as
described in this
manual. Misuse could
result in a shock, fire
hazard or damage to
the range.
WARNING!
COIL SURFACE UNITS
(on some models)
IMPORTANT SAFETY INFORMATION.
READ ALL INSTRUCTIONS BEFORE USING.
12
Operating Instructions
Installation Instructions
Safety InformationTroubleshooting TipsCustomer Service
Read and follow this Safety
Information carefully.
SAVE THESE INSTRUCTIONS
Loading page 13...
Using the radiant surface units
(on some models)
14
Operating Instructions
Installation Instructions
Safety Information
Troubleshooting TipsCustomer Service
Do not slide cookware across the cooktop
because it can scratch the glass—the glass is
scratch resistant, not scratch proof.
,,
,,,,,
,,,,,,,,,
,,,,,,,,,,,
,,,,,,,,,,
,,,,,,,
,,,,
DRAGGING
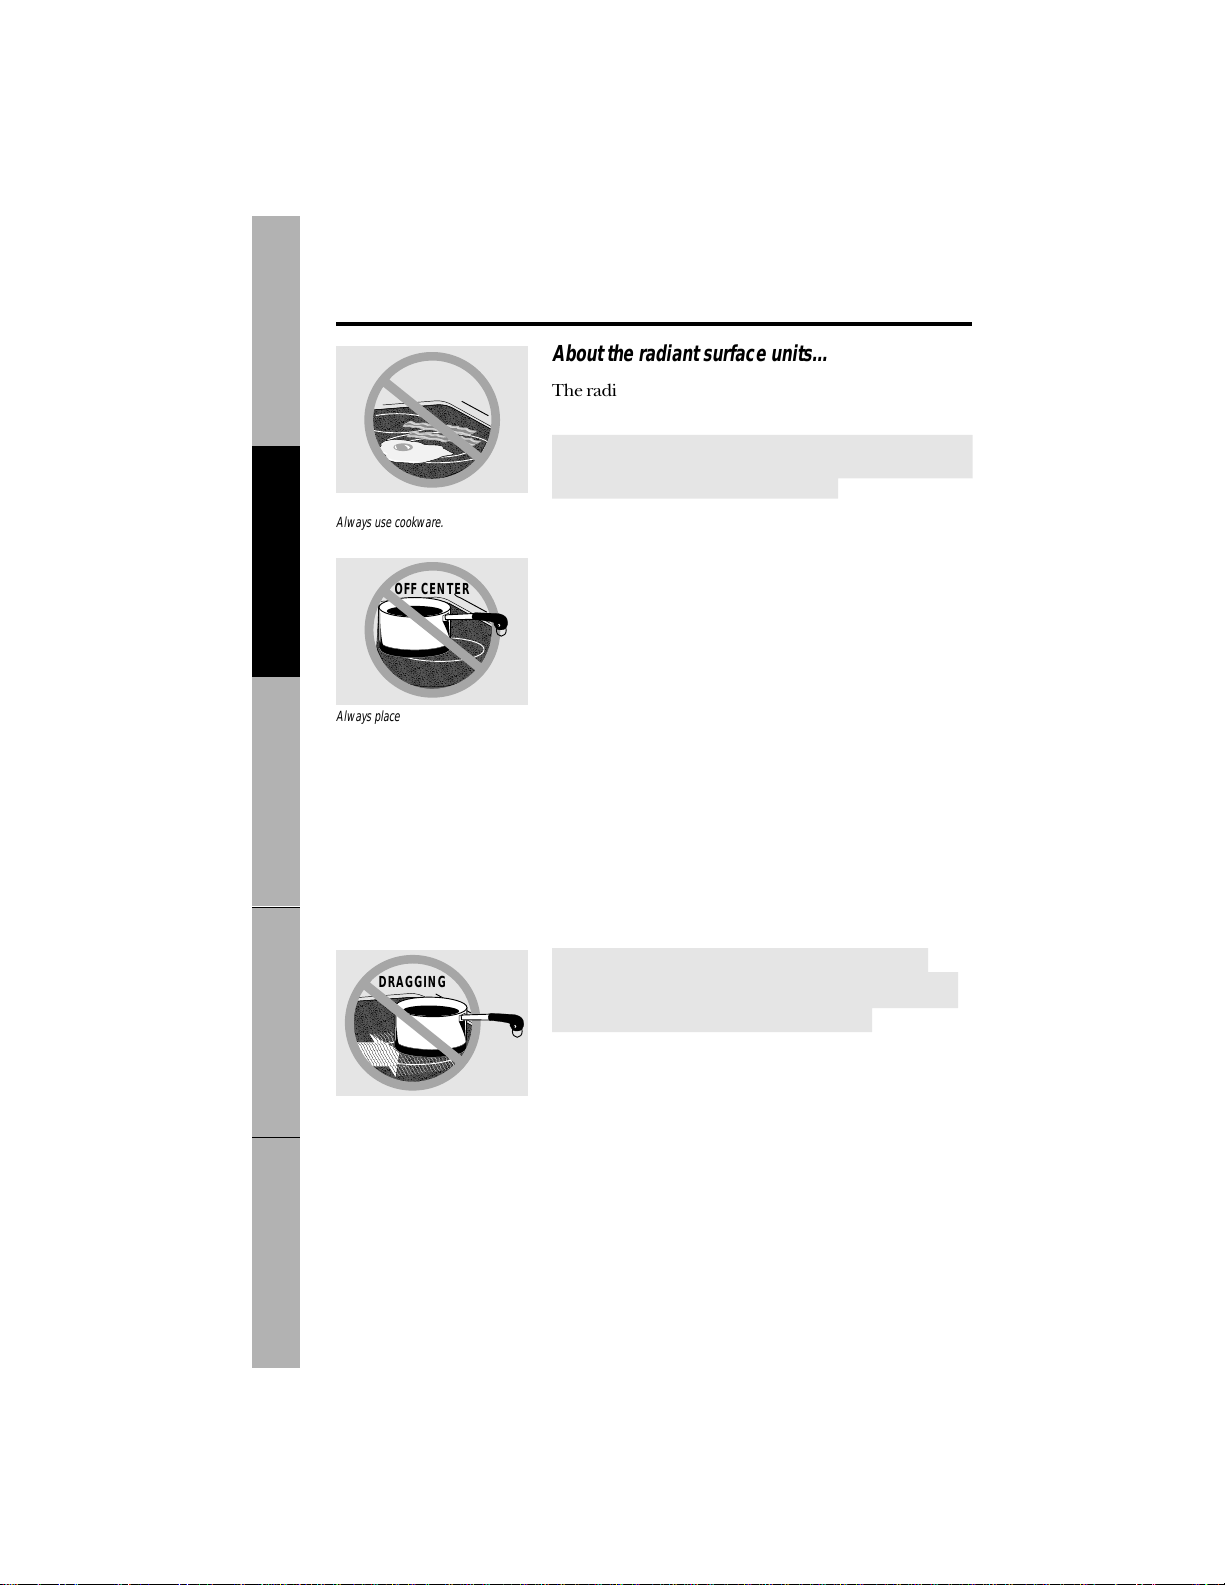
About the radiant surface units…
The radiant cooktop features heating units beneath a
smooth glass surface.
NOTE: A slight odor is normal when a new cooktop is used for the
first time. It is caused by the heating of new parts and insulating
materials and will disappear in a short time.
The surface unit will cycle on and off to maintain your
selected control setting.
It is safe to place hot cookware from the oven or surface
on the glass surface when the surface is cool.
Even after the surface units are turned off, the glass
cooktop retains enough heat to continue cooking. To
avoid over-cooking, remove pans from the surface units
when the food is cooked. Avoid placing anything on the
surface unit until it has cooled completely.
■
Water stains (mineral deposits) are removable using the cleaning
cream or full strength white vinegar.
■
Use of window cleaner may leave an iridescent film on the
cooktop. The cleaning cream will remove this discoloration.
■
Don’t store heavy items above the cooktop. If they drop onto the
cooktop, they can cause damage.
■
Do not use the surface as a cutting board.
,,,,
,,,,,,,,
,,,,,,,,,,,
,,,,,,,,,,
,,,,,,,
,,,
SURFACE
COOKING
Never cook directly on the glass.
Always use cookware.
,
,,,,,,
,,,,,,,,,
,,,,,,,,,,
,,,,,,,,,
,,,,,,,
,,,
OFF CENTER
Always place the pan in the center of
the surface unit you are cooking on.

Troubleshooting TipsInstallation Instructions
Customer Service
Operating InstructionsSafety Information
Selecting types of cookware
for radiant glass cooktop models.
The following information will help you choose cookware which
will give good performance on glass cooktops.
Stainless Steel:
recommended
Aluminum:
heavy weight recommended
Good conductivity. Aluminum residues sometimes
appear as scratches on the cooktop, but can be removed
if cleaned immediately. Because of its low melting point,
thin weight aluminum should not be used.
Copper Bottom:
recommended
Copper may leave residues which can appear as
scratches. The residues can be removed, as long as the
cooktop is cleaned immediately. However, do not let
these pots boil dry. Overheated metal can bond to glass
cooktops. An overheated copper bottom pot will leave a
residue that will permanently stain the cooktop if not
removed immediately.
Porcelain Enamel Covered Cast Iron:
recommended
As long as the cookware is covered completely with
porcelain enamel, this cookware is recommended.
Caution is recommended for cast iron cookware that is
not completely covered with smooth porcelain enamel,
as it may scratch the glass ceramic cooktop.
Glass-ceramic:
usable, but not recommended
Poor performance. May scratch the surface.
Stoneware:
usable, but not recommended
Poor performance. May scratch the surface.
Check pans for flat bottoms by
using a straight edge.
Pans with rounded, curved, ridged
or warped bottoms are not
recommended.
15
Selecting types of cookware
for coil cooktop models.
Operating Instructions
Installation Instructions
Safety InformationTroubleshooting TipsCustomer Service
The following information will help you choose cookware which
will give good performance on coil cooktops.
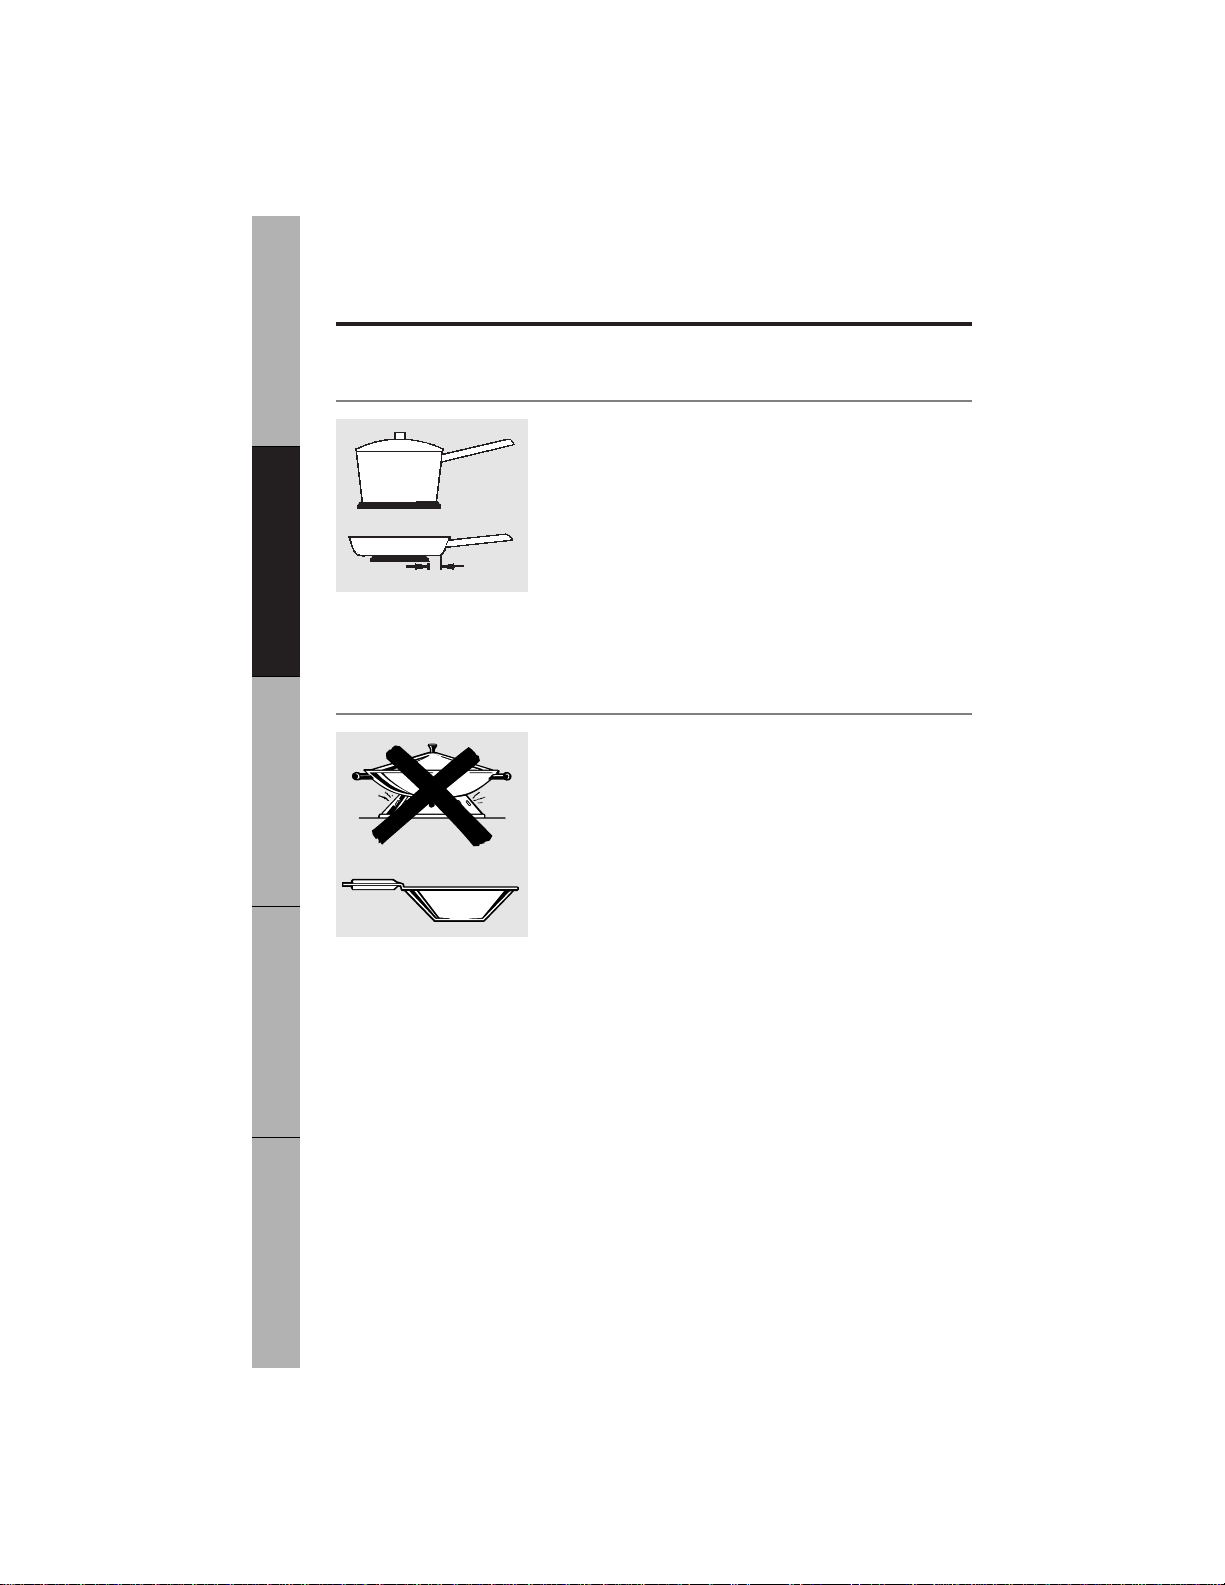
Wok Cooking
We recommend that you use only a flat-bottomed wok. They are
available at your local retail store.
Do not use woks that have support rings. Use of these
types of woks, with or without the ring in place, can be
dangerous. Placing the ring over the surface unit will
cause a build-up of heat that will damage the porcelain
cooktop. Do not try to use such woks without the ring.
You could be seriously burned if the wok tipped over.
Use only flat-bottomed woks.
Surface Cookware Tips
Use medium- or heavy-weight cookware. Aluminum
cookware conducts heat faster than other metals. Cast-
iron and coated cast-iron cookware are slow to absorb
heat, but generally cook evenly at low to medium heat
settings. Steel pans may cook unevenly if not combined
with other metals.
For best cooking results, pans should be flat on the
bottom. Match the size of the saucepan to the size of the
surface unit. The pan should not extend over the edge
of the surface unit more than 1 inch.
Not over 1 inch
1″
16
Using the oven controls.
Troubleshooting TipsInstallation Instructions Customer ServiceOperating InstructionsSafety Information
Throughout this manual, features and appearance may vary from your model.
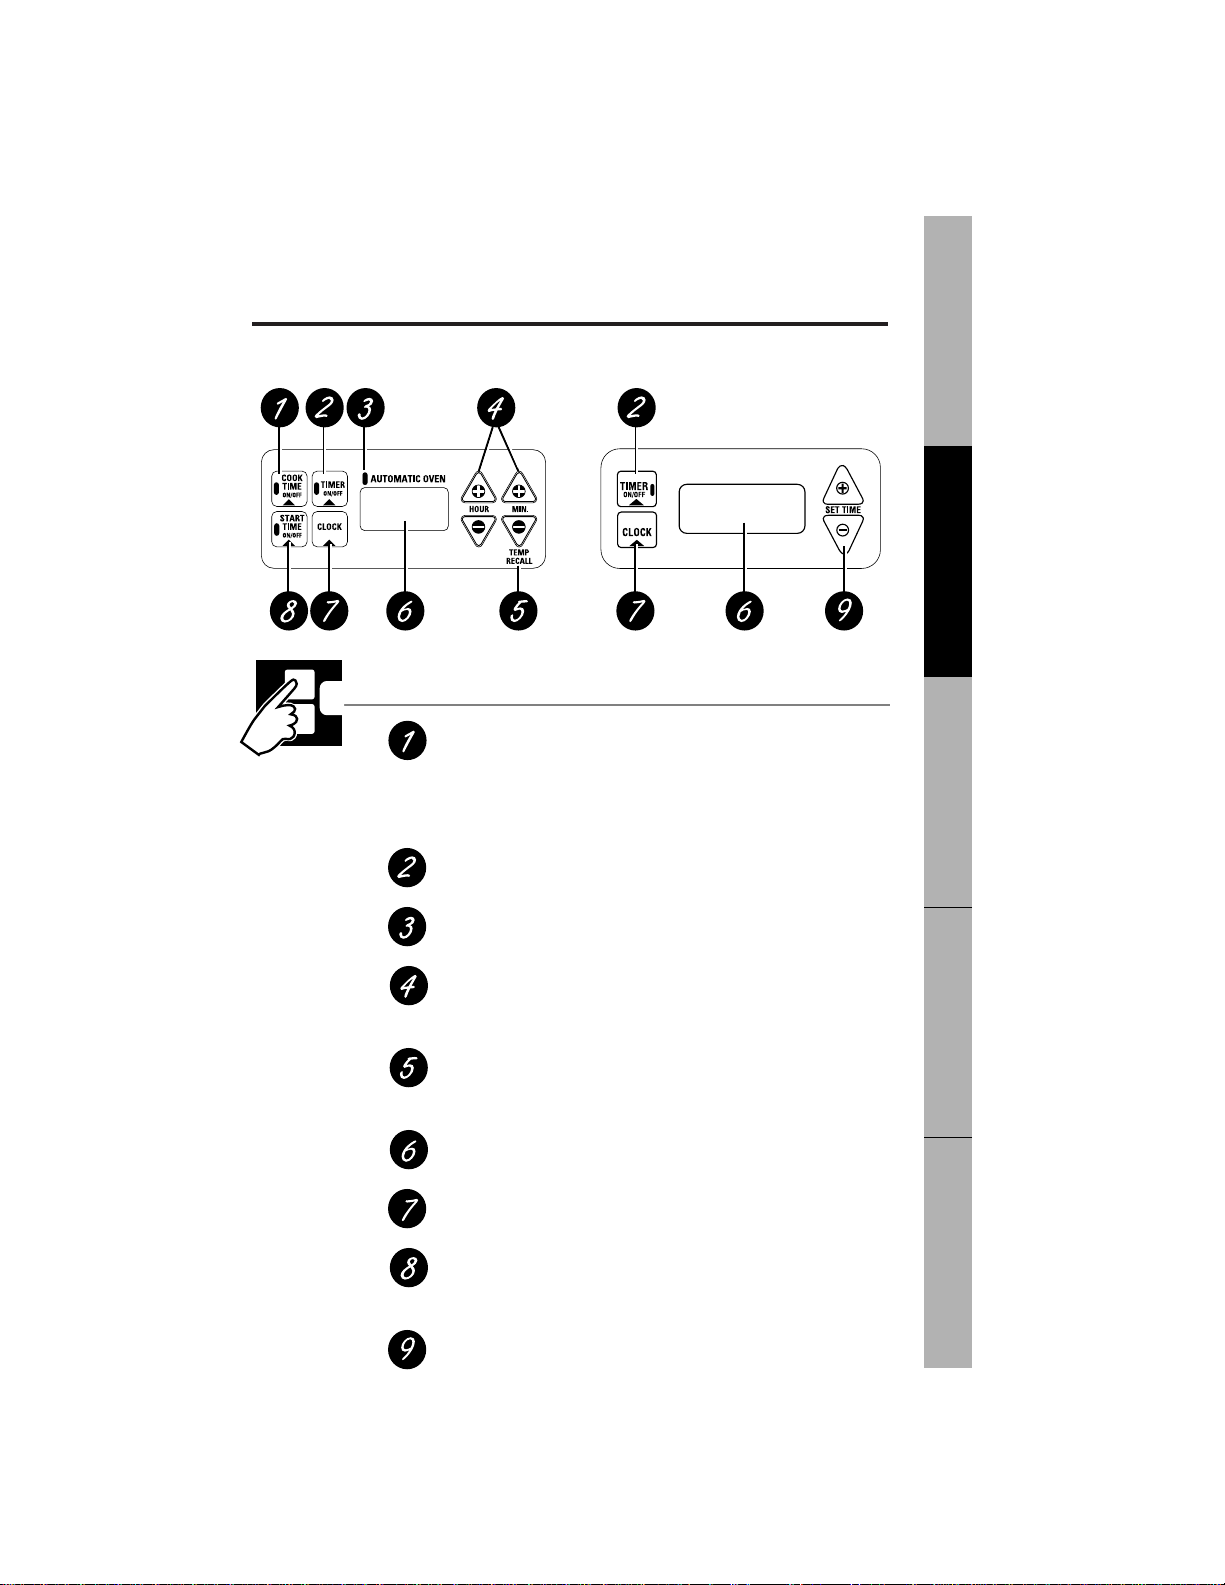
Clock and Timer Features
COOK TIME ON/OFF Pad
Press this pad and then press the
HOUR
and
MIN.
pads to set
the amount of time you want your food to cook. Turn the
Oven Temperature knob to the desired temperature.
The oven will shut off when the Cook Time has run out.
TIMER ON/OFF Pad
Press this pad to select the timer feature.
AUTOMATIC OVEN Light
This lights anytime the oven has been programmed.
HOUR and MIN. Pads
These pads allow you to set times up to 11 hours
and 59 minutes.
TEMP RECALL
Press the
–
pad above
TEMP RECALL
to display the selected
oven temperature.
Display
Shows the time of day and the time set for the timer.
CLOCK Pad
Press this pad before setting the clock.
START TIME ON/OFF Pad
Press this pad and the
HOUR
and
MIN.
pads to delay the
starting of your oven up to 11 hours and 59 minutes.
SET TIME +/- Pads
These pads allow you to set the clock and timer.
17
Loading page 18...
Using the oven.
Troubleshooting TipsInstallation Instructions Customer ServiceOperating InstructionsSafety Information
19
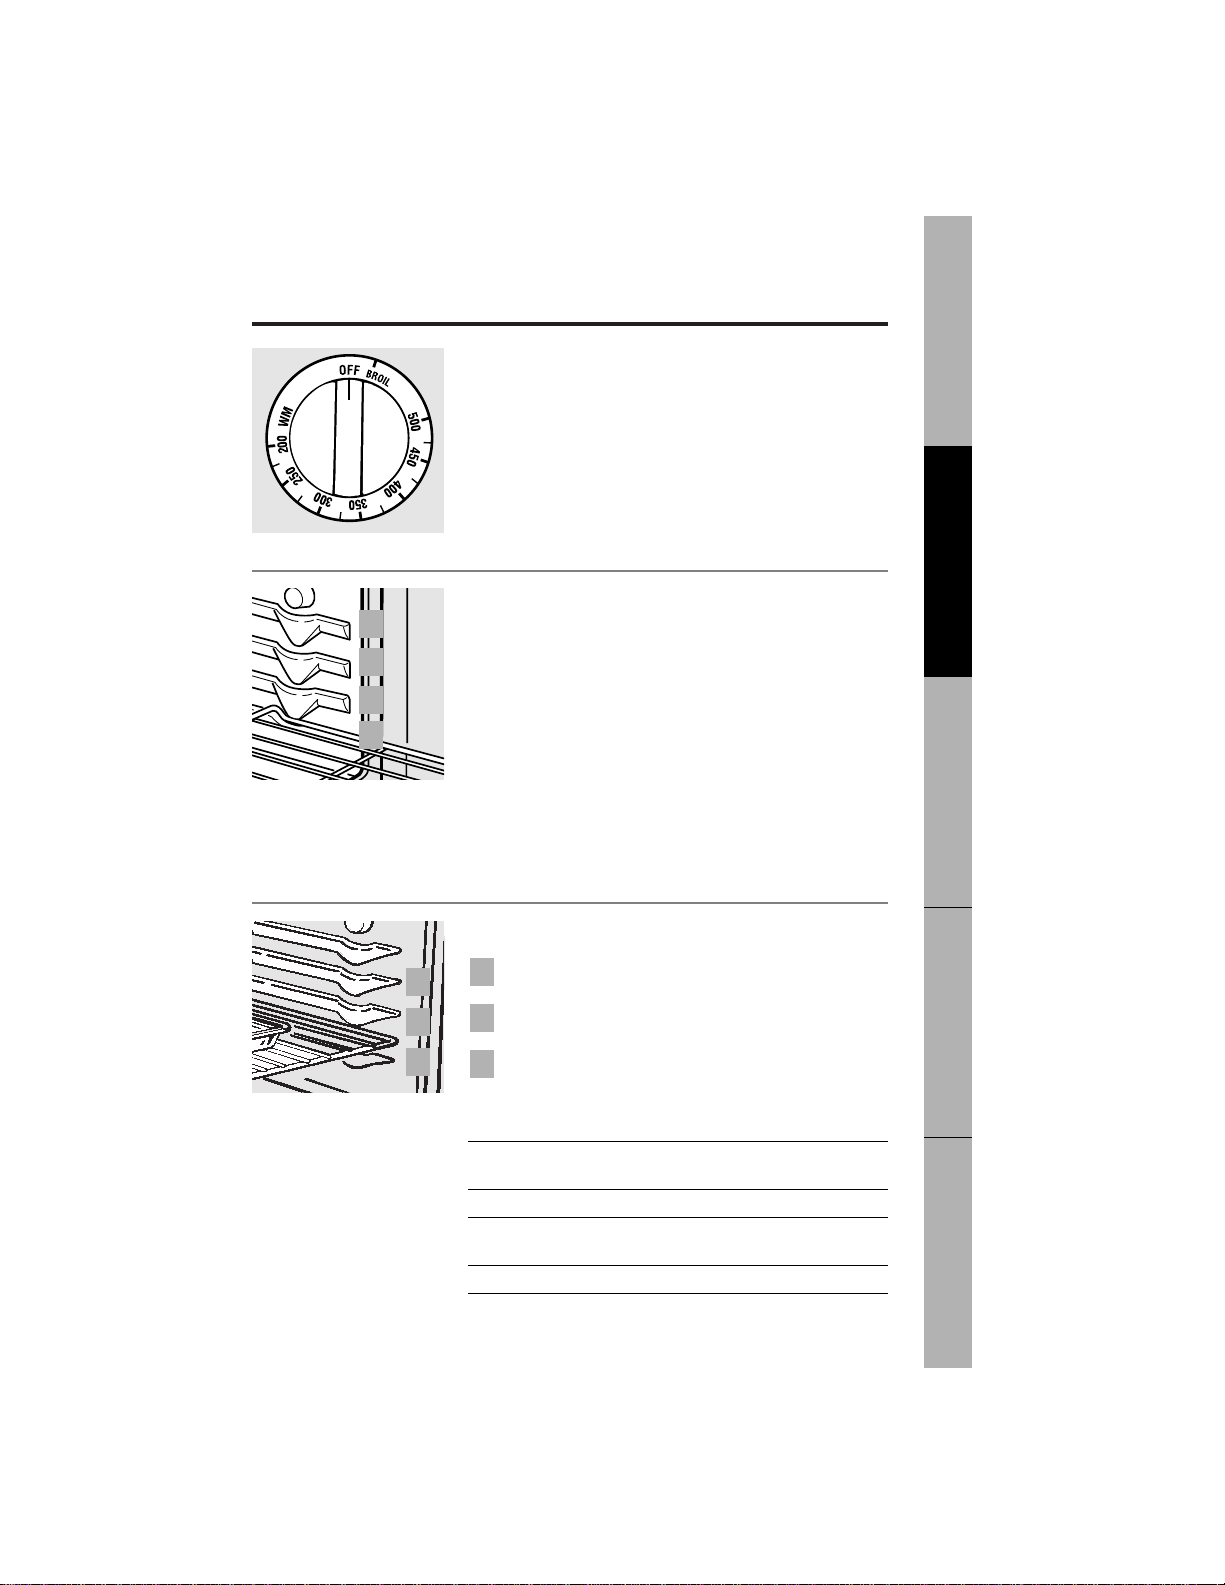
Before you begin…
To avoid possible burns, place the shelves in the desired position
before you turn the oven on.
The shelves have stop-locks, so that when placed
correctly on the supports, they will stop before coming
completely out, and will not tilt.
When placing and removing cookware, pull the shelf
out to the bump on the shelf support.
To remove a shelf,
pull it toward you, tilt the front end up
and pull it out.
To replace,
place the end of the shelf (stop-locks) on the
support, tilt up the front and push the shelf in.
The oven has 4 shelf positions.
A
B
C
D
How to Set the Oven for Baking or Roasting
Turn the Oven Temperature knob to the
temperature you desire.
Check food for doneness at minimum time on
recipe. Cook longer if necessary.
Turn the Oven Temperature knob to
OFF
when
cooking is complete.
3
2
1
A
B
C
Type of Food Shelf Position
Angel food cake and A
frozen pies (on cookie sheet)
Bundt or pound cakes B
Biscuits, muffins, brownies, cookies, B or C
cupcakes, layer cakes, pies
Casseroles B or C
Oven Temperature Knob
(on some models)
Turn this knob to the setting you want.
■The oven cycling light glows until the oven reaches
your selected temperature, then goes off and on with
the oven element(s) during cooking.
Using the oven.
20
Operating Instructions
Installation Instructions
Safety Information
Troubleshooting TipsCustomer Service
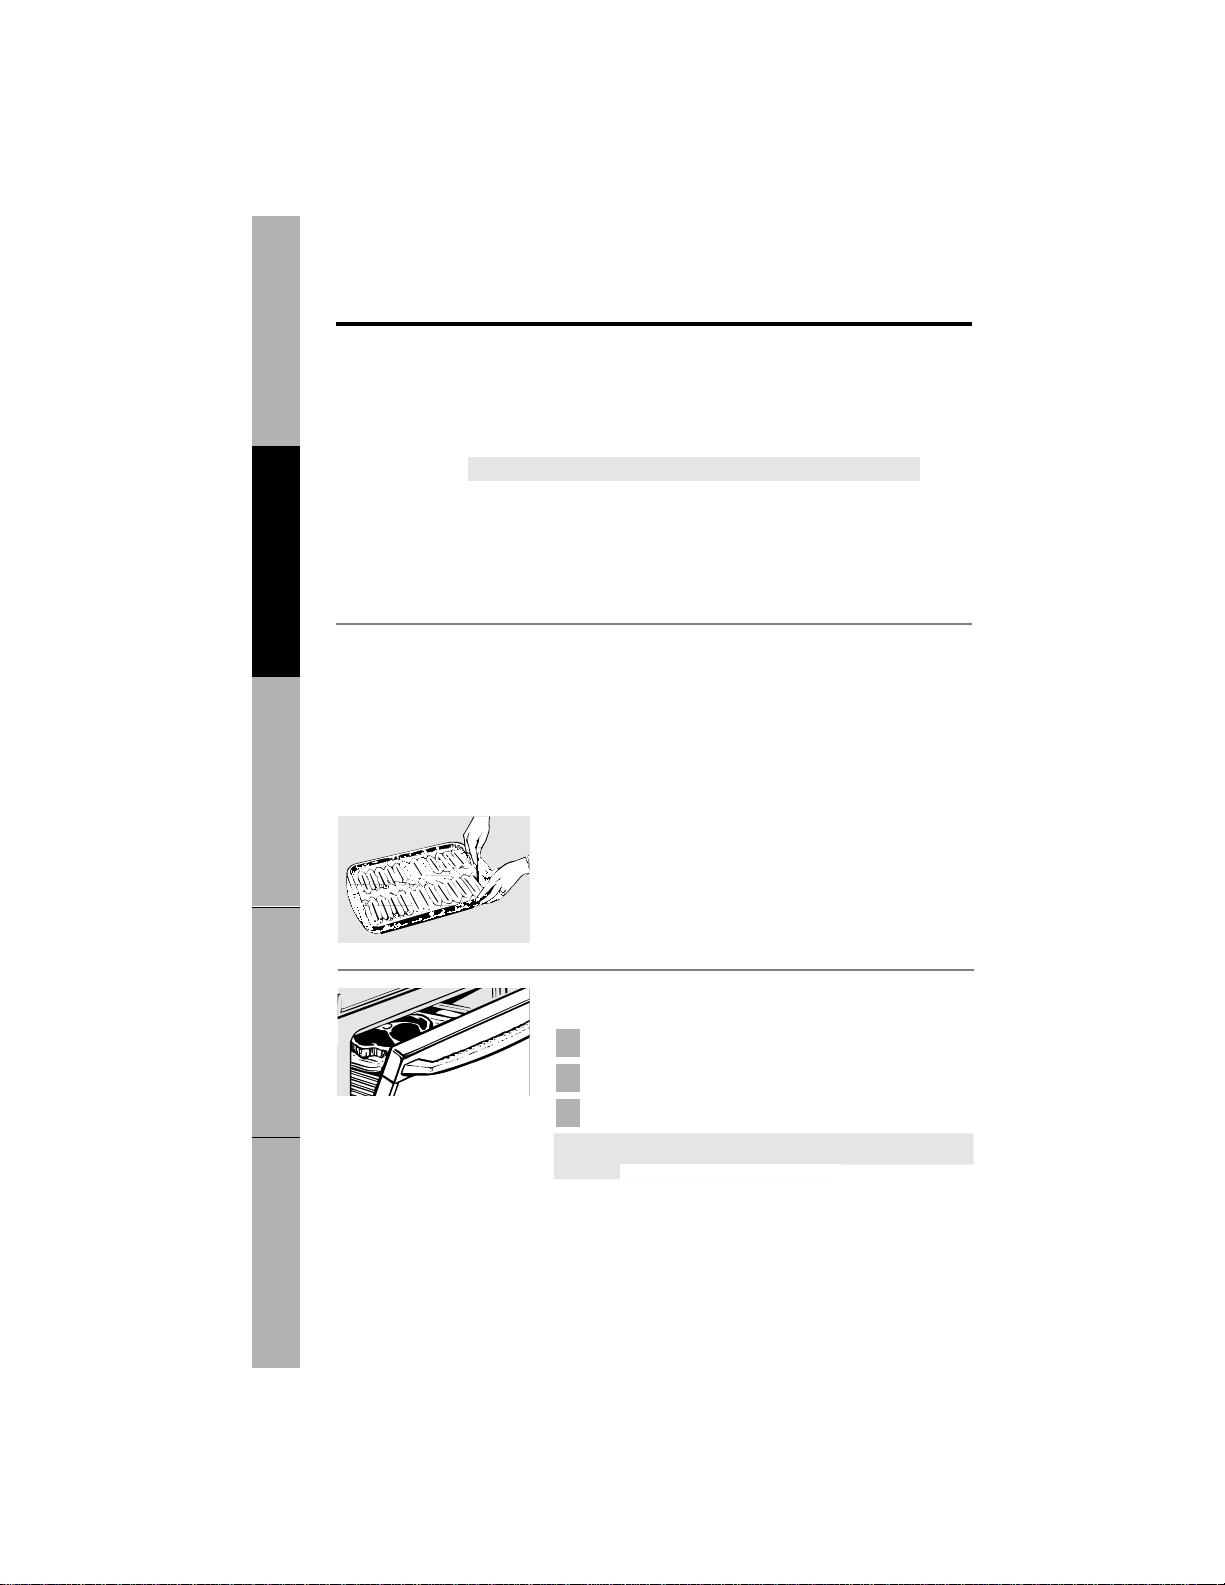
Aluminum Foil
Do not use aluminum foil to catch spillovers when using
the CircuWave fan. The foil will be sucked toward the
convection fan. Also, covering an entire shelf with
aluminum foil will disturb the heat circulation and
result in poor baking.
You can use aluminum foil to line the broiler pan and
broiler grid. However, you must mold the foil tightly to
the grid and cut slits in it just like the grid.
Leave the door open to the broil stop
position. The door stays open by itself,
yet the proper temperature is
maintained in the oven.
Preheat the oven if the recipe calls for it. To preheat, set the oven
at the correct temperature. Preheating is necessary for good results
when baking cakes, cookies, pastry and breads.
For ovens without a preheat indicator light or tone, preheat 10 minutes.
Baking results will be better if baking pans are centered in the oven
as much as possible. Pans should not touch each other or the walls
of the oven. If you need to use two shelves, stagger the pans so one
is not directly above the other, and leave approximately 1
1
⁄
2
″from
the front of the pan to the front of the shelf.
Preheating and Pan Placement
How to Set the Oven for Broiling
Place the food on the broiler grid in the broiler pan.
Follow suggested shelf positions in the
Broiling guide.
Turn the Oven Temperature knob to
BROIL.
NOTE: To reduce smoking, do not use the CircuWave fan during
broiling.
3
2
1

Broiling guide
21
Troubleshooting TipsInstallation Instructions
Customer Service
Operating InstructionsSafety Information
Quantity and/ Shelf First Side Second Side
Food or Thickness Position Time (min.) Time (min.) Comments
Bacon 1/2 lb. (about C 4
1
⁄
2
4
1
⁄
2
Arrange in single layer.
8 thin slices)
Ground Beef 1 lb. (4 patties) C 10 7 Space evenly.
Well Done 1/2 to 3/4″ Up to 8 patties take
thick about same time.
Beef Steaks
Rare 1″ thick C 6 5 Steaks less than 1″thick
Medium (1 to 1
1
⁄
2
lbs.) C 8 6 cook through before
Well Done C 12 11 browning. Pan frying is
recommended.
Rare 1
1
⁄
2
″ thick C 10 7–8 Slash fat.
Medium (2 to 2
1
⁄
2
lbs.) C 15 14–16
Well Done C 25 20–25
Chicken 1 whole A 35 10–15 Reduce time about 5 to 10
(2 to 2
1
⁄
2
lbs.), minutes per side for cut-up
split lengthwise chicken. Brush each side
with melted butter. Broil
skin-side-down first.
Lobster Tails 2–4 B 13–16 Do not Cut through back of shell.
(6 to 8 oz. turn Spread open. Brush with
each) over. melted butter before
broiling and after half
of broiling time.
Fish 1-lb. fillets C 5 5 Handle and turn very carefully.
1/4 to 1/2″ Brush with lemon butter
thick before and during cooking,
if desired. Preheat broiler
to increase browning.
Ham Slices 1″ thick B 8 8 Increase time 5 to 10
(precooked) minutes per side for 1
1
⁄
2
″
thick or home cured ham.
Pork Chops 2 (1/2″ thick) C 10 10 Slash fat.
Well Done 2 (1″ thick), B 13 13
about 1 lb.
Lamb Chops
Medium 2 (1″ thick), C 10 9 Slash fat.
Well Done about 10 to 12 oz. C 12 10
Medium 2 (1
1
⁄
2
″ thick), C 14 12
Well Done about 1 lb. B 17 12–14
Using CircuWave
™
(on some models)
22
Operating Instructions
Installation Instructions
Safety Information
Troubleshooting TipsGECustomer Service
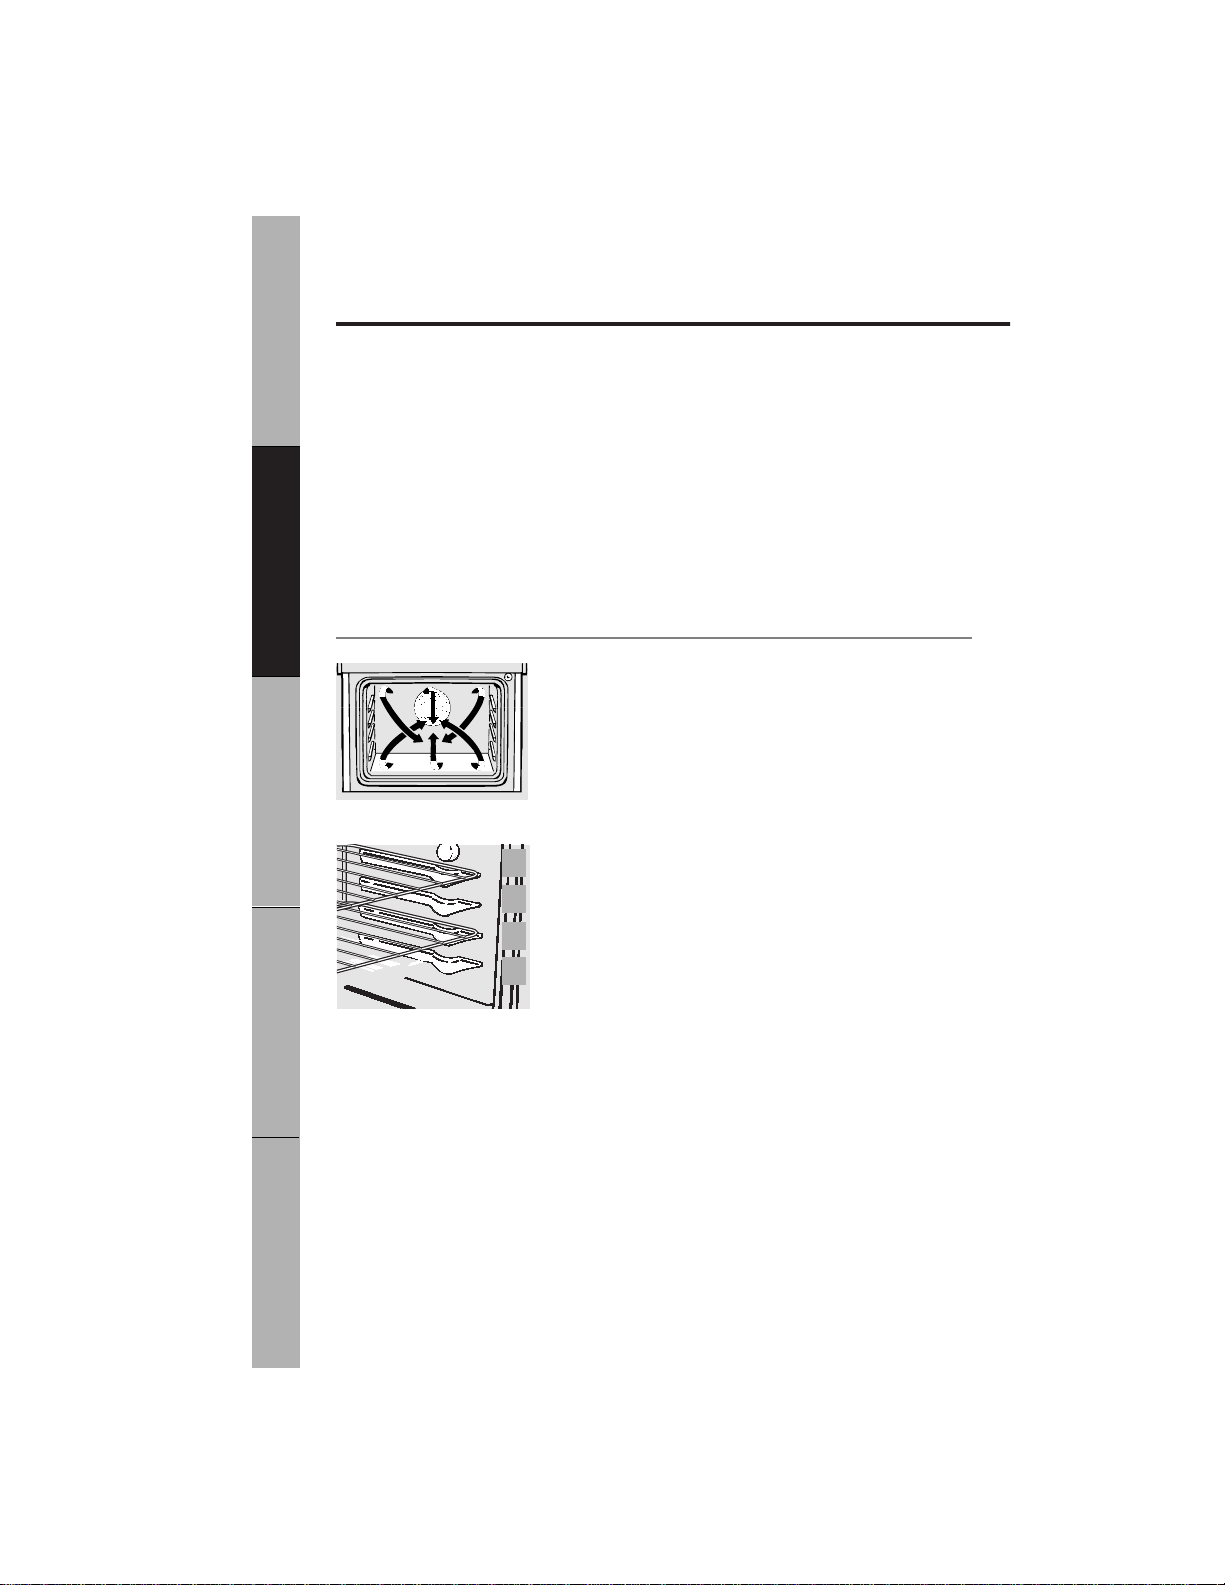
CircuWave Fan
In the CircuWave oven, a fan circulates the hot oven air
over and around the food.
This circulating hot air is evenly distributed throughout
the oven cavity.
The CircuWave fan will remain on when the oven door is opened.
To reduce smoking, avoid turning the fan on while
broiling.
For best baking results with two racks, place the racks in
B and D positions.
■ Saves time (up to 30%) when roasting meats and cooking
casseroles, whole meals and main dishes. Time savings will
depend on size, type and amount of food.
■ Seals in moisture while the outside of meats and poultry gets
crisp and brown.
■ By reducing cooking time, you will save energy and reduce heat
in the kitchen.
■ The greatest time savings and best results are seen with foods that
require more than 45 minutes cooking time.
Benefits of CircuWave
A
B
C
D
Loading page 23...
Loading page 24...
Loading page 25...
Loading page 26...
Loading page 27...
Loading page 28...
Loading page 29...
Loading page 30...
Loading page 31...
Loading page 32...
Loading page 33...
Loading page 34...
Loading page 35...
Loading page 36...
Loading page 37...
Loading page 38...
Loading page 39...
Loading page 40...
Loading page 41...
Loading page 42...
Loading page 43...
Loading page 44...
Loading page 45...
Loading page 46...
Loading page 47...
Loading page 48...
Loading page 49...
Loading page 50...
Loading page 51...
Loading page 52...
Loading page 53...
Loading page 54...
Loading page 55...
Loading page 56...