Loading ...
Loading ...
Loading ...
Before You Begin
Wall Oven
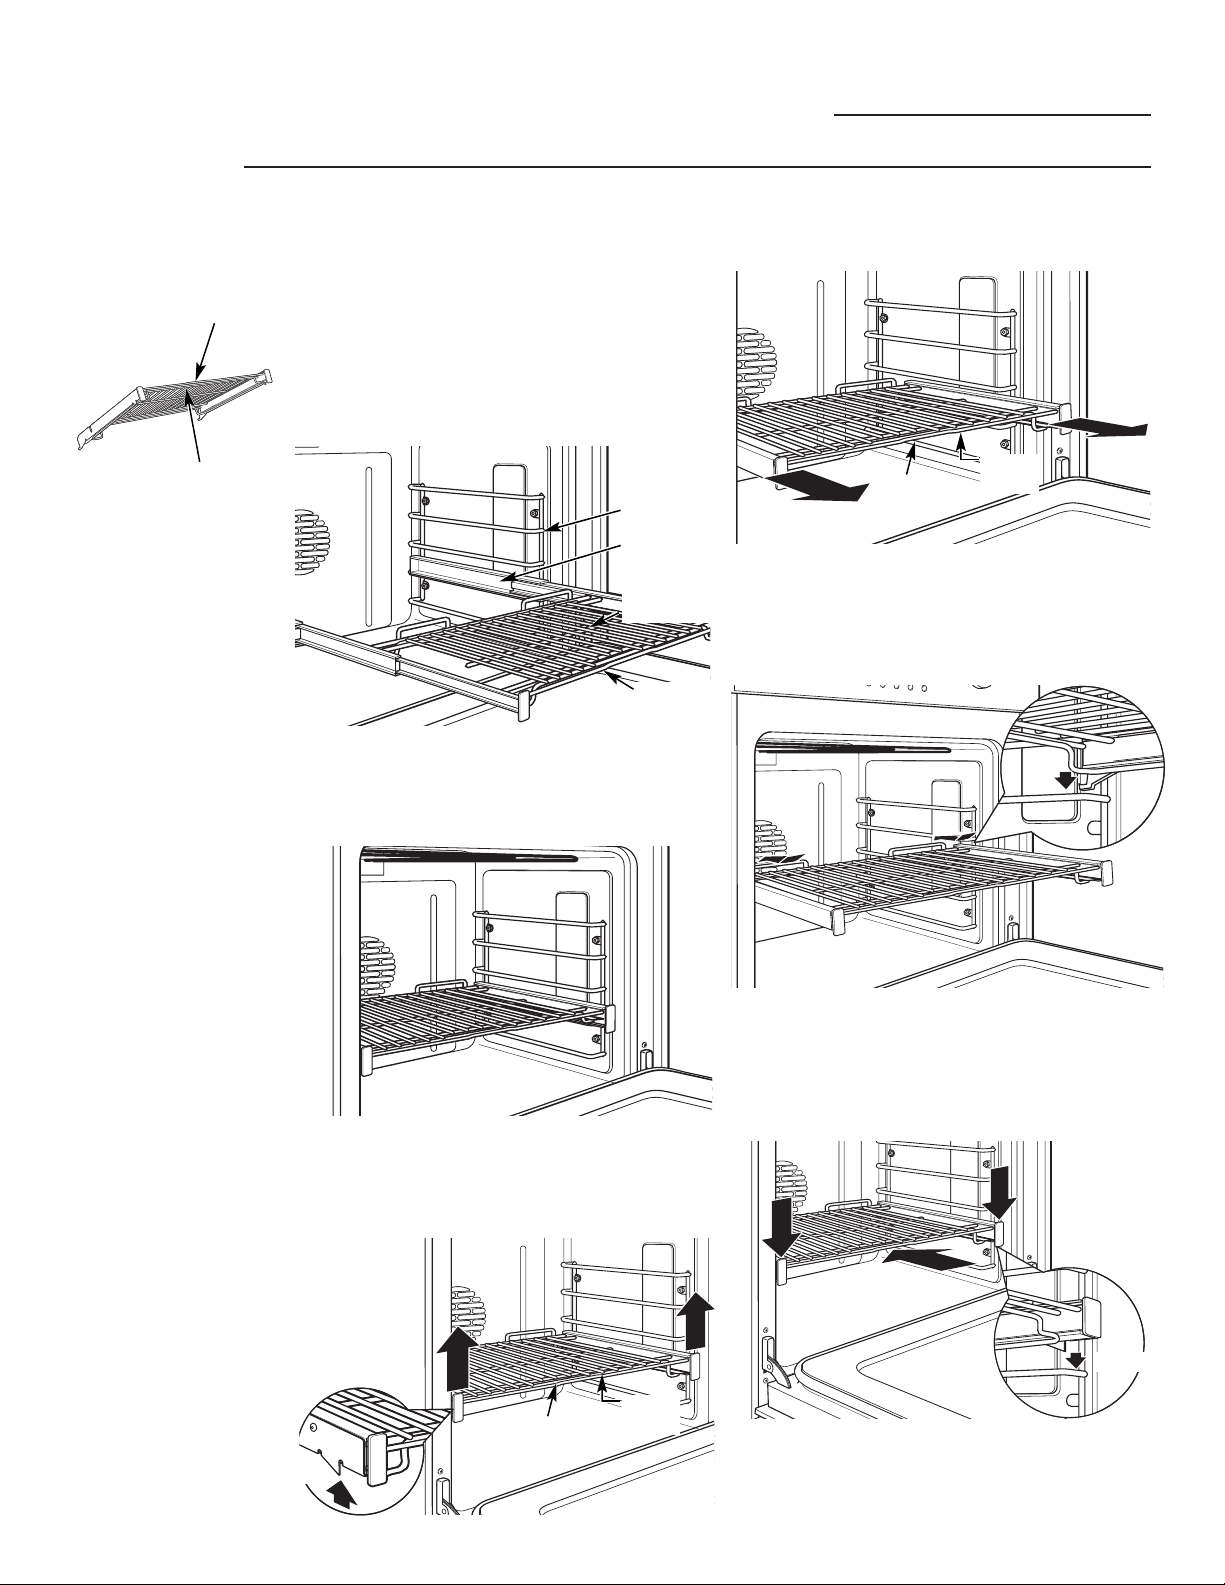
To avoid possible burns, place the racks in the
correct position before turning on the oven.
The correct rack position depends on the
kind of food and the browning desired.
The racks have a frame that locks into the
rack supports on both sides. Once the frame is
locked into place, always pull the rack out, by
its upper front rail, to its full extension stop
position, when placing or removing cookware.
To remove a rack:
1. Make sure the rack is pushed all the way into
the oven.
2. Grasp the rack by both its upper front rail
and its lower front rail and lift straight up
to unlock the front rack locks from the
rack supports.
3. Firmly holding onto both the upper and
lower front rack rails, pull the rack forward
and remove it from the oven.
To replace a rack:
1. Place the rear rack locks over and onto
the rack supports (five rack positions are
available including the top position).
2. Slide the rack all the way in until the
rear rack locks are secure on the rear rack
supports and press the front rack locks onto
the front rack supports.
Full
extension
oven racks
The oven
has 5 rack
positions
Rack frame
Rack extended
to its full stop
position
Upper front
rack rail
Slide the rack all the way in
and push down to lock the
front rack locks onto the
front rack supports
Lift to unlock
front rack
locks from
the rack
support
Upper
front rail
Lower
front rail
Upper
front rail
Lower
front rail
Front rack lock
Front rack lock
Lower
front rail
Upper
front rail
11
Loading ...
Loading ...
Loading ...