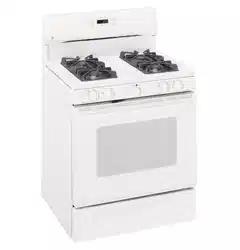
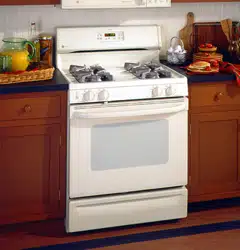
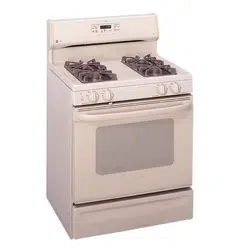
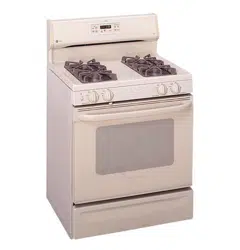
Throughout this manual, features and appearance may vary from your model.
(on models with INCREASE [+] and DECREASE [–] pads only)
Oven Control, Clock and Timer Features and Settings
1.BAKE Pad
Press this pad to select the bake function.
2. BROIL HI/LO Pad
Press this pad to select the broil function.
3. Function Indicators
Light up to show whether the oven is in the bake, broil or self-clean mode.
4. Oven Temperature and Broil Display
Shows the oven temperature or the broil setting selected.
5. Time Display
Shows the time of day, the times set for the timer or automatic oven operation.
6. Program Status
Words light up in the display to indicate what is in the time display. Programmed information can be displayed at any time by touching the pad of the operation you want to see. For example, you can display the current time of day while the timer is counting down by pressing the CLOCK pad.
If “F—and a number or letter” flash in the display and the oven control signals, this indicates a function error code.
On models with an oven door latch, if the function error code appears during the self-cleaning cycle, check the oven door latch. The latch handle may have been moved, even if only slightly, from the latched position. Make sure the latch is moved to the right as far as it will go.
Press the CLEAR/OFF pad. Allow the oven to cool for one hour. Put the oven back into operation. If the function error code repeats, disconnect the power to the range and call for service.
If a flashing time of day is in the display,you have experienced a power failure. Reset the clock.
If your oven was set for a timed oven operation when the power outage occurred, the clock and all programmed functions must be reset.
7. COOKING TIME Pad
Press this pad and then press the INCREASE or DECREASE pads to set the amount of time you want your food to cook. The oven will shut off when the cooking time has run out.
8. START TIME Pad
Use along with the COOKING TIME or SELF CLEAN pad to set the oven to start and stop automatically at a time you set.
9. CLOCK Pad
Press this pad before setting the clock. The time of day will flash in the display when the oven is first turned on.
10. KITCHEN TIMER ON/OFF Pad
Press this pad to select the timer feature.
11. START Pad
Must be pressed to start any cooking or cleaning function.
12. DECREASE Pad
Short taps to this pad will decrease the time or temperature by small amounts. Press and hold the pad to decrease the time or temperature by larger amounts.
13. INCREASE Pad
Short taps to this pad will increase the time or temperature by small amounts. Press and hold the pad to increase the time or temperature by larger amounts
14. CLEAR/OFF Pad
Press this pad to cancel ALL oven operations except the clock and timer.
15. SELF CLEAN Pad
Press this pad to select the self-cleaning function. See the Using the self-cleaning oven section.
Special features of your oven control (on some models).
Your new touch pad control has additional features that you may choose to use. The following are the features and how you may activate them.
The special feature modes can only be activated while the display is showing the time of day clock. They remain in the control’s memory until the steps are repeated.
When the display shows your choice, press the START pad. The special features will remain in memory after a power failure.
Appearance may vary.
12 Hour Shut-Off
With this feature, should you forget and leave the oven on, the control will automatically turn off the oven after 12 hours during baking functions or after 3 hours during a broil function.
If you wish to turn off this feature, follow the steps below.
Press the BAKE and BROIL HI/LO pads at the same time for 3 seconds until the display shows SF
Press the START TIME or DELAY START pad. The display will show 12 shdn (12 hour shut-off). Press the START TIME or DELAY START pad again and the display will show no shdn (no shut-off).
Press the START pad to activate the no shut-off and leave the control set in this special features mode.
Appearance may vary.
Fahrenheit or Centigrade Temperature Selection
Your oven control is set to use the Fahrenheit temperature selections but you may change this to use the Centigrade selections.
Press the BAKE and BROIL HI/LO pads at the same time for 3 seconds until the display shows SF.
Press the BROIL HI/LO pad. The display will show F (Fahrenheit).
Press the BROIL HI/LO pad again. The display will show C (Centigrade).
Press the START pad.
Appearance may vary.
Control Lockout
Your control will allow you to lock down the touch pads so they cannot be activated when pressed.
Press the BAKE and BROIL HI/LO pads at the same time for 3 seconds until the display shows SF.
Press the SELF CLEAN pad. The display will show LOC OFF. Press the SELF CLEAN pad again. The display will show LOC.
Press the START pad to activate the control lockout feature and leave the control set in this special features mode.
When this feature is on and the touch pads are pressed the control will beep and the display will show LOC.
NOTE: The control lockout mode will not affect the CLOCK, KITCHEN TIMER ON/OFF and OVEN LIGHT touch pads.
Using the oven.
To avoid possible burns, place the shelves in the desired position before you turn the oven on.
The oven has 5 shelf positions.
It also has a special low shelf position (R) for roasting extra large items, such as a large turkey
Before you begin…
The shelves have stop-locks, so that when placed correctly on the supports, they will stop before coming completely out, and will not tilt.
When placing and removing cookware, pull the shelf out to the bump on the shelf support.
To remove a shelf, pull it toward you, tilt the front end up and pull it out.
To replace, place the end of the shelf (stoplocks) on the support, tilt up the front and push the shelf in.
If your model has a door latch, do not lock the oven door with the latch during baking or roasting. The latch is used for self-cleaning only
The oven has a special low shelf (R) position just above the oven bottom. Use it when extra cooking space is needed, for example, when roasting a large turkey. The shelf is not designed to slide out at this position.
How to Set the Oven for Baking or Roasting
1.Press the BAKE pad.
2. Press the + or – pad (on some models) or the number pads (on some models) until the desired temperature is displayed.
The oven will start automatically. The word ON and 100° will be displayed. As the oven heats up, the display will show the changing temperature. When the oven reaches the temperature you set, a tone will sound.
To change the oven temperature during BAKE cycle, press the BAKE pad and then the + or – or number pads to get the new temperature.
3. Press the CLEAR/OFF pad when baking is finished and then remove the food from the oven.
Preheating and Pan Placement
Preheat the oven if the recipe calls for it. To preheat, set the oven at the correct temperature. Preheating is necessary for good results when baking cakes, cookies, pastry and breads.
For ovens without a preheat indicator light or tone, preheat 10 minutes.
Baking results will be better if baking pans are centered in the oven as much as possible. Pans should not touch each other or the walls of the oven. If you need to use two shelves, stagger the pans so one is not directly above the other, and leave approximately 11 ⁄2″ between pans, from the front, back and sides of the wall.
Using the clock and timer.
Not all features are on all models.
Make sure the clock is set to the correct time of day
To Set the Clock
The clock must be set to the correct time of day for the automatic oven timing functions to work properly. The time of day cannot be changed during a timed baking or selfcleaning cycle.
1.Press the CLOCK pad.
2. Depending on which model you have, you will set the clock by pressing either the number pads or + or – pads.
Press the number pads the same way you read them. For example, to set 12:34, press the number pads 1, 2, 3 and 4 in that order.
If number pads are not pressed within one minute after you press the CLOCK pad, the display reverts to the original setting. If this happens, press the CLOCK pad and reenter the time of day.
3. Press the START pad. This enters the time and starts the clock.
To check the time of day when the display is showing other information, simply press the CLOCK pad. The time of day shows until another pad is pressed.
The timer is a minute timer only.
The CLEAR/OFF pad does not affect the timer
To Set the Timer
The timer does not control oven operations. The maximum setting on the timer is 11 hours and 59 minutes.
1.Press the KITCHEN TIMER ON/OFF pad.
2. Press the + or – or number pads to set the time. For example, to enter 2 hours and 45 minutes, touch 2, 4 and 5 in that order.
If you make a mistake, press the KITCHEN TIMER ON/OFF pad and begin again.
3. Press the START pad. After pressing the START pad, SET disappears; this tells you the time is counting down, although the display does not change until one minute has passed.
4. When the timer reaches :00, the control will beep 3 times followed by one beep every 6 seconds until the KITCHEN TIMER ON/OFF pad is pressed.
The 6 second tone can be canceled by following the steps in the Special features of your oven control section under Tones at the End of a Timed Cycle. Display then shows the time of day
Power Outage
If a flashing time is in the display, you have experienced a power failure. Reset the clock.
To reset the clock, press the CLOCK pad. Enter the correct time of day by pressing the + or – or the appropriate number pads. Press the START pad.
Care and cleaning
Be sure electrical power is off and all surfaces are cool before cleaning any part of the range.
If your range is removed for cleaning, servicing or any reason, be sure the anti-tip device is re-engaged properly when the range is replaced. Failure to take this precaution could result in tipping of the range and cause injury
CAUTION: Do not operate the burner without all burner parts and drip pans (if so equipped) in place.
Clean these holes thoroughly on each burner
Standard Twin Burner Assemblies (on some models)
On models with standard twin burners, the cooktop lifts up for easy access.
Turn all controls OFF before removing burner parts and drip pans (if so equipped).
The burner grates and drip pans (if so equipped) can be lifted off, making them easy to clean.
The holes in the surface burners of your range must be kept clean at all times for proper ignition and an even, unhampered flame.
You should clean the surface burners routinely, especially after bad spillovers, which could clog these holes.
Wipe off surface burners. If heavy spillover occurs, remove the surface burners from the range. Burners lift out for cleaning. Lift up the cooktop and then lift out the surface burners.
To remove burned-on food, soak the surface burner in a solution of mild liquid detergent and hot water. Soak the surface burner for 20 to 30 minutes.
For more stubborn stains, use a cleanser like Soft Scrub® brand or Bon Ami® brand. Rinse well to remove any traces of the cleanser that might clog the surface burner openings.
Do not use steel wool because it will clog the surface burner openings and scratch the surface burners. If the holes become clogged, clean them with a sewing needle or twist-tie.
Before putting the surface burner back, shake out excess water and then dry it thoroughly by setting it in a warm oven for 30 minutes. Then place it back in the range, making sure it is properly seated and level.
Check the flame pattern of each burner. If the flames are “jumpy” (not steady), clean the holes again with a sewing needle or twist-tie.
Drip Pans (on some models)
Remove the grates and lift out the drip pans. Drip pans can be cleaned in a dishwasher or by hand.
When replacing the drip pans, make sure they are in the correct position.
To get rid of burned-on food, place them in a covered container (or plastic bag) with 1/4 cup ammonia to loosen the soil. Then scrub with a soap-filled scouring pad if necessary.
CAUTION: Do not clean the drip pans in a selfcleaning oven.
CAUTION: Do not operate the burner without all burner parts and drip pans (if so equipped) in place.
Sealed Burner Assemblies (on some models)
Turn all controls OFF before removing the burner parts and drip pans (if so equipped).
The burner grates, caps, burner heads and drip pans (if so equipped) can be lifted off, making them easy to clean.
The electrode of the spark igniter is exposed when the burner head is removed. When one burner is turned to LITE, all the burners spark. Do not attempt to disassemble or clean around any burner while another burner is on. An electric shock may result, which could cause you to knock over hot cookware.
Use a sewing needle or twist-tie to unclog the small hole in the burner head.
After cleaning, make sure the slot in the burner head is positioned over the electrode.
Burner Heads (on sealed burners only)
NOTE: Before removing the burner heads and caps, remember their size and location. Replace them in the same location after cleaning.
For proper ignition, make sure the small hole in the section that fits over the electrode is kept open. A sewing needle or wire twist-tie works well to unclog it.
The slits in the burner heads of your range must be kept clean at all times for an even, unhampered flame.
You should clean the surface burners routinely, especially after bad spillovers, which could clog these openings.
To remove burned-on food, soak the burner heads in a solution of mild liquid detergent and hot water for 20-30 minutes. For more stubborn stains, use a toothbrush.
Before putting the burner head back, shake out excess water and then dry it thoroughly by setting it in a warm oven for 30 minutes.
Replace the burner heads and caps. Make sure that the heads and caps are replaced in the correct location. There is one small, 2 medium and one large head and cap.
NOTE: On some models there are 2 large, one medium and one small head and cap.
Burner Caps (on sealed burners only)
Lift off when cool. Wash burner caps in hot, soapy water and rinse with clean water. You may scour with a plastic scouring pad to remove burned-on food particles.
Dry them in a warm oven or with a cloth— don’t reassemble them wet. Replace the burner caps.
Make sure that caps are replaced on the correct size burner. There is one small, 2 medium and one large cap.
NOTE: On some models there are 2 large, one medium and one small head and cap
Burner Grates
Lift out when cool. Grates should be washed regularly and, of course, after spillovers. Wash them in hot, soapy water and rinse with clean water. After cleaning, dry them thoroughly by putting them in a warm oven for a few minutes. Don’t put the grates back on the range while they are wet. When replacing the grates, be sure they’re positioned securely over the burners.
To prevent rusting on cast iron grates, apply a light coating of cooking oil on the bottom of the grates.
Do not operate a burner for an extended period of time without cookware on the grate. The finish on the grate may chip without cookware to absorb the heat.
To get rid of burned-on food, place the grates in a covered container (or plastic bag) with 1/4 cup ammonia to loosen the soil. Let sit overnight (or approximately 12 hours), then scrub with a soap-filled scouring pad if necessary. Rinse grates thoroughly and dry completely before replacing them on the range top.
Although they’re durable, the grates will gradually lose their shine, regardless of the best care you can give them. This is due to their continual exposure to high temperatures. You will notice this sooner with lighter color grates.
CAUTION: Do not clean the grates in a dishwasher or in a self-cleaning oven.
Cooktop Surface
To avoid damaging the porcelain enamel surface of the cooktop and to prevent it from becoming dull, clean up spills right away. Foods with a lot of acid (tomatoes, sauerkraut, fruit juices, etc.) or foods with high sugar content could cause a dull spot if allowed to set.
When the surface has cooled, wash and rinse. For other spills such as fat spatterings, etc., wash with soap and water once the surface has cooled. Then rinse and polish with a dry cloth.
NOTE: Do not store flammable materials in an oven or near the cooktop. Do not store or use combustible materials, gasoline or other flammable vapors and liquids in the vicinity of this or any other appliance.
Oven Bottom
The oven bottom has a porcelain enamel finish. To make cleaning easier, protect the oven bottom from excessive spillovers by placing a cookie sheet on the shelf below the shelf you are cooking on. This is particularly important when baking a fruit pie or other foods with a high acid content. Hot fruit fillings or other foods that are highly acidic (such as tomatoes, sauerkraut, and sauces with vinegar or lemon juice) may cause pitting and damage to the porcelain enamel surface and should be wiped up immediately.
We don’t recommend using aluminum foil on the oven bottom. It can affect air flow if the holes are blocked and it can concentrate heat at the bottom of the oven, resulting in poor baking performance.
To clean up spillovers, use soap and water, an abrasive cleaner or soap-filled steel wool pad. Rinse well to remove any soap before self-cleaning.
Lift the door straight up and off the hinges.
The gasket is designed with a gap at the bottom to allow for proper air circulation.
Do not rub or clean the door gasket—it has an extremely low resistance to abrasion.
If you notice the gasket becoming worn, frayed or damaged in any way or if it has become displaced on the door, you should have it replaced.
Lift-Off Oven Door
The oven door is removable, but it is heavy. You may need help removing and replacing the door.
To remove the door, open it a few inches to the special stop position that will hold the door open. Grasp firmly on each side and lift the door straight up and off the hinges.
NOTE: Be careful not to place hands between the hinge and the oven door frame as the hinge could snap back and pinch fingers.
To replace the door, make sure the hinges are in the special stop position. Position the slots in the bottom of the door squarely over the hinges. Then lower the door slowly and evenly over both hinges at the same time. If the hinges snap back against the oven frame, pull them back out.
To clean the inside of the door:
Do not immerse the door in water.
Because the area inside the gasket is cleaned during the self clean cycle, you do not need to clean this by hand. Any soap left on the liner causes additional stains when the oven is heated.
The area outside the gasket can be cleaned with a soap-filled steel wool or plastic pad.
To clean the outside of the door:
Use soap and water to thoroughly clean the top, sides and front of the oven door. Rinse well. You may also use a glass cleaner to clean the glass on the outside of the door.
Spillage of marinades, fruit juices, tomato sauces and basting materials containing acids may cause discoloration and should be wiped up immediately. When the surface is cool, clean and rinse.
Do not use oven cleaners, cleansing powders or harsh abrasives on the outside of the door.
Broiler Pan and Grid
After broiling, remove the broiler pan from the oven. Remove the grid from the pan. Carefully pour out grease from the pan into a proper container. Wash and rinse the broiler pan and grid in hot water with a soap-filled or plastic scouring pad.
If food has burned on, sprinkle the grid with detergent while hot and cover with wet paper towels or a dishcloth. Soaking the pan will remove burned-on foods.
The broiler pan and grid may be cleaned with a commercial oven cleaner.
Both the broiler pan and grid can also be cleaned in a dishwasher.
Do not store a soiled broiler pan and grid anywhere in the range.
CAUTION: Do not clean the broiler pan or grid in a self-cleaning oven.
Wire cover holder.
Oven Light Replacement (on some models)
CAUTION: Before replacing your oven light bulb, disconnect the electrical power to the range at the main fuse or circuit breaker panel. Be sure to let the light cover and bulb cool completely.
The oven light bulb is covered with a removable glass cover that is held in place with a bail-shaped wire. Remove the oven door, if desired, to reach cover easily.
To remove:
Hold a hand under the cover so it doesn’t fall when released. With fingers of the same hand, firmly push back the wire cover holder. Lift off the cover. Do not remove any screws to remove the cover
Do not touch hot bulb with a wet cloth. Replace bulb with a 40-watt household appliance bulb.
To replace cover:
Place it into the groove of the light receptacle. Pull the wire forward to the center of the cover until it snaps into place. When in place, the wire holds the cover firmly. Be certain the wire is in the depression in the center of the cover.
Connect electrical power to the range.
Removable Warming Drawer (on some models)
Before performing any adjustments, cleaning or service, disconnect the range electrical power supply at the household distribution panel by removing the fuse or switching off the circuit breaker. Make sure the warming drawer heating element is cool.
Most cleaning can be done with the drawer in place. However, the drawer may be removed if further cleaning is needed. Use soap and warm water to thoroughly clean.
To remove the warming drawer:
Pull the drawer straight out until it stops.
Press the left rail release down and push the right rail release up, while pulling the drawer forward and free.
To replace the warming drawer:
Place the left drawer rail around the inner left rail guide and slide it in slightly to hook it.
Place the right drawer rail around the inner right rail guide and slide it in slightly to hook it.
Slide the drawer all the way in.
The storage drawer may be removed for cleaning under the range.
Removable Storage Drawer (on some models)
The storage drawer is a good place to store cookware and bakeware. Do not store plastics and flammable material in the drawer.
The storage drawer may be removed for cleaning under the range. Clean the storage drawer with a damp cloth or sponge. Never use harsh abrasives or scouring pads.
To remove storage drawer:
Pull drawer straight out until it stops.
Tilt the front of the drawer up and free of the range.
To replace storage drawer:
Set the stops on the back of the drawer over the stops in the range.
Slide drawer evenly and straight back, so that the rails in the range are engaged.
Vent appearance and location vary.
Oven Air Vents
Never block the vents (air openings) of the range. They provide the air inlet and outlet that are necessary for the range to operate properly with correct combustion.
Air openings are located at the rear of the cooktop, at the top and bottom of the oven door, and at the bottom of the range, under the kick panel or storage drawer (depending on the model).
Some models have dual support rods that will hold the cooktop up while you clean underneath it.
Lift-Up Cooktop (on models with standard twin burners)
Clean the area under the cooktop often. Built-up soil, especially grease, may catch on fire.
To make cleaning easier, the cooktop may be lifted up.
To raise the cooktop:
Be sure the burners are turned off.
Remove the grates.
Grasp the two front burner wells and lift up
Clean under the cooktop with hot, soapy water and a clean cloth. If you removed your surface burners while cleaning, make sure they are properly seated when replacing them.
After cleaning, lower the cooktop (be careful not to pinch your fingers).
Pull the knob straight off the stem.
Control Panel and Knobs
It’s a good idea to wipe the control panel after each use of the oven. Clean with mild soap and water or vinegar and water, rinse with clean water and polish dry with a soft cloth.
Do not use abrasive cleansers, strong liquid cleaners, plastic scouring pads or oven cleaners on the control panel—they will damage the finish. A 50/50 solution of vinegar and hot water works well.
The control knobs may be removed for easier cleaning. To remove a knob, pull it straight off the stem. If knob is difficult to remove, place a towel or dishcloth between the knob and control panel and pull gently. Wash the knobs in soap and water or a vinegar and hot water solution.
Metal parts can be cleaned with soap and water. Do not use steel wool, abrasives, ammonia, acids or commercial oven cleaners. Dry with a soft cloth.
Oven Shelves
Clean the shelves with an abrasive cleanser or steel wool. After cleaning, rinse the shelves with clean water and dry with a clean cloth.
NOTE: Take the shelves out of the oven before you begin the self-clean cycle.
Brushed Chrome Cooktop (on some models)
Clean the brushed chrome top with warm, soapy water or Bon Ami® brand cleanser and immediately dry it with a clean, soft cloth. Take care to dry the surface following the “grain.”
To help prevent finger marks after cleaning, spread a thin film of baby oil on the surface. Wipe away excess oil with a clean, soft cloth.
Warming Drawer Rack
Clean the rack with detergent and water. After cleaning, rinse the rack with clean water and dry with a clean cloth.
Fluorescent Top Light (on some models)
CAUTION: Do not touch the bulb with wet hands or when the bulb is hot. Never wipe the light area with a wet cloth. Electrical power must be shut off if you have to replace the bulb
Pinch the clips on the back, on both sides, and free the back of the canopy.
Roll the canopy up and off.
Remove the fluorescent light bulb. Replace the bulb with one of the same length and wattage.
Replace the canopy by placing the front in the grove and rolling it back. Snap it into place over the back clips on both sides.
Troubleshooting Tips
Problem
Possible Causes
What To Do
Top burners do not light or do not burn evenly
Plug on range is not completely inserted in the electrical outlet.
Make sure electrical plug is plugged into a live, properly grounded outlet.
Burner holes on the side or around the top of the burner may be clogged.
Remove the burners (on models with standard twin burners) or burner heads (on models with sealed burners) or burner caps on spill-proof models, and clean them with a sewing needle or twist-tie. Make sure you do not enlarge the holes. On spill-proof models, check the electrode area for burned-on food or grease.
Improper burner assembly.
Make sure the drip pans are installed correctly See the Care and cleaning of the range section.
Burner flames very large or yellow
Improper air to gas ratio.
If range is connected to LP gas, contact the person who installed your range or made the conversion.
Surface burners light but oven does not
The oven gas shut-off valve may have accidentally been moved during cleaning or moving
To check the oven gas shut-off valve on standard twin burner models, raise the cooktop and look for the gas shut-off lever at the extreme right rear corner. (Standing pilot models do not have a gas shut-off valve on the regulator.) Follow the directions in box A or B that match your regulator type.
To check the oven gas shut-off valve on sealed burner models, remove the storage drawer or warming drawer (see the Care and cleaning of the range section) and look for the gas shut-off lever at the back of the range. Follow the directions in box A or B that match your regulator type.
Florescent top light does not work
Fluorescent bulb is loose or defective
Adjust or replace.
Switch operating the light is broken.
Call for service.
Control signals after entering cooking time or start time
You forgot to enter a bake temperature or cleaning time.
Press the BAKE pad and desired temperature or the SELF CLEAN pad and desired clean time.
Food does not bake or roast properly
Oven controls improperly set.
See the Using the oven section.
Shelf position is incorrect.
See the Using the oven section.
Incorrect cookware or cookware of improper size being used.
See the Using the oven section.
Oven thermostat needs adjustment.
See the Adjust the oven thermostat—Do it yourself! section
Clock not set correctly.
See the Using the clock and timer section.
Aluminum foil used improperly in the oven.
See the Care and cleaning of the range section.
Oven bottom not securely seated in position.
See the Installation of the range section.
Food does not broil properly
Oven controls improperly set.
Make sure you press the BROIL HI/LO pad.
Oven door not closed.
See the Using the oven section.
Improper shelf position being used.
See the Broiling Guide.
Food being cooked in a hot pan.
Use the broiling pan and grid that came with your range. Make sure it is cool.
Cookware not suited for broiling
Use the broiling pan and grid that came with your range.
Aluminum foil used on the the broiling pan and grid has not been fitted properly and slit as recommended.
See the Using the oven section.
Oven bottom not securely seated in position.
See the Installation of the range section.
Oven temperature too hot or too cold
Oven thermostat needs adjustment.
See the Adjust the oven thermostat—Do it yourself! section
Clock and timer do not work
Plug on range is not completely inserted in the electrical outlet.
Make sure electrical plug is plugged into a live, properly grounded outlet.
A fuse in your home may be blown or the circuit breaker tripped.
Replace the fuse or reset the circuit breaker.
Oven controls improperly set.
See the Using the clock and timer section.
Oven light does not work
Light bulb is loose or defective.
Tighten or replace the bulb
Switch operating light is broken.
Call for service
Plug on range is not completely inserted in the electrical outlet.
Make sure electrical plug is plugged into a live, properly grounded outlet.
Oven will not self-clean
The oven temperature is too high to set a self-clean operation.
Allow the range to cool to room temperature and reset the controls.
Oven controls improperly set.
See the Using the self-cleaning oven section.
On models with a door latch, the oven door is not in the locked position.
Make sure you move the door latch handle all the way to the right.
“Crackling” or “popping” sound
This is the sound of the metal heating and cooling during both the cooking and cleaning functions.
This is normal.
Excessive smoking
Excessive soil.
Press the CLEAR/OFF pad. Open the windows to rid the room of smoke. Wait until the LOCKED DOOR light goes off. Wipe up the excess soil and reset the clean cycle.
Oven door will not open after a clean cycle
Oven too hot.
Allow the oven to cool below locking temperature.
Oven not clean after a clean cycle
Oven controls not properly set
See the Using the self-cleaning oven section.
Oven was heavily soiled.
Clean up heavy spillovers before starting the clean cycle. Heavily soiled ovens may need to self-clean again or for a longer period of time.
“LOCK DOOR” flashes in the display
The self-clean cycle has been selected but the door is not closed.
Close the oven door.
LOCKED DOOR light is on when you want to cook
The oven door is locked because the temperature inside the oven has not dropped below the locking temperature.
Press the CLEAR/OFF pad. Allow the oven to cool, and then, on models with a door latch, unlock the door.
“F—and a number or letter” flash in the display
On models with a door latch, if a function error code appears during the self-cleaning cycle, check the oven door latch.
The latch may have been moved, even if only slightly, from the locked position. Make sure the latch is moved to the right as far as it will go.
You have a function error code.
Press the CLEAR/OFF pad. Allow the oven to cool for one hour. Put the oven back into operation.
If the function code repeats.
Disconnect all power to the range for 5 minutes and then reconnect power. If the function error code repeats, call for service.
Oven door will not unlock (on models with a door latch)
Oven is too hot.
Allow the oven to cool below locking temperature. Do not lock the door with the door latch except when using the self-clean feature.
“Door” appears in the display (on models with a door latch)
Self-cleaning cycle has been selected but the latch handle was not moved all the way to the right.
Move the latch handle all the way to the right.
Latch handle was moved to the right but a program other than self-cleaning was selected.
Move the latch handle to the right only when setting the self-cleaning cycle.
Display goes blank
A fuse in your home may be blown or the circuit breaker tripped.
Replace the fuse or reset the circuit breaker.
The clock is in the black-out mode.
See the Special features of your oven control section
Display flashes
Power failure.
Reset the clock.
Unable to get the display to show “SF”
Oven control pads were not pressed properly
The BAKE and BROIL HI/LO pads must be pressed at the same time and held for 3 seconds.
Power outage, clock flashes
Power outage or surge.
Reset the clock. If the oven was in use, you must reset it by pressing the CLEAR/OFF pad, setting the clock and resetting any cooking function.
“Burning” or “oily” odor emitting from the vent
This is normal in a new oven and will disappear in time.
To speed the process, set a self-clean cycle for a minimum of 3 hours. See the Using the self cleaning oven section.
Strong odor
An odor from the insulation around the inside of the oven is normal for the first few times the oven is used.
This is temporary.
Fan noise
A cooling fan may automatically turn on and off to cool internal parts.
This is normal. The cooling fan will turn off and on.
Drawer does not slide smoothly or drags
The drawer is out of alignment.
Fully extend the drawer and push it all the way in. See the Care and cleaning of the range section.
Drawer is over-loaded or load is unbalanced.
Reduce weight. Redistribute drawer contents.
Warming drawer will not work
A fuse in your home may be blown or the circuit breaker tripped.
Replace the fuse or reset the circuit breaker.
The oven is self-cleaning.
Wait for the self-clean cycle to finish and the oven to cool.