Loading ...
Loading ...
Loading ...
10
4. Press START to save the drying setting.
The drying setting you selected will become your new preset
drying setting for all Automatic Dry cycles.
Control Locked
This feature allows you to lock your settings to avoid unintended
use of the dryer. You can also use the Control Locked feature to
avoid unintended cycle or option changes during dryer operation.
To enable
the Control Locked feature:
Press and hold CYCLE SIGNAL for 3 seconds. The Lock/Unlock
Controls indicator light glows, and a single beep tone is heard.
To unlock, press and hold CYCLE SIGNAL for 3
seconds.
The indicator light turns off.
End of Cycle Signal
End of Cycle Signal
The End of Cycle Signal produces an audible sound when the
drying cycle is finished. Promptly removing clothes at the end
of the cycle reduces wrinkling.
Press CYCLE SIGNAL to adjust the sound level or turn off the
signal.
NOTE: When Wrinkle Prevent is selected and the End of Cycle
Signal is on, a tone sounds every 5 minutes until the clothes are
removed, or Wrinkle Prevent ends.
Drying Rack Options
The drying rack is useful for drying items you would not
necessarily want to tumble dry or that you would normally line dry
(for example, sweaters).
If your model does not have a dry
ing rack, you may be able to
purchase one for your model. To find out whether your model
allows drying rack usage and for information on ordering, please
refer to the front page of the manual or contact the dealer from
whom you purchased your dryer.
The drying rack is recommended for use with the Air Fluff cycle or
wi
th Timed Dry cycles. The drying rack cannot be used with
Automatic Cycles.
To use the heated drying rack:
Do not remove the lint screen.
1. Op
en dryer door.
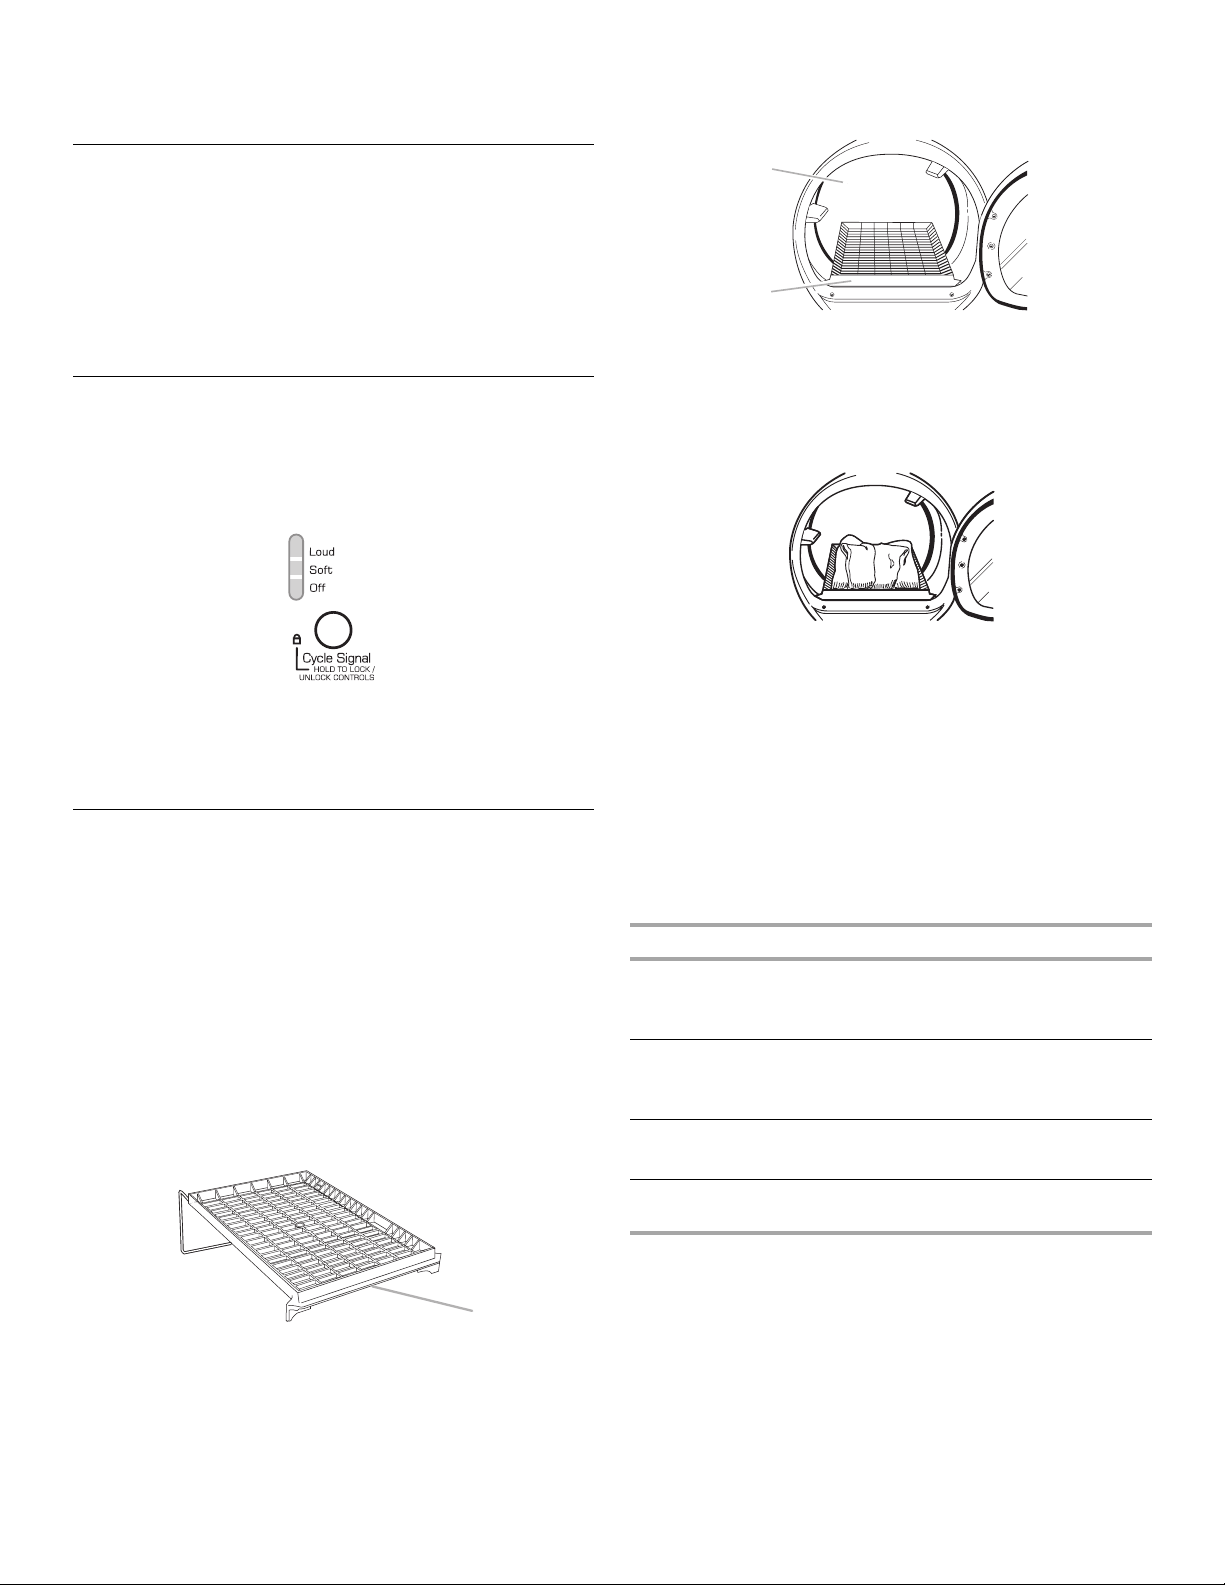
A
A. Front edge
2. Place drying rack over the bottom of the dryer door opening.
Rest the back wire on the dryer back ledge. Push down on
the frame front to secure over lint screen.
A
B
A. Drying rack front edge
B. Dryer back panel
3. Place wet items on top of the drying rack. Allow space
around items for air to circulate. The drying rack does not
move, but the drum will rotate. Make sure items do not hang
over the edges or between drying rack grille.
4. Close the door.
5. R
otate the dial to the Air Fluff cycle or press Timed Dry.
Select a drying time by pressing MORE TIME or LESS TIME.
Press TEMPERATURE until the desired temperature glows.
Items containing foam, rubber, or plastic must be dried on a
clothesline or by using the Air Fluff cycle. Refer to the
following table.
6. When Air Fluff is selected, the Estimated Time Remaining
display shows the default time. You can change the actual
time in the cycle by pressing More Time or Less Time.
7. Sta
rt the dryer.
NOTE: Check the lint screen and remove any lint accumulated
from items dried on the drying rack after the cycle is finished.
Drying Rack Cycle Temp. Time*
Wool Sweaters
Block to shape and lay flat
on the drying rack
Timed Dry Low 60
Stuffed toys or pillows
Cotton or polyester fiber
fi
lled
Timed Dry Low 60
Stuffed toys or pillows
Foam rubber filled
Air Fluff Air Only
(no heat)
90
Sneakers or canvas
sho
es
Air Fluff Air Only
(no heat)
90
*Reset cycle to complete drying if needed.
NOTE:
You must remove drying rack for normal tumbling. To
remove the drying rack, lift it straight up and out of the dryer.
Loading ...
Loading ...
Loading ...