
Loading ...
Loading ...
Loading ...
ATTACH FREEZER DOOR HANDLE
TO THE RIGHT
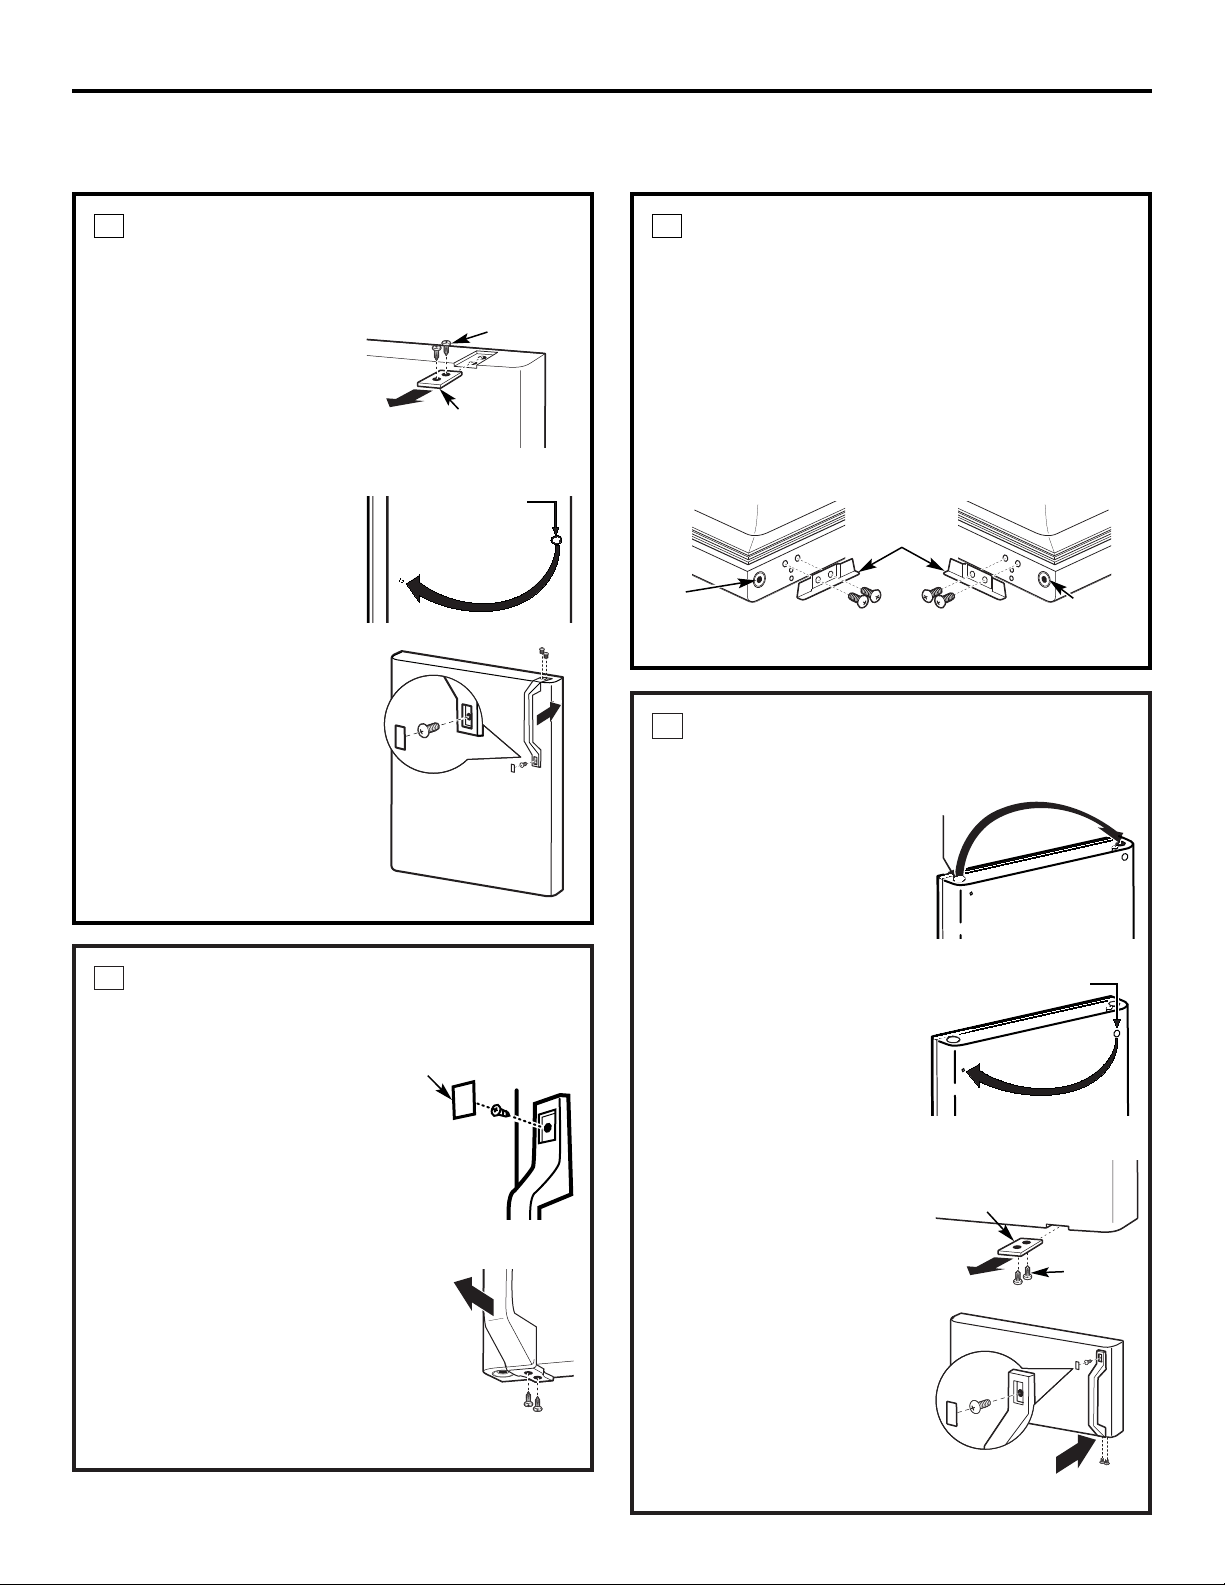
Carefully remove the
button on the top of
the door by prying under the
edge with a putty knife and
transfer to the opposite side.
For models with handles:
Carefully remove the
button on the front of the
door by prying under the
edge with a putty knife and
transfer to the opposite side.
For models with filler blocks:
Remove the screws from the
filler block on the underside
of the door and pull the
block forward. Insert the filler
block into the slot on the
opposite side where the
handle was removed and
replace the screws. Slide the
handle into the track on the
underside of the door where
the filler block was removed
and install the screws.
Install the screw and
nameplate plug button.
10
REMOVE FREEZER DOOR HANDLE
FROM THE LEFT
For models with handles:
Remove the nameplate
plug button by carefully
prying under the edge with a putty
knife. Remove the exposed screw
holding the handle.
Remove the two screws holding
the handle to the bottom of the
door and remove the handle.
On models with filler blocks,
the handle must be pulled straight
out away from the door to remove.
8
Handle bottom
Installation Instructions
REVERSING THE DOOR SWING
(CONT.)
12
Nameplate
plug button
Handle top
Plug button
TRANSFER FREEZER DOOR STOP
TO THE LEFT
Remove the door stop from the bottom of the right
side of the door. Transfer the plug buttons from the
bottom left side to the right side, if applicable.
Install the door stop on the left side.
NOTE: The door stop appearance may vary by model.
Always face flange toward the front of the door.
For models without handles, skip to Step 11.
9
ATTACH FRESH FOOD DOOR
HANDLE TO THE RIGHT
(CONT.)
B. Models with filler block:
Remove the screws from
the filler block on the right
side of the door and pull
the block forward. Insert
the filler block into the slot
on the opposite side where
the handle was removed and replace the screws.
Carefully remove the
button on the door by
prying under the edge with
a putty knife and transfer
to the opposite side.
Install handle: Install the
handle on the other side
of the door by sliding the
handle into the slot.
7
Filler block
Plug button
Screws
Pull
straight
out
Slide
straight in
Front of door
Front of door
Flange
Plug button
Plug
button
location
Plug
button
location
Filler block
Screws
Loading ...
Loading ...
Loading ...