User Manual Tcl 65S405 65" Class S4-series 4k Uhd Hdr Roku Smart Tv

Documents for TCL 65S405

The following documents are available:
User Manual Other Documents
  • S405 Specification Sheet - (English) Download
  • S405 Quick Start Guide - (English) Download
  • 65S405 Energy Guide - (English) Download
Photos
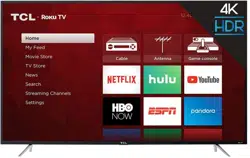
65S405 photo
User Guide
TCL S-Series
Version 8.0
For U.S. and Canada
English
Illustrations in this guide are provided
for reference only and may differ from
actual product appearance.
Loading ...
Loading ...
Loading ...

Specifications

TCL 65S405 Questions and Answers

Find answers or Ask a question.


  • Total questions: 1
  • Questions unAnswered : 1

#1 Why do I need a Roku Account?

To bring out your TCL Roku TV's full potential and enjoy
thousands of contents from different streaming
services and channels, you need to create a Roku
account.
What is a Roku account?
Your Roku account will help you manage your TCL Roku
TV, other Roku® streaming devices you own, and the
channels you have installed. Signing-up for a Roku
account is completely FREE! Here are additional
benefits of having a Roku account:
It will connect your TCL Roku TV and your other Roku®
streaming devices to the Roku Channel Store. You can
easily manage your channel selection, your account
preferences and settings within the TV's Roku menu
options, Roku can automatically send software updates
to your TV.

#2 How to Enable and Disable Text-to-Speech on My TCL Roku
TV?

Your TCL Roku TV has built-in Audio Guide which assist
users to navigate the on-screen menus. Once this text-
to-speech (TTS) feature is activated, Audio Guide will
read out text, menu items and other on-screen items.
Below are the step-by-step instructions to enable or
disable this feature:
Press on your remote to open the main screen.
Scroll up or down and select Settings.
Press the right arrow button and select Accessibility
Press the right arrow button and select Audio Guide
Press the right arrow button and select ON to enable or
OFF to disable the text-to-speech feature
TIP: You can also enable and disable Audio Guide by
pressing the key four (4) times from your TCL Roku TV
remote.

#3 How to Erase Personal Information Off of a Roku TV

A full factory reset returns the TV to its original, out-of-
the-box state. Performing a factory reset will remove all
stored personal data relating to your settings, network
connections, Roku data, and menu preferences. When
completed, you must repeat the guided setup,
reconnecting to the internet, re-linking your Roku
account, and reloading streaming channels. You also
must repeat the antenna TV setup (channel scan) and
input configuration.
A factory reset is the recommended choice if you want
to transfer the TV to another owner, and is the only
choice if you want to switch from store mode to home
mode (if you inadvertently selected store mode during
the guided setup).
1.Go to Settings > System > Advanced system settings >
Factory reset, and then highlight Factory reset
everything. Read the information on the screen to make
sure you understand what this reset operation does.
2. To proceed with the full factory reset, enter the code
listed on the screen and select ok.
Tip: After resetting you’ll be prompted to go through the
setup process again. We suggest Setting up Wi-Fi, then
use your Roku remote control app on your tablet or
smart phone to input passwords for your streaming
devices.

#4 Will my PS4 Pro play in 4K 60Hz?

Our 4K TVs will support the PS4 Pro in 4K, but there are
specific settings that must be changed for this to work.
To change the HDMI mode, go to Settings> TV Inputs>
Select the input where the PS4 is connected and select
go to HDMI Mode. There, you will select HDMI 2.0.
Once you’ve made this change, you should be able to
select either 2160p- YUV420 or 2160p- RGB in the
Resolution menu by going to Settings> Sound and
Screen> Video Output Settings> Once you’ve made this
change, you should be able to select either 2160p-
YUV420 or 2160p- RGB in the Resolution menu by
going to Settings> Sound and Screen> Video Output
Settings> Once you’ve made this change, you should be
able to select either 2160p- YUV420 or 2160p- RGB in
the Resolution menu by going to Settings> Sound and
Screen> Video Output Settings> Once you’ve made this
change, you should be able to select either 2160p-
YUV420 or 2160p- RGB in the Resolution menu by
going to Settings> Sound and Screen> Video Output
Settings>