Loading ...
Loading ...
Loading ...
16
Anti-Tip Bracket Installation
36” All-Refrigerator and All-Freezer Units
Anti-tip
bracket
installation
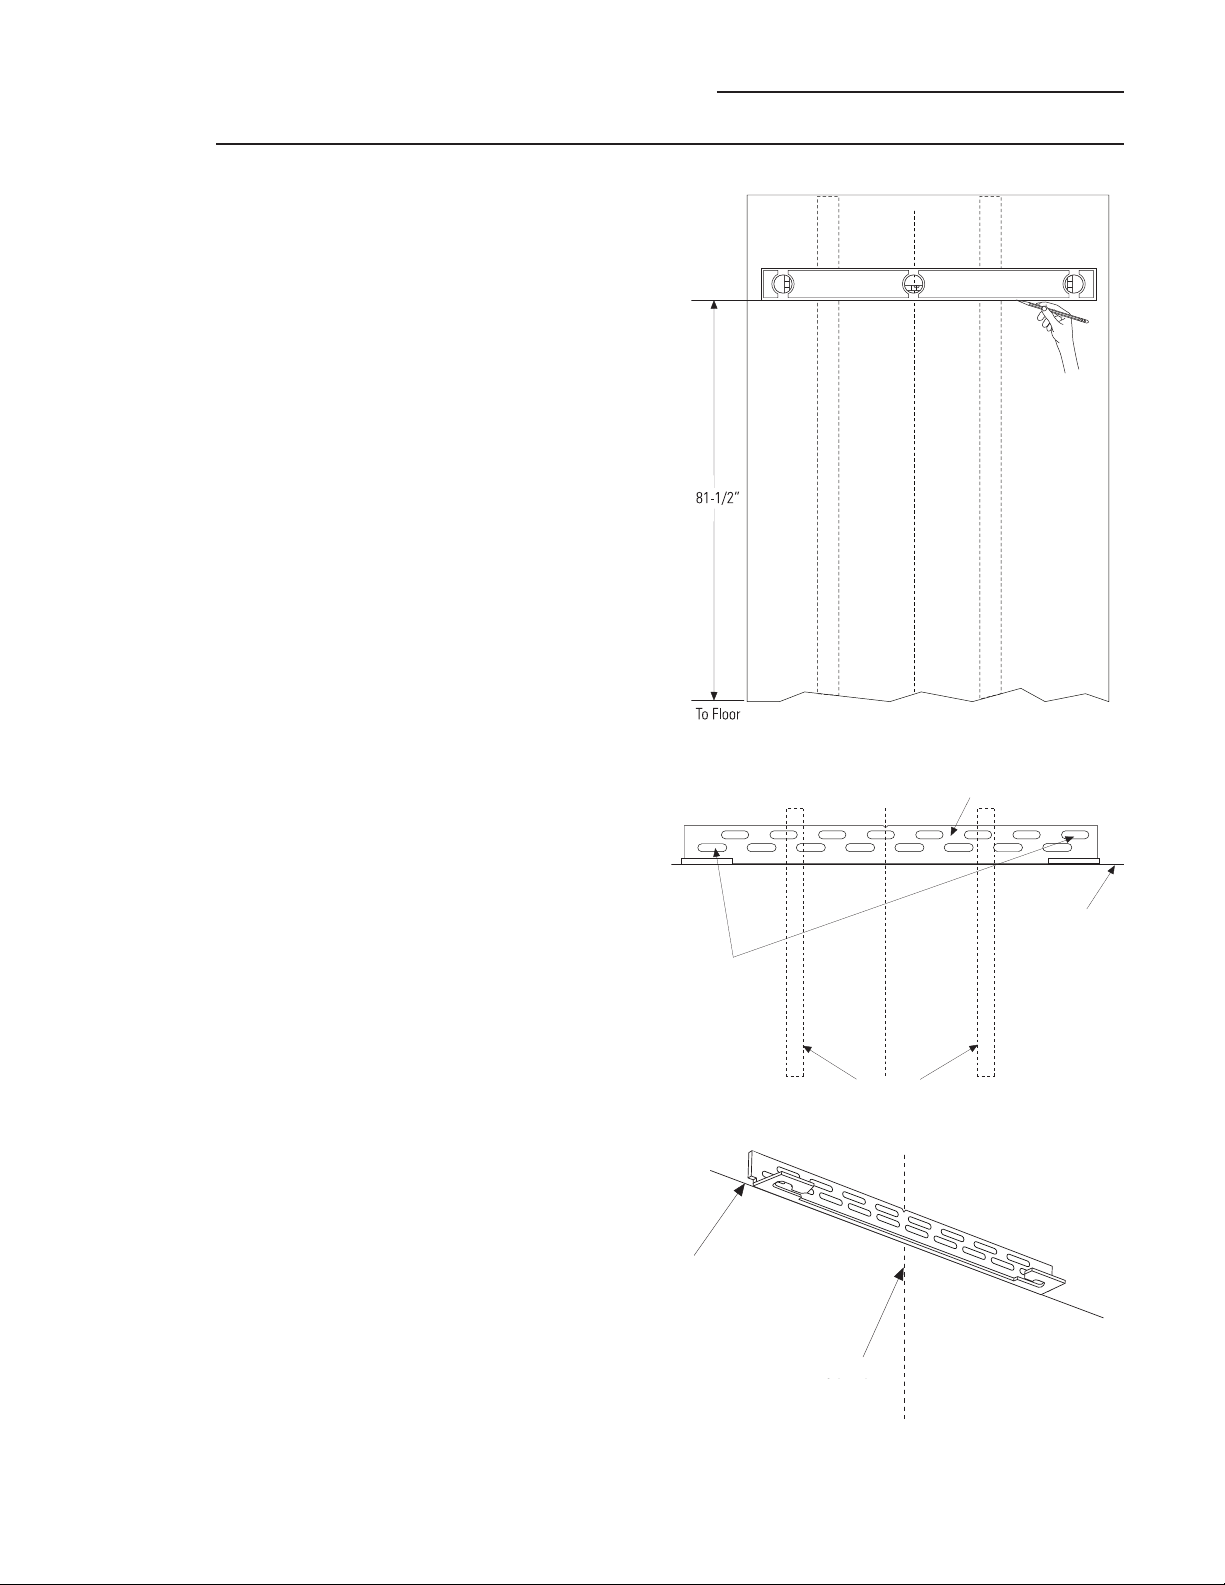
• The kit supplied with the unit contains 2 lag
bolts and 4 toggles with bolts. The wall bracket
will be attached to the wall in 4 places.
• Measure the opening where the unit is to be
installed. Mark the center with a vertical line.
• Measure up 81 1/2" from the floor. Mark this
point on the wall.
• Using a level, draw a horizontal line on the wall
at this height.
• Locate at least 2 studs on the back wall.
Mark these points on the horizontal line.
• Place the bottom of the wall bracket with tabs
on the horizontal line. Align the center notch
on the bracket with the center line on the wall.
• The anti-tip wall bracket has a series of holes.
Select 2 holes that match with the located
studs. Make sure the holes selected are
on the center of the studs. Mark the wall
at these points.
• Mark an additional hole at each end
of the bracket. If one of the studs is closer
to the end of the bracket, mark an additional
hole towards the center of the bracket.
• Drill 1/2" holes into the wall board
at the locations marked for the toggles
to be mounted (not the stud markings).
• Drill 3/16" holes into wooden studs where
marked. If steel stud construction, drill 1/2"
holes into the studs where marked. You will
use 2 toggles with the metal studs.
Two Additional
Hole Locations at
Ends of Brackets
Center
Wall Bracket
Line On Wall
Wall Studs
Line on Wall
Center
Loading ...
Loading ...
Loading ...