User Manual
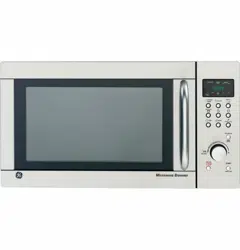
About the features of your microwave oven.
Throughout this manual, features and appearance may vary from your model.
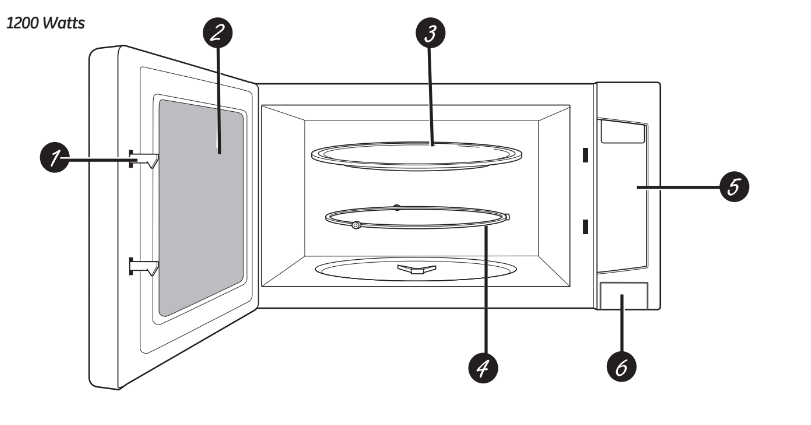
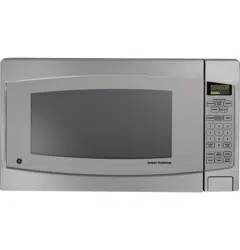
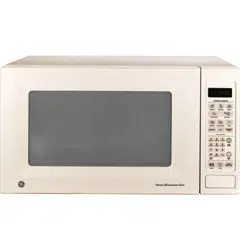
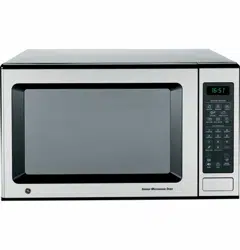
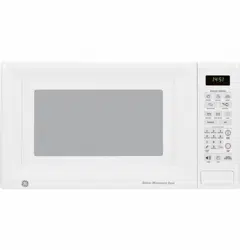
Features of the Oven
- Door Latches.
- Window with Metal Shield. Screen allows cooking to be viewed while keeping microwaves confined in the oven.
- Removable Turntable. Turntable and support must be in place when using the oven. The turntable may be removed for cleaning.
- Removable Turntable Support. The roller ring support must be in place when using the oven.
- Touch Control Panel Display.
- Door Latch Release. Press latch release to open door.
NOTE: Rating plate, oven vent(s) and oven light are located on the inside walls of the microwave oven.
You can microwave by time, with the sensor features or with the auto feature.

Cooking Controls
About changing the power level.
 |
|
Power Level
Select the power level before entering the cooking time. Press POWER LEVEL until the desired power level appears in the display.

The maximum programmable cooking time at Power Level 10 is 30 minutes. For other Power Levels, the maximum cooking time is 99 minutes and 99 seconds.
Variable power levels add flexibility to microwave cooking. Power Level 7 (P7) is microwave energy at 70% of full power. Power Level 3 (P3) is microwave energy at 30% of full power. Most cooking will be done on High (P10), which gives you 100% of power.
A high setting (P10) will cook faster but food turning over. A lower setting will cook more evenly and need less stirring or rotating of the food.
Here are some examples of uses for various power levels:
P10 High for fish, bacon, vegetables, boiling liquids, etc.
P7 Medium high for gentle cooking of meat and poultry, baking casseroles and reheating
P5 Medium for slow cooking and tenderizing for stews and less tender cuts of meat
P2 or P3 Low for defrosting
|
About the time features.
 |
|
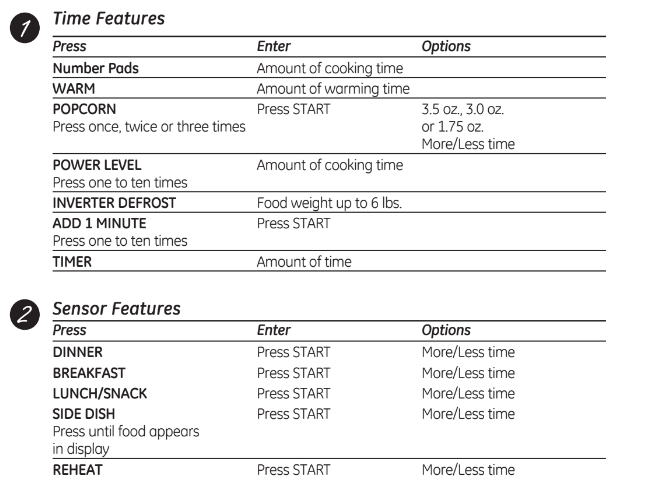
To Cook by Time
The microwave is automatically set for Power Level 10 (High). It can be changed for cooking flexibility. At Power Level 10, the maximum programmable cooking time is 30 minutes. Maximum cooking times for Power Levels 1 to 9 are 99 minutes and 99 seconds.
- Press POWER LEVEL until the desired power level appears in the display window. Skip this step if you wish to use Power Level 10.
- Enter the cooking time using the number pads.
- Press START.
You may open the door during the cooking time to check the food. Close the door and press START to resume cooking. The microwave will beep 5 times to signal that the cooking time is completed.
Stage Cooking
You can program up to 5 cooking stages:
- Press POWER LEVEL until the desired power level appears in the display window.
- Set the cooking time using the number pads.
- Repeat steps 1 and 2. (For additional stages, repeat steps 1 and 2).
- Press START.
Each cooking stage time will count down in the display. The microwave will beep 2 times between each stage. At the end of the sequence, the microwave will beep 5 times.
|
 |
|
Add 1 Minute
You can use this feature in two ways:
- Each time the pad is pressed, it will add one minute to the time counting down. Press up to 10 times to add 10 minutes of cooking time.
- It can be used to set one minute of cooking time.
- Press ADD 1 MINUTE, up to 10 times.
- Press START.
The oven will beep 5 times when cooking is completed.
ADD 1 MINUTE only applies to Time Cook, Warm and Timer.
|
 |
|
Popcorn
To use the Popcorn feature:
1. Follow package instructions. Place the package of popcorn in the center of the microwave.
2. Press POPCORN:
Once for 3.5 oz. bag.
Twice for 3.0 oz. bag.
3 times for 1.75 oz. bag.
3. Press START.
How to Adjust the Popcorn Program to Provide a Shorter or Longer Cook Time
If the brand of popcorn you use consistently overcooks or underpops, you can add or subtract 10 to 20 seconds to the popping time.
Press the MORE/LESS pad before the START pad:
Once Adds 10 seconds
Twice Adds 20 seconds
3 Times Subtracts 10 seconds
4 Times Subtracts 20 seconds
5 Times Reverts to original setting
|
 |
|
Warm
This feature will keep food warm up to 30 minutes after cooking.
This feature can be programmed as a final cooking stage, after one or more cooking times have been entered. It cannot be used in combination with Sensor or Auto features.
- Press WARM.
- Enter the warming time, up to 30 minutes.
- Press START.
|
To Soften and Melt
The following are a few examples of how to soften or melt food items using various Power Levels and cooking times.
Brown Sugar
To soften 1 cup of brown sugar, place sugar in a microwave-safe dish with a slice of bread. Cover with lid or plastic wrap.
- Select POWER LEVEL P10 (High).
- Enter 20 to 30 seconds.
- Press START.
Refrigerated Butter
To soften 1 stick (1/4 lb.) of refrigerated butter, remove wrapper and place the butter in a microwave-safe dish.
- Select POWER LEVEL P2.
- Enter 1 minute.
- Press START.
To melt 1 stick (1/4 lb.) of refrigerated butter, place in a microwave-safe dish. Cover with lid or vented plastic wrap.
- Select POWER LEVEL P6 (Medium).
- Enter 1 to 11ø2 minutes.
- Press START.
Cream Cheese
To soften 8 oz. of cream cheese, remove wrapper and place the cream cheese in a microwave-safe dish.
- Select POWER LEVEL P3 (Med.-Low).
- Enter 1 to 2 minutes.
- Press START.
Ice Cream
To soften 1 quart of ice cream, place
- Select POWER LEVEL P3 (Med.-Low).
- Enter 45 seconds.
- Press START.
Check often to prevent melting.
 |
|
Inverter Defrost
Use INVERTER DEFROST for meat, poultry and fish.
INVERTER DEFROST automatically sets the defrosting time and power levels for even defrosting results. Use for meats, poultry and fish weighing up to 6 pounds.
- Press INVERTER DEFROST.
- Using the Conversion Guide below, enter food weight. For example, press pads 1 and 2 for 1.2 pounds pound, 3 ounces).
- Press START.
When the oven beeps two times, TURN OVER appears in the display. Turn food over, rearrange foods or remove defrosted meat. Shield warm areas with small pieces of foil.
Defrosting Tips
- Place food in a microwave safe dish.
- Place roasts fat-side down. Place whole poultry breast-side down.
- Drain liquids during defrosting
Standing Time
After defrosting, most meats should stand minutes to complete defrosting. Large roasts should stand for about 30 minutes.
Standing time can be programmed to count down at the end of the defrost cycle. See the Timer section on page 15 for details.
Conversion Guide
If the weight of food is stated in pounds and ounces, the ounces must be converted to tenths (.1) of a pound.

|
 |
|
More/Less
Use the MORE/LESS pad to adjust Sensor cooking and Popcorn program cooking times.
For Sensor cooking, press the MORE/LESS pad:
Once Adds approximately 20% more time
Twice Subtracts approximately 20% time
3 Times Reverts to original setting
Press START.
To adjust Popcorn, press the MORE/LESS pad:
Once Adds 10 seconds
Twice Adds 20 seconds
3 Times Subtracts 10 seconds
4 Times Subtracts 20 seconds
5 Times Reverts to original setting
Press START.
|
About the sensor features.
Humidity Sensor
The Sensor Features detect the increasing humidity released during cooking. The oven automatically adjusts the cooking time to various types and amounts of food.
Severely overcooked or burnt food. If food is undercooked after the countdown, use the number pads to add more cooking time. Cooking preference varies with individuals. After using the Sensor Reheat or Sensor Cooking pad, you may want to adjust for a different cooking time. The MORE/ LESS pad allows you to add or subtract 10% to 20% cooking time to the program. See page 11 for details.

|
|
- The proper containers and covers are essential for best sensor cooking.
|
 |
|
- Always use microwave-safe containers and cover them with lids or vented plastic wrap.
|
 |
|
- Be sure the outside of the cooking containers and the inside of the microwave oven are dry before placing food in the oven. Beads of moisture turning into steam can mislead the sensor.
|
 |
|
Reheat
The Reheat feature should be used to heat previously cooked foods, such as a plate of leftovers.
- Place covered food in the oven. Press REHEAT.
- Press START. The oven beeps 2 times when steam is detected. Time remaining begins to count down in the display window. The oven will beep 5 times at the end of the countdown.
Do not open the oven door until time is counting down. If the door is opened, close it and press START immediately.
After removing food from the oven, stir, if possible, to even out the temperature. Reheated foods may have wide variations in temperature. Some areas may be extremely hot.
Some Foods Not Recommended for Use With Reheat
It is best to use Time Cooking for these foods:
- Bread products.
- Foods that must be reheated uncovered.
- Foods that need to be stirred or rotated.
- Foods calling for a dry look or crisp surface after reheating.
After using this feature a few times, you may find that beverages are not hot enough. To reduce time by 20%: Press the MORE/LESS pad two times. To add 20% to cooking time: Press the MORE/LESS pad one time. Press the MORE/LESS pad before the START pad.
|
 |
|
Sensor Cooking
Sensor cooking allows you to cook food without setting a time.
Choose the Sensor Cooking feature for your food type.
Always use microwave-safe containers. Cover them with lids or vented plastic wrap. Be careful when removing covers after cooking. To avoid steam burns, remove covers facing away from you.
- Place food in the oven. Press the food pad until the food category appears in the window.
- Press START. The oven beeps 2 times when steam is detected. Time remaining begins to count down in the display window. The oven will beep 5 times at the end of the countdown.
Do not open the oven door until time is counting down. If the door is opened, close it and press START immediately.
How to Change the Automatic Settings
After using this feature a few times, you may find that food is undercooked or over- cooked. You can adjust the cooking time for some foods to suit your personal taste.
To reduce time by 20%:
Press the MORE/LESS pad two times.
To add 20% to cooking time:
Press the MORE/LESS pad one time.
Press the MORE/LESS pad before the START pad.”
|
About the other features.
 |
|
Stop/Reset
Use the STOP/RESET pad to clear the memory. During cooking, press once to stop the cooking process. Press twice to cancel all cooking instructions.
|
 |
|
Options Features
The OPTIONS pad allows you to establish and set preferred non-cooking features. These features include: Child Lock, Word Speed, and more. See the chart below.
To access and change the various OPTIONS features:
- Press OPTIONS.
- Press the number of the desired feature, 1 through 9.
- Select and press the number for the desired setting, 1 or 2, or 1, 2 or 3.
|
 |
| |
|
Insert Food Reminder
A reminder will show on the display if the user tries to start cooking cycle without placing food inside the microwave oven within 5 minutes prior to starting the cooking cycle.
|
 |
|
Clock
Press to enter the time of day.
- Press CLOCK.
- Enter the time of day.
- Press CLOCK.
|
 |
|
Timer
This feature operates as a kitchen timer. It can also be used to program a delay start or a standing time after cooking is completed.
- Press TIMER.
- Enter the amount of time, in minutes and seconds, using the number pads (up to 99 minutes and 99 seconds).
- Press START.
Time will count down in the display window. The oven will beep 5 times to alert you when the time is up.
Opening the door will not stop the countdown. The time will continue to count down if the oven door is opened.
|
 |
|
Delay Start
You can program the oven to start at a later time.
- Press TIMER.
- Enter the amount of delay time, in minutes and seconds, using the number pads (up to 99 minutes and 99 seconds).
- Press the POWER LEVEL pad to set the desired power level. Skip this step for power level 10 (P10).
- Enter the desired cooking time using the number pads.
- Press START.
The Delay Start time will count down. The oven will automatically start at the set time. To cancel the Delay Start time, press STOP/ RESET.
|
 |
|
Stand Time
You can program the oven for a standing time after cooking is completed.
- Press the POWER LEVEL pad to set the desired power level. Skip this step for power level 10 (P10).
- Enter the desired cooking time using the number pads.
- Press TIMER.
- Enter the amount of stand time, up to 99 minutes and 99 seconds.
- Press START.
The Stand Time will count down. When each stage finishes, the oven will beep 2 times. At the end of the program, the oven will beep 5 times. To cancel the Stand Time, press STOP/ RESET.
|
Microwave terms.
| Term |
Definition |
| Arcing |
Arcing is the microwave term for sparks in the oven. Arcing is caused by:
- metal or foil touching the side of the oven.
- foil that is not molded to food (upturned edges act like antennas).
- metal such as twist-ties, poultry pins, gold-rimmed dishes.
- recycled paper towels containing small metal pieces.
|
| Covering |
Covers hold in moisture, allow for more even heating and reduce cooking time. Venting plastic wrap or covering with wax paper allows excess steam to escape.
|
| Shielding |
In a regular oven, you shield chicken breasts or baked foods to prevent over-browning. When microwaving, you use small strips of foil to shield thin parts, such as the tips of wings and legs on poultry, which would cook before larger parts.
|
| Standing Time |
When you cook with regular ovens, foods such as roasts or cakes are allowed to stand to finish cooking or to set. Standing time is especially important in microwave cooking. Note that a microwaved cake is not placed on a cooling rack.
|
| Venting |
After covering a dish with plastic wrap, you vent the plastic wrap by turning back one corner so excess steam can escape.
|
Care and cleaning of the microwave oven.
 |
|
Helpful Hints
An occasional thorough wiping with a solution of baking soda and water keeps the inside fresh.
Unplug the cord before cleaning any part of this oven.
|
 |
|
How to Clean the Inside
Walls, Floor, Inside Window, Metal and Plastic Parts on the Door
Some spatters can be removed with a paper towel, others may required a damp cloth. Remove greasy spatters with a sudsy cloth, then rinse with a damp cloth. Do not use
abrasive cleaners or sharp utensils on oven walls.
To clean the surface of the door and the surface of the oven that come together upon closing, use only mild, nonabrasive soaps or detergents using a sponge or soft cloth. Rinse with a damp cloth and dry.
Never use a commercial oven cleaner on any part of your microwave oven.
|
 |
|
Removable Turntable and Turntable Support Ring
To prevent breakage, do not place the turntable into water just after cooking. Wash it carefully in warm, sudsy water or in the dishwasher. The turntable and support ring can be broken if dropped. Remember, do not operate the oven without the turntable and support ring in place.
|
 |
|
How to Clean the Outside
Do not use cleaners containing ammonia or alcohol on the microwave oven. Ammonia or alcohol can damage the appearance of the microwave oven. If you choose to use a common household cleaner, first apply the cleaner directly to a clean cloth, then wipe the soiled area.
Stainless Steel
Do not use a steel-wool pad; it will scratch the surface.
To clean the stainless steel surface, use a hot, damp cloth with a mild detergent suitable for stainless steel surfaces. Use a clean, hot, damp cloth to remove soap. Dry with a dry, clean cloth.
The stainless steel can be cleaned with Cerama Bryte® or a similar product using a clean, soft cloth. You can order Cerama Bryte® Stainless Steel Appliance Cleaner through GE Parts by calling
Control Panel and Door
Wipe with a damp cloth. Dry thoroughly. Do not use cleaning sprays, large amounts of soap and scratch the control panel.
Door Surface
It is important to keep the area clean where the door seals against the microwave oven.
Use only mild, non-abrasive detergents applied with a clean sponge or soft cloth. Rinse well.
Power Cord
If the cord becomes soiled, unplug and wash with a damp cloth. For stubborn spots, sudsy water may be used, but be certain to rinse with a damp cloth and dry thoroughly before plugging cord into outlet
|
Troubleshooting Tips
Save time and money! Review the chart below and you may not need to call for service.
Oven will not start
- A fuse in your home may be blown or the circuit breaker tripped.
- Replace fuse or reset circuit breaker.
- Power surge.
- Unplug the microwave oven, then plug it back in.
- Plug not fully inserted into wall
- Make sure the 3-prong plug on the oven is fully outlet. inserted into wall outlet.
- Door not securely closed.
- Open the door and close securely.
Control panel lighted, yet oven will not start
- Door not securely closed.
- Open the door and close securely.
- START pad not pressed after entering cooking selection.
- Another selection entered already in oven and STOP/RESET pad not pressed to cancel it.
- Cooking time not entered after after pressing POWER LEVEL.
- Make sure you have entered cooking time pressing POWER LEVEL and before pressing START.
- CLEAR/OFF was pressed accidentally.
- Reset cooking program and press START.
- Food weight not entered after selecting INVERTER DEFROST.
- Make sure you have entered food weight after selecting INVERTER DEFROST.
- Oven was paused accidentally.
- Press START to restart the cooking program.
SENSOR ERROR message appears on display
- During the Sensor cooking program, the door was opened or STOP/RESET was pressed before steam could be detected.
- Close the door and press START immediately.
- Steam was not detected in maximum amount of time.
"LOCK” appears on the display
- The control has been locked.(When the control panel is locked,LOCK will be displayed.)
- The child lock-out has been initiated. Press the OPTIONS pad, then select 5 (CHILD LOCK-OUT) and press 2 to cancel lock-out.
Food amount too large for Sensor Reheat
- Sensor Reheat is for single servings of recommended foods.
- Use Time Cooking for large amounts of food.
Things That Are Normal With Your Microwave Oven
- Steam or vapor escaping from around the door.
- Light reflection around door or outer case.
- Dimming oven light and change in the blower sound at power levels other than high.
- Dull thumping sound while oven is operating.
- TV/radio interference might be noticed while using the microwave. Similar to the interference caused by other small appliances, it does not indicate a problem with the microwave. Plug the microwave into a different electrical circuit, move the radio or TV as far away from the microwave as possible or check the position and signal of the TV/radio antenna.