Eggs, egg whites, heavy cream, boiled frostings, sponge cakes, mayonnaise, some candies
DOUGH HOOK
Mixing and kneading yeast doughs
Breads, rolls, pizza dough, buns
SPEED CONTROL GUIDE
All speeds have the Soft Start® feature which automatically starts the Stand Mixer at a lower speed to help avoid ingredient splash-out and “flour puff” at start-up, then quickly increases to the selected speed for optimal performance.
NOTE: The speed control can be set between the speeds listed in the chart to obtain speeds 1, 3, 5, 7, and 9 if a finer adjustment is required. Do not exceed Speed 2 when preparing yeast doughs as this may cause damage to the Stand Mixer.
SPEED
ACCESSORY
ACTION
DESCRIPTION
STIR
STIR
For starting all mixing procedures, slow stirring, combining, and mashing. Use to add flour and dry ingredients to batter, and to add liquids to dry ingredients. Do not use Speed 1 to mix or knead yeast doughs.
1
2
SLOW MIXING
For slow mixing, mashing, and faster stirring; start mashing potatoes or other vegetables; cut shortening into flour.
Use to mix and knead yeast doughs, heavy batters, and candies; mix thin or splashy batters.
4
MIXING, BEATING
For mixing semi-heavy batters, such as cookies, or to combine sugar and shortening. Medium speed for cake mixes.
Use to add sugar to egg whites for meringues.
6
BEATING, CREAMING
For medium-fast beating (creaming), or whipping. Use to finish mixing cake, doughnut, and other batters. High speed for cake mixes.
For medium-fast whipping of ingredients requiring incorporation of air, such as egg whites.
8
FAST BEATING, WHIPPING
For whipping cream, egg whites, and boiled frostings.
10
FAST WHIPPING
For whipping small amounts of cream or egg whites; for final whipping of mashed potatoes.
NOTE: To move the speed control lever with ease, lift slightly up as you move it across the settings in either direction.
ASSEMBLING THE STAND MIXER
Check to be sure that the Stand Mixer is unplugged, and the speed control is turned to “0”.
2. Raise the motor head: Slide the locking lever to the unlock position and lift the motor head. Once lifted, slide the locking lever to the lock position to keep the motor head up.
NOTE: To move the speed control lever with ease, lift slightly up as you move it across the settings in either direction.
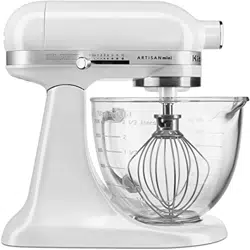
3. Attach the bowl: Place the bowl on the bowl clamping plate and gently turn it in a clockwise direction to lock it into place.
4. Attach any accessory: Slip the accessory onto the beater shaft and press upward as far as possible. Turn the accessory counterclockwise to hook the accessory over the pin on the shaft.
5. Lower the motor head: Slide the locking lever to the unlock position and guide the motor head down. Make sure motor head is completely down, then slide the locking lever to the lock position. Before mixing, test lock by attempting to raise motor head.
MPORTANT: Your Stand Mixer is adjusted at the factory so that the flat beater just clears the bottom of the bowl. If, for any reason, the flat beater hits the bottom of the bowl or is too far away from the bowl, you can easily correct the clearance.
NOTE: When properly adjusted, the flat beater will not strike on the bottom or sides of the bowl. If the flat beater or the wire whip is so close that it strikes the bottom of the bowl, coating may wear off the beater or wires on the whip may wear.
(OPTIONAL) To adjust beater to bowl clearance: Tilt the motor head back; then turn the screw slightly counterclockwise (left) to raise the beater, or clockwise (right) to lower the beater. Adjust the beater so that it just clears the surface of the bowl. If you over-adjust the screw, the bowl lock lever may not lock into place.
(OPTIONAL) Place the pouring shield*: Slide the pouring shield* from the front of the Stand Mixer over the bowl until the pouring shield* is centered. The bottom rim of the pouring shield* fits inside of the bowl. The pouring chute will be just to the right of the attachment hub as you face the Stand Mixer.
*Available with select models only and available as an accessory purchase.
OPERATING THE STAND MIXER
NOTE: The Stand Mixer may warm up during use. Under heavy loads with extended mixing time, the top of the unit may become hot. This is normal.
1. Plug the Stand Mixer into a grounded 3 prong outlet. Always set the speed control lever on lowest speed to start, then gradually increase speed to avoid splashing ingredients. See the “Speed control guide” to select the best speed for your recipe.
NOTE: To move the speed control lever with ease, lift slightly up as you move it across the settings in either direction.
2. Do not scrape the bowl while the Stand Mixer is operating. The bowl and beaters are designed to provide thorough mixing without frequent scraping. Scraping the bowl once or twice during mixing is usually sufficient.
(OPTIONAL) Pour ingredients into the bowl through the pouring chute.
NOTE: The pouring shield* can be used to avoid ingredients splashing out of the bowl when mixing, as well as to easily pour ingredients in the bowl while mixing.
DISASSEMBLING THE STAND MIXER
1. Raise the motor head: Check to be sure that the Stand Mixer is unplugged, and the speed control is turned to “0”; then slide the locking lever to the unlock position and lift the motor head. Once lifted, slide the locking lever to the lock position to keep the motor head up.
(OPTIONAL) Remove the pouring shield*: Lift the front of the pouring shield* clear of the rim of the bowl, and pull away from the Stand Mixer.
2. Remove the accessory: Turn the speed control to “0”, unplug the Stand Mixer, and tilt the motor head back. Then, press the accessory upward as far as possible, turn the accessory clockwise, and pull it off of the beater shaft.
3. Remove the bowl: Gently turn the bowl counterclockwise to release it from the bowl clamping plate.
OPTIONAL ATTACHMENTS
KitchenAid offers a wide range of optional attachments such as the Spiralizer, Pasta Cutters, or Food Grinder that may be attached to the Stand Mixer attachment power hub as shown here.
1. Check to be sure that the Stand Mixer is unplugged, and the speed control is turned to “0”.
2. Turn the attachment knob counterclockwise to remove attachment hub cover
3. Insert attachment into attachment hub, making certain that attachment power shaft fits into the square attachment hub socket. It may be necessary to rotate the attachment back and forth. When it is in the proper position, the pin on the attachment will fit snugly into the notch on the hub rim.
4. Tighten the attachment knob by turning it clockwise until the attachment is completely secured to the Stand Mixer. See the Use and Care Guide that came with your attachment for detailed directions on using the attachment
CARE AND CLEANING
CLEANING THE STAND MIXER
IMPORTANT: Do not wash the wire whip in the dishwasher. Do not immerse the Stand Mixer body in water or other liquids. These parts should be hand washed.
1. Turn Stand Mixer off and unplug before cleaning. Wipe the Stand Mixer body with a soft, damp cloth. Do not use household/commercial cleaners. Wipe off the beater shaft frequently to remove any accumulation of residue. Do not immerse in water.
2. The stainless steel bowl, glass bowl*, glass bowl lid*, flat beater, dough hook, Flex Edge beater*, and pouring shield* may be washed in a dishwasher (top shelf only); or clean them thoroughly in hot, sudsy water and rinse completely before drying. Do not store beaters on the shaft.
IMPORTANT: Do not place a hot bowl in cold water, or a cold bowl in hot water, as sudden temperature changes may lead to breakage.
3. The wire whip is not dishwasher-safe. Clean it thoroughly in hot, sudsy water and rinse completely before drying. Do not store the wire whip on the shaft.
GLASS BOWL CARE*
IMPORTANT:
Glass bowl may crack or break if exposed to sudden temperature changes. To prevent potential damage:
Do not place hot bowl on wet or cold surface, or add cold water to a hot bowl.
Allow hot bowl to cool down before washing, refrigerating, or freezing.
Allow a cold bowl to reach room temperature before cleaning in hot, sudsy water, or in the dishwasher.
The glass bowl is both microwave- and dishwasher-safe.
Do not use the glass bowl in the oven.
The glass bowl lid is non-sealing, and is dishwasher-safe (top rack only).
TROUBLESHOOTING
If your Stand Mixer should malfunction, please check the following:
The Stand Mixer may warm up during use. Under heavy loads with extended mixing time periods, you may not be able to comfortably touch the top of the unit. This is normal.
The Stand Mixer may emit a pungent odor, especially when new. This is common with electric motors.
If the flat beater hits the bowl, stop the Stand Mixer. See the “Assembling the Stand Mixer” section and adjust the beater to bowl clearance.
The speed control lever does not move smoothly or easily. To move the speed control lever with ease, lift slightly up as you move it across the settings in either direction.
If your Stand Mixer should fail to operate, please check the following:
Is the Stand Mixer plugged in?
Is the fuse in the circuit to the Stand Mixer in working order? If you have a circuit breaker box, be sure the circuit is closed.
Turn off the Stand Mixer for 10-15 seconds, then turn it back on. If the Stand Mixer still does not start, allow it to cool for 30 minutes before turning it back on.
If the problem cannot be corrected: See the “Warranty and service” section. Do not return the Stand Mixer to the retailer; retailers do not provide service.