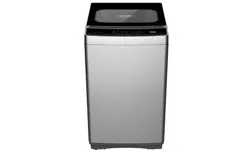
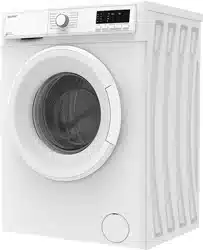
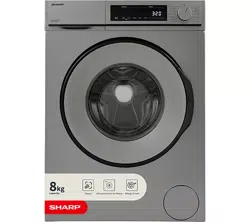
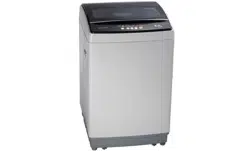
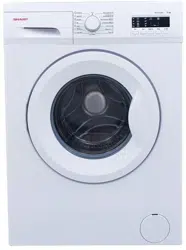
Sharp ES-FA7123W2 Washing Machine
Product's Documents
Below are documents related to this product, you can read online or download:
- Owner's manual - (English) Read Online | Download pdf

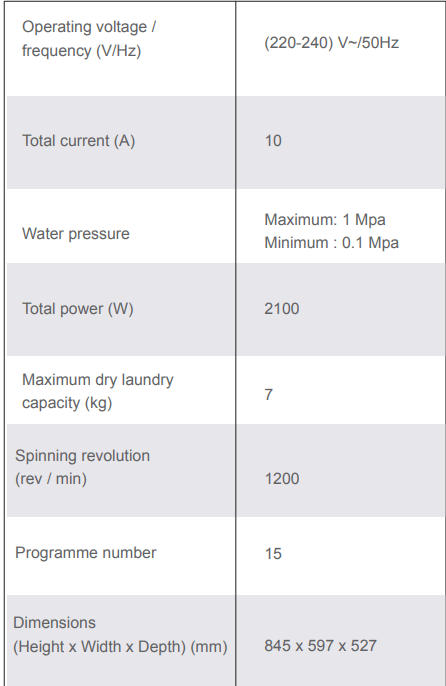
SPECIFICATIONS
SECTIONS
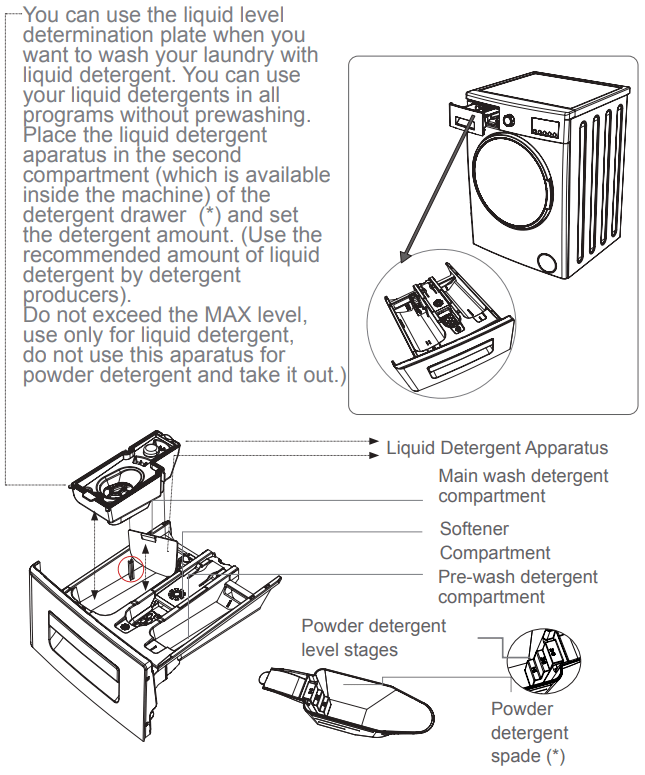
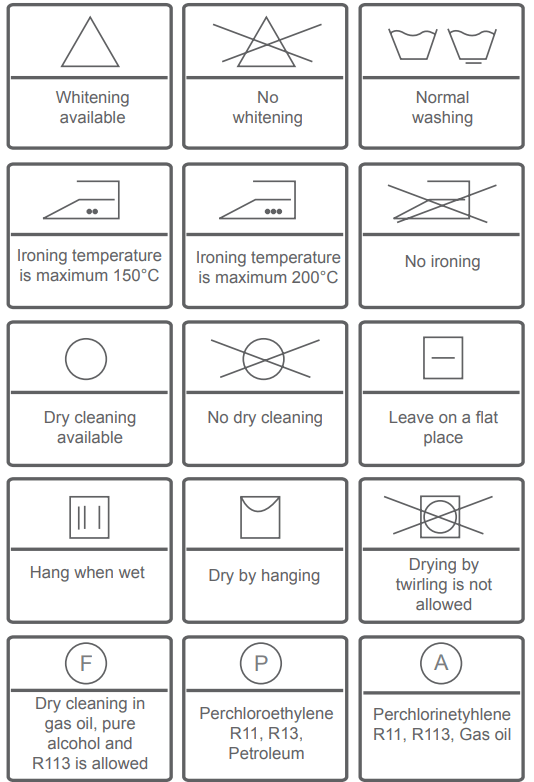
Main wash detergent compartment:
In this compartment, only materials like detergent (liquid or powder), lime preventer and such can be used. You can find the liquid detergent aparatus inside your machine at first installation.
Fabric conditioner, starch, detergent compartment:
You can use softener for your laundry (recommended amount and type by the producer is recommended). Sometimes the fabric conditioners you use for your laundry mar remain in this compartment. The reason for this is that the conditioner is not viscous. To prevent this situation, more viscous liquid softeners are recommended to be used or the softener could be thinned and then used.
Pre-wash detergent compartment:
This compartment must only be used when the pre-wash feature is selected. Pre-wash feature is recommended for very dirty laundry.
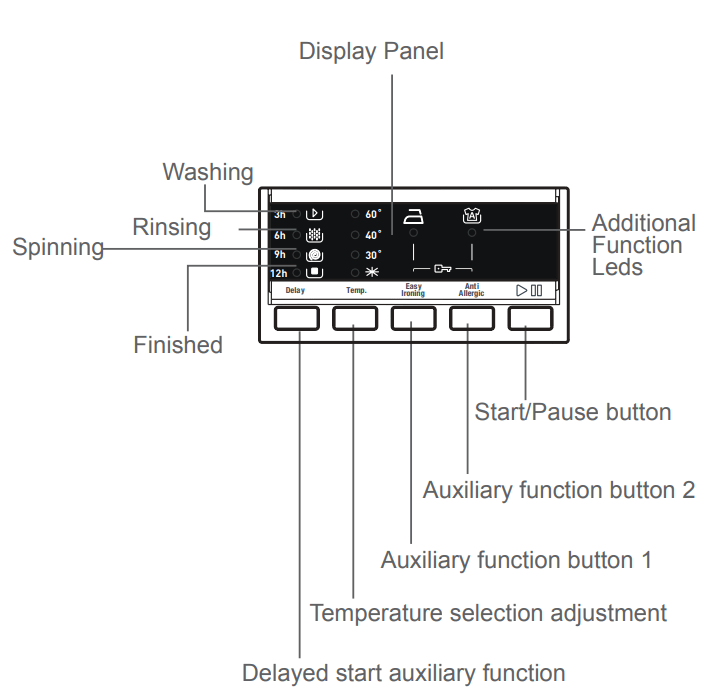
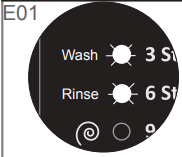
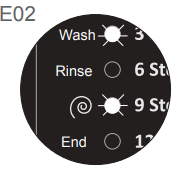
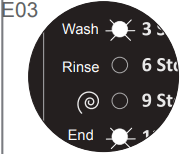
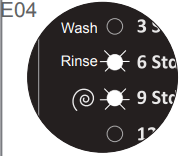
On the display panel, you can see the washing delay timer of your machine, temperature selection of your machine, the auxiliary functions you have selected and the stage of the programme you are running on your machine (  pre wash/ wash state,
  rinsing stage,
  wringing stage).
Furthermore, electronic display will warn you by means of led combinations that will turn on its display when a fault oc- curs on your machine and notify you of the completion of the washing programme by revealing expression of “Finished” on the display as soon as the washing programme you have selected has finished as well.
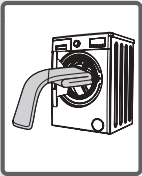
Open the door of your machine.
Spread your laundries in your machine.
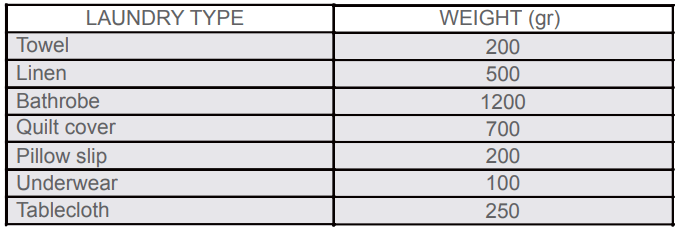
Note: Maximum loading capacity may vary based on the laundry type you will wash, degree of contamination and the programme you have chosen. Do not exceed maximum dry loading capacity indicated in the programme table for washing programmes.
You can take the following table of weights as an example.
The amount of detergent you will put in your machine will depend on the following criteria:

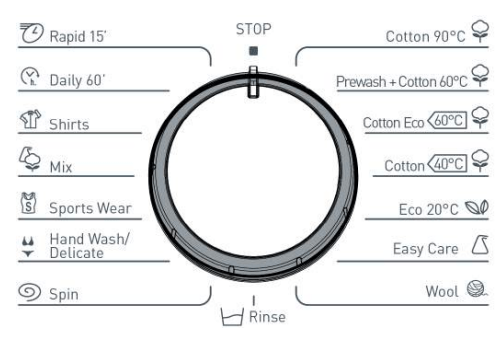
Selecting programme
Select the convenient programme for your laundries on the programme table.
AUXILIARY FUNCTIONS
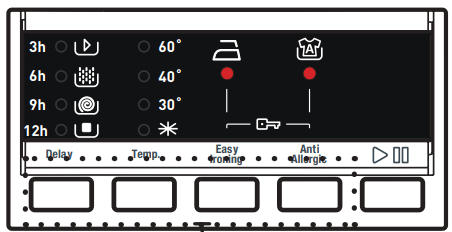
Before starting the programme, you can optionally select an auxiliary function.
HALF-LOAD DETECTION SYSTEM
Your machine features a half-load detection system.
In case yuo put approximately half or less amount of laun- deries of maximum laundry capacity in your machine, your machine will run so as to save washing time, water con- sumption and energy in some programmes.When the halfload function is active, the machine can complete the pro- gramme you have set in a shorter time
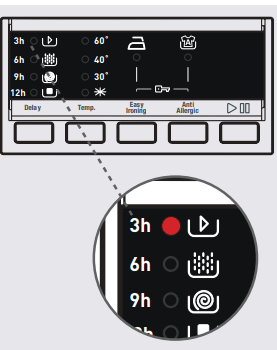
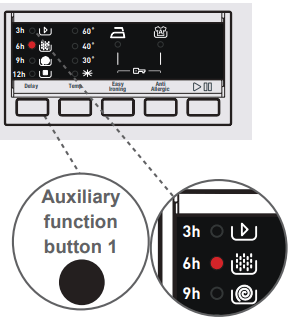
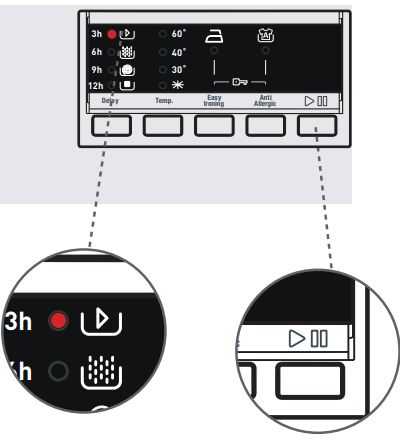
1- Delay timer
By using this auxiliary function, you can make your machine to start the washing operation with delays between “3h, 6h, 9h, 12h”
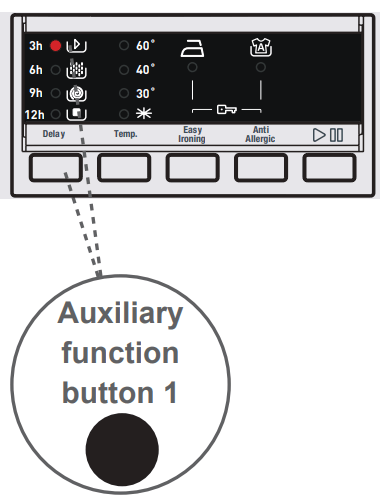
To use auxiliary function of delayed start:
If you have skipped the time delay you want to set, you can go back to the time desired by keeping pressed on time delay button.
If you want to cancel the time delay, you just have to press the time delay button until all of the time adjustment leds on the display panel turn off.
To run time delay function, your machine is required to be operated by pressing on Start/Standby button.
2- Temperature selection
You can select the washing water temperature with the washing water temperature adjustment button. When you select a new programme, there won’t be any display on the temperature adjustment leds on the display panel.
When you press the temperature adjustment button, the max. temperature value of the programme you have selected shall appear on the led display panel.
You can gradually decrease the washing water tempera- ture between the maximum washing water temperature of the selected programme and cold washing selections by pressing temperature adjustment button.
If you have missed the washing water temperature you wanted, you can return to the intended temperature by continuously pressing the washing water temperature adjustment button.
3- Easy ironing
You can enable your laundries to be taken out less wrinkled as the washing operation is completed by employing this auxiliary function.

You may make the programme active by pressing the easy ironing auxiliary function button when the led light of the symbol turns on.
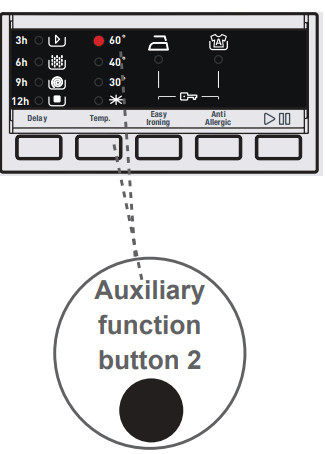
4- Anti-Allergic
In the programmes where this auxiliary function is active, you may have your machine perform an extra rinsing operation on your laundries prior to latest rinsing operation.
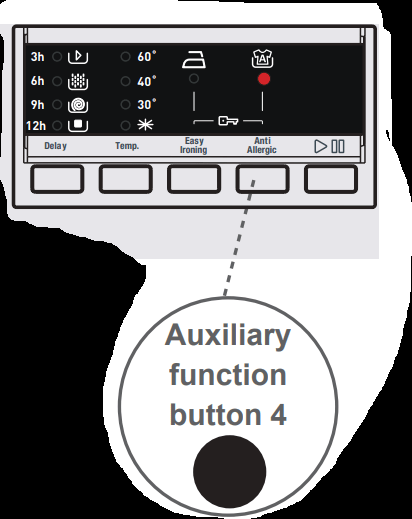
You may make the programme active by pressing the anti-allergic button on the display panel when the led light of the  symbol turns on.
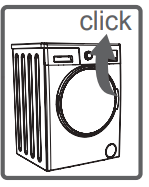
Start/Pause button
By pressing on the Start/Pause button, you may start the programme you have selected or suspend a running programme. If you switch your machine to the standby mode, the Start/Pause led on the electronic display will blink.
To avoid programme flow from being affected if programme buttons are pressed or programme button is turned when performing washing operation in your machine, child lock is available. Child lock will be activated in case pressed on both auxiliary functions 3 and 4 at the same time for more than 3 seconds. You can see the auxiliary function leds on the display when activated.
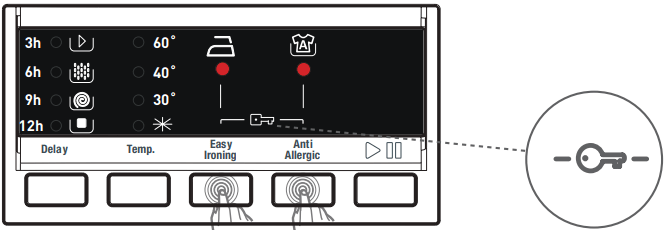
If pressed any button while child lock is active, the Additional Function Leds will blink on the display. If while the child lock is engaged and any programme is run- ning, the programme knob is switched to the STOP position and another programme is selected, the programme previously selected continues from where it left. To deactivate it, it will be sufficient to press on the same buttons for more than 3 seconds. When the child lock is deacti- vated, the Additional Function Leds will blink on the display.
If you want to cancel any programme running:
Your machine will stop by itself as soon as the programme you have selected finishes.

All repairing operations required for your machine should be carried out by our authorised service. If your machine re- quires a repair or if you cannot remove the fault by the help of the information provided as follows:
FAULT | POSSIBLE CAUSE | TROUBLESHOOTING |
Your machine does not start. | It is not plugged. | Plug it. |
Fuse blown.. | Replace the fuses. | |
Electricity cut-off. | Check mains power. | |
Start/pause button not pressed. | Press on Start/ Pause button. | |
Programme dial ‘stop’ position. | Switch the programme button to the desired position. | |
The machine door is not completely closed.. | Close the machine door. | |
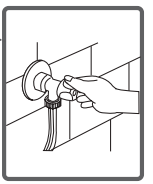
Your machine does not intake water. | Water tap is turned off. | Turn your faucet on. |
Water inlet hose may be twisted. | Check water inlet hose and untwist. | |
Water inlet hose clogged. | Clean water inlet hose filters. (*) | |
Valve inlet filter clogged. | Clean the valve inlet filters. (*) | |
The machine door is not completely closed.. | Close the machine door. |
| Discharging hose clogged or twisted. | Check the discharging hose, then either clean or untwist. | |
| Your machine does not discharge water. | Pump filter clogged. | Clean the pump filter. (*) |
| Laundry settled in the machine unevenly | Spread your laundry in the machine evenly. | |
The feet of your machine have not been adjusted. | Adjust the feet on your machine. (**) | |
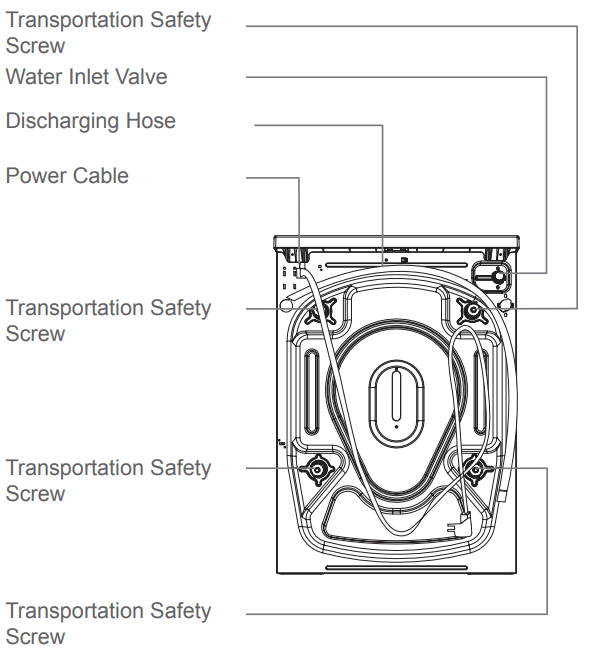
| Safety stays fitted for transportation not disassembled. | Disassemble the safety stays of your machine. (**) | |
| Less amount of laundry in the appliance. | This will not block operation of your machine. | |
| Your machine vibrates. | Your machine is overloaded with laundry or laundry settled unevenly.. | Prevent your machine from resting on hard surfaces. |
| Your machine rests on a hard surface. | Prevent your machine from resting on hard surfaces. |
Excessive foam is formed in the detergent drawer. | Excessive amount of detergent used. | Press on Start/Pause button. To eliminate foam formation, mix a spoon of softener with half litres of water, and pour the mixture in the detergent drawer. After 5-10 minutes, press on Start/Pause button again. In your next washing operation, Adjust the detergent dose accordingly. |
| Wrong detergent used. | Use detergents produced only for automatic washing machines in your machine. |
| The contamination degree of your laundries does not match the programme you have chosen. | Select the programme appropriate for the contamination degree of your laundries. (See programme table) |
Unsatisfactory washing result. | Amount of detergent used insufficient. | Adjust the amount of detergent based on the amount and contamination degree of your laundries. |
| Laundries in excess of maximum capacity put in your machine. | Load your machine with laundries, amount of which will not exceed maximum laundry capacity. |
Unsatisfactory washing result. | Water being hard. ( Contaminated, lime water etc.) | Adjust the amount of detergent based on the instruction of detergent manufacturer. |
Laundries distributed in your machine nonhomogenously. | Spread your laundries in the machine properly and homogeneously. | |
As soon as the machine is loaded with water, water discharges. | The end of water discharging hose is too low for the machine. | Set the water discharging hose on appropriate height. (**) |
No water appears in the drum during washing. | No fault. Water is in the unseen part of the drum. |
|
Laundries have detergent residues on them. | Non-dissolving particles of some detergents may stick to your laundries as white spots. | Perform an extra rinsing by setting your machine to “Rinsing” programme, or clean the spots using a brush after your laundries dry. |
Grey spots appear on the laundries. | The reason for such spots may be oil, cream or ointment. | Apply the maximum amount of detergent instructed by the detergent manufacturer in the next washing operation. |
| Spinning operation is not performed or runs late. | No fault. Unbalanced load control system has been activated. | Unbalanced load control system will try to spread your laundries homogeneously. Wringling operation will begin after your laundry is spread. Place the laundry in the machine in a balanced fashion the next time. |
AUTOMATIC FAULT WARNINGS AND WHAT TO BE DONE
Your machine is equipped with the systems which are capable of both taking necessary precautions and warning you in case of any breakdown by means of continuous self-checking during washing operations.
TROUBLE CODE | POSSIBLE FAULT | WHAT TO DO |
 | The door of your machine is left open. | Close the machine door. If your machine persists to indicate fault, turn off your machine, unplug it and contact the nearest authorised service immediately. |
 | The water pressure or the water level inside the machine is low. | Turn on the faucet. Mains water may be cut-off. If the problem still continues, your machine will stop after a while automatically. Unplug the machine, turn off your faucet and contact the nearest authorised service. |
 | The pump is faulty or pump filter is clogged or electrical connection of the pump is faulty. | Clean the pump filter. If the problem persists, contact the nearest authorised service. (*) |
 | Your machine has excessive amount of water. | Your machine will discharge water by itself. Pursuant to discharging operation, turn off your machine and unplug it. Turn off your faucet and contact the nearest authorised service. |
(*) See the chapter regarding maintenance and cleaning of your machine.
Reference file: Sharp ES-FA7123W2 Washing Machine
Additionally, the document applies to other Sharp models: ES-FA7123W1