
Loading ...
Loading ...
Loading ...
13
3
Do not make any cutouts until you have decided whether this installation will be: ducted or non-ducted
and wiring has been prepared based on based on blower type.
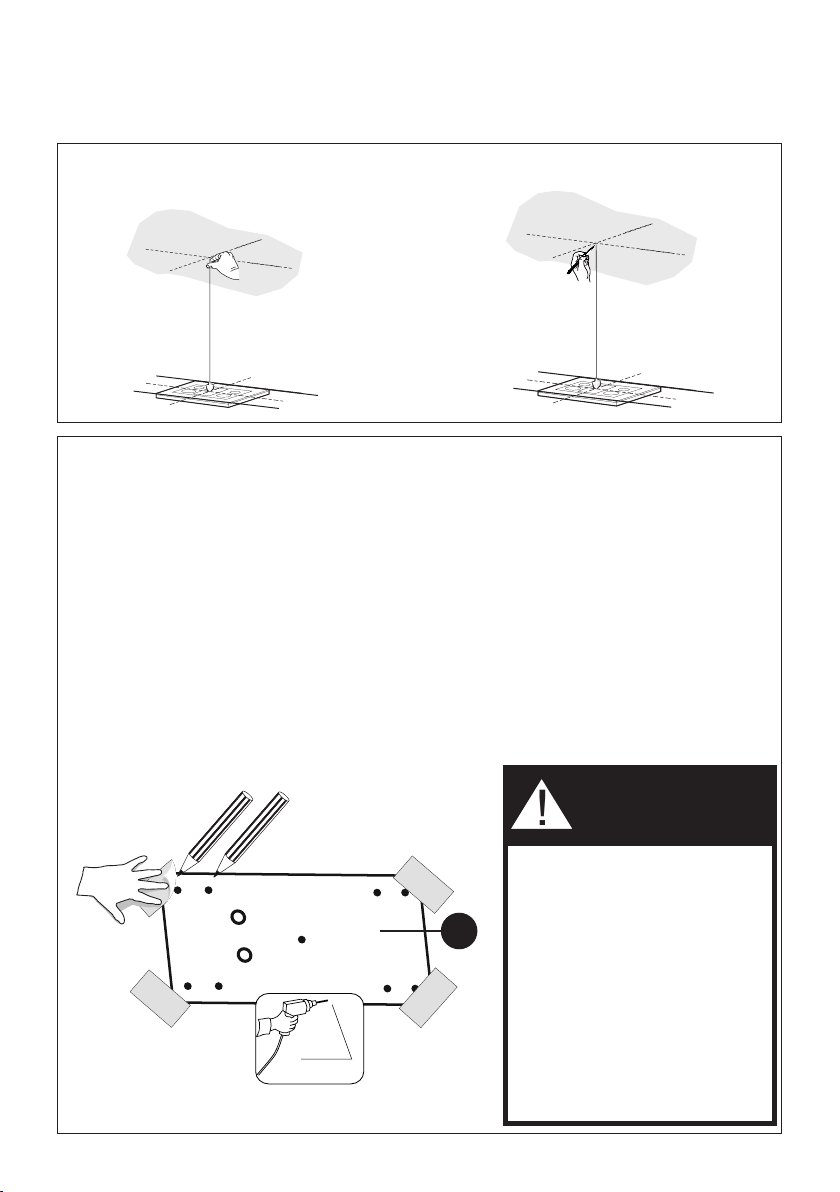
CEILING HOOD INSTALL PREPARATION
Use a plumb line to mark the center of the
range on the ceiling.
Mark the centers.
4
5
DUE TO THE SIZE AND WEIGHT OF
THIS Range Hood, THE SUPPORT
MUST BE FIRMLY ATTACHED TO
THE CEILING. For plaster or sheet
rock ceiling, the support must be
attached to the joists. If this is not pos-
sible, a support structure must be built
behind the plaster or sheet rock. The
manufacturer assumes no responsibil-
ity for injury or damage caused by
improper installations.
WARNING
!
• For all installations, an access point to the hood must be created for installation and future maintenance
of the hood.
• Put a thick, protective covering over cooktop to protect from damage or dirt.
• Use the mounting template on the ceiling to determine placement of mounting screws on the ceiling.
• Mark the center of the holes in the ceiling template.
• Determine and make necessary cuts for the ductwork.
• Install ductwork before mounting the hood.
• Determine the proper location for the Power Supply Cable as indicated on the Template.
• Use a 1 1/4" Drill Bit to make this hole.
• Run the Power Supply Cable. Use caulking to seal around the hole.
• A knockout for threading through the Power Supply from the ceiling is located on the top of the Range
Hood.
• Do not connect the Power Cable to the Wiring Box or power up the hood at this time.
• Run enough power cable from the ceiling to reach the wiring box on the hood.
1 1/4"
H
Loading ...
Loading ...
Loading ...