
Loading ...
Loading ...
Loading ...
6
ASSEMBLY INSTRUCTIONS
We value your experience using Sunny Health and Fitness products. For assistance with parts or
troubleshooting, please contact us at [email protected] or 1-877-90SUNNY (877-
907-8669).
27
28
40
43
15
14
27
8
14
43
40
15
28
3
35
35
21
50
49
38
50
49
38
3
2
50
49
40
40
49
46
46
49
40
#35 M8x60 2PCS
#49 φ8.1xφ10.6x1.5 5PCS
#38 M8 2PCS
#40 M8x16 3PCS
#50 φ8.2xφ19x1.5 3PCS
#46 φ8.2xφ16x1.5 2PCS
#61 S10-S13-S17 1PC
#60 S6 1PC
S13
S17
S10
#40 M8x16 2PCS
#43 φ8.2xφ22x1.5 2PCS
#60 S6 2PCS
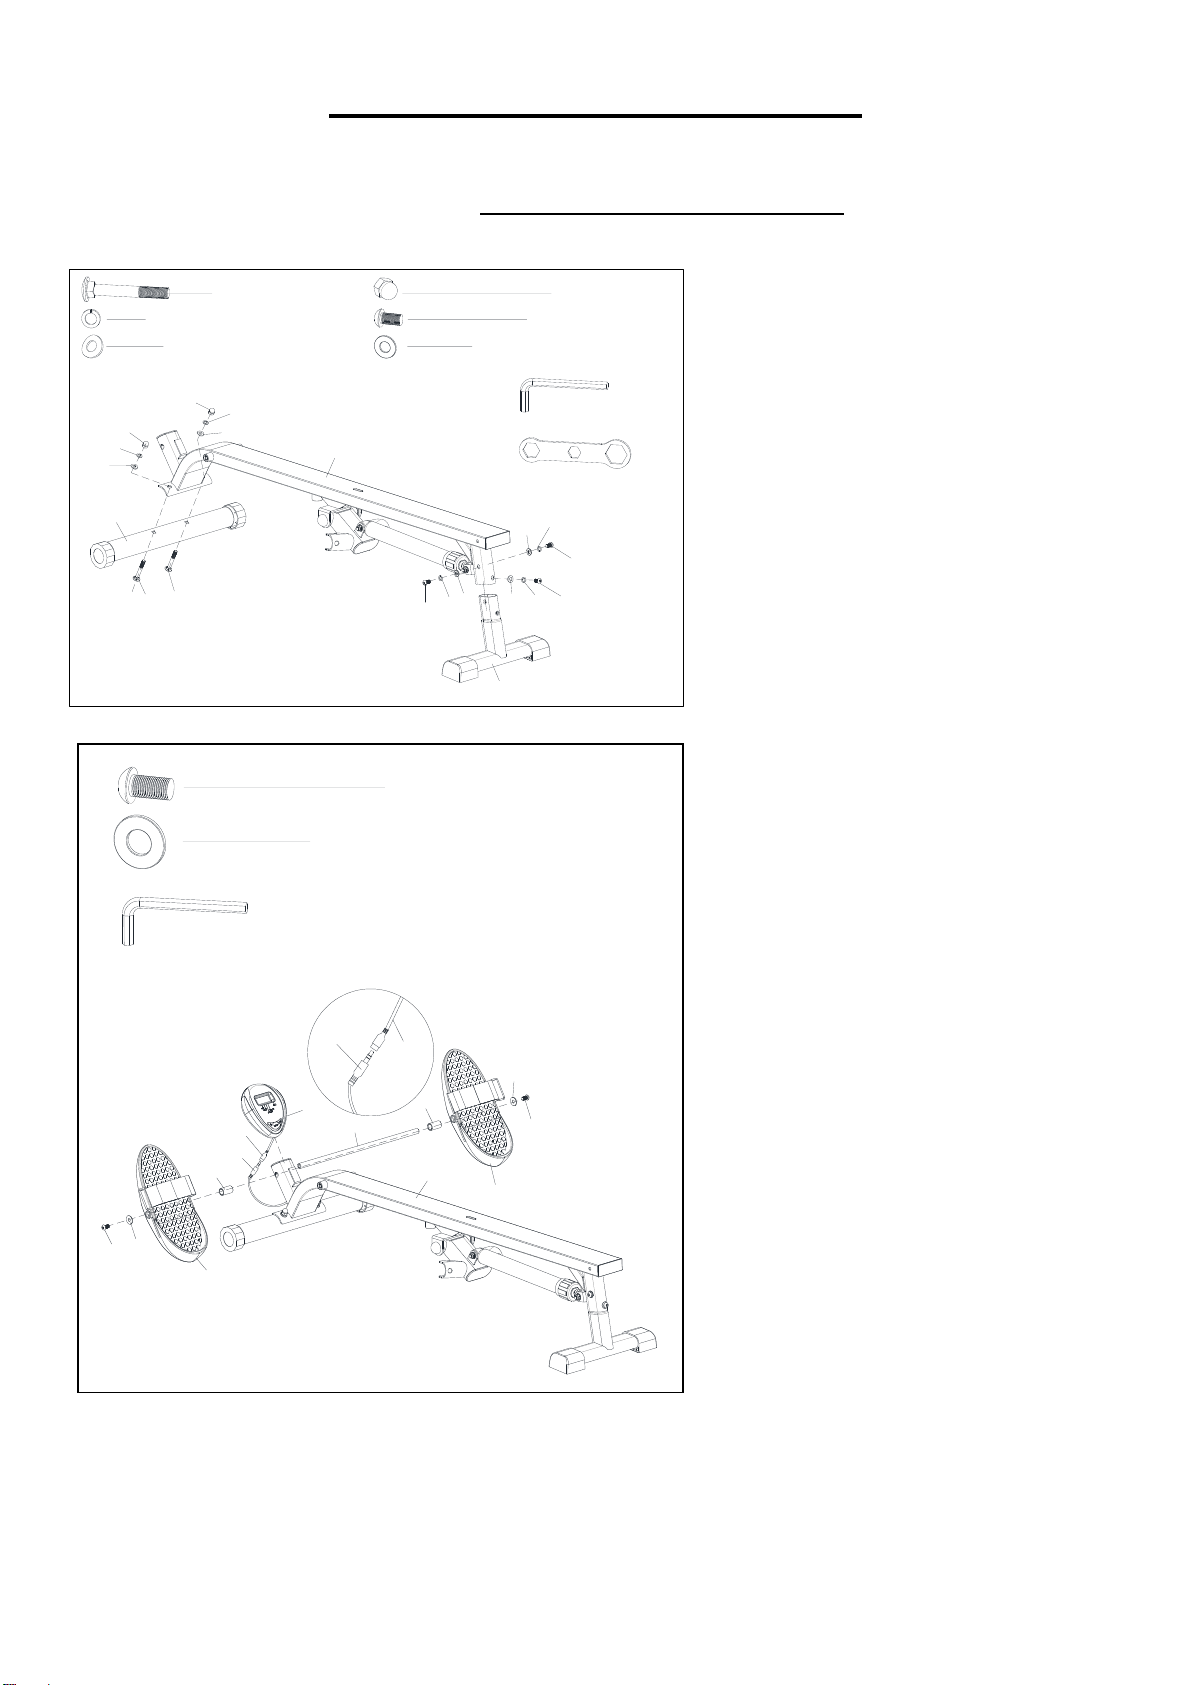
STEP 1:
Attach Front Stabilizer (No. 21) to
Seat Rail (No. 3) with 2 Bolts (No.
35), 2 Arc Washers (No. 50), 2
Spring Washers (No. 49), and 2
Nuts (No. 38). Tighten and secure
with Spanner (No. 61).
Attach the Rear Stabilizer (No. 2) to
the Seat Rail (No. 3) with 3 Inner Hex
Screws (No. 40), 3 Spring Washers
(No. 49), 2 Flat Washers (No. 46) and
1 Arc Washer (No. 50). Tighten and
secure with Allen Wrench (No. 60).
STEP 2:
Remove 2 Flat Washers (No. 43), 2
Spacers (No. 14) and 2 Inner Hex
Screws (No. 40) from Long Shaft
(No. 8) with 2 Allen Wrenches (No.
60).
Insert Long Shaft (No. 8) into the
Seat Rail (No. 3) and insert 2
Spacers (No. 14) that were removed
onto the Long Shaft (No. 8) on both
ends. Then, slide the Pedals (No.
15L/R) onto each side of the Long
Shaft (No. 8). Secure with 2 Flat
Washers (No. 43) and 2 Inner Hex
Screws (No. 40) that were removed.
Tighten and secure with 2 Allen
Wrenches (No. 60).
Insert the Meter (No. 27) into the
meter support on the Seat Rail (No.
3). Then, connect the Sensor Wire
(No. 28a) with the Meter Wire (No.
27a).
40
43
15
14
27
8
14
43
40
15
28a
3
27a
28a
27a
Loading ...
Loading ...
Loading ...