Loading ...
Loading ...
Loading ...
8
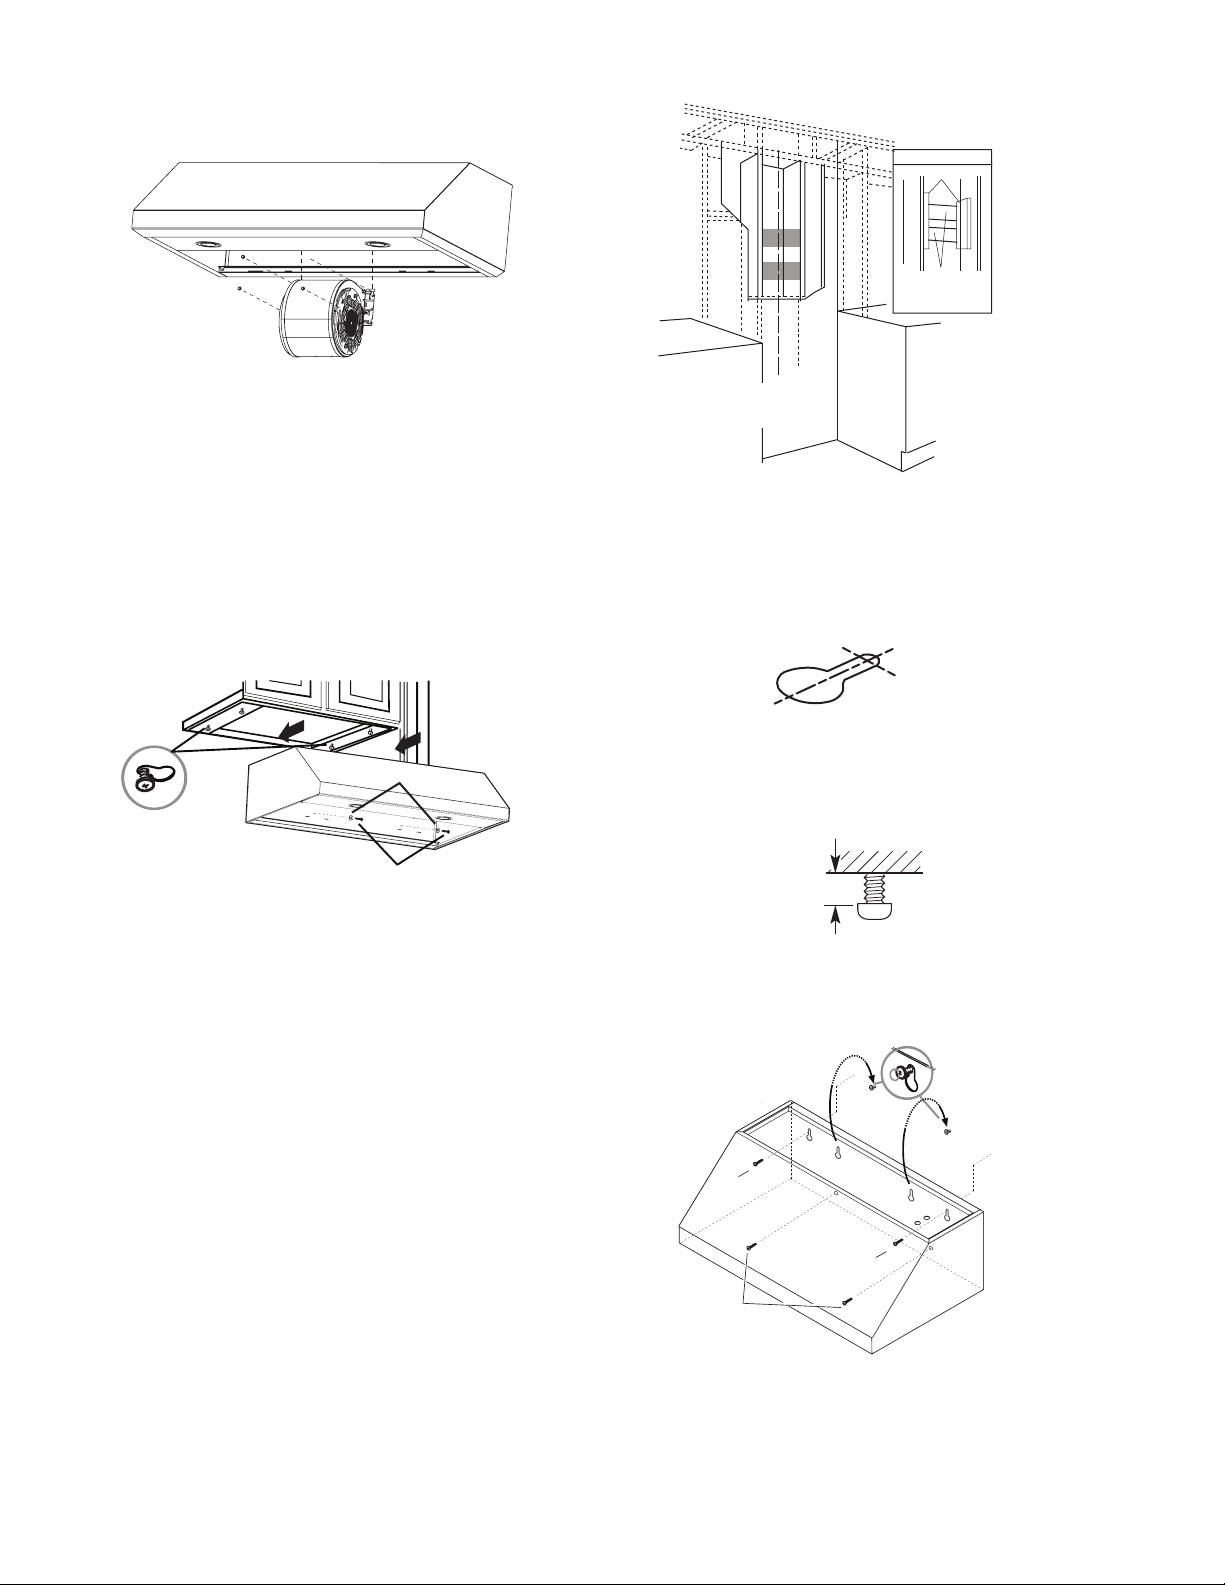
7 Insert the two blower springs to the top of the range hood
housing, secure it with the four mounting screws previously
released,
8 Connect the blower harness to the hood.
Cabinet Installation
NOTE: Your cabinet must be able to support at least 88 lb (40kg).
1 Drive a mounting screw (from the hardware package)
partway into each center of the narrow neck of the keyhole
slots marked on the cabinet bottom.
2 Install the 4 - 4 x 8 mm mounting screws. Leave a
1
⁄4” (6.4 mm)
gap between the wall and the back of the screw head to
slide range hood into place
1
⁄4” (6.4 mm).
3 Fix the wiring conduit of the hood.
4 Slide the hood back against the cabinet. Tighten the
mounting screws. Be sure the screw heads are in the narrow
neck of the keyhole slot.
5 Drive 2 pieces of the selected screws in the security holes
(See the image below).
A
B
C
A. 4- 4x8 mm mounting screws
B. Round washers
C. Security screws
Wall Installation
Install framing for hood support
1 Mark the screw hole locations indicated in the “Outside
rear exhaust” figure.
2 If drywall is present, cut away enough drywall to expose
2 vertical studs at the indicated holes location. Install two
horizontal supports between two wall studs at the bottom
and upper mounting holes installation location.
3 The horizontal support must be flush with the room side
of the studs. Use cleats behind both sides of the support
to secure wall studs.
4 Reinstall drywall and refinish.
View from rear
Mounting
Support
Centerline of
Installation
Space
IMPORTANT: Framing must be capable
of supporting 100 lbs.
Cleats
5 Cut holes at marked locations for duct and electrical
wiring.
Mounting the hood
1 Drive a mounting screw (from the hardware package)
partway into each center of the narrow neck of the keyhole
slots marked on the wall’s support frame.
2 Install the 2 pieces of the selected screws on the mountings
screws location (see the image). Leave a
1
⁄4” (6.4 mm) gap
between the wall and the back of the screw head to slide
range hood into place.
1
⁄4”
(6.4 mm)
3 Fix the wiring conduit of the hood.
4 Slide the hood back against the wall. Tighten the mounting
screws. Be sure the screw heads are in the narrow neck of
the keyhole slot.
A
B
C
B
A. Mounting screws
B. Upper security screws (Wall Installation)
C. Lower security screws (Wall Installation)
Loading ...
Loading ...
Loading ...