
Loading ...
Loading ...
Loading ...
9
Wood shims
2 Cut holes at marked locations for duct and electrical
wiring. For the vertical duct, cut out
3
⁄4” extra toward the
front of the cabinet so you can move the duct freely when
installing the hood. It may also ease installation by cutting
the hole 10
1
⁄ 2” instead of 10”.
3 Drive a mounting screw (from the hardware packet)
partway into each center of the narrow neck of the keyhole
slots marked on the cabinet bottom.
4 Fix the wiring conduit to the hood.
5 Slide the hood back against the wall. Tighten the mounting
screws. Be sure the screw heads are in the narrow neck of
the keyhole slot. Connect Ductwork to hood.
Electrical Connection
I WARNING
ELECTRICAL SHOCK HAZARD.
I WARNING
TURN OFF POWER CIRCUIT AT THE SERVICE PANEL
BEFORE WIRING THIS UNIT.
120 VAC, 15 OR 20 AMP CIRCUIT REQUIRED.
ELECTRICAL GROUNDING INSTRUCTIONS
THIS APPLIANCE IS FITTED WITH AN ELECTRICAL JUNC-
TION BOX WITH 3 WIRES, ONE OF WHICH (GREEN/YELLOW)
SERVES TO GROUND THE APPLIANCE. TO PROTECT YOU
AGAINST ELECTRIC SHOCK, THE GREEN AND YELLOW WIRE
MUST BE CONNECTED TO THE GROUNDING WIRE IN YOUR
HOME ELECTRICAL SYSTEM, AND IT MUST UNDER NO
CIRCUMSTANCES BE CUT OR REMOVED.
Failure to do so can result in death or electrical shock.
• Remove the knockout and the Junction box cover and
install the conduit connector (cULus listed) in junction box.
A
B
A. Knockout
B. Junction box cover
• Run 3 wires; black, white and green ,according to the
National Electrical Code and local codes and ordinances,
in
1
⁄2” conduit from service panel to junction box.
• Connect black wire from service panel to black or red in
junction box, white to white and green to green-yellow.
• Close and secure junction box cover.
Complete Installation
Replace filters.
Check operation of the hood.
If range hood does not operate:
• Check that the circuit breaker is not tripped or the house
fuse blown.
• Disconnect power supply. Check that wiring is correct.
To get the most ecient use from your new range hood,
read the “Mainteinance” section.
Keep your Installation Instructions and Use and Care Guide
close to range hood for easy reference.
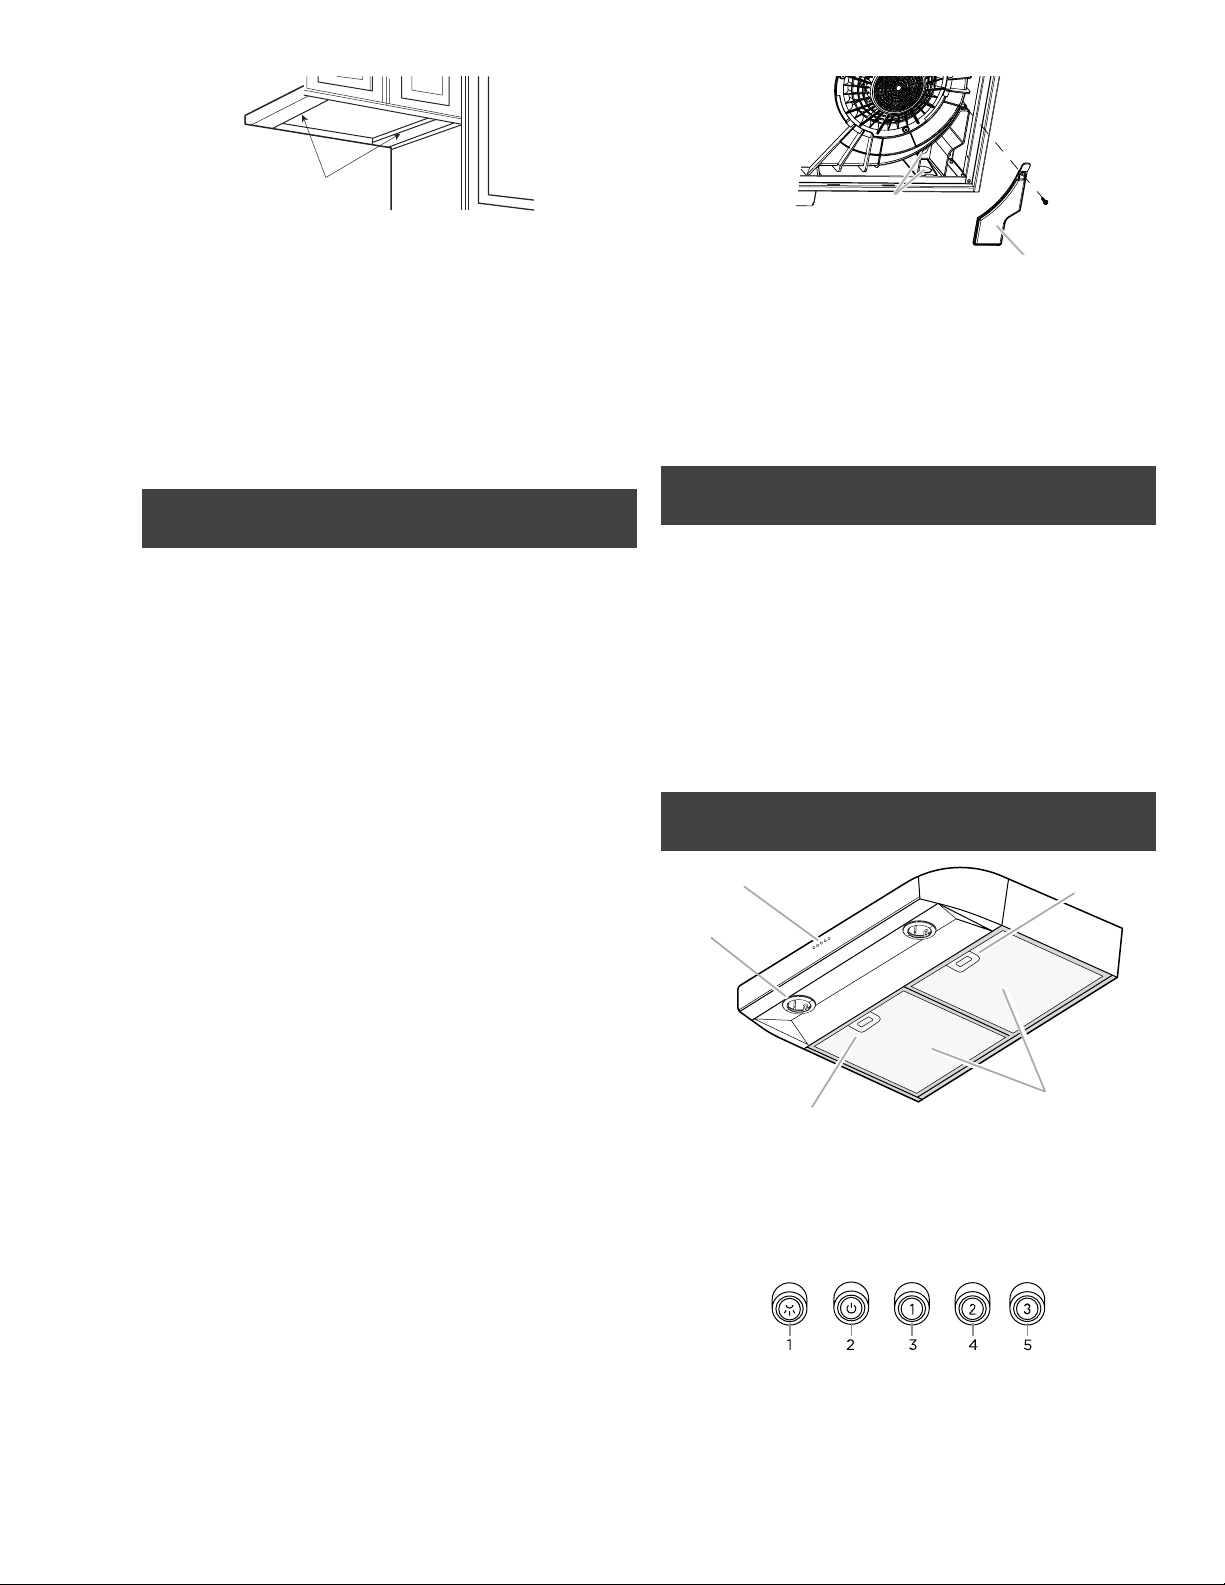
Description of the Hood
2
4
3
3
1
1. Blower and light controls
2. LED lamps
3. Grease filter handle
4. Grease filter
Controls
1. Light On/O button
2. Blower On/O button
3. Blower speed minimum button
4. Blower speed medium button
5. Blower speed maximum button
NOTE: Control buttons will light up when range hood is On.
Loading ...
Loading ...
Loading ...