Loading ...
Loading ...
Loading ...

CARE & USE/INSTALLATION
|
8 9
|
CARE & USE/INSTALLATION
VISIBLE LOSS OR DAMAGE
Be certain any visible damage to the carton is noted on
freight bill or express receipt and signed by the person
making delivery.
FILE CLAIM FOR DAMAGES IMMEDIATELY, regardless of
extent of damage.
CONCEALED LOSS OR DAMAGE
If damage is unnoticed until the grill is unpacked, notify
the transportation company or carrier immediately and file
a “concealed damage” claim with them. This should be
done within (5) days of the date delivery is made to you. Be
sure to hold on to the container for inspection. We cannot
assume responsibility for damage or loss incurred in transit.
(See INDEX: “Obtaining Service from Lynx” for further
details.)
• Never install this product into a combustible enclosure without an insulated jacket. Doing so could result in fire,
property damage and personal injury.
• Never locate the grill under a roof or overhang, in a building, garage, shed or other such enclosed area.
• Never locate the grill under unprotected combustible construction.
• Installation must conform with local codes or, in the absence of local codes, with either the National Fuel Gas
Code, ANSI Z223.1/NFPA 54, Natural Gas and propane Installation Code, CSA B149.1, or Propane Storage and
Handling Code, B149.2, in Canada.
BEFORE YOU START
WARNING
IF SHIPMENT ARRIVES DAMAGED
IMPORTANT NOTES
WHERE’S THE WIND?
When selecting a suitable location, consider important
factors such as exposure to the wind and foot-traffic
patterns.
If you have a freestanding grill, position it so the prevailing
wind blows into the front control panel (at your back when
grilling), supporting the proper front-to-rear airflow.
Built-in grills located in areas with prevailing winds should
be protected by a wind barrier.
Winds hitting the back of the grill directly may cause
problems, as well as
wind blowing along
the hood gap.
HOW LONG IS YOUR RUN?
Keep all gas supply lines as short as possible because
gas lines lose pressure over distance and with each elbow
and tee that is added. This drop in pressure affects grill
performance. (See INDEX: “Gas Supply Line Runs” for
further details.)
ARE YOU “ON-THE-LEVEL”?
Proper leveling during installation is critical. A grill that
is out of level will cause erratic burner combustion and
inefficient, uneven heating. A carpenter’s spirit level
should be used to level the grill both front-to-back and
side-to-side.
If the floor is uneven or has a decided slope, re-leveling
may be required each time you move a freestanding unit.
Be sure wind doesn’t blow into the hood gap.
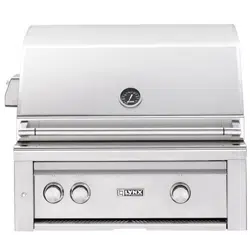
BUILT-IN INSTALLATIONS
The Lynx Built-In Grill is designed for easy installation into
masonry enclosures.
NOTE: Lynx built-in grills are intended either for
installation in a built-in enclosure constructed of
non-combustible materials or for an installation in a built
in enclosure constructed of combustible material when
installed with a Lynx insulating jacket (LIJ).
For non-combustible applications, the grill drops into the
opening shown in the cutout detail drawing (See INDEX:
“Gas Requirements”) and hangs from its counter-top trim. A
deck is not required to support it from the bottom.
When using the insulated jacket in a combustible enclosure,
the jacket must be supported from the bottom by a ledge
on each side or a full deck beneath the jacket.
(See INDEX: “Gas Requirements”) Pay special attention to
the provisions shown for gas line hook-up.
The enclosure should have ventilation holes to prevent gas
build-up in the event of a leak. The deck ledges and counter
should be flat and level. (refer to ANSI Z21.58 Standard for
Outdoor Cooking Gas Appliances, Section 1.7 Enclosures
For Self Contained LP-Gas Supply Systems)
This grill requires that a 120 volt, 60 hertz, 15 amp GFI
certified outlet be installed by a qualified electrician.
Never locate the transformer or grill gas line behind the grill
inside the insulated jacket.
CLEARANCE TO COMBUSTIBLE MATERIALS
Minimum clearance from the sides and back of the grill to
adjacent combustible construction below the counter top
surface is 12” from the sides and 6 1/4” from the back of
the hood.
Dégagement minimal entre les parois latérales et l’arrière de l’appariel
et la construction combustible au-dessous du panneau supérieur de
l’appareil (30 cm à partir des parois latérales et 15.9 cm à partir de
l’arrière de la hotte).
Minimum clearance from sides and back of grill to adjacent
combustible construction extending above the counter top
surface is 12” from the sides and 6 1/4” from the back.
Dégagement horizontal minimal entre les parois latérales et l’arrière
de l’appariel et la construction verticale combustible au-dessus de
l’appareil (30 cm à partir des parois latérales et 15.9 cm à partir de
l’arrière).
Do not use this appliance under unprotected overhead
combustible surfaces.
N’utilisez pas cet appareil sous des surfaces inflammables non
protégées.
A minimum of 6” of clearance is needed on the left side of
the grill above the counter top for the rotisserie motor and
spit rod.
If the grill is to be placed into a combustible enclosure, an
approved insulated jacket is necessary and is available only
from your Lynx dealer. Lynx insulated jackets have been
designed and tested specifically for your Grill.
REAR HOOD CLEARANCE
A 3 inch clearance is required behind the grill to allow the
front hood to open.
The grill exhausts combustion products and cooking
greases to the back. Never locate the grill where this
exhaust will be difficult to clean.
OVERHEAD PROTECTION AND EXHAUST REMOVAL
If installed under any combustible contruction the
cooking area over the grill must be covered with an exhaust
hood. The hood must provide 3-6 inches of overhang on all
exposed sides. The exhaust hood shall provide no less than
1,200 CFM for proper exhaust ventilation. The hood must
be approved for outdoor installation and provided with a
dedicated GFCI protected branch circuit.
BEFORE YOU START ...continued
Vent Hood
Overhead Construction
R
e
a
r
W
a
l
l
3” overhang on left and right side of grill
36” Minimum
6’ Minimum to
non-combustible
6 1/4” Clearance from the
grill back to above
counter combustibles
3” Minimum
hood clearance
12” clearance to combustibles from
surface level right/left/below
Combustible overhead
construction requires a
vent hood
Non-combustible overhead
construction a vent hood is
highly recommended
6 1/4” Minimum
clearance to
combustibles
Loading ...
Loading ...
Loading ...