QUESTIONS? visit www.ihome.com or call 1-800-288-2792
#TQOCVJGTCR['UUGPVKCN1KN&KHHWUGT
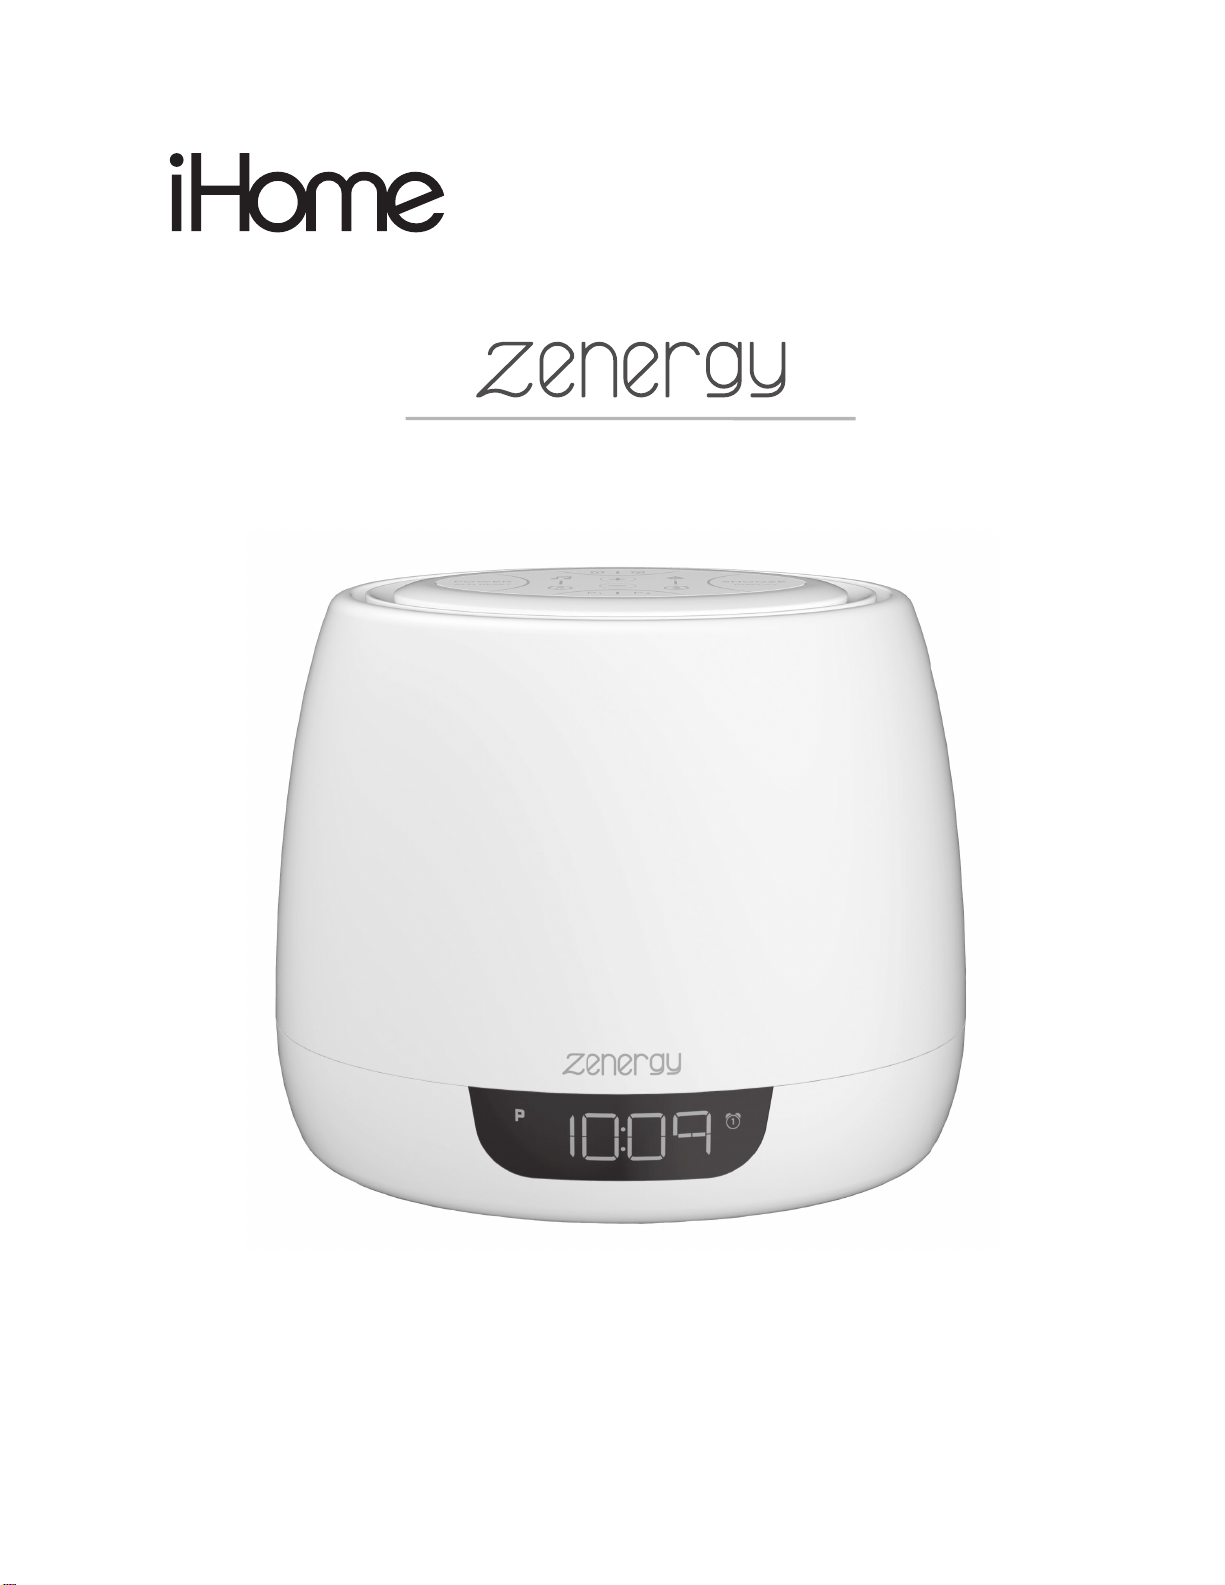
#NCTO%NQEMYKVJ5QWPF6JGTCR[
Model: iZA40
AROMA DREAM
1
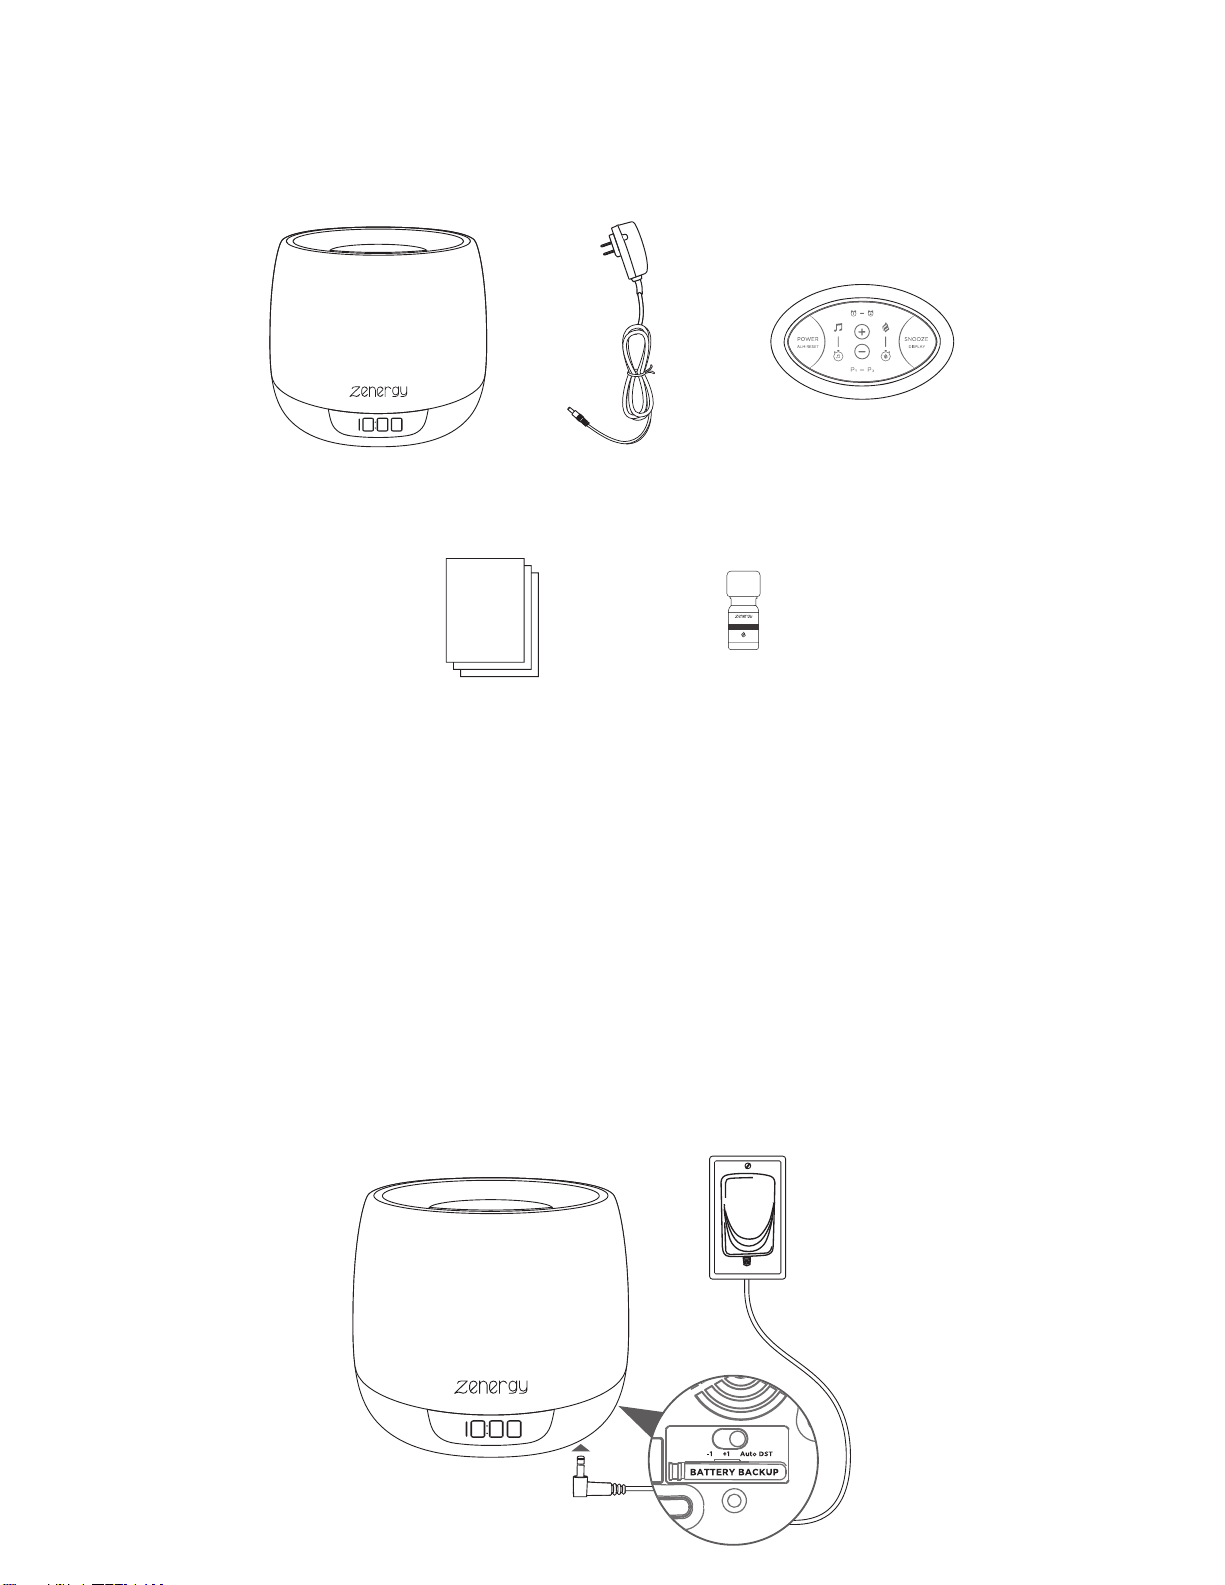
1. iZA40 2. AC adapter
CONNECTING THE UNIT
WHAT’S INCLUDED:
Connect the included AC adapter to the DC jack located on the bottom of the
unit and connect the other end to a working wall outlet. Remove the battery
pull tab from the bottom of the unit. Press Power to turn the unit ON.
Always place unit on a firm, flat, stable surface. If water accidentally enters the
air outlet, it may drain from the bottom of the unit. We recommend placing a
waterproof mat or pad under the unit to protect your furniture.
RESET
RESET
RESET
RESET
TEST
TEST
TEST
TEST
3. remote
LAVENDER
100% Pure Essential Oil
5ml
4. instructions 5. essential oil
2
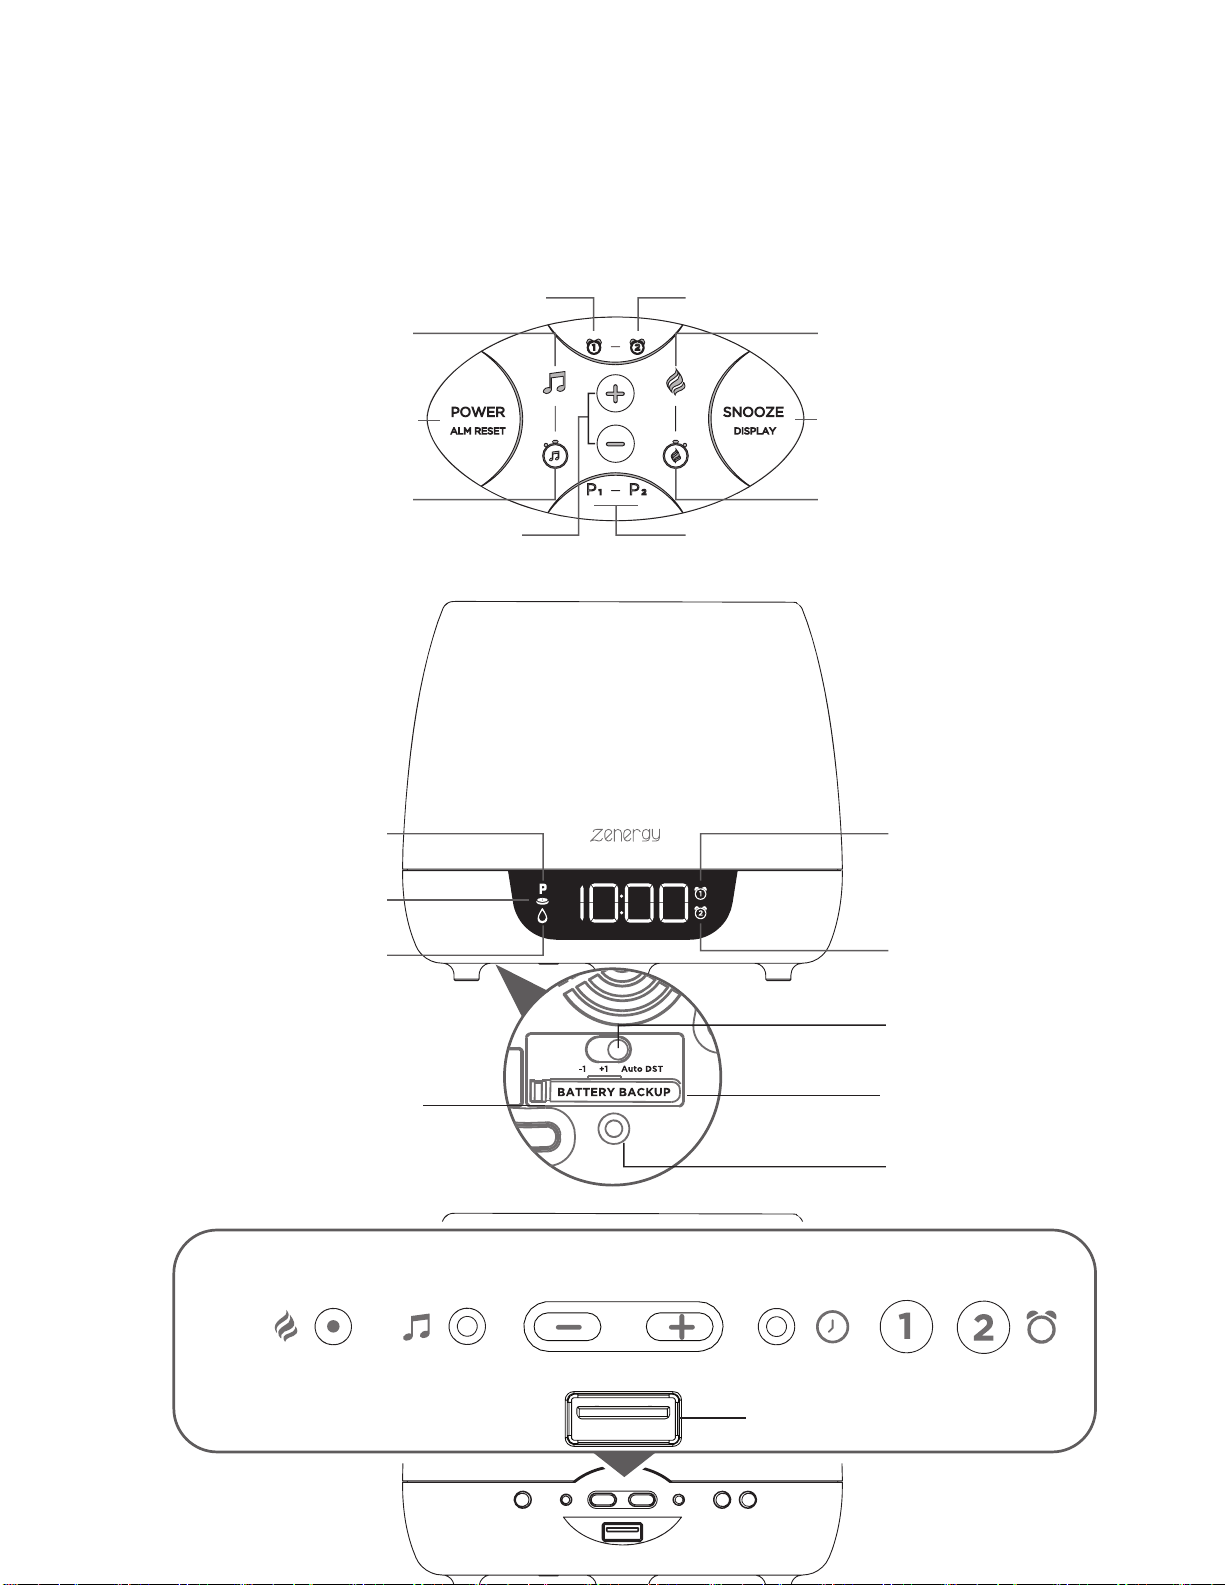
FEATURES & FUNCTIONS
REMOTE CONTROL
4'565106121(70+6
Alarm 2Alarm 1
AromatherapySound Therapy
Aroma Timer
Snooze &
Display Dimmer
Sound Timer
Programmable
Therapy Presets
Volume +/-
Control Settings
BACK & BOTTOM
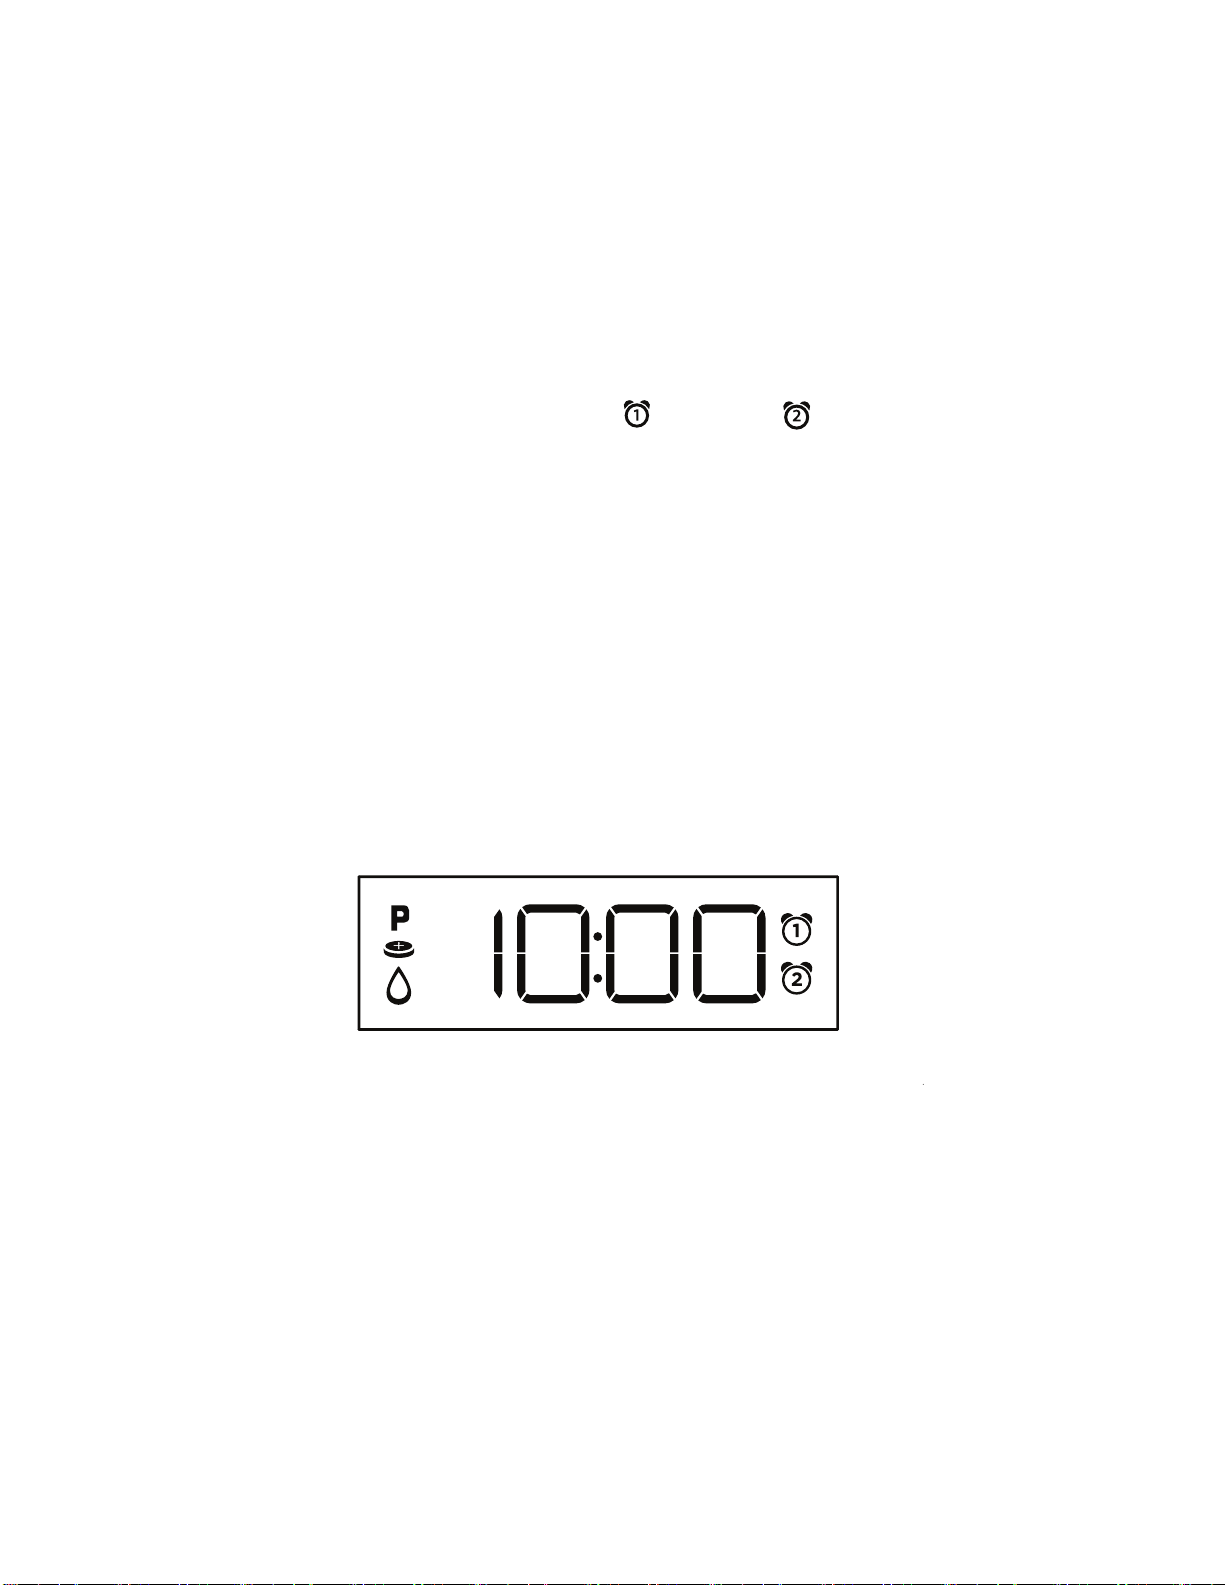
DISPLAY
Aroma Sound Time Set Alarm 1
Volume -/+
Control Settings
USB Charging Port (1A)
PM Indicator
Low Water Indicator
(aroma will shut o when tank is empty)
Alarm 2
Indicator
Alarm 1
Indicator
Low Backup
Battery Indicator
DST Switch
(Daylight Savings)
DC Jack
(24v/1000mA)
Battery Backup
(remove pull tab before use)
push in corner to unlock
Alarm 2
Power/
Alarm
Reset
3
SETTING THE TIME
1. Press and hold the Time Set Button located on the back of the unit
f
or 2 seconds until the clock display flashes and a beep sounds.
2.
Press the – or + Buttons to adjust the clock to the curr
ent time (hold
f
or rapid setting). Make sure you set the correct AM/PM time. T
he PM
indicat
or appears to the left of the display; there is no AM indicator.
3.
To toggle the clock display between standard 12 hour time and 24
hour
(“military”) time displa
y, press the Alarm or Alarm Button
while
the display is flashing during time setting.
4.
Press and release the Time Set Button to confirm the curr
ent time
setting. T
he YEAR will flash on the display. Press the – or + Buttons
to set the correct year.
5.
Press and release the Time Set Button to confirm the current y
ear
setting. T
he Date will flash on the display. Press the – or + Buttons to
set the correct month and day (hold for rapid adjustment).
6.
Press and release the Time Set Button to confirm the current date
setting. 2 beeps will sound to indicate time setting mode is complete.
Note: To toggle the clock display between 12 and 24 hour (military) time,
press any Alarm Button while the display is flashing during time setting.
DAYLIGHT SAVINGS (DST) SWITCH
This unit has a DST switch on the bottom of the unit to adjust the time
for daylight saving time and standard time. By default, it is set to Auto
and will automatically adjust the time at the start and end of daylight
saving time.
If you wish to adjust manually, slide the switch to +1 to add one hour
or to –1 to subtract an hour.
4
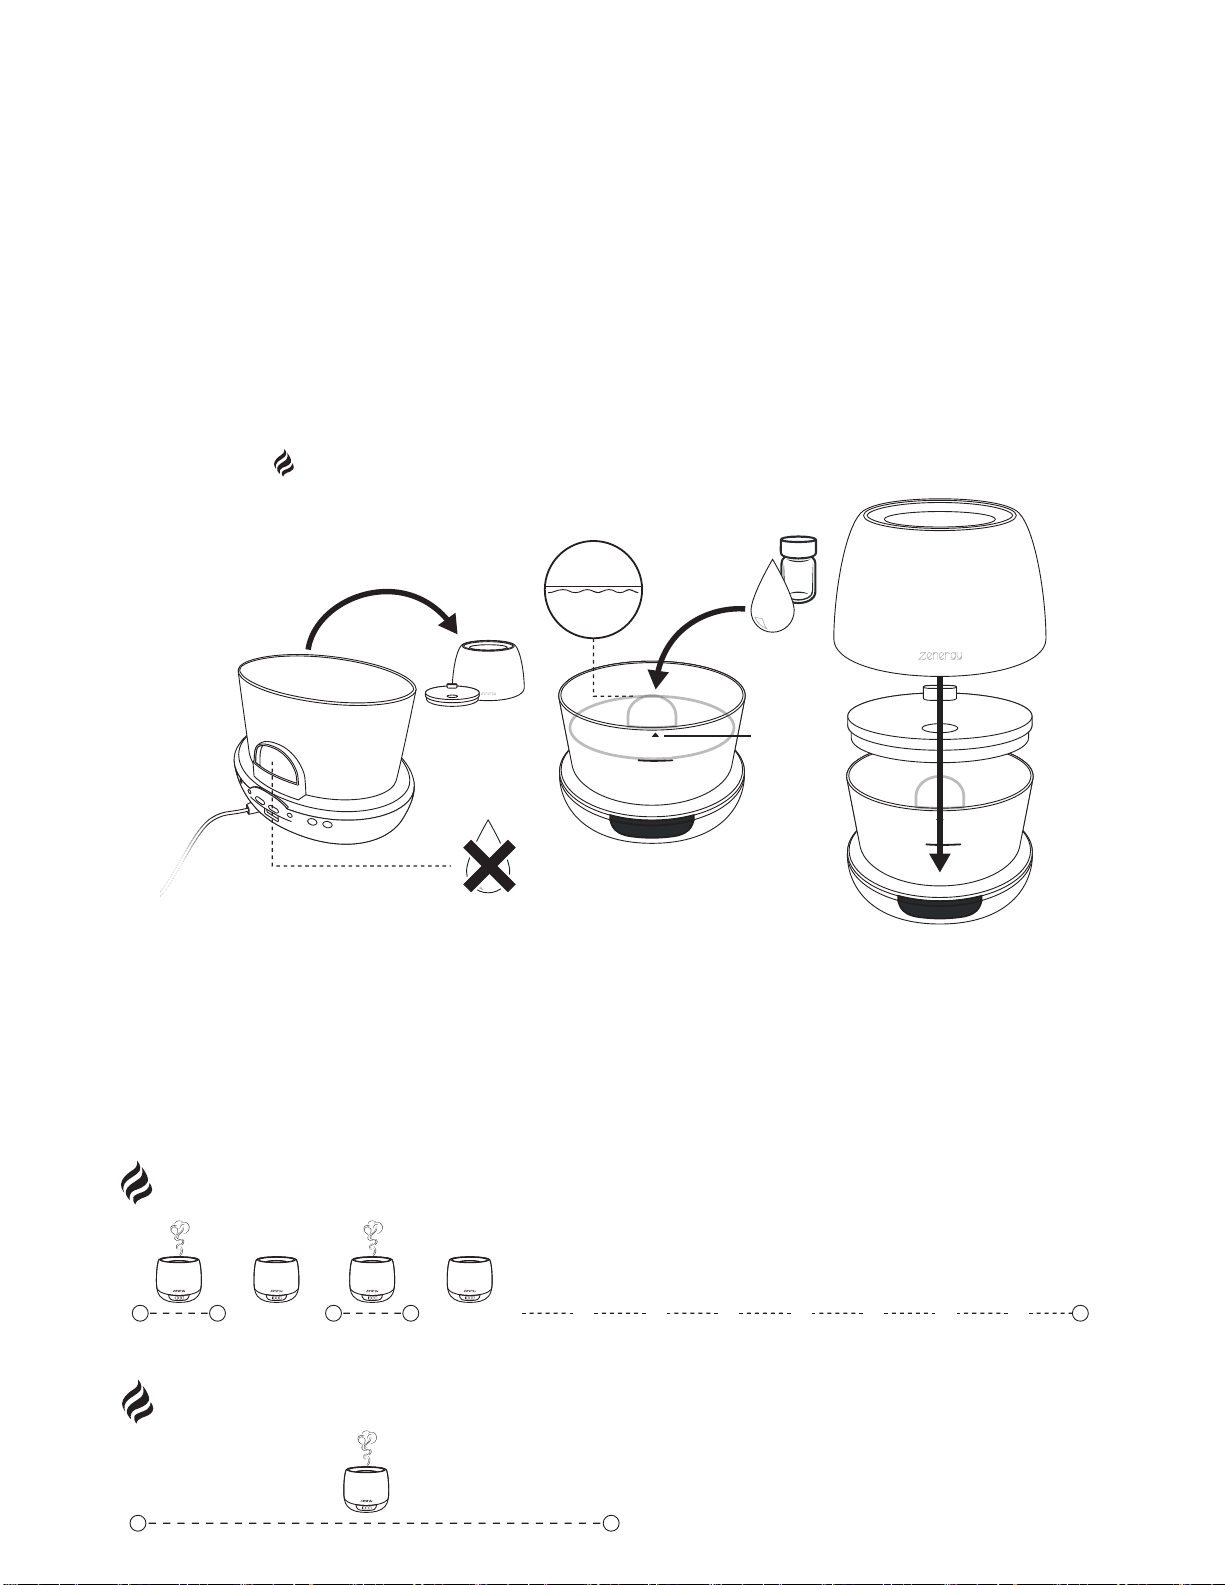
• Lift the outer cover from the unit. Next, gently lift the inner lid from the top of
the w
ater reservoir.
•
Use a cup to add water. Water level should not exceed the MAX FILL
line
print
ed on the tank (250ml).
•
Add 5-7 drops of essential oil to the water. Add more or fewer dr
ops of
es
sential oil based on your personal preference.
•
Gently press the inner lid back on the tank until it locks into place. Replac
e the
outer cover.
•
Press the Aroma Button to turn the diuser on and choose your aroma mis
t
and sound options.
USING AROMATHERAPY
M
A
X
F
I
L
L
D
R
A
I
N
S
I
D
E
MAX FILL
5-7
M
A
X
X
F
I
L
L
M
A
X
F
I
L
L
NOTE: No water may enter the air outlet opening. This will damage the
unit and will void any claim to the warranty. Do not carry the unit around
while it is filled with water. The water could run into the electronics.
D
R
A
I
N
S
I
D
E
H20
Drain water
from this side
CONTINUOUS
(up to 18 hours with full water reservoir in low mode)
0h 18h
INTERVAL
10min 20min 20min10min 54h
AROMATHERAPY MISTING OPTIONS
Press repeatedly to cycle through aroma settings: High, Low, Interval (periodic mist), and OFF.
The sound of water dripping is a natural part of the misting process. To enhance your
aromatherapy experience, activate a Sound Therapy Mode (see page 7).
ON OFF ON OFF

5
CLEANING AND CARE
1. Before cleaning the unit, turn the power o. Make sure your hands are dry
bef
ore the adapter is unplugged from the diuser and outlet.
2.
Remove the outer cover from the base. Next, remove the inner cover.
3.
Carefully pour any remaining water and essential oil out of the reservoir
,
fr
om the drain side, opposite the air outlet. Be sure not to
empty the
r
eservoir near the air outlet in order to av
oid malfunction.
CAUTION: Never immerse the unit in water (danger of short circuit)
.
TO CLEAN THE SURFACE
Clean the surface of your diuser with a clean, damp, soft cloth as often as
needed.
TO CLEAN THE RESERVOIR AND ULTRASONIC MEMBRANE
We recommend wiping the reservoir with a clean, damp, soft cloth at least once
every 2-3 weeks, depending on usage.
NOTE: Depending on your usage, and the amount of essential oil you use, you
may want to clean the reservoir and ultrasonic membrane more frequently for
best performance.
For the most thorough clean, pour a 50/50 mixture of vinegar and water into
the reservoir, then soak for five minutes. (Do not use detergents or other harsh
cleaning agents as this may damage the unit.) Brush reservoir interior walls,
base and ultrasonic membrane clean with a soft bristle brush (not included) and
rinse. NEVER touch the ultrasonic membrane with your fingers, as the natural
oils in skin can damage the membrane.
Clean and dry the unit before extended periods of inactivity.
CHANGING FRAGRANCE
If you would like to change the fragrance, empty the unit completely and clean
the reservoir with a clean, damp, soft cloth. Fill unit once again and pour new
drops into the device following the instructions.

6
SETTING AND USING ALARMS
This unit features dual alarms which can be set to dierent times and alarm
sources. Each is set in the same way. Instructions are given as ‘Alarm Button’
- pr
ess Alarm 1 or Alarm 2 to set alarms.
1.
Press and hold the Alarm Button for 2 seconds until the alarm time displa
y
and alarm icon flash.
2.
Press the – or + Buttons to adjust the alarm time (hold for r
apid setting).
Mak
e sure you set the correct AM/PM alarm time. The PM indicato
r
appears to the left of the time display. Press the Alarm Button to confirm
the alarm time setting.
3.
Now press the – or + Buttons choose an aroma mode to wake to
: High,
L
ow, Interval, or O. Press the Alarm Button to c
onfirm.
4. Pr
ess the – or + Buttons to select a sound therap
y mode
t
o wake to (1-12), to wake to a buzzer, or OFF (no sound). Press the
Alarm
Butt
on to confirm the alarm source
.
5. Pr
ess the – or + Buttons to adjust the alarm volume. Press the
Alarm
Butt
on to c
onfirm.
6. Pr
ess the – or + Buttons to set the desir
ed alarm schedule:
7 Da
ys (every day), 5 Days (week days only) or 2 Days (weekends only).
7.
Pr
ess the Alarm Button to confirm all settings. The corresponding
Alarm
Indicat
or (1 or 2) will appear on the display to confirm the alarm is armed.
TURNING THE ALARM ON/OFF
1. Press the Alarm Button to preview the alarm time. Press again toggle the
alarm ON and OFF
, indicated by the related LED indicator.
2.
When the alarm sounds, press the corresponding Alarm Butt
on
(1 or 2)
or the P
ower/Alarm Reset Button to
disable the alarm
and r
eset it for the next day.
SNOOZE/DISPLAY DIMMER
Snooze: When the alarm is sounding, press the Snooze/Dimmer Button on
the remote to snooze (default is 9 minutes).
Dimmer: Press and release theSnooze/Dimmer Buttonon the remote
(when alarm is NOT sounding) to adjust display brightness: MAX,
MID, LOW, MIN, and OFF. To adjust the display brightness on the
unit itself, press and release the Time Set Button to select dimmer
settings.
7
PROGRAMMABLE SNOOZE
Set the duration of your snooze timer:
1. To program Snooze, press and hold the Snooze/Dimmer Button for 2
seconds during normal operation (when no alarm is sounding).
2.
Press
the –
or + Buttons to select the desired snooze time (between 1 and
29 minutes).
3. Press
the Snooze/Dimmer Button again to confirm setting.
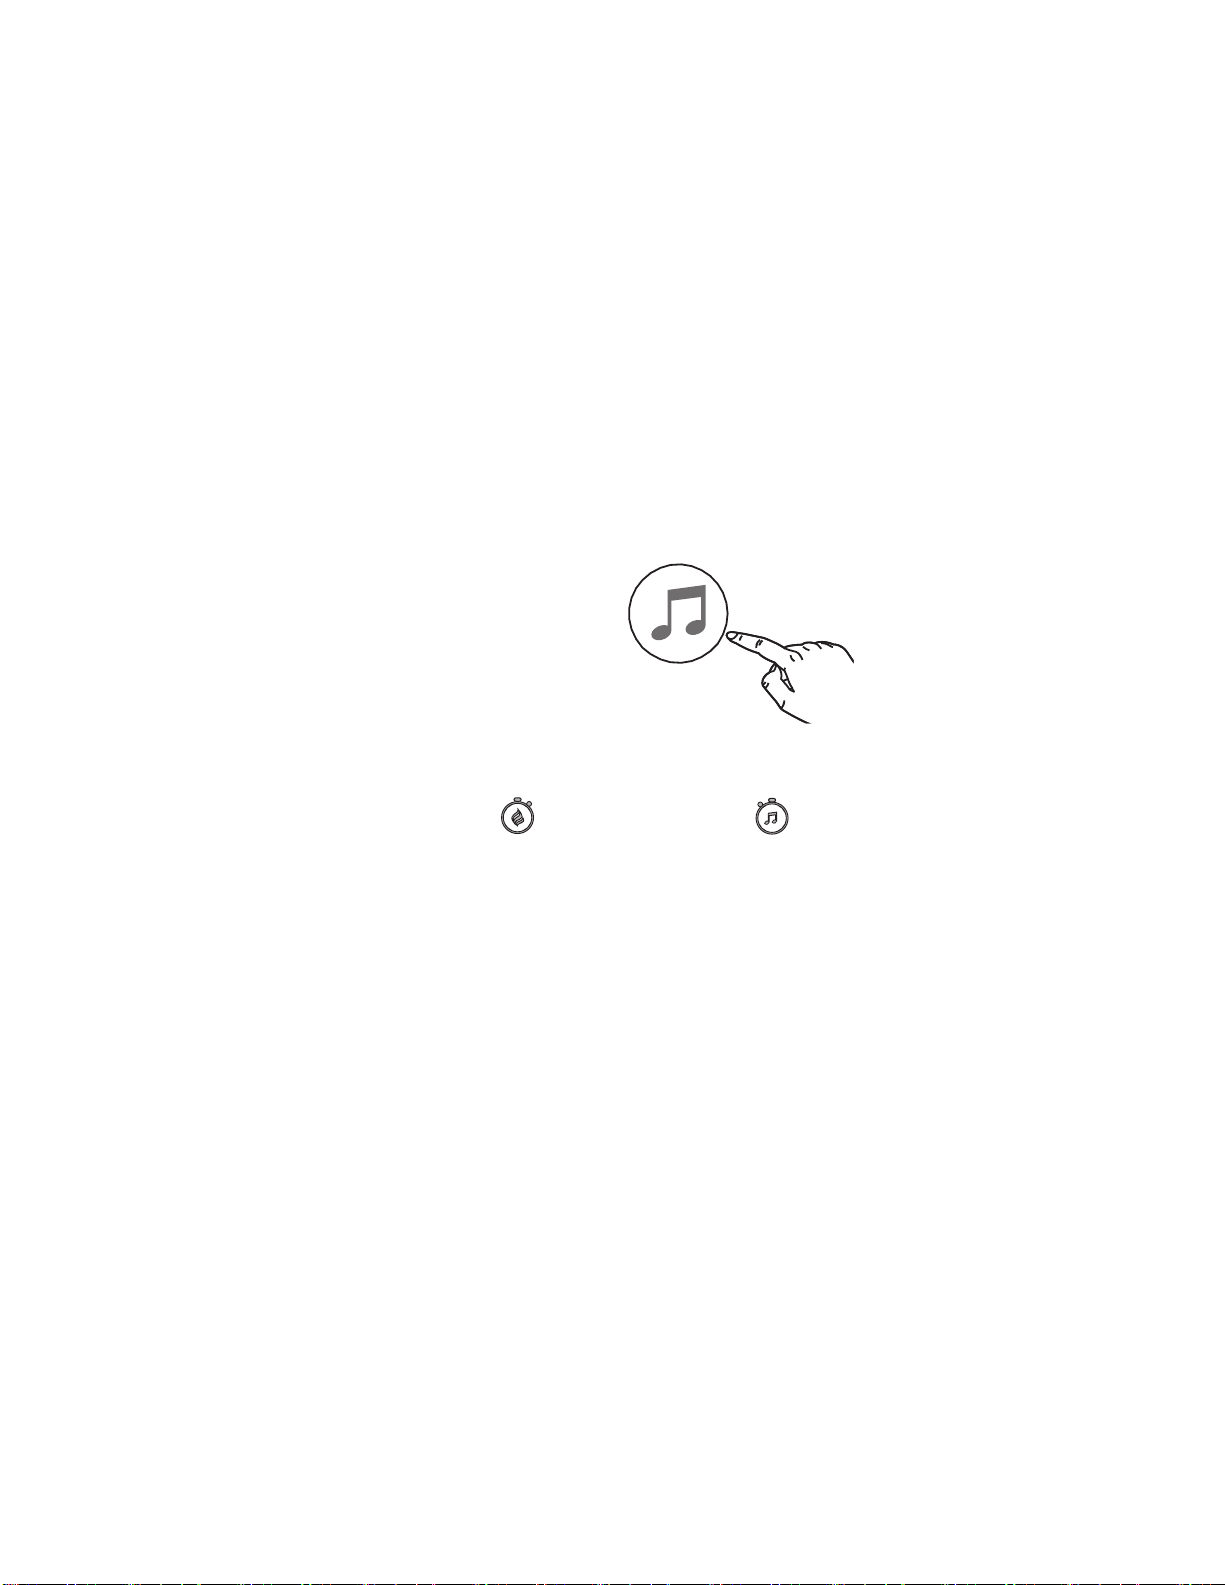
SOUND THERAPY
Press the Sound Button repeatedly to cycle through 12 modes:
• Dream
• Zen
• Tr
ance
• Meditation
Press and hold to pause / Tap to resume
TIMERS (AROMA + SOUND )
This unit allows you to set a timer for the current sound and/or aroma source. A
voice prompt will confirm when either timer is set.
Using the remote control:
1. To set an Aroma Timer, press the Aroma Timer Button as needed to cycle to
the desired duration: 10 minutes, 30 minutes, 1 hour, 2 hours, 4 hours, 6
hours, 8 hours, or OFF.
2.
To set a Sound Timer, press the Sound Timer Button as needed to cycle to
the desired duration: 10 minutes, 30 minutes, 1 hour, 2 hours, 4 hours, 6
hours, 8 hours, or OFF.
PROGRAMMABLE THERAPY PRESETS
The unit allows you to store up to 2 presets to easily access your
favorite aroma and sound mode combinations.
Using the remote control:
1. When your preferred sound and aroma modes are active, press
and hold P1 or P2 to set up a preset.
2. Once set, press P1 or P2 to activate your preset at any time.
• Nature
• Ocean
• River
• Storm
• Air
• Focus
• Drive
• Quiet
•
OFF
8
REMOTE CONTROL
The remote will automatically enter pairing mode when the unit is plugged
into a power source. To manually pair the remote:
1. When the unit is OFF, press and hold the +/- Buttons on the unit
at the same time for 5 seconds.
2. ‘PAIR’ will read on the clock display to indicate the unit is in pairing mode.
3. Press any button on the remote to continue.
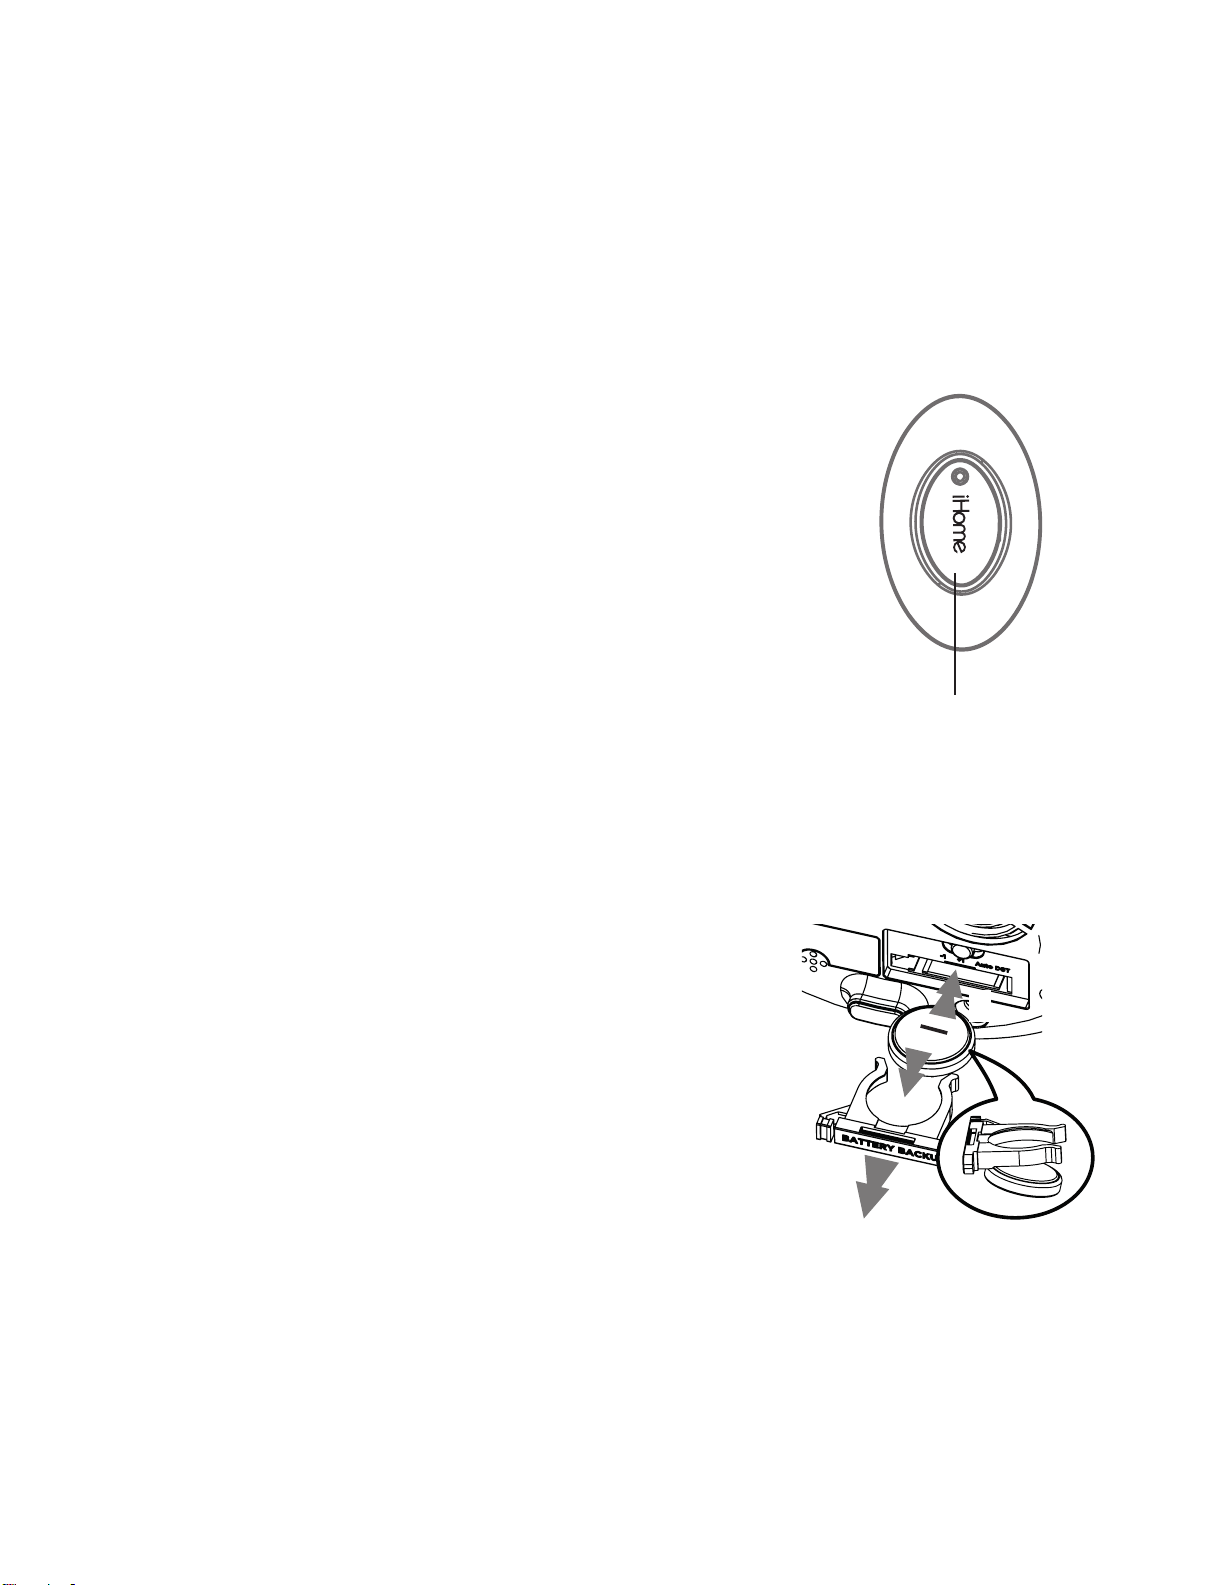
The remote control comes with 1 CR2032
battery already installed. To replace the battery:
1.
Use a Phillips screwdriver to open the battery door.
2. Remove the exhausted battery and replace with 1
new CR2032 battery, making sure the ‘+’ sign is
facing up. Close the battery door. Do not
overtighten the screw.
BATTERY BACKUP
The unit comes with 1 CR2450 back-up battery to maintain alarm and clock settings
during a temporary power failure. When the low battery icon appears on the clock
display, it is time to replace the back-up battery. The battery compartment is located
on the bottom of the unit.
1.
Make sure the water tank is empty before r
eplacing
the batt
ery. The AC adapter should be connect
ed, or
y
ou will lose your clock settings during batt
ery
r
eplac
ement.
2.
Push in the corner to unlock the batt
ery
c
ompartment door and then remove
it.
3.
Remove the exhausted battery and insert 1 CR2450
batt
ery. Replace the compartment door
.
WARNING
• Keep new and used batteries away from children.
•
Do not ingest the battery, Chemical Burn Hazard
•
This product contains a coin/button cell battery. If the coin/button cell batt
ery is
s
wallowed, it can cause severe internal burns in just 2 hours and can lead to death.
•
If the battery compartment does not close securely, stop using the product and k
eep it
a
way from children.
•
If you think batteries might have been swallowed or placed inside any part of the body
,
seek immediat
e medical attention.
•
CAUTION-Danger of explosion if battery is incorrectly replaced. Replac
e only with
the same or equiv
alent type following the diagram above.
Battery
Compartment
1
2
3
REMOTE CONTROL BATTERY

9
IMPORTANT SAFETY INSTRUCTIONS
When used in the directed manner, this unit has been designed and manufactured to ensure your
personal safety. However, improper use can result in potential electrical shock or fire hazards. Please
read and follow all safety and operating instructions carefully before installation and use, and keep
these instructions handy for future reference. Take special note of all warnings listed in these
instructions and on the unit.
1. Water and Moisture – The unit should not be used near water. For example: near a bathtub, washbowl,
kit
chen sink, laundry tub, swimming pool or in a we
t basement.
2.
Ventilation – The unit should be situated so that its location or position does not interfere with its pr
oper
v
entilation. For example, it should not be situated on a bed, sofa, rug or similar surface that ma
y block
v
entilation openings. Also, it should not be placed in a built-in installation, such as a book
case or cabinet,
which ma
y impede the flow of air through the ventilation openings.
3. Heat – T
he unit should be situated away from heat sources such as radiators, heat registers, stov
es or
other applianc
es (including amplifiers) that produce heat.
4.
Power Sources – The unit should be connected to a powe
r supply only of the type described in the
oper
ating instructions or as marked on the appliance. Only use the AC adapter that came with the unit.
5.
Power-Cable Protection – Power supply cables should be routed so that they are not likely to be walk
ed
on or pinched b
y items placed upon or against them. It is always best to have a clear area from wher
e
the cable e
xits the unit to where it is plugged into an AC socket.
6.
Lightning and Power Surge Protection – Unplug the unit from the wall socket and empty the water fr
om
tank during a lightning s
torm or when unit is left unattended and unused for long periods. Th
is will
pr
event damage to the product due to lightning and power-line surges.
7. Objects and Liquid Entry – Care should be taken so that objects do not fall and liquids are not spilled int
o
an
y openings or vents located on the product.
8.
Attachments – Do not use attachments not recommended by the product manufacturer.
9. Damage Requiring Service – The unit should be serviced by qualified service personnel when:
A.
the power supply cable or plug has been damaged.
B.
objects have fallen into or liquid has been spilled into the air outlet.
C.
the unit has been exposed to rain.
D. the unit has been dropped or the enclosure damaged.
E.
the unit exhibits a marked change in performance or does not operate normally.
10
.
Periods of Nonuse – If the unit is to be left unused for an extended period of time,
such as a month or
longer
, empty water from tank and remove batteries before storage.
11.
Servicing – The user should not attempt to service the unit beyo
nd those methods described in this
manual. Servic
e methods not covered in the operating instructions should be referred to qualified servic
e
personnel.
12.
Magnetic Interference: This product’s speakers contain powerful magnets which could cause interference
or damage to sensitive equipment such as hard drives, CRT televisions and monitors, as we
ll as medical,
scientific, and na
vigational devices. Keep this unit away from these pr
oducts at all times.
13.
Only use attachments/accessories specified by the manufacturer. This product is suitable fo
r use in
tr
opical and/or moderate climates.
14.
No naked flame sources, such as lighted candles, should be placed on or near the apparatus.
15. W
ARNING: To reduce the risk of fire or electric shock, do not expose this product to rain or moisture.
16.
Do not dispose of batteries in the household trash or fire.
17
.
The mains plug of power adaptor is used as the disconnect device, it shall remain readily operable.
18.
Clean only with dry cloth.
19
.
Attention should be drawn to the environmental aspects of battery disposal. Check yo
ur local
r
equirements.
20
.
Clean and disinfect the water reservoir on a regular basis.
USB CHARGING
Connect a USB cable (not included) to the
USB Charging Port on the back of the unit
to charge your devices. (Make sure the unit
is connected to a power source.)

© 2019 SDI Technologies, Inc. All rights reserved
Questions? Visit www.ihome.com
or call 1-800-288-2792 Toll Free
LIMITED ONE YEAR WARRANTY
iHome Products, a division of SDI Technologies Inc. (hereafter referred to as SDI),
warrants this product to be free from defects in workmanship and materials, under
normal use and conditions, for a period of one (1) year from the date of original
purchase. Should this product fail to function in a satisfactory manner, it is best to first
return it to the store where it was originally purchased. Should this fail to resolve the
matter and service still be required by reason of any defect or malfunction during the
warranty period, SDI will repair or, at its discretion, replace this product without charge.
This decision is subject to verification of the defect or malfunction upon delivery of this
product to the Factory Service Center authorized by Customer Service.
If service is required, please call Customer Service at 1-800-288-2792 to obtain a Return
Authorization Number and shipping instructions. A copy of the sales receipt is required
to validate in-warranty coverage.
Disclaimer of Warranty
NOTE: This warranty is valid only if the product is used for the purpose for which it was
designed. It does not cover (i) products which have been damaged by negligence or
willful actions, misuse or accident, or which have been modified or repaired by
unauthorized persons; (ii) cracked or broken cabinets, or units damaged by excessive
heat; (iii) damage to digital media players, CD’s or tape cassettes (if applicable); (iv) the
cost of shipping this product to the Factory Service Center and its return to the owner.
This warranty is valid only in the United States of America and does not extend to
owners of the product other than to the original purchaser. In no event will SDI or any of
its aliates, contractors, resellers, their ocers, directors, shareholders, members or
agents be liable to you or any third party for any consequential or incidental damages,
any lost profits, actual, exemplary or punitive damages. (Some states do not allow
limitations on implied warranties or exclusion of consequential damages, so these
restrictions may not apply to you.) This warranty gives you specific legal rights, and you
may also have other rights which vary from state to state. Your acknowledgment and
agreement to fully and completely abide by the above mentioned disclaimer of
warranty is contractually binding to you upon your transfer of currency (money order,
cashier's check, or credit card) for purchase of your SDI product.