Loading ...
Loading ...
2
FEATURES AND BENEFITS
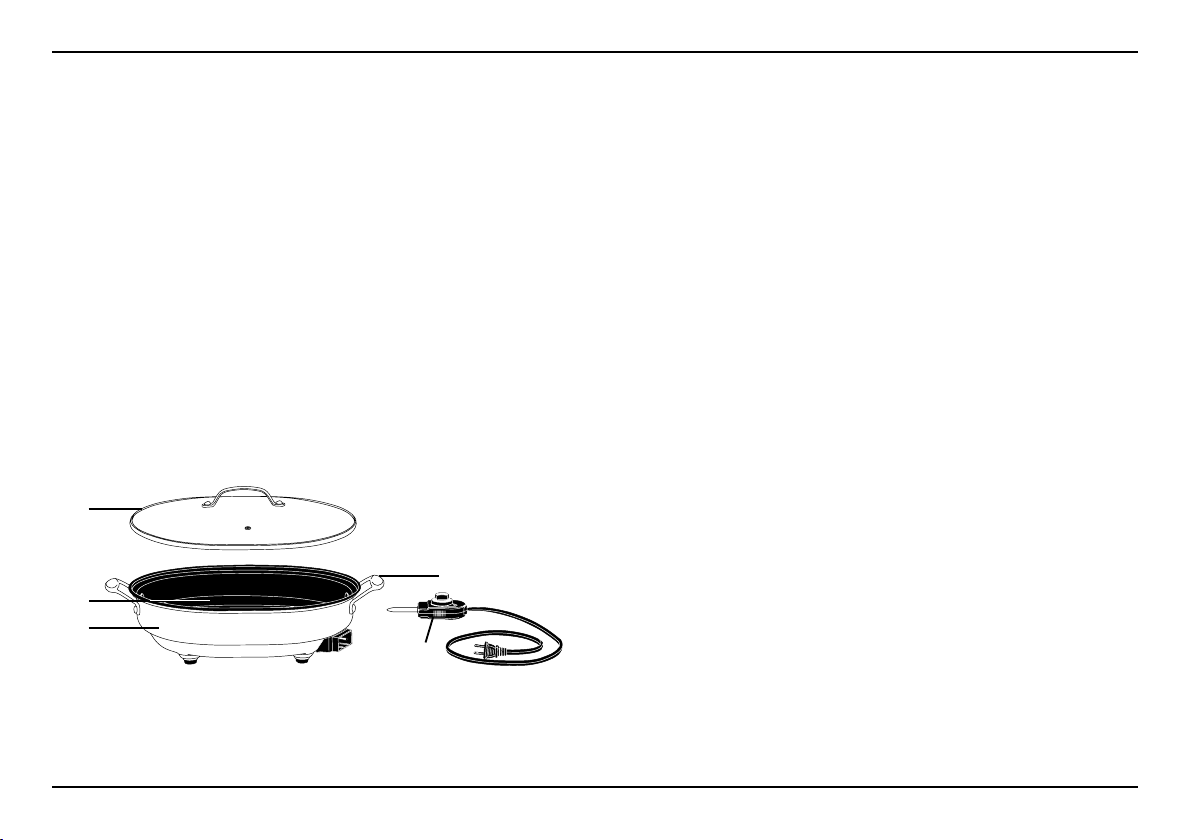
1. Glass Cover w/ Stainless Steel Rim, Steam Vent and Handle:
See-through glass cover allows you to view your entrée while it’s cooking
and the steam vent helps to prevent splattering.
2. Brushed Stainless Steel Housing:
Durable stainless steel construction complements any décor.
3. Nonstick Cooking Surface:
Large nonstick cooking surface makes cleanup easy. For even heat
distribution and cooking, the heating element is mounted in a 5mm thick
encapsulated aluminum base.
4. Stainless Steel Handles:
Heavy Cast Stainless Steel helper handles with embossed Cuisinart
™
logo.
5. Adjustable Temperature Probe:
Removable temperature probe with adjustable heat settings that range
from Warm to 450°F. Indicator light turns off when Skillet has reached the
desired temperature.
6. BPA-Free (not shown):
All materials that come in contact with food are BPA-Free.
IMPORTANT GUIDELINES
• Do not use metal utensils. Metal utensils will damage the nonstick finish.
Use wooden or heat-proof plastic utensils.
• Do not use a metal knife or utensil to cut on the nonstick surface.
• Add only enough oil to coat the bottom of the Skillet. Do not use larger
amounts of oil.
• The steam vent in the cover should always be placed to the back of the
Skillet. Lift the lid from the back to the front to prevent steam burns.
• Use pot holders to lift lid or move Skillet.
• Do not lift or move Skillet while cooking.
• Never immerse the temperature probe in water or any other liquid.
• Temperature probe must always be in the “OFF” position before the unit
is unplugged.
• Do not knock or drop the temperature probe as this can damage the
probe.
ASSEMBLY INSTRUCTIONS
To use your Cuisinart
®
Skillet:
1. Carefully unpack the Skillet.
2. Rinse the Skillet base, and glass cover in warm, soapy water. Rinse well
and dry thoroughly. Note: The Skillet base and glass cover are immersible
and top shelf dishwasher safe. Make sure temperature probe is removed
before cleaning.
3. Place Skillet base on a clean, dry surface.
4. Place the cover on top of the base.
5. Make sure the control knob is facing upward and in the “OFF” position.
Insert temperature probe into the receptacle located on the side of the unit.
6. Plug in unit.
7. Your Skillet is now ready for use.
5.
4.
1.
3.
2.
Loading ...
Loading ...
Loading ...