Loading ...
Loading ...
Entretien
Votre nouveau robinet est conçu pour fonctionner sans problème, des années durant. Nettoyez-le périodiquement avec un chiffon doux pour qu’il conserve la même apparence qu’à l’état neuf. Évitez
les nettoyants abrasifs, la laine d’acier et les produits chimiques forts puisqu’ils endommageront le fini et rendront votre garantie nulle.
Enregistrement de la garantie:
veuillez vous connecter sur
danze.com pour enregistrer votre produit aujourd'hui.
Mantenimiento
Su grifo nuevo está diseñado para brindar años de servicio sin problemas. Mantenga su apariencia nueva limpiándolo periódicamente con un paño suave. Evite limpiadores abrasivos,
estropajo de acero y químicos cáusticos porque deslustrarán el acabado y anularán la garantía.
Registro de la garantía:
por favor ingrese para danze.com para registrar su producto en la actualidad.
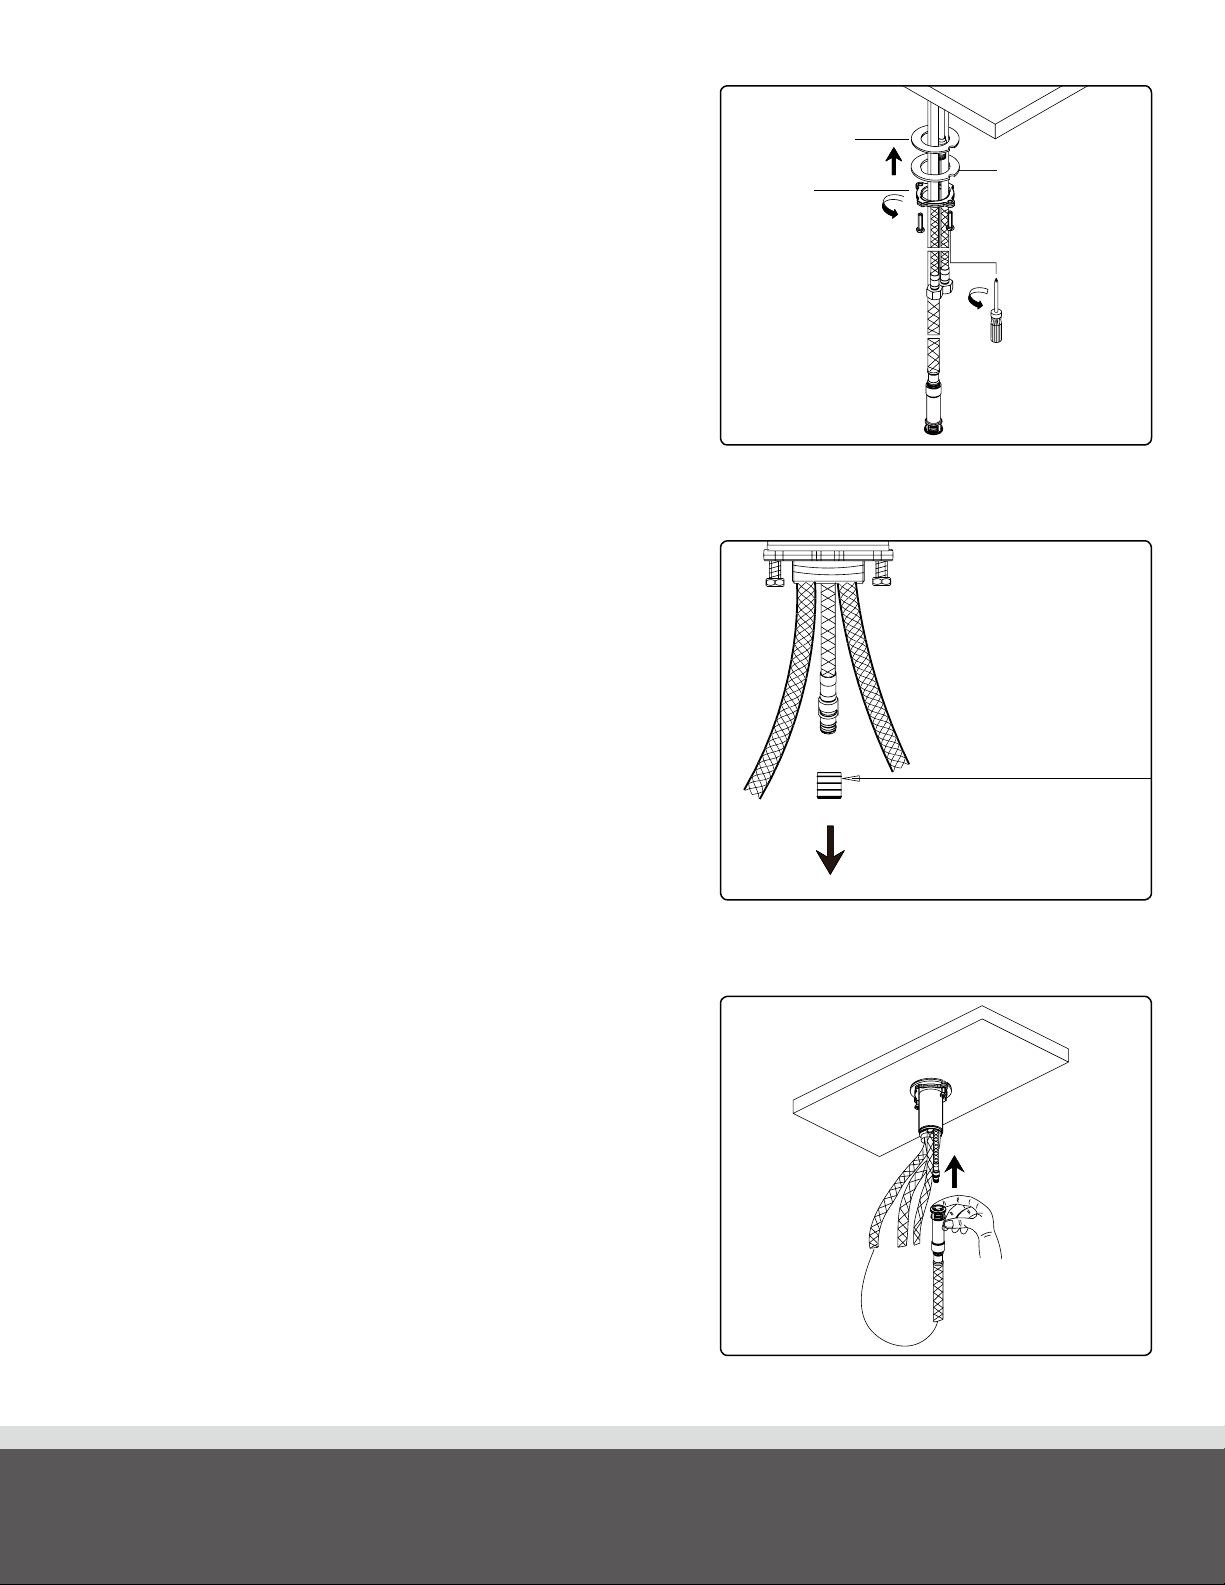
5.
Install the quick connect hose assembly by following these simple steps:
A. Push the quick connect housing firmly upwards onto the outlet hose
until a ‘click ’ is heard.
B. Pull down on the quick connect housing. If you cannot pull housing
off, the quick connect is secure.
For future reference (C): Push up housing tight to clip. While holding
assembly together, pull down the complete assembly to release from
outlet hose.
Note: Please make sure the spray hose does not intertwine with other
pipes. Refer to the following link to see video instructions on the
proper installation: http://www.danze.com/quick-connect/
3.
From underneath the sink, install the mounting hardware onto the valve
shank. Use the phillips screwdriver for final tightening after the body is
aligned.
Sous l’évier, installer le matériel de fixation sur la tige de robinet. Employer
un tournevis Phillips pour effectuer le serrage final lorsque le corps est
bien placé.
Instale las piezas de montaje en el vástago de la válvula por la parte de
abajo del fregadero. Utilice un destornillador phillips para apretar al final,
una vez que esté alineado el cuerpo.
4.
Remove the plastic seal cover from the outlet port prior to pushing the
hose adapter onto the same port.
Enlever le capuchon de plastique sur l'orifice de sortie avant de pousser
en place l’adaptateur du tuyau.
Quite la cubierta obturadora de plástico de la conexión de salida antes de
presionar el adaptador de manguera contra la misma conexión.
Metal Washer/
Arandela de metal/
Rondelle en métal
Rubber Washer/
Arandela de goma/
Rondelle étanche
Lock Nut/
Contratuerca/
Écrou de blocage
Plastic Seal Cover
Aapuchon de plastique
Cubierta obturadora de plástico
3
4
5
Loading ...
Loading ...
Loading ...