
Loading ...
Loading ...
Loading ...
6
ASSEMBLY INSTRUCTIONS
We value your experience using Sunny Health and Fitness products. For assistance with parts or
(877-907-8669).
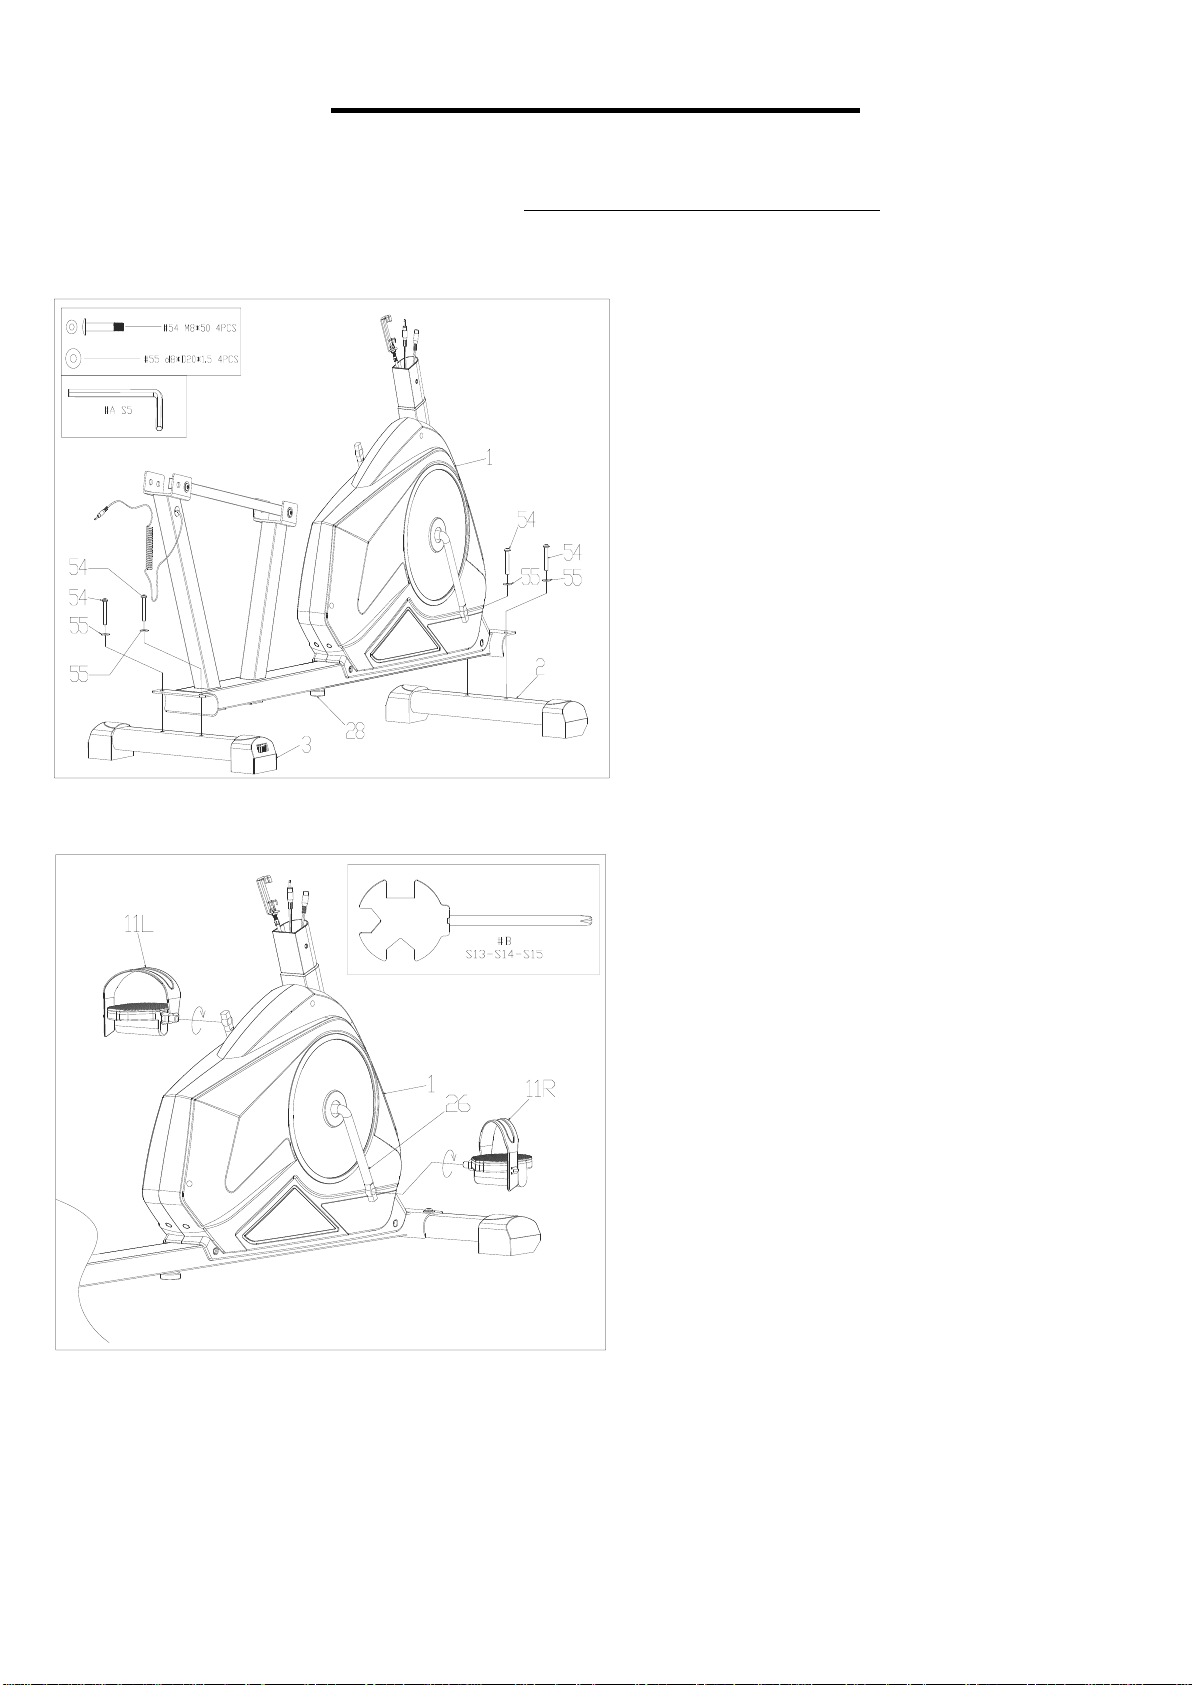
STEP 1:
Remove 4 Bolts (No. 54) and 4 Flat
Washers (No. 55) from Front Stabilizer (No.
2) and Rear Stabilizer (No. 3) using Allen
Wrench (No. A).
Attach Front Stabilizer (No. 2) and Rear
Stabilizer (No. 3) onto Main Frame (No. 1)
using 4 Bolts (No. 54) and 4 Flat Washers
(No. 55) that were removed. Tighten and
secure with Allen Wrench (No. A).
STEP 2:
Align the Left Pedal (No. 11L) with the left
side of the Crank (No. 26) at 90° and gently
insert the pedal into the crank arm. Turn the
Left Pedal (No. 11L) counter-clockwise as
tightly as you can with your hands, then use
Spanner (No. B) to tighten securely.
Align the Right Pedal (No. 11R) with the right
side of the Crank (No. 26) at 90° and gently
insert the pedal into the crank arm. Turn the
Right Pedal (No. 11R) clockwise as tightly as
you can with your hands, then use Spanner
(No. B) to tighten securely.
NOTE: Left Pedal (No. 11L) is marked with
“L” and Right Pedal (No. 11R) is marked with
“R”.
Loading ...
Loading ...
Loading ...