Loading ...
Loading ...
Loading ...
HE120, HE160 HUMIDIFIER INSTALLATION KIT
5 69-1571
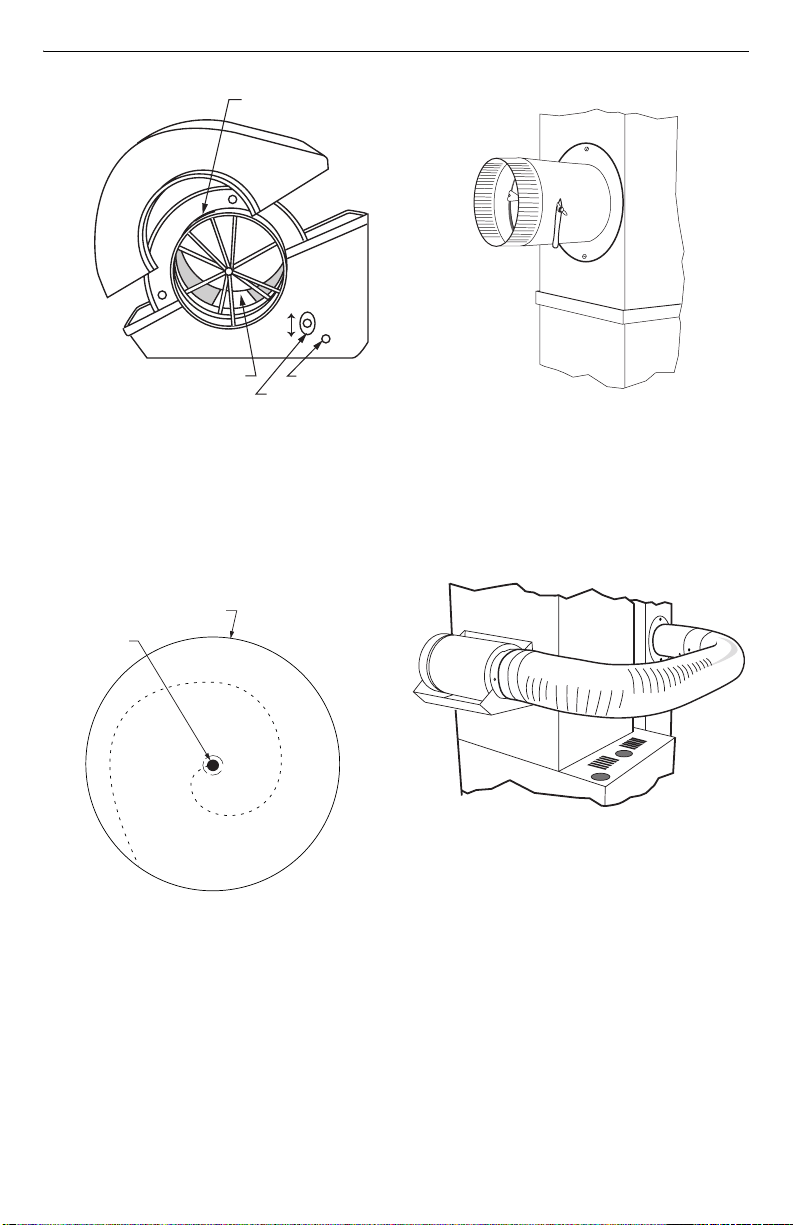
Fig. 8. Adjusting HE160 water level.
INSTALLING BYPASS
1.
Use inside of the 6 in. (155 mm) starter collar as a
template to mark the opening for the bypass.
2.
Carefully cut the 6 in. (155 mm) opening for the
starter collar. See Fig. 9. Use a drill, punch or awl
to start the cut in the middle of the circle. Cut in an
outward spiral to assist in controlling the cut.
Fig. 9. Cutting bypass opening.
3.
Assemble the summer shutoff damper into the
starter collar. Verify that the damper rotates freely
between the open and closed positions. Make sure
handle will be accessible. Mark the damper closed
position as summer and the open position as win-
ter. See Fig. 10.
Fig. 10. Installing starter collar.
4.
Remove liner to expose foam adhesive. Position
starter collar over opening.
5.
Using sheet metal screws, connect starter collar to
the duct and bypass duct from humidifier to starter
collar. Be sure to secure the collar to the duct with
sheet metal screws. See Fig. 11.
Fig. 11. Connecting bypass ducting.
IMPORTANT
To avoid sagging and stress on humidifier, add
support if ducting is longer than 4 ft (1.25m).
6.
Seal the duct connections with duct tape.
7.
Reinstall the humidifier drum or disk assembly in
the humidifier housing.
8.
Install the humidifier lid.
ENSURE TABS ON INLET AND
MOTOR PLATE FIT INTO
SLOTS IN LID FLANGES
WATER
OVERFLOW HOLE
M20222
FLOAT ADJUSTMENT SLOT
STARTING
HOLE
6 IN. ROUND TEMPLATE
M20172
SUMMER
WINTER
M20173
M20223
Loading ...
Loading ...
Loading ...