
Loading ...
Loading ...
Loading ...
8 | Sub-Zero Customer Care 800.222.7820
Anti-Tip Bracket
WARNING
To prevent the unit from tipping forward, the anti-tip
bracket must be installed.
Use the centerline locating holes to position the anti-tip
bracket in the center of the opening. The bracket must be
positioned 24"
(610) from the front of the opening to the
back of the bracket. This depth will increase to 26"
(660) for
a ush installation. Failure to properly position the anti-tip
bracket will prevent proper engagement.
Use all anti-tip bracket hardware as instructed for wood or
concrete oors.
IMPORTANT NOTE: For wood or concrete oor applications,
if the #12 screws do not hit a wall stud or wall plate, use the
#8 screws and #12 washers with the wall anchors.
IMPORTANT NOTE: In some installations the subooring or
nished oor may necessitate angling the screws used to
fasten the anti-tip bracket to the back wall.
ANTI-TIP HARDWARE
1 Anti-tip bracket
12 #12 x 2
1
/2" pan head screws
3
3
/8"–16 x 3
3
/4" wedge anchors
12 #12 at washers
3 #8–18 x 1
1
/4" truss head screws
3 Nylon Zip-it
®
wall anchors
CENTERLINE
LOCATING HOLES
Anti-tip bracket
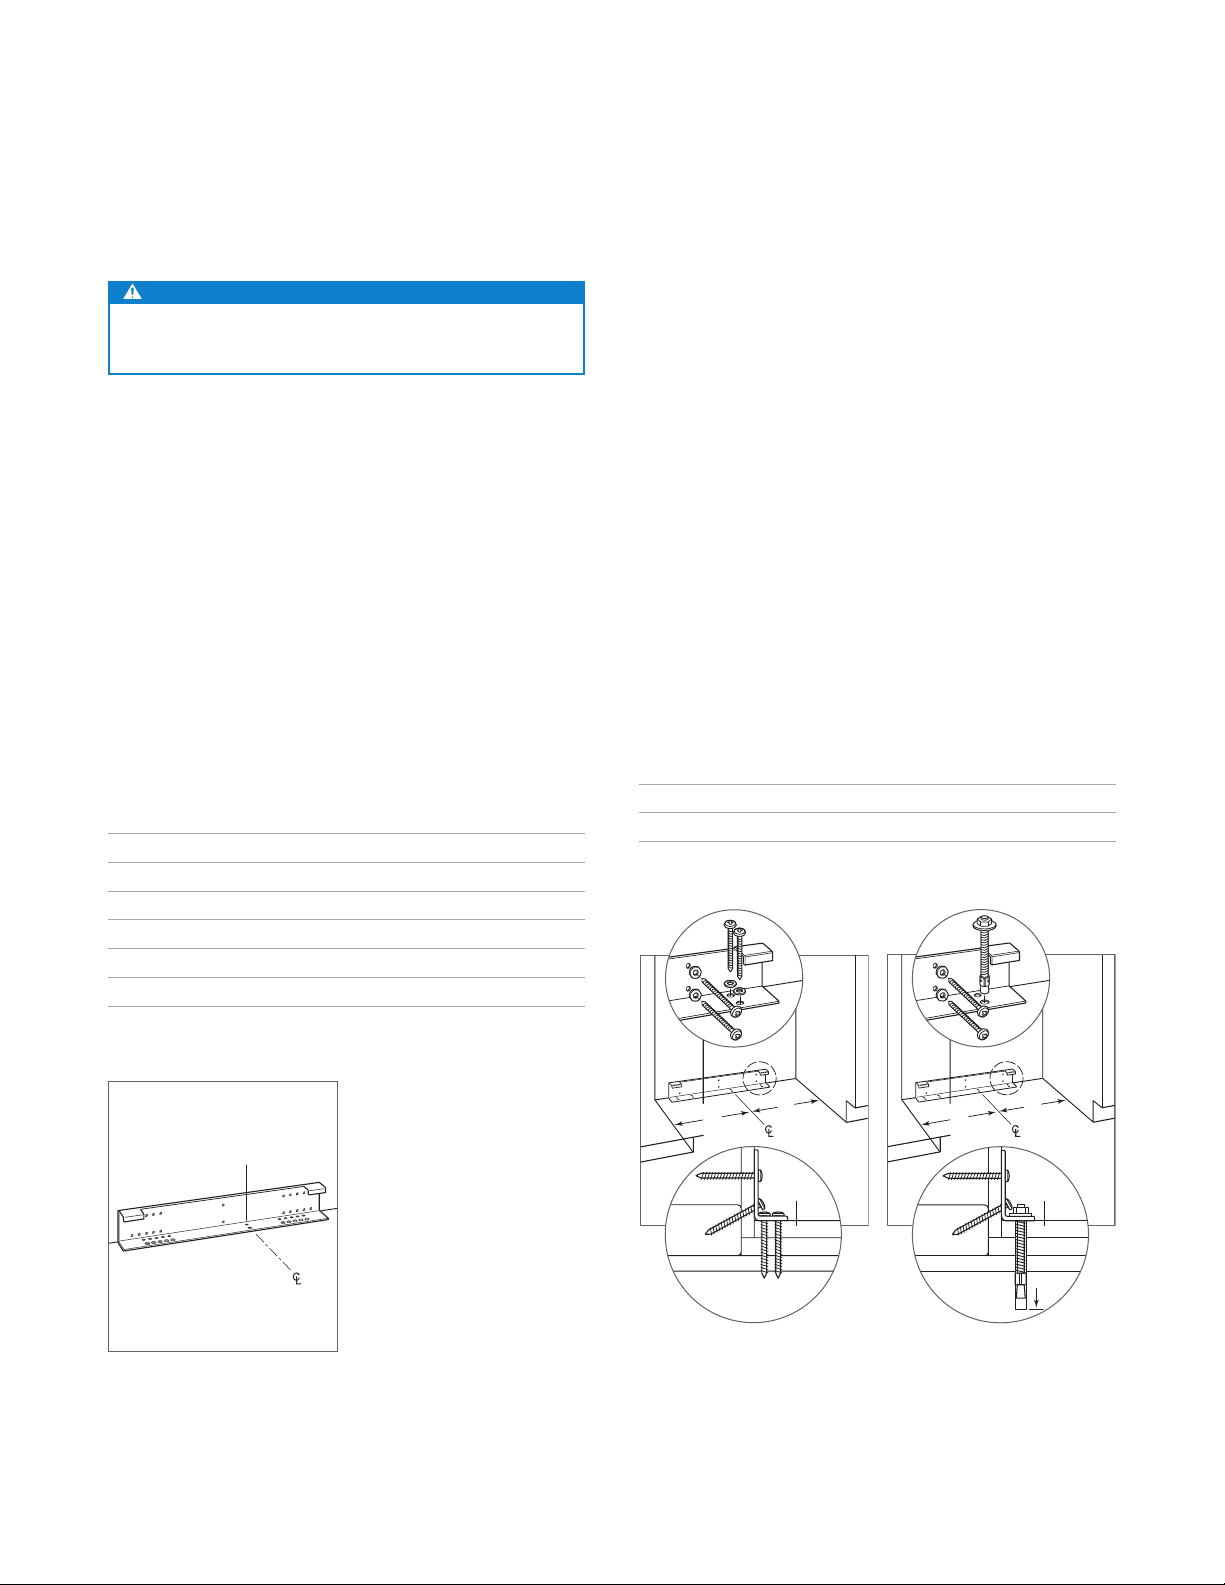
INSTALLATION
WOOD FLOOR APPLICATION
After properly locating the anti-tip bracket in the opening,
drill pilot holes
3
/16" (5) diameter maximum in the wall studs
or wall plate. Use the #12 screws and washers to secure
the bracket. Verify the screws penetrate through the ooring
material and into the wall studs or wall plate a minimum of
3
/4" (19). Refer to the chart and illustration below.
CONCRETE FLOOR APPLICATION
After properly locating the anti-tip bracket in the opening,
drill pilot holes
3
/16" (5) diameter maximum in the wall studs
or wall plate. Drill
3
/8" (10) diameter holes into the concrete
a minimum of 1
1
/2" (38) deep. Use the #12 screws and
washers to secure the bracket to the wall, and use the
3
/8"
wedge anchors to secure the bracket to the oor. Verify the
screws penetrate the wall studs or wall plate a minimum of
3
/4" (19). Refer to the chart and illustration below.
ANTI-TIP BRACKET PLACEMENT
A
36" Model 17
3
/4" (451)
48" Model 23
3
/4" (603)
A
A
SUBFLOORING
WOOD FLOOR
WALL PLATE
FINISHED
FLOORING
A
A
SUBFLOORING
CONCRETE
FLOOR
WALL PLATE
FINISHED
FLOORING
1
1
/2"(38)
min
Wood oor
Concrete oor
Loading ...
Loading ...
Loading ...