INDEX
IMPORTANT SAFETY INFORMATION 1
EXPLODED DRAWING 2-3
PARTS LIST .. 4-5
ASSEMBLY PARTS LIST / TOOLS & HARDWARE. 6
ASSEMBLY INSTRUCTIONS 7-11
COMPUTER INSTRUCTIONS. 14-18
MAINTENANCE ..19
ATTENTION: Please verify that all parts associated with this product are in good condition and accounted for. During the assembly process please be sure to follow each step accordingly as it has been explained within the manual.
WARNING: During assembly it is recommended that all bolts be tightened by hand.
We thank you for choosing our product. To ensure your safety and health. please use this equipment correctly. It is important to read this entire manual before assembling and using the equipment. Safe and effective use can only be achieved if the equipment is assembled. maintained and used properly. It is your responsibility to ensure that all users of the equipment are informed of all warnings and precautions.
1. Before starting any exercise program you should consult your physician to determine if
2. Be aware of your body’s signals. Incorrect or excessive exercise can damage your
3. Keep children and pets away from the equipment. The equipment is designed for adult
4. Use the equipment on a solid. flat level surface with a protective cover for your floor or
5. Ensure that all nuts and bolts are securely tightened before using the equipment. The
6. It is recommended that you lubricate all moving parts on a monthly basis.
7. Always use the equipment as indicated. If you find any defective components while
8. Wear suitable clothing while using the equipment. Avoid wearing loose clothing that
9. Do not place fingers or objects into moving parts of the exercise equipment.
10. The maximum weight capacity of this unit is 265 pounds.
11. The equipment is not suitable for therapeutic use.
12. You must take care of yourself when lifting and moving the equipment so as not to injure
13. This equipment is designed for indoor and home use only! It is not intended for
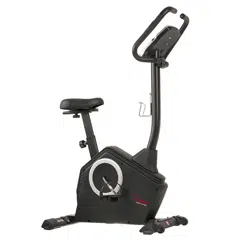
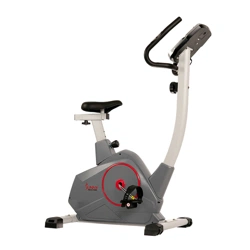
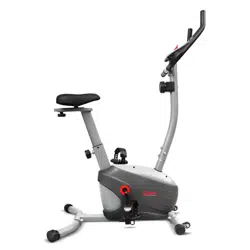
NOTE: Using the Asuna Upright Bike will provide you with several benefits. It will improve your physical fitness. tone muscles. and in conjunction with a calorie controlled diet. it can even help you lose weight.
1. THE WARM-UP PHASE: This stage helps to get the blood flowing around the body while loosening and the muscles for workout. This phase will also reduce the risk of cramp and muscle injury.
It is advisable to do a few stretching exercises as shown below. Each stretch should be held for approximately 30 seconds. do not force or jerk your muscles into a stretch. if it hurts. STOP!
2. THE EXERCISE PHASE: After regular use. the muscles in your legs will become stronger as a result the duration & intensity of your workouts may increase based on your body’s tolerance to physical activity. when increasing physical activity it is very important to maintain a steady tempo throughout. The rate of work should be sufficient enough to raise your heart beat into the target zone shown on the graph below.
This stage should
SIDE BENDS
OUTER THIGH
FORWARD
BENDS
CALF / ACHILLES
Exercise Instructions
Physical activity during this stage should last for a minimum of 12 minutes. although for most people it will take about 15-20 minutes for their heart rate to reach the target zone.
3. THE COOL-DOWN PHASE: This stage is to allow your cardiovascular system and muscles wind down. This is a repeat of the warm up exercise e.g. reduce your tempo. continue for approximately 5 minutes. The stretching exercises should now be repeated. again remembering not to force or jerk your muscles into the stretch.
As you get fitter you may need to train longer and harder. It is advisable to train at least three times a week. and if possible space your workouts evenly throughout the week.
MUSCLE TONING: To tone muscles using the Asuna Upright Bike. you will need to set the resistance level to high. This will increase the strain on the leg muscles. which will result in shorter training sessions. As the work load is increased. it will decrease the required time for the muscles to obtain an adequate workout. If you’re trying to improve your fitness. you’ll need to alternate your training programs. You should start with your usual routine. but towards the end of the exercise phase. the resistance should be increased in order to make your legs work harder than normal. You may need to reduce your speed to keep your heart rate in the target zone.
WEIGHT LOSS: The most important factor here is the amount of effort you put in. The harder and longer you work. the more calories you will burn.
Exercise Instructions
KEY FUNCTION:
ITEM DESCRIPTION
TIME Workout time displayed during exercise.
Range: 0:00 ~ 99:59
SPEED Workout speed displayed during exercise.
Range: 0.0 ~ 99.9
DISTANCE Workout distance displayed during exercise.
Range: 0.0 ~ 99.9
CALORIES Burned calories during workout display.
Range: 0 ~ 999
PULSE Pulse (BPM) displayed during exercise.
Pulse alarm when over preset target pulse.
RPM Rotation per minute Range: 0 ~ 999
WATT
Watt is the amount of power that you are generating by pedaling. This program allows you to vary your pace or RPM to which the machine’s resistance will adjust accordingly to based on your selected goal. In Watt Program Mode. the computer will remain at the preset watt value (setting range is 0-350).
MANUAL Manual mode workout.
PROGRAM Beginner. Advance. and Sporty PROGRAM selection.
CARDIO Target HR training mode.
Up ‧ Increase resistance level ‧ Setting selection.
Down ‧ Decrease resistance level ‧ Setting selection.
Enter ‧ Confirm setting or selection.
Reset
‧ Pressing and holding for 2 seconds will reboot the computer and re-start
‧ Return to main menu during or after stopping an exercise by pressing the
RESET button.
Start / Stop ‧ Start or Stop workout.
Recovery ‧ Test heart rate recovery status.
Body fat ‧ Test body fat% and BMI.
Computer Instructions
POWER ON Plug in power supply. computer will power on and display all segments on LCD for 2 seconds. After 4 minutes without pedaling or pulse input. console will enter into power saving mode. Pressing any key may wake the Console up.
WORKOUT SELECTION
Press UP and Down to select workout Manual Beginner Advance Sporty Cardio Watt
MANUAL MODE
Press the START button from the main menu to begin a workout in Manual Mode.
1. Turn the control knob +UP or -DOWN to select workout program. choose Manual
2. Turn the control knob +UP or -DOWN to preset TIME. DISTANCE. CALORIES or
PULSE and press Enter to confirm.
3. Press START/STOP keys to start workout. Turn the control knob +UP or -DOWN to
4. Press START/STOP keys to stop workout. Press RESET to return to the main
Computer Instructions
1. Turn the control knob +UP or -DOWN to select workout program. choose Beginner
2. Turn the control knob +UP or -DOWN to preset TIME. Press enter to confirm.
3. Press START/STOP key to start workout. Turn the control knob +UP or -DOWN to
4. Press START/STOP key to stop workout. Press RESET to return to the main
ADVANCED MODE
1. Turn the control knob +UP or -DOWN to select workout program. choose Advance
Mode and press Enter to confirm. (Advance Mode contains four levels. 1-4).
2. Turn the control knob +UP or -DOWN to preset TIME. Press enter to confirm.
3. Press START/STOP key to start workout. Turn the control knob +UP or -DOWN to
4. Press START/STOP key to stop workout. Press RESET to return to the main
1. Turn the control knob +UP or -DOWN to select workout program. choose Sporty
2. Turn the control knob +UP or -DOWN to preset TIME. Press enter to confirm.
3. Press START/STOP key to start workout. Turn the control knob +UP or -DOWN to
4. Press START/STOP key to stop workout. Press RESET to return to the main
Computer Instructions
1. After completing an exercise hold the pulse receives located on the handlebar.
2. All functions will stop. only the PULSE and TIME will be active. The TIME will begin
F1.0 = Excellent
F2.0 = Good
F3.0 = Fair
F4.0 = Below Average F5.0 = Not Good F6.0 = Poor
3. Press the Pulse Recovery button again to return to the main display.
1. In stop mode. press the BODY FAT button to start BMI (Body Mass Index).
2. The selected user (E1-E4) will blink for 2 seconds and then begin measuring.
3. During measuring. users must hold the pulse receives located on the handlebar
4. Upon completion the Monitor will display Body Fat Reading. Body Fat Percentage
Computer Instructions
IMPORTANT: Safe and effective use can only be achieved if the equipment is assembled. maintained and used properly. It is your responsibility to ensure that the equipment is maintained regularly. Any components found to be worn and/or damaged should be replaced before continuing use of the equipment. Equipment should only be used and stored indoors. prolonged exposure to weathering and changes in temperature and humidity may have a severe impact on electrical components and moving parts of the machine.
Daily Maintenance: Clean and remove sweat and moisture after each use. Perform inspection of all nuts and bolts associated with moving parts of the
Check the mobility of moving parts and components on the equipment. lubricate if
Clean plastic parts of the equipment using a damp cloth. clean metal parts of the
Weekly Maintenance: Thoroughly inspect the parts of the equipment; nuts. bolts. screws and moving parts
Monthly Maintenance: Inspect the frame and inner working components for wear and tear and damage.
Maintenance or replace as required.
Maintenance