READ AND SAVE THESE SAFETY INSTRUCTIONS BEFORE USING THIS FAN
When using electrical appliances, basic precautions should always be followed to reduce the risk of fire, electric shock, and injury to persons, including the following:
Use this fan only as described in this manual. Other use not recommended may cause fire, electric shock or injury to persons.
This product is intended for household use ONLY and not for commercial, industrial or outdoor use.
To protect against electric shock: do not place fan on windowsills, immerse unit, plug or cord in water or spray with liquids.
Close supervision is necessary when any appliance is used by or near children.
Turn the fan OFF and unplug the fan from the outlet when not in use, when moving the fan from one location to another and before cleaning.
To disconnect the fan, first turn the unit OFF, grip the plug and pull it from the wall outlet. Never pull the plug by the cord.
Do not operate the fan in the presence of explosive and/or flammable fumes.
Do not place the fan or any parts near an open flame, cooking or other heating appliance.
Do not operate fan with a damaged cord or plug, or if the product malfunctions, or dropped and damaged in any manner.
Avoid contact with moving fan parts.
The use of attachments not recommended by the manufacturer may be hazardous.
Place the fan on a dry level surface.
Do not hang or mount fan on a wall or ceiling.
Do not operate if the fan housing is damaged.
A loose fit between the AC outlet (receptacle) and plug may cause overheating and a distortion of the plug. Contact a qualified electrician to replace loose or worn outlet.
Only use on 220-240VAC, 50Hz power supply.
If the supply cord Is damaged, It must be replaced by the manufacturer, its service agent or similarly qualified persons in order to avoid hazard.
This appliance is not intended for use by person (including children) with reduced physical, sensory or mental capabilities, or lack of experience and knowledge, unless they have been given supervision or instruction concerning use of the appliance by a person responsible for their safety.
This product is not a toyl Children should be supervised to ensure that they do not play with the appliance.
Do not cover the grille or operate in close proximity to curtains, etc. Ensure adequate ventilation around the unit.
Do not use or store the fan where it may be exposed to water, other liquids, or excessive dust. Do not use in or near bathrooms, windows etc.
The fan must be fully and properly assembled before use.
Keep batteries out of reach of children.
Do not dispose of used batteries in fire, or try to recharge non-rechargeable batteries.
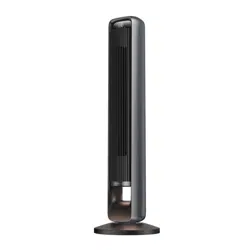
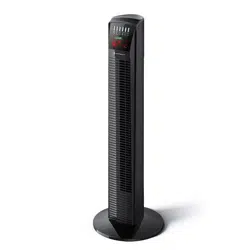
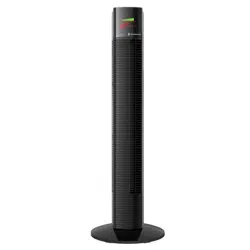
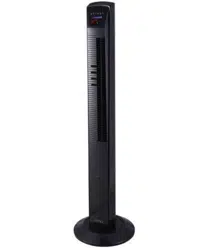
OVERVIEW
INSTRUCTIONS
BASE ASSEMBLY
Run the power cord through the central gap between the two halves of the unassembled Base.
Connect the two halves by pushing the plastic pegs on one half into the corresponding slots on the other half.
Using the 3 provided thumbscrews, secure the assembled Base to the bottom of the main Tower Fan unit.
Warning: Do not plug in the power cord before the base is correctly assembled with the 3 butterfly screws,
ADDING WATER TO THE WATER TANK
Warning: Unplug the unit from the mains supply before removing the water tank.
Remove the water tank from the fan body as shown.
Unscrew the water tank lid, and fill clean tap water into the tank. DO NOT overfill above the 'MAX' line.
Replace the lid and tighten it securely.
Carefully reinsert the water tank into the fan body.
Make sure that the Water Outflow Plug (on the rear of the fan body underneath the water tank) is securely closed to avoid water leakage.
CLEANING AND STORAGE
Unplug the unit before cleaning.
Use only a soft, damp cloth to gently wipe the outer surfaces of the fan clean.
To clean between the grilles, we recommend using a pipe cleaner, flexible dustwand, vacuum cleaner or compressed air to gently remove the dust.
DO NOT immerse the fan in water and never allow water to drip into the motor housing.
DO NOT use gasoline, paint thinner or other chemicals to clean the unit.
Before storage or extended periods without use, make sure the water tank is empty and dry. You may leave the fan assembled and covered to protect it from dust.
Store the unit in a cool, dry place.
TECHNICAL SPECIFICATIONS
Source: 220-240V- 50Hz
Power: 80W
WARNING!
DO NOT ATTEMPT TO OPEN OR REPAIR THE FAN YOURSELF. DOING SO COULD VOID THE WARRANTY AND CAUSE DAMAGE OR PERSONAL INJURY
Water Outflow Plug:
During normal operation of the misting function, some water will collect at the bottom of the water tank compartment. The water outflow plug helps you drain this excess water.
To drain, keep a container underneath to collect water and open the plug carefully.
Once all the water is drained, replace the plug securely to avoid water leakage.
Note: Make sure that the water tank is emptied and dried, and the excess water is completely drained before storing, or when you will not be using the misting function for a long time. This helps to prevent growth of mould or mildew.
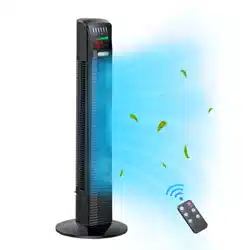
REMOTE CONTROL BATTERY
The remote control uses 2 x 'AAA' batteries (not included). Open the battery compartment and install the batteries, ensuring correct polarity. Replace the battery compartment cover before use.
Warning: Do not mix old and new batteries. Do not mix alkaline, standard (carbon-zinc) or rechargeable (nickel-cadmium) batteries.
Remove batteries if the product will not be used for a long time.
The remote control buttons have the same functions as the control panel buttons.
OPERATION
Plug into any AC 220-240V, 50Hz source, ensure that the plug and the socket fit well. The LED screen will display the current room temperature. This means that the unit is now in stand-by mode, the fan can now be operated via the control panel or the remote control.
Note: The fan and the humidifier can be used together or independently.
IMPORTANT: The misting function is intended for use when the air in your home is dry. Using the misting function in environments that already have sufficient humidity can cause water to collect and then drip from the misting outlet.
USING THE CONTROL PANEL
Control Button
Function
POWER
Press to turn on the fan - it will start in Low speed and Normal mode.
This fan has a built-in Ioniser that helps reduce airborne particles in the room. The Ioniser automatically turns on every time the Fan is turned on. Press the POWER button again to switch the fan to Standby mode. Note: The POWER button only controls the fan operation. It does not control the misting function.
SPEED
Press to select Fan Speed: Low / Medium / High
STYLE
Press to select Normal, Natural or Sleep wind mode.
NORMAL: Fan operates at selected speed: Low / Med / High
NATURAL: Fan speed is automatically changed at various intervals, to simulate a natural breeze.
SLEEP: Fan speed reduces from the set speed every half hour until it reaches Low speed, then continues in Low speed until turned off manually or via timer.
OSC
Press to start Oscillation; press again to cancel.
TIMER
The Sleep Timer lets you set the fan to automatically turn off after the set time. Press the TIMER button repeatedly to set the timer - the numbered TIMER indicator lights add up to the set timer duration. In this way, you can set the timer in 0.5-hour increments (up to 8 hours).
MIST
Press once for high misting volume; the symbol turns green. Press again for regular misting volume; the symbol will turn orange. Press a third time to stop the misting function.
LED DISPLAY SYMBOLS
Symbol
Meaning
This water level warning symbol flashes when the water tank needs to be refilled (if the Misting function is turned on)
Misting function is activated.
Green symbol = High misting volume
Orange symbol = Regular misting volume
Degrees Celsius
Hours
'Sleep' wind mode is activated
'Natural' wind mode is activated
Swing function is activated
Fan speed display
Numerical display of room temperature or timer status. If the Timer is operational, the timer status is displayed; at other times, the room temperature is displayed.


 symbol turns green. Press again for regular misting volume; the